Page is loading ...

REMSWIID™
Z-WAVE REMOTE CONTROL
Installation and User's Guide
I - FOREWORD
This Swiid® remote control - known as RemSwiid™ - is a battery-operated Z-Wave portable
controller which can control any on-off Z-Wave device, such adapter plugs, a switch inserts, sirens,
etc. It is also suitable to control Z-Wave dimmer lighting devices and - with certain restrictions - blind
and shutter inserts.
The RemSwiid™ is basically intended to control up to 8 sets of Z-Wave devices, "groupings" and/or
"scenes". A "grouping" is where all the devices in the grouping are intended to do the same thing at
the same time (e.g. turn on) and a "scene" is where the devices do different things in simultaneously
or in a timed and/or conditional sequence. Your RemSwiid™ is capable of activating scenes, not of
creating them. To create scenes, you need a more sophisticated primary controller.
The components of the RemSwiid™ have been manufactured under contract to our specifications
and assembled, quality controlled and packaged by ourselves in France. In addition, RemSwiid™'s
unique leather and wood finish turns a technical product into a decorative object which is readily
coordinated with many home decoration styles
As remote control, capable of being hand-held, there are few physical installation guidelines for the
RemSwiid™. This manual shall therefore focus primarily on how to set up and operate the
RemSwiid™ in order to control Z-Wave devices, groupings and scenes.
II - SPECIFICATIONS
Device Type :
PORTABLE REMOTE CONTROLLER
Power supply :
2x AA, 1.5V (LR06)
Transmission dist.:
Up to 30m indoors (depending
on materials)
Size :
172 x 50 x 22 mm
EU Norms :
EN 61058-1 & EN 55015
Working temp :
0 – 40°C
Radio protocol :
Z-Wave
LEDs :
12 = 1 green, 1 red, 1 blue
and 9 amber
Radio frequency :
868,42 MHz (EU)
Your RemSwiid™ has been certified by a specially approved certification firm and, as such,
is fully interoperable with all the certified Z-Wave devices produced by other manufacturers
using the same authorised radio frequency (EU in our case)
KEY FEATURES
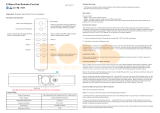
The interface panel of the RemSwiid™ includes keys (buttons), pictograms and LEDs, namely :
• Eight (8) individual "Device" keys each for one device/group/scene, each key with its own
associated pictogram and amber LED activity indicator
• One (1) "All" key also with its own amber LED activity indicator, but no pictogram.
• One (1) " Up " (or "On") command key and the associated green LED indicator
• One (1) " Down" (or "Off ") command key with the associated red LED indicator
• One (1) "Stop" command key with NO associated LED indicator
• One (1) blue LED to indicate when remote is in Z-Wave Setup Mode
The eight (8) individual device keys will be referred to generically as device keys, and so shall the
"All" key depending on the context. The other 3 keys located centrally are the command keys.
III - INSTALLATION OF THE REMOTE
Insertion of the batteries:
Press the battery door release button on the back of the RemSwiid™ and remove its left side panel.
Insert the two batteries (2x AA 1.5V) into the lodging making sure that they are inserted in the correct
(+)/(-) direction. Place the side panel back into position making sure it clicks back on and the blue
LED will blink three (3) times.
1
2
Changing the pictograms:
The RemSwiid™ has a pictogram associated with each of the 8 device keys other than the "All" key.
The device has two (2) removable trays for four (4) vertically aligned pictograms are provided.
The RemSwiid™ is provided with a pre-cut folded accordion strip containing an additional total of 90
ready-to-use pictograms representing commonly controlled home automation devices. They are
stored in a cavity next to the battery compartment and are for inclusion by you, so as to correspond
to your personal configuration of the device keys.
To insert/change a pictogram :
1. Unsnap the bottom of the leather cover of the RemSwiid™ using a pointed object like a screwdriver
2. Remove the tray containing the pictogram you want to include/change
3. Insert/substitute the pictogram(s), reinsert the tray and snap the leather cover back on
Should you want a specific pictogram which does not figure in the collection provided, do not hesitate
to place a specific order via our website on www.swiid.com/products/rc-ct//
IV - PRIMARY OR SECONDARY Z-WAVE CONTROLLER?
As a certified Z-Wave Plus controller, your RemSwiid™ can be used either as primary or a secondary
controller and it can be switched from one to the other.
As a primary controller, it will create its own network using its factory-set unique identification number
(Home ID), which will be the attributed to all the devices (also additional controllers) which will be
included into the Z-Wave network.
Because your RemSwiid™ is really intended to remain in one room and because of its limited
interface, it is generally used as a secondary controller in a home with a large Z-Wave network.
V - THE REMOTE CONTROL AS A PRIMARY Z-WAVE
CONTROLLER
This is the default configuration of your RemSwiid™. There is therefore no specific set up necessary
for it to act as a primary controller. However, configuration steps are necessary to associate your
RemSwiid™ with each of the Z-Wave devices which you want it to operate and for any additional
device you want to include in the same Z-Wave network as your RemSwiid™.
A- DIRECT INCLUSION AND CONTROL OF A Z-WAVE DEVICE
Press three times (3x) on the Device key (other than the "All" key) to which you want to allocate
your external Z-Wave device. The amber LED above the device key will blink and the blue Z-Wave
LED in the centre of the remote will light up and stay lit indicating you are in the setup mode..
1. Put the Z-Wave device you want to include and control in inclusion mode (generally done by
pressing once or several times on an inclusion/exclusion button on the device - see device's
manual) and the green LED on the remote will blink.
2. The inclusion process will start automatically : the amber LED above the device key will first turn
off, then the green and blue Z-Wave LEDs will also turn off after 1-2 seconds to indicate success.
In order to create groupings, simply add new devices to the chosen device key following the steps
described above. Each grouping may include up to eight (8) devices.
B- INCLUDING A Z-WAVE DEVICE WITHOUT CONTROLLING IT
There are cases where you might want to include Z-Wave devices which you cannot - or do not
want to - control into the network of your RemSwiid™. A typical example would be the inclusion a
Z-Wave motion sensor (say to associate it with the Z-Wave adapter plug of lamp).
The steps for this inclusion are as follows :
1. Press and hold both the "Up" and "Down" command keys of your RemSwiid™ until the blue Z-
Wave LED in the centre of the remote lights up (after 2-3 seconds) and stays lit indicating you
are in the Setup Mode.
2. Press again once (1x) but only the "Up" command key and the green LED in the centre of your
RemSwiid™ will blink to indicate that it is now in the Inclusion Mode.
3. Put the Z-Wave device you want to include in inclusion mode (generally done by pressing once
or several times on an inclusion/exclusion button - see manual of the device) and the inclusion
process will start automatically whereby the green LED will then tremble and blink again for 1-2
seconds to indicate success and the blue Z-Wave LED will also turn off.
C- EXCLUDING A Z-WAVE DEVICE ALTOGETHER
1. Press and hold both the "Up" and "Down" command keys until the blue Z-Wave LED in the centre
of the remote lights up (after 2-3 seconds) and stays lit indicating you are in the Setup Mode.
2. Press again once (1x) but only the "Down" command key and the red LED in the centre of the
remote will blink to indicate that it is now in the Inclusion Mode.
3. Put the Z-Wave device you want to exclude in exclusion mode (see manual of the device) and
the exclusion process will start automatically whereby the red LED will turn off and the green LED
will blink for 1-2 seconds to indicate success and the blue Z-Wave LED will also turn off.
Once the device has been successfully excluded, its Node ID and the Home ID of the remote
controller will have been erased from the device.
D- REMOVING A DEVICE FROM A GROUPING
1. Press and hold both the "Up" and "Down" command keys until the blue Z-Wave LED in the centre
of the remote lights up (after 2-3 seconds) and stays lit indicating you are in the Setup Mode.
2. Press once on the Device key of the grouping from which you want to remove the device. The
amber LED above the Device key and the red LED in the centre will both turn on.
3. Put the Z-Wave device you want to exclude in exclusion mode (see manual of the device) : the
red and amber LEDs will turn off and the green LED will blink for 1-2 seconds to indicate success
and the blue Z-Wave LED will also turn off.
The device excluded from the grouping will retain both its Node ID and the Home ID of your
RemSwiid™ and the other existing associations of the device (including control by other
controllers) will remain undisturbed.
3
4
EN
ZRC1
Device key
(3 out of 9)
Command keys (3)
Pictogram
(1 out of 8)
Click !!
+
-

The device excluded from the grouping will retain both its Node ID and the Home ID of your
RemSwiid™ and the other existing associations of the device (including control by other
controllers) will remain undisturbed.
E- DELETING A COMPLETE GROUPING
1. Press and hold both the "Up" and "Down" command keys until the blue Z-Wave LED in the
centre of the remote lights up (after 2-3 seconds) and stays lit indicating you are in the Setup
Mode. Release the "Up" and "Down" command keys.
2. Press once on the device key of the grouping which you want to delete. The amber LED above
the device key and the red LED in the centre will both turn on.
3. Press once on the "Stop" command key. The red LED will switch to blinking and then the green
LED will also light up to indicate success and after 1-2 seconds all the LEDs will turn off.
As with the previous removal of a single device from a grouping, all the devices of the deleted
grouping will retain their Node ID and the Home ID of your RemSwiid™.
VI - THE REMOTE CONTROL AS A SECONDARY Z-WAVE
CONTROLLER
The first task is to get your RemSwiid™ included into the network of your primary Z-Wave controller
(i.e. substituting the Home ID of the primary controller for the remote's own factory-set Home ID).
The factory-set Home ID of your RemSwiid™ will not be lost and can be reinstated at any time by
running Z-Wave "Reset" procedure (see dedicated Chapter) : your remote control of course then be
excluded from the primary controller's network.
A- INCLUDING THE REMOTE INTO ANOTHER Z-WAVE NETWORK (LEARN MODE)
Proceed as follows:
1. Put the primary Z-Wave controller in the inclusion mode (see user's manual of the controller)
2. Press and hold both the "Up" and "Down" command keys of the remote until the blue Z-Wave
LED lights up (after 2-3 seconds) and stays lit indicating the remote is in the Setup Mode.
3. Press once on the “All” key and the both the green and red LEDs will also light up to indicate
that the inclusion process can begin. The 3 LEDs will then blink rapidly and turn off to indicate
that the process has completed successfully. If not successful, the LEDs will remain lit solid
until they time out after 30 seconds.
B- EXCLUDING THE REMOTE FROM A Z-WAVE NETWORK
Exactly the same as for direct inclusion described in Section A above, except that in Step 1 the
primary Z-Wave controller must be put into in the exclusion mode.
C- PUTTING THE REMOTE IN LISTENING MODE
If you want to send instructions from your primary controller to your RemSwiid™, it will either have
to wait until the next programmed wake-up to receive the instructions or you can put it into
Listening Mode by pressing twice (2x) on the “All” key, at which time the blue Z-Wave LED in
the centre of the remote will light up (timeout : 30 seconds)
D- CONTROLLING A Z-WAVE DEVICE THROUGH THE REMOTE
Although your RemSwiid™ is programmed to act as an Inclusion Controller in certain instances, it
is recommended any Z-Wave device you want to control be included into the network via its
primary controller (see user's manual of the primary controller).
Once included in the Z-Wave network, attribute each of the devices which you want to control to
one or more of the RemSwiid™ ‘s Device keys. Proceed exactly as you would to control a device
if your RemSwiid™ were a primary controller, namely : pressing three times (3x) on the
appropriate device key (other than the "All” key) and putting the device to be controlled into the
inclusion mode. Please see steps 1 to 3 under Section A of the preceding Chapter for details.
E- CONTROLLING A Z-WAVE SCENE THROUGH THE REMOTE
If you want to control a scene which has been created and stored on the primary controller, you
will need to attribute that scene to one of the device keys of your RemSwiid™. In order to do this,
you will first need to set the functionality of the device key from “Control Associations Groups”
(default setting) to “Control Central Scene” or to “Control Scene Activation” and then allocate the
scene to this device key using the configuration options (parameter settings) of your RemSwiid™
via your primary controller’s user interface : see manual of your primary controller and advanced
setup and configuration options of your RemSwiid™ at http://www.swiid.com/en/ZRC1-AS.pdf
VII - OPERATING THE REMOTE CONTROL
The basic operating principle of the RemSwiid™ is a two-step command/control process :
1. Select which device/group/scene you want to control by pressing on appropriate device key and
the amber LED above the device key will turn on for up to 3 seconds, and
2. Select command you to apply to the selected device/group/scene by pressing on the appropriate
command key and the associated LED (green/red/none) will flash twice for success.
If the command is either not AT ALL successful or only PARTLY successful, the blue LED will
start to blink and then all 4 central LEDs will blink together three times (3x) before turning off.
Shortcut : If you want to execute the same command for more than one device/grouping (but not
all), press in succession on the device key of each of the chosen devices/groups/scenes, the amber
LED above each pressed device key will light up in turn and stay lit, then press the command key you
wish and the associated LED (green/red/none) will flash twice to indicate success.
If you press the wrong device key, you must either wait for the amber LED of that device to turn off
or force it to turn off prematurely by pressing the "All" device key.
It is possible to dim up or down controlled devices by a long press on the "Up" or "Down" command
key of your RemSwiid™ and the device will continue dimming up and down until the “Stop” Command
key is pressed. It is also possible to set up the dimming so that is stops as soon as the Up or down
Command key is released : (see configuration options at http://www.swiid.com/en/ZRC1-AS.pdf.
VIII - ASSOCIATIONS
Your RemSwiid™ can be used to set up “associations” in the Z-Wave network in which it operates.
In Z-Wave speak, an "association " means that one node (i.e. device) is programmed to control
directly another node whenever the status of the status of the first node changes (by being triggered
or operated), all without needing to pass through the Z-Wave controller.
An example would be an association between a Z-Wave door sensor (Association Source Node) with
a Z-Wave light switch (Association Destination Node), so that when the door sensor is triggered the
light switch is automatically turned on, even if no Z-Wave controller is active at the time.
5
6
Associations are obviously only possible between devices which are part of the same Z-Wave
network. Associations are unidirectional (one-way) from a first node ("Association Source Node”)
which issues a message to the second node ("Association Destination Node") which receives the
message and executes a corresponding pre-agreed action. It is possible to have bi-directional
(reciprocal) associations, but in order to achieve this, it is necessary to create two separate
associations : one from A to B and a second one from B to A.
A Source Node can be associated with more than one Destination Nodes, the maximum number
depends on the characteristics of the source node device. This a called herein a "association
grouping” (not to be confused with “Association Group” which always carries a number). Your
RemSwiid™ - whether as a primary or secondary controller – can create or delete associations from
any number of Source Nodes, as well as remove a device from a grouping.
To create, modify or delete a Group 1 (or Group 2 depending on the configuration setting) association
or to remove a device therefrom proceed as follows :
A- CREATING AN ASSOCIATION
1. Press and hold both the "Up" and "Down" command keys of the remote until the blue Z-Wave
LED in the centre of the remote lights up (after 2-3 seconds) and stays lit indicating the remote
is in the Setup Mode.
2. Press once and release the “Stop” key, the amber LED above the "All" key will turn on
3. Press once and release the “Up” key, the green LED will turn on as well
4. Put the Z-Wave device of the Destination Node you want to associate in the
inclusion/exclusion mode (generally done by pressing once or several times on an
inclusion/exclusion button on the device – see manual of the device), the green LED on your
RemSwiid™ will start blinking.
5. Put the Z-Wave device of the Source Node you want to associate in the inclusion/exclusion
mode (again, see manual of the device), and the three central LEDs which were lit (blue/green/
amber) will blink rapidly before turning off indicating that the association has been set up
successfully.
To create an association grouping simply repeat the process for each additional Destination
Node.
B- DELETING A WHOLE ASSOCIATION GROUPING (REMOVING A SOURCE NODE)
1. Press and hold both the "Up" and "Down" command keys of the remote until the blue Z-Wave
LED in the centre of the remote lights up (after 2-3 seconds) and stays lit indicating the remote
is in the Setup Mode.
2. Press once and release the “Stop” key, the amber LED above the "All" key will turn on
3. Press once and release the “All” command key and both the green and red LEDs will turn
on as well.
4. Put the Z-Wave device of the Source Node of the association you want to delete in the inclusion
mode (see manual of the device). All four central LEDs (blue/green/red/ amber) will blink 3
times rapidly before turning off indicating that the association has been successfully deleted.
C- REMOVING A DESTINATION NODE FROM AN ASSOCIATION GROUPING
1. Press and hold both the "Up" and "Down" command keys of the remote until the blue Z-Wave
LED in the centre of the remote lights up (after 2-3 seconds) and stays lit indicating the remote
is in the Setup Mode.
2. Press once and release the “Stop” key, the amber LED above the "All" key will also turn on
3. Press once and release the “Down” key, the red LED will turn on as well
4. Put the Z-Wave device of the Destination Node of the association you want to delete in the
inclusion mode (see manual of the device), the red will start blinking.
Put the Z-Wave device of the Source Node of the association you want to delete in the inclusion
mode (see manual of the device) and the three central LEDs which were lit (blue/red/amber) will
blink 3 times rapidly before turning off indicating that the device has been successfully removed
from the association.If you wish to create or delete an association using an Association Group of the
chosen Source Node other than Group 1 (or Group 2 depending on the configuration setting) or to
remove a device therefrom, the procedure involves one additional step between steps 2 and 3 (choice
of association group via the Device keys). For further details, please refer to
http://www.swiid.com/en/ZRC1-AS.pdf
When acting as a secondary controller, your RemSwiid™ remote control is required - like all Z-Wave
Plus devices - to support as a Source Node associations on Group 1. Group 1 is called the Lifeline
group because important "lifeline" notifications about your RemSwiid™ remote control are sent to that
group’s Destination nodes.
IX - OTHER SETUP AND CONFIGURATION OPTIONS
Your RemSwiid™ offers a number of other setup and advanced configuration options, including the
capacity to act as an Inclusion Controller after having handed over its primary controller role to a
Central Static Controller. For further details, please refer to http://www.swiid.com/en/ZRC1-AS.pdf
X - RESETTING THE REMOTE CONTROL
In order to reset your RemSwiid™ to its Z-Wave original factory status and for it to recover its factory-
settings and a new Home ID, proceed as follows :
1. Press and hold both the “Stop” and “All” keys until the red and green LEDs both start
blinking at the same time (after about 3 seconds)
2. Press three times (3x) on the “Up” key of your remote and the blue Z-Wave LED will
also light up. After about 2-3 seconds, the blue and red LEDs will turn off and the
green LED will remain lit for 1-2 seconds indicating that the reset has been completed.
Resetting the RemSwiid™ remote will result in its taking on a new randomly generated Home ID.
Obviously, if the RemSwiid™ remote is the primary controller in the Z-Wave network, resetting it will
result in the nodes in the network being orphaned and it will be necessary after the reset to exclude
and re-include all the nodes in a network with a new Home ID. If the RemSwiid™ is being used as a
secondary controller in the network, the reset procedure should only be used once it has been
excluded from the network, except of course if such exclusion is not feasible (e.g. if the network’s
primary controller is missing or otherwise inoperable).
XI - WHAT IS Z-WAVE?
Z-Wave is a bidirectional radio communication protocol designed specifically for controlling, operating
and monitoring home automation equipment : lighting, heating, security, etc.
The Z-Wave protocol utilizes an optimized technology for weak bandwidth radio communications (9-
100 kbps) around the 900 MHz band (868.4 MHz in Europe) and does not interfere with wireless
receivers operating in 2.4 or 5.0 GHz (WiFi, Bluetooth, ZigBee®).
7
8

The range of the Z-Wave signal is approximately 50m (higher outdoors and lower indoors). However,
the Z-Wave technology automatically and dynamically creates a "mesh network" between the
various Z -Wave® devices that compose it and each of these devices becomes itself a repeater. This
enables connections between devices that are not within direct range of each other.
Each Z-Wave network has its own identifier (Home ID), which enables multiple Z-Wave networks in
a single location to operate completely independently and without interfering with each other.
The main advantage of the Z-Wave radio protocols over mesh network competitors such as ZigBee®
is the complete interoperability between the various Z-Wave devices from different manufacturers.
The main advantage of the Z-Wave radio protocols over mesh network competitors such as ZigBee®
is the complete interoperability between the various Z-Wave devices from different manufacturers.
This interoperability is guaranteed by a "Zertification" process which is performed by companies
approved by Sigma Designs, which itself is the creator and owner of the Z-Wave, and by the Z-Wave
Alliance, which was created in 2005 to bring together all the stakeholders in the Z-Wave ecosystem.
The Z-Wave Alliance has more than 600 member companies (as of June 2017) and more 2100
different products have been "Zertified". It is estimated that, as of end 2016, more than 70 million
devices using the Z-Wave technology had been sold worldwide.
Your RemSwiid™ has been successfully tested with most of the integrated Z-Wave IP gateways
available in Europe today (June 2017).
XII - Swiid® / CBCC DOMOTIQUE
Swiid® is a registered trademark of CBCC Domotique SAS, a French limited liability company,
incorporated in Paris under the Commerce Registry number 791 884 125 and having its registered
address at 27 avenue de l'Opéra, 75001 Paris, France
WARRANTY
CBCC Domotique SAS (as defined in the next section and hereinafter referred to as the
"Supplier") warrants to the original purchaser for a period of twelve (12) months from the date of
purchase or delivery (whichever is later) that the present device is free from material defects in
materials and workmanship and undertakes, subject to continuing availability of the device, to supply
at its cost a new device to replace any malfunctioning or otherwise defective device. In no event,
shall the Supplier refund any monies paid for the device.
Warranty claims must be filed by using the form provided on the Supplier's website
(www.swiid.com/en/contact.html) and completing it in full and sending us (against refund) the
defective device and a copy of the proof of purchase (with the date of purchase or delivery date!).
Warranty claims made more than thirty (30) days after the occurrence of the event giving rise to the
warranty claim and claims made without following the procedure set out above shall not be
admissible.
The present warranty shall NOT cover, whether for damages to the device itself and for consequential
damages, faults not resulting from a material or manufacturing defect on the device, including but
not limited to:
• Accidents, actions of civil or military authority, civil disturbances, war, strikes, fires, floods or other
catastrophic events ;
• Installation or operation of the device other than in conformity with the present Installation and
User's Guide ;
• Devices which have been repaired or modified by any person not duly authorised to do so by the
Supplier ;
• Damages caused by (i) software utilized directly or indirectly by the device's owner or user, (ii)
computer viruses or other malware attacks or (iii) failure to implement any firmware updates
supplied without charge by the Supplier ; and
• Damages caused by power surges, by improper connection to the power grid or by using
unauthorised accessories
The present warranty shall be governed by the laws of France.
9
10
SUMMARY - Keystrokes and LED Combinations
v1.09
11
12
Device
selected
SUCCESS FAILURE
Listen
mode
(Include) and
control
Dev.
Dev. " porqDev. " porqAll " All 3x Dev.
Blink 3x On On
On 2-3s Blink 3x
Blink 3x
Blink 3x
D D-On D-On 2-3s D-Blink
Setup
mode
Include Exclude
Remove device
from grouping
Delete
grouping
pqpq " p pq " qpq " Dev.
pq " Dev. " STOP
On On On On On
Blink Blink
Blink On
D D-On D-On
Association
mode
Create
association
Creation
success
Remove dest.
node
Removal
success
pq " STOP pq " STOP " p pq " STOP " q
On On Blink 3x On Blink 3x
On -> Blink Blink 3x
On -> Blink Blink 3x
On On Blink 3x On Blink 3x
D
Delete
Association
Ass. deletion
success
In-/Exclude as
secondary
Reset
(step 1)
Reset
(step 2)
pq " STOP " ALL pq " ALL STOP+ALL (3s) STOP+ALL " 3x p
On Blink 3x On -> Blink Blink
On Blink 3x On -> Blink Blink Blink
On Blink 3x On -> Blink Blink Blink
On Blink 3x
D
LEDs
LEDs
LEDs
LEDs
Keystrokes
Keystrokes
Keystrokes
Keystrokes
/