Page is loading ...

Page 1/6
Thank you for purchasing this quality product. Be sure to check all packing material carefully for
small parts that may come loose inside the carton during shipment.
TOOLS REQUIRED (NOT PROVIDED)
PHILLIPS SCREWDRIVER
aspenhome
RASSEMBLY INSTRUCTIONS
MADE IN VIETNAM
ah
BEFORE USING THIS PRODUCT PLEASE READ, UNDERSTAND, AND FOLLOW THESE INSTRUCTIONS.
Save these instructions for future reference.
FOR INDOOR USE ONLY
ITEM NO: I215-307 Writing Desk
I215-308 Reversible Desk Return
I215-308
HARDWARE LIST: I215-307
1 PC
No.
B
C
D
Description Sketch Quantity
Bolt Ø1/4" x 2-3/16"
Lock Washer Ø1/4"
Flat Washer Ø1/4" x 3/4"
Allen Wrench 4mm
12 PCS COMPONENTS LIST: I215-307
No.
1Description Sketch Quantity
A
2
32 PCS
E
Bolt Ø1/4" x 1" 4 PCS
Support Stretcher
Side Assembly
Table Top Assembly 1 PC
16 PCS
16 PCS
HARDWARE LIST: I215-308
1 PC
No.
B
C
D
Description Sketch Quantity
Bolt Ø1/4" x 2-3/16"
Lock Washer Ø1/4"
Flat Washer Ø1/4" x 3/4"
Allen Wrench 4mm
COMPONENTS LIST: I215-308
No.
1Description Sketch Quantity
A
2
31 PC
E
Bolt Ø1/4" x 1" 4 PCS
Support Stretcher
Side Assembly
Table Top Assembly 1 PC
1 PC
14 PCS
Option 1
2 PCS
I215-307
I215-308
UNIT SHOULD BE INSTALLED BY 2 OR MORE PERSONS.
I215-307
Option 2
10 PCS
Metal Connect 2 PCS
F
14 PCS
07-09-2020

Page 2/6
aspenhome
RASSEMBLY INSTRUCTIONS
MADE IN VIETNAM
ah
ITEM NO: I215-307 Writing Desk
I215-308 Reversible Desk Return
STEP 1: Put the table top assembly face down on a soft surface.
STEP 2: Take out the side drawers, then attach the side assemblies to table top assembly by
using 12 bolts(B), lock washers(C) and flat washers(D). Do not completely tighten bolts.
CD
B
E
I215-307
Side Assembly
Side Assembly
STEP 3: Attach the support stretchers to table top assembly by using 4 bolts(A), lock washers(C)
and flat washers(D). Completely tighten all bolts. Put the side drawers back to the original
position. Turn the assembled table to the upright position.
A
C
D
E
Support Stretcher
I215-307
Table Top Assembly
Table Top Assembly
07-09-2020

Page 3/6
aspenhome
RASSEMBLY INSTRUCTIONS
MADE IN VIETNAM
ah
ITEM NO: I215-307 Writing Desk
I215-308 Reversible Desk Return
STEP 4: Put the table top assembly face down on a soft surface.
STEP 5-1: Attach the side assembly to table top assembly by using 4 bolts(B), lock washers(C)
and flat washers(D). Do not completely tighten bolts.
STEP 5-2: Attach the metal connects to the table top assembly by using 4 bolts(A), lock
washers(C) and flat washers(D).
C
DBE
I215-308
STEP 6: Attach the support stretcher to table top assembly by using 2 bolts(A), lock washers(C)
and flat washers(D). Completely tighten all bolts.
A
C
D
E
I215-308
Side Assembly
Support Stretcher
For OPTION 1: The side assembly may be used on either side. Attach the side assembly
to table top assembly as shown below.
Table Top Assembly
Table Top Assembly
A
C
D
E
Metal Connect
07-09-2020

Page 4/6
aspenhome
RASSEMBLY INSTRUCTIONS
MADE IN VIETNAM
ah
ITEM NO: I215-307 Writing Desk
I215-308 Reversible Desk Return
STEP 7: Pull out the side drawer front panel at the stop position and take off the handle by
removing screws before assembling the reversible desk to the writing desk. Attach the reversible
desk return with metal connects to writing desk by using 4 bolts(A), lock washers(C) and flat
washers(D) as shown below. Use the Allen wrench provided to tighten all the bolts.
A
C
D
I215-308
Side Assembly
For OPTION 2: The side assembly may be used on either side. Before assembling the side
assembly, make sure that the metal connect is assembled on the other side as shown below.
STEP 4: Put the table top assembly face down on a soft surface.
Adjust the leveler
when necessary
Leveler on bases
EBCD
Table Top Assembly
E
STEP 5-1: Attach the side assembly to table top assembly by using 4 bolts(B), lock washers(C)
and flat washers(D). Do not completely tighten bolts.
STEP 5-2: Attach the metal connects to the table top assembly by using 4 bolts(A), lock
washers(C) and flat washers(D).
A
C
D
E
Metal Connect
Handle
Drawer front panel
Metal connect
07-09-2020

Page 5/6
aspenhome
RASSEMBLY INSTRUCTIONS
MADE IN VIETNAM
ah
ITEM NO: I215-307 Writing Desk
I215-308 Reversible Desk Return
STEP 6: Attach the support stretcher to table top assembly by using 2 bolts(A), lock washers(C)
and flat washers(D). Completely tighten all bolts.
A
C
D
E
I215-308
Support Stretcher
Table Top Assembly
A
C
D
Adjust the leveler
when necessary
Leveler on bases
E
Metal connect
Handle
Drawer front panel
07-09-2020
STEP 7: Pull out the side drawer front panel at the stop position and take off the handle by
removing screws before assembling the reversible desk to the writing desk. Attach the reversible
desk return with metal connects to writing desk by using 4 bolts(A), lock washers(C) and flat
washers(D) as shown below. Use the Allen wrench provided to tighten all the bolts.

Option 2
Page 6/6
aspenhome
RASSEMBLY INSTRUCTIONS
MADE IN VIETNAM
ah
ITEM NO: I215-307 Writing Desk
I215-308 Reversible Desk Return
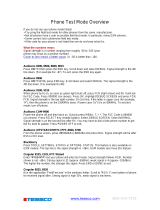
FUNCTIONALITY INSTRUCTION
Press here to release
Hook latch
Metal plate
Flip down keyboard tray
Option 1
I215-308
I215-307
I215-307
Flip down keyboard tray
I215-308
Adjust the leveler
when necessary
Leveler on bases
Adjust the leveler
when necessary
Leveler on bases
07-09-2020
/