Page is loading ...

VCIOM-01979-EN 17/11
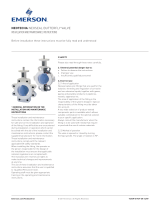
NEOTECHA PV REACTOR SAMPLING SYSTEM
InstallatIon & MaIntenance InstructIons
© 2017 Emerson. All Rights Reserved.
These installation and maintenance instructions must be read in full and
completely understood before the installation!
GENERAL INFORMATION ON THE
INSTALLATION AND MAINTENANCE
INSTRUCTIONS
• These installation and maintenance
instructions contain the information
necessary for safe and correct installation
and operation of the valve in the prescribed
manner. If any difficulties are encountered
during installation or operation which cannot
be solved with the aid of the installation and
maintenance instructions, please contact the
supplier/manufacturer for more information.
• These installation and maintenance
instructions comply with the relevant
applicable EN safety standards.
• When installing the valve, the operator or
the person responsible for the design of
the installation must ensure that applicable
national regulations are complied with.
• The manufacturer reserves all rights to make
technical changes and improvements at any
time.
• The use of these installation and maintenance
instructions assumes that the user is
qualified to “Qualified Personnel” level.
• Operating staff must be given appropriate
training in the operating and maintenance
instructions.
SAFETY
Please also read through these notes
carefully.
USAGE RESTRICTIONS
The product-wetted components must be
classified as resistant to the product to be
conveyed. Refer to appropriate literature or
consult the manufacturer or distributor for advice.
MODIFICATION PROHIBITION
Mechanical modifications to the valves or the use
of other manufacturers’ parts for repair purposes
are not permissible. Safety is not guaranteed if
this requirement is disregarded. Repair work
must only be carried out by the manufacturer’s
trained personnel.
WARNING ABOUT FORESEEABLE MISUSE
Valves and their accessories must not be misused
as climbing aids.
Duty to comply with the instructions for
operation, maintenance and servicing
These operating instructions are part of the
delivery package and must be kept clean and
made accessible to the user.
Emerson.com/FinalControl
Validity of the installation and maintenance
instructions
These installation and maintenance
instructions are valid for all PV sampling valves
for sampling into bottles, which have been
manufactured since 28 November 2001 by
the Neotecha AG company. The validity is only
guaranteed until the next revision change!
ELECTRICAL
If static charges can lead to explosions, the
valve must be earthed by means of the earthing
accessory.
Alternative: Use valves with electrically conductive
linings. Please contact your supplier!
THERMAL
Due to the range of operating temperatures
between -20°C and +200°C, surface temperatures
from -20 °C to +200°C can be present on the valve
bodies. Suitable precautions should be taken at
the installation stage to protect against burns due
to high or freezing temperatures. Insulated gloves
should be worn when using the valve. In case of
fire, the mechanical strength of the PFA coatings
is no longer guaranteed above 250°C.
MECHANICAL
When using the hand lever, it should be ensured
that there is still sufficient clearance for the
hands at the end position of the handle, so that
there is no risk of trapping. Excessive oscillation
and vibration should be avoided, to prevent the
bolts loosening.

2
NEOTECHA PV REACTOR SAMPLING SYSTEM
InstallatIon & MaIntenance InstructIons
REQUIREMENTS FOR THE OPERATOR
This means people who are familiar with the
erection, installation, commissioning, operation
and maintenance of the product and have
appropriate qualifications relating to their
activities and functions, such as, for example:
- instruction in and duty to comply with all
installation-related, regional and internal
works regulations and requirements.
- training or instruction in accordance with the
Safety Standards for personal care and use of
appropriate safety equipment and protective
workgear, like, for example, personal
protection equipment (insulated gloves or
similar), suitable for the operating conditions.
Furthermore, these people must have read and
understood these instructions.
TRANSPORT & STORAGE
Transport
- transport temperature -20°C to +65°C
- protect against external force (impact, shock,
vibration)
- do not damage the coating
Storage
- storage temperature -20°C to +65°C, dry and
dust-free.
- a drying agent or heating is required in
damp storage areas to protect against
condensation.
Handling prior to installation
- do not remove the protective caps until
immediately prior to installation
- protect against the effects of weather, such as
dampness, (or else use a drying agent)
- proper treatment prevents damage
CAUSE AND REMEDY OF OPERATING FAULTS
If the PV Reactor function or operating action is
faulty, a check should be made to ensure that
the assembly and installation work has been
carried out and completed in accordance with
the installation and maintenance instructions.
The information relating to material, pressure,
temperature and direction of flow should be
compared with the installation diagram of the
reactor system. Furthermore, a check should
be made on whether the installation conditions
correspond to the technical data given in the
data sheet or on the rating plate.
The safety regulations must always be observed
when troubleshooting.
Decommissioning
Removal of the valve for repair or servicing is
often carried out carelessly, as the PV reactor
has to be repaired or replaced in any case.
However, it is recommended that the valve be
removed with care, without damaging the PFA
coating, so that the possible cause of damage
can be determined after removal.
ATTENTION!
Check that the PV reactor and reactor is
depressurized and drained.
With corrosive, inflammable, aggressive or toxic
media, flush out and ventilate the PV reactor
system.
1. Only allow assembly work to be carried out
by qualified personnel (see Section 2.5)
2. Loosen all flange bolts and withdraw them
until the PV reactor can be removed.
DISPOSAL
Hand in the correctly cleaned valve to the scrap
material recycling plant.
Badly cleaned PV reactors can cause severe
burning of the hands and other parts of the body.
If the sampler is passed on to a third party, the
manufacturer does not guarantee the safety of the
equipment.
COMMISSIONING
General commissioning
Tools for increasing the lever or handwheel
torque are not allowed.
Any debris left in the pipeline and valves (dirt,
welding beads, etc.) will inevitably lead to
leakage.
Before each commissioning of a new system or
re-commissioning of a system after repair or
modification, it must be ensured that:
- all installation and assembly work has been
completed in accordance with the regulations!
- commissioning is only undertaken by “Qualified
Personnel”
- the valve is in the correct operating position.
- new protective equipment is installed or existing
protective equipment repaired.
- valve and valve flanges are tight
- valve functionality and smooth operation
Mounting additional modules
Where valves are fitted with additional options
(limit switches, etc.) these should be connected
according to their operating mode in line with
the installation diagram.
NOTES ON DANGERS DURING INSTALLATION,
OPERATION AND MAINTENANCE
Safe operation of the valve is only guaranteed if
it has been correctly installed, commissioned
and maintained by qualified personnel (see
“Qualified Personnel”), taking into account
the warning information of these installation
and maintenance instructions. In addition,
compliance with the general installation and
safety regulations for the pipeline or plant
construction, together with the correct use
of tools and protective equipment, must be
ensured.
The installation and maintenance instructions
must be strictly followed when any work is carried
out on the valve or when handling the valve. Non-
observance can result in injuries or damage to
property.

3
NEOTECHA PV REACTOR SAMPLING SYSTEM
InstallatIon & MaIntenance InstructIons
PV Sampler
• Take PV sampler and uncoil the suction hose
In case the suction hose has been kinked
use a hot air gun and heat the suction hose
to about 180°C. The hose will assume the
original shape again. Use a wet cloth and cool
it down before moving it. Suction hose should
be approx. 50mm longer than dip tube.
• Place PTFE enveloped gasket (supplied by
end user) over dip tube mounting flange
• Insert suction hose through gasket and into
dip tube
• Secure sampler:
- ASME version with 4 x ⅝” UNC bolts
- DIN version with 4 x M16 bolts (supplied by
end user)
• Tighten bolts to get a non leaking connection
Dip tube mounting flange
size NPS 2 ASME 150 or
DINDN50
Dip tube reactor flange
size as per customers
requirements
Dip tube
Reactor flange
Reactor
PTFE enveloped gasket
Nut
Bolt
INSTALLATION
Dip tube
• Determine reactor flange where sampling
system is to be installed
• Insure that reactor flange is the same size as
the dip tube reactor flange
• Place PTFE enveloped gasket (supplied by
end user) over reactor flange
• Insert dip tube through gasket and reactor
flange
• Make sure dip tube is lowered vertically into
reactor
• Lower dip tube gently till both flanges meet
• Take bolts, nuts and washers (supplied by end
user) and secure dip tube with reactor flange
• Tighten bolts to get a non leaking connection
Maximum pressure and temperature range,
see tagplate.
Suction
hose
PV-sampler
PTFE enveloped gasket
Dip tube mounting flange
size 2” ASME 150 or DIN DN50
Washer bolts
for ASME 150 flanges
4 X ⅝” UNC
for DIN DN50 flanges
4 X M16

4
NEOTECHA PV REACTOR SAMPLING SYSTEM
InstallatIon & MaIntenance InstructIons
Auxiliary connections
Most auxiliary connections required on the PV
sampler are vacuum, nitrogen and solvent.
All connections to the sampler should be
made with smooth bore flexible Teflon hoses
stainless steel braided.
Flanges A, B and C are equipped with
connecting ports:
• Flange A has 2 ports
• Flange B has 3 ports and a mounting face for
the pump bracket
• Flange C has 4 ports and an additional one
can be supplied in the cover (total of 5)
The connecting port is a factory standard 2 hole
mini flange version Teflon PFA lined.
Bottle
• Depending on the size of sample volume, the
PV sampler is supplied with an appropriate
size bottle i.e.
• Sample volume
150 ml: bottle size 250 ml
250 ml: bottle size 250 ml
500 ml: bottle size 500 ml
1000 ml: bottle size 1000 ml
• Unscrew cap on supplied Borosilicate bottle
and screw it into transfer device
Flange
NPS ½ ASME 150 or
DIN DN15
Flexible smooth bore Teflon
hose stainless steel braided
with flanged connections
Flange “C”
Ball valve type NTB
PFA Teflon lined
size NPS ½ ASME 150
or DIN DN15
Transfer device
PTFE gasket
Thread
ISO GL45
Cap
Bottle
Flange “B”
Flange “A”
ATTENTION
• After PV sampler has been installed, check all
bolts, buts and screws for tightness
• Set sampler under pressure max. 10bar and
check for possible leaks
• Close all valves on sampler
• Screw supplied sample bottle into transfer
device on PV sampler
• After PV sampler has been installed, close all
valves on the sampler

5
PVV-1
PVBV-1
TV-1
TV-2
NEOTECHA PV REACTOR SAMPLING SYSTEM
InstallatIon & MaIntenance InstructIons
Transfer of sample into bottle
1. Open transfer valve TV-1 on transfer device
2. Open transfer valve TV-2 on transfer device
Liquid in sight glass will now transfer into
bottle
3. When all liquid has been transferred into
bottle, close both valves TV-1 and TV-2
4. Unscrew the bottle from the transfer device
5. Take cap and close bottle
Displaced air in bottle has been transferred
back into sight glass and has not contaminated
the atmosphere.
SCHEMATIC DIAGRAM
Vacuum
Transfer valves
Sample
Bottle
Check valve
PTFE ball
Suction hose
OPERATION
Operating instructions for sampler with
transfer device and vacuum lift
Taking a sample
• Before taking a sample, make all connections
are properly connected
• Make sure all valves on PV sampler are
closed
• Make sure sample bottle is connected to
transfer unit
• Insure that the vacuum supply is functioning
1. Open ball valve PVBV-1 on sampler carefully
till fully open
2. Open vacuum valve PVV-1 carefully
Liquid will now be drawn through suction
hose into sight glass. Make sure liquid level
rises slowly in sight glass. Hollow PTFE ball
will float on liquid and cut off vacuum when
pressed into the check valve seat
3. Close ball valve PVBV-1 immediately
4. Close vacuum valve PVV-1
A sample has now been drawn from the reactor

6
PVV-1
PVBV-1
TV-1
TV-2
PVN-1
NEOTECHA PV REACTOR SAMPLING SYSTEM
InstallatIon & MaIntenance InstructIons
Operating instructions for sampler with
transfer device, vacuum lift and nitrogen
connection
Taking a sample
• Before taking a sample, make sure all
connections are properly connected
• Make sure all valves on PV sampler are
closed
• Make sure sample bottle is connected to
transfer unit
• Insure that the vacuum supply is functioning
• Insure that the nitrogen supply is functioning,
recommended pressure 2-3bar
1. Open ball valve PVBV-1 on sampler carefully
till fully open
2. Open vacuum valve PVV-1 carefully
Liquid will now be drawn through suction
hose into sight glass. Make sure liquid level
rises slowly in sight glass. Hollow PTFE ball
will float on liquid and cut off vacuum when
pressed into the check valve seat.
3. Close ball valve PVBV-1 immediately
4. Close vacuum valve PVV-1
A sampler has now been drawn from the
reactor
Transfer of sample into bottle
1. Open transfer valve TV-1 on transfer device
2. Open transfer valve TV-2 on transfer device
Liquid in sight glass will now transfer into
bottle
3. When all liquid has been transferred into
bottle, close both valves TV-1 and TV-2
4. Unscrew the bottle from the transfer device
5. Take cap and close bottle
Displaced air in bottle has been transferred
back into sight glass and has not contaminated
the atmosphere.
SCHEMATIC DIAGRAM
Blow down of suction hose
1. Open ball valve PVBV-1 on sampler
2. Open nitrogen valve PVN-1 on sampler for
about 3 seconds
Liquid in sampler and suction hose is now
blown out
3. Close ball valve PVBV-1 on sampler
4. Close nitrogen valve PVN-1 on sampler
5. Open transfer valve PV-1 and close it again
Pressure in sight glass has now been
relieved
Nitrogen
Transfer valves
Check valve
PTFE ball
Suction hose
Sample
bottle
Vacuum

7
PVV-1
PVN-1
PVBV-1
TV-1
TV-2
PVS-1
NEOTECHA PV REACTOR SAMPLING SYSTEM
InstallatIon & MaIntenance InstructIons
Nitrogen
Solvent
Transfer valves
Check valve
PTFE ball
Suction hose
Sample
bottle
Vacuum
Operating instructions for sampler with
transfer device, vacuum lift, nitrogen and
solvent connection
Taking a sample
• Before taking a sample, make sure all
connections are properly connected
• Make sure all valves on PV sampler are
closed
• Make sure sample bottle is connected to
transfer unit
• Insure that the vacuum supply is functioning
• Insure that the nitrogen supply is functioning,
recommended pressure 2-3bar
1. Open ball valve PVBV-1 on sampler carefully
till fully open
2. Open vacuum valve PVV-1 carefully
Liquid will now be drawn through suction
hose into sight glass. Make sure liquid level
rises slowly in sight glass. Hollow PTFE ball
will float on liquid and cut off vacuum when
pressed into the check valve seat
3. Close ball valve PVBV-1 immediately
4. Close vacuum valve PVV-1
A sample has now been drawn from the reactor
Transfer of sample into bottle
1. Open transfer valve TV-1 on transfer device
2. Open transfer valve TV-2 on transfer device
Liquid in sight glass will now transfer into
bottle
3. When all liquid has been transferred into
bottle, close both valves TV-1 and TV-2
4. Unscrew the bottle from the transfer device
5. Take cap and close bottle
Displaced air in bottle has been transferred
back into sight glass and has not contaminated
the atmosphere.
SCHEMATIC DIAGRAM
Blow down of suction hose
1. Open ball valve PVBV-1 on sampler
2. Open nitrogen valve PVN-1 on sampler for
about 3 seconds
Liquid in sampler and suction hose is now
blown out
3. Close ball valve PVBV-1 on sampler
4. Close nitrogen valve PVN-1 on sampler
5. Open transfer valve TV-1 and close it again
Pressure in sight glass has not been
relieved
Rinsing
1. Connect an empty 250 ml bottle to the
transfer device
2. Fill sight glass with solvent by opening valve
PVS-1. Close PVS-1
3. Open nitrogen valve PVN-1
4. Open transfer valve TV-2 and transfer 50 ml
solvent to bottle. Close valve again
5. Open ball valve PVBV-1 till all solvent is
pressed out of sight glass into reactor.
Close valve again
6. Close nitrogen valve PVN-1
7. Open transfer valve TV-1 and close it again
8. Unscrew bottle and close it with cap
9. Dispose of solvent in an appropriate way

8
PVN-1
TV-1
TV-2
PVE-1
PVBV-1
NEOTECHA PV REACTOR SAMPLING SYSTEM
InstallatIon & MaIntenance InstructIons
Operating instructions for sampler with
transfer device and vacuum lift with eductor
Taking a sample
• Before taking a sample, make sure all
connections are properly connected
• Make sure all valves on PV sampler are
closed
• Make sure sample bottle is connected to
transfer unit
• Insure that the nitrogen supply is functioning,
recommended pressure 2-3bar
1. Open ball valve PVBV-1 on sampler carefully
till fully open
2. Open nitrogen discharge valve PVE-1 fully
3. Open nitrogen discharge valve PVN-1
carefully
Liquid will now be drawn through suction
hose into sight glass. Make sure liquid level
rises slowly. Hollow PTFE ball will float on
liquid and cut off vacuum when pressed into
the check valve seat
4. Close ball valve PVBV-1 immediately
5. Close nitrogen discharge valve PVE-1
6. Close nitrogen supply valve PVN-1
A sample has now been drawn from the
reactor.
Transfer of sample into bottle
1. Open transfer valve TV-1 on transfer device
2. Open transfer valve TV-2 on transfer device
Liquid in sight glass will now transfer into
bottle
3. When all liquid has been transferred into
bottle, close both valves TV-1 and TV-2
4. Unscrew the bottle from the transfer device
5. Take cap and close bottle
Displaced air in bottle has been transferred
back into sight glass and has not contaminated
the atmosphere.
SCHEMATIC DIAGRAM
Nitrogen
Eductor
PTFE
ball
Transfer valves
Check valve
Sample
bottle
Nitrogen
discharge hose
Suction hose

9
PVN-1
PVN-1
PVBV-1
PVE-1
NEOTECHA PV REACTOR SAMPLING SYSTEM
InstallatIon & MaIntenance InstructIons
Operating instructions for sampler with
Sapro
®
sampling valve and eductor
Taking a sample
• Before taking a sample, make sure all
connections are properly connected
• Make sure all valves on PV sampler are
closed
• Insure that the solvent supply is functioning
• Insure that the nitrogen supply is functioning,
recommended pressure 2-3bar
1. Open ball valve PVBV-1 on sampler carefully
till fully open
2. Open nitrogen discharge valve PVE-1 fully
3. Open nitrogen supply valve PVN-1 carefully
Liquid will now be drawn through suction
hose into sight glass. Make sure liquid level
rises slowly. Hollow PTFE ball will float on
liquid and cut off vacuum when pressed into
the check valve seat
4. Close ball valve PVBV-1 immediately
5. Close nitrogen discharge valve PVE-1
6. Close nitrogen supply valve PVN-1
A sample has now been drawn from the reactor
Transfer of sample into syringe
1. Take syringe and connect to Sapro
®
sampling valve
2. Open syringe by pressing down the handle
and lock it in the open position
For more information on the Sapro
®
valve
and syringe, consult the Sapro
®
operating
manual
3. Open nitrogen supply valve PVN-1
The sample is now pressed out of the sight
glass into the syringe. Depending on the size
of the syringe, sample will remain in the
sight glass. Close PVN-1
4. Release handle on syringe and disconnect
syringe from the Sapro
®
valve
5. Open ball valve PVBV-1 on sampler carefully
till fully open
6. Open nitrogen supply valve PVN-1 for 2-3
seconds and close it again
Remaining sample in sight glass has now
been pushed back into reactor through
suction hose
Nitrogen
PTFE ball
Ball valve
Sapro sampling valve
Eductor
Solvent
Syringe
Nitrogen
discharge hose
Suction hose
SCHEMATIC DIAGRAM

10
PVE-1
PVBV-1
TV-2
NEOTECHA PV REACTOR SAMPLING SYSTEM
InstallatIon & MaIntenance InstructIons
Operating instructions for sampler with
transfer device and diaphragm circulating
pump
Taking a sample
1. Make sure transfer valves TV-1 and TV-2 are
closed
2. Insure that the pH-probe is properly
connected
3. Make sure sample bottle is connected to
transfer unit
4. Start circulating pump. Open ball valve
PVBV-1 and discharge valve PVE-1
5. Close ball valve PVBV-1 on sampler
6. Close discharge valve PVE-1
7. Interrupt air supply to circulating pump
Transfer of sample into bottle
1. Open transfer valve TV-1 and TV-2
Sample will now transfer to bottle
2. Close transfer valve TV-1 and TV-2
3. Unscrew bottle from transfer device
4. Take cap and close bottle
A sample has now been drawn from the reactor
Displaced air in bottle has been transferred
back into sight glass and has not contaminated
the atmosphere.
SCHEMATIC DIAGRAM
Air supply
min. 4bar
Suction hose
Pump
Sample
bottle
Discharge hose
Pressure regulator
Throttling
valve
pH probe
Check valve
Solvent
TV-1

Neither Emerson, Emerson Automation Solutions, nor any of their affiliated entities assumes responsibility for the selection, use or maintenance of any product.
Responsibility for proper selection, use, and maintenance of any product remains solely with the purchaser and end user.
Neotecha is a mark owned by one of the companies in the Emerson Automation Solutions business unit of Emerson Electric Co. Emerson Automation Solutions, Emerson
and the Emerson logo are trademarks and service marks of Emerson Electric Co. All other marks are the property of their respective owners.
The contents of this publication are presented for informational purposes only, and while every effort has been made to ensure their accuracy, they are not to be
construed as warranties or guarantees, express or implied, regarding the products or services described herein or their use or applicability. All sales are governed by
our terms and conditions, which are available upon request. We reserve the right to modify or improve the designs or specifications of such products at any time without
notice.
Emerson.com/FinalControl
/