Page is loading ...

1
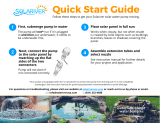
AquaNura Solar Birdbath Kit
0°C /32°F
Configuration and Assembly
In strong sunlight or windy conditions, the water may spray outside of the birdbath.
We recommend the water be regularly topped off and changed to ensure it remains
clean and free from debris. Shallow birdbaths require more frequent filling due to
evaporation or the pump will run dry, which may cause damage
Frost causes damage and is not covered by warranty. Empty water and store product
inside during cold weather. For safety, we recommend doing this when the weather is
going to dip below 40°F.
Unit includes:
Solar panel housing x1
Support ring (attached) x1
Pump x1
Fountain head set x1
1” Extension tube x1
The AquaNura can be configured to allow use with a variety of birdbaths.
Below are some suggestions. You may need to adjust the components based
upon your birdbath. You must have a minimum of 1.5” of water to work correctly.
Deep Birdbath
(2+ inches) with Flat Bowl
Shallow Birdbath
with Flat Bowl
Shallow Birdbath with
Curved Bowl
• Use with support ring attached
• Connect pump tube directly into
bottom of solar panel
• Solar panel will not be effected
if submerged underwater
• Remove support ring
• Connect pump tube directly
into bottom of solar panel
• Remove the support ring
• Add 1” tube between the
underside of solar panel and
pump. This will lower the pump
closer to bottom of bowl.
See next page for instructions on how to attach pump and remove support ring.
* Birdbath not included
Warning! Important! Read Me!
1” Extension tube
Pump
Pump
Pump
1” Extension tube
Fountain head set

2
.
In order to remove the support ring, turn the solar panel housing upside down. Hold the circuit
box with one hand, and with your other hand turn the support ring to the right to unlock.
Fill your birdbath with water and place the AquaNura into the birdbath.
Attach the fountain head of your choice.
OR
Important
!
BEFORE USE: Connect the tube on the pump to the hole
in the underside of the solar panel. Connect the cables,
ensure the connections are water tight.
Circuit box

3
Performance
This product is designed primarily to operate in summer months but will also work in spring and autumn
provided there is strong direct sunlight. Performance is directly related to the amount and strength of
sunlight received. The 360˚ fountain head will work effectively in strong direct sunlight. The short bubbler
fountain head may need to be removed in strong direct sunlight to avoid splashing.
Pump Cleaning / Manual Pump Start
Filter cover can simply
be pulled apart as
shown.
Turn impeller cover to
release as shown,
impeller can be
easily removed
Remove filter
material and rinse in
water.
Rinse all parts
thoroughly in
water.
If the pump is not working immediately, try the following for a
manual start. Remove the pump cover. Remove the impeller
cover, face the panel to the sun, and start manually spinning
the impeller clockwise, this can take 1-3 minutes.
In bright direct sunlight your pump will work well with a
consistent fountain height and flow rate.
In slightly cloudy conditions your pump will work
however fountain height and flow will vary as clouds
pass in front of the sun.
In overcast conditions the solar panel does not
generate enough power to run the pump and it will
NOT work.
At night the solar panel does not generate power and
your pump will NOT work.
Position
Position your AquaNura so that
receives direct sunlight. The
fountain will NOT work if the solar
panel is in a shaded area.

4
© 2018.0
Smart Living Home & Garden warranties your solar panel, pump and battery (for Solar-on-Demand units) for
one (1) year from the original date of purchase from authorized distributors and retailers. The warranty covers
parts that are properly installed and regularly maintained. If the product fails due to a defect in material or
workmanship, Smart Living will replace the defective parts free of charge. Your fountain is designed for outdoor
use and with proper care will last for many years. If over time your fountain develops scratches or minor wear
from normal use, you can contact our customer service department for easy to apply one step touch up paint.
Please unpack and inspect the entire product upon receipt. Report any broken or missing pieces within five (5)
business days of receipt to our customer service department and we will provide replacement parts free of
charge. Please do not discard any damaged parts until instructed to do so by our customer service department.
Thank you for purchasing this Smart Solar fountain.
Register your Product Here:
https://smartlivinghg.com/wp/customer-service/product-registration/
FAQs are available online along with step by step video tutorials to help you with pump
cleaning and solar kit assembly.
Visit: https://smartlivinghg.com/wp/customer-service/faq/
Smart Solar is a Smart Living Home & Garden brand
Telephone: + 1 813 343 5775
Email: [email protected]
Web: www.smartlivinghg.com
US Patent 7484671, EU Patent 1648620
Maintenance
L
To maintain optimum performance, regularly clean
the solar panel using water or glass cleaner with a
non-abrasive sponge or cloth.
If the fountain head, nozzle, or tubes become
blocked, rinse through with water.
• Ensure the cables from the pump to the solar panel are connected properly.
• Ensure the pump tube is connected to the underside of the solar panel.
• Check water level in birdbath to ensure pump is fully submerged.
• Remove and clean impeller from the pump (see pump cleaning section).
• If dirty, clean glass on solar panel housing. Remove any hard water scale/build up.
• Try Manual Pump Start (see pump cleaning section).
• There may be an air bubble in the tube. Try pouring water down the tube to force out the
air bubble.
Troubleshooting Tips
/