Page is loading ...

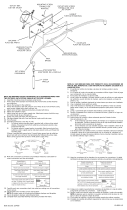
THREADED BALL
BOLA ROSCADO
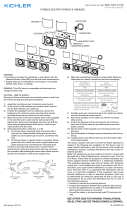
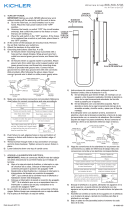
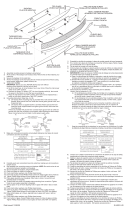
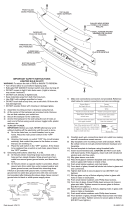
1) Setxtureoverbackpan.Alignholesinbracketsonxturewithholesinbackpan.
2) Frominsideofbackpan,threadscrewsintoholesinbackpanandintoholesin
xture.Tightenscrewstosecurebackpantoxture.
3) TURN OFF POWER.
IMPORTANT:Beforeyoustart,NEVERattemptanyworkwithoutshuttingoffthe
electricityuntiltheworkisdone.
a) Gotothemainfuse,orcircuitbreaker,boxinyourhome.Placethemain
powerswitchinthe“OFF”position.
b) Unscrewthefuse(s),orswitch“OFF”thecircuitbreakerswitch(s),that
controlthepowertothextureorroomthatyouareworkingon.
c) Placethewallswitchinthe“OFF”position.Ifthexturetobereplacedhas
aswitchorpullchain,placethoseinthe“OFF”position.
4) Findtheappropriatethreadedholesonmountingstrap.Assemblemounting
screwsintothreadedholes.
5) Attachmountingstraptooutletbox.(Screwsnotprovided).Mountingstrapcanbe
adjustedtosuitpositionofxture.
6) Groundinginstructions:(SeeIllus.AorB).
A) Onxtureswheremountingstrapisprovidedwithaholeandtworaised
dimples.Wrapgroundwirefromoutletboxaroundgreengroundscrew,
andthreadintohole.
B) Onxtureswhereacuppedwasherisprovided.Attachgroundwirefrom
outletboxundercuppedwasherandgreengroundscrew,andthreadinto
mountingstrap.
Ifxtureisprovidedwithgroundwire.Connectxturegroundwiretooutletbox
groundwirewithwireconnector.(Notprovided.)Afterfollowingtheabovesteps.
Neverconnectgroundwiretoblackorwhitepowersupplywires.
7) Makewireconnections(connectorsnotprovided.)Referencechartbelowforcorrect
connectionsandwireaccordingly.
8) Pushxturetowall,carefullypassingmountingscrewsthroughholes.
9) Sliplockwashersovermountingscrewsandscrewthreadedballsontoendof
mountingscrews.
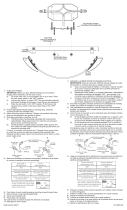
10) Insertrecommendedbulb.
11) Placediffuseroversocketsotopandbottomacrylicdiscstinsideshade.
12) Alignholesinbracketondiffuserwithholesintopofxture.
13) Threadscrewsdownintoholesinbracketandintoxtures.Tightenscrewsto
securediffuserinplace.(DONOTovertighten.)
1) Coloqueelartefactoencimadelaplacadeapoyo.Alineelosagujerosenlos
apoyosdelartefactoconlosagujerosenlaplacadeapoyo.
2) Desdeadentrodelaplacadeapoyo,rosquelostornillosenlosagujerosdela
placadeapoyoyenlosagujerosdelartefacto.Aprietelostornillosparasujetarla
placadeapoyoalartefacto.
3) APAGUELAALIMENTACIÓNELÉCTRICA.
IMPORTANTE: Antesdecomenzar,NUNCAtratedetrabajarsinantes
desconectarlacorrientehastaqueeltrabajosetermine.
a) Vayaalacajaprincipaldefusibles,ointerruptorocajadecircuitosdesu
casa.Coloqueelinterruptordelacorrienteprincipalenposiciónde
apagado“OFF”.
b) Desatornilleel(los)fusible(s),ocoloqueelinterruptorointerruptoresdel
breakerenposicióndeapagado“OFF”,quecontrola(n)lacorrientehacia
elartefactoohabitacióndondeestátrabajando.
c) Coloqueelinterruptordeparedenposicióndeapagado“OFF”.Siel
artefactoquesevaareemplazartieneuninterruptorocadenaquesejala,
colóquelosenlaposicióndeapagado“OFF”.
4) Encontrarlosagujerosroscadoscorrectosenlaabrazaderade
montaje.Instalarlostornillosdemontajeenlosagujerosroscados.
5) Unirlaabrazaderademontajealacajadeconexiones.(Noseproveentornillos).
Laabrazaderademontajepuedeajustarseparaacomodarlaposicióndelartefacto.
6) InstruccionesdeconexiónatierrasolamenteparalosEstadosUnidos.(Veala
ilustracionAoB).
A) Enlaslámparasquetieneneleje,demontajeconunagujeroydos
hoyuelosrealzados.Enrollarelalambreatierradelacajatomacorriente
alrededordeltornilloverdeypasarloporelaquiero.
B) Enlaslámparasconunaarandelaacopada.Fijarelalambreatierradela
cajatomacorrientedelajodelaarandelaacoadaytornilloverde,ypaser
porelejedemontaje.
Silalámparavieneconalambreatierra.Conecterelalambreatierradelalámpara
alalambreatierradelacajatomacorrienteconunconectordealambres.(No
incluido)Espuésdeseguirlospasosanteriores.Nuncaconectarelalambraa
tierraalosalambreseléctrosnegrooblanco.
7) Hagalesconexionesdelosalambres(noseproveenlosconnectores.)Latabla
dereferenciadeabajoindicalasconexionescorrectasylosalambrescorrespondientes.
8) Empujelaunidadcontralapared,pasandoconcuidadoaltuboroscadoatravès
delagujero.
9) Deslicelasrondanasdeseguridadsobrelostornillosdemontajeyatornillelas
esferasroscadasenelextremodelostornillosdemontaje.
10) Insertelabombillarecomendada.
11) Coloqueeldifusorsobreelcasquillodemaneratalquelosdiscosacrílicossuperiores
einferioresseajustendentrodelapantalla.
12) Alineelosagujerosenelapoyodeldifusorconlosagujeroseneltopedelartefacto.
13) Rosquelostornillosabajo,enlosagujerosdelapoyoyenlosartefactos.Apriete
lostornillosparasujetareldifusorenellugar.(NOaprieteexcesivamente.)
Connect Black or
Red Supply Wire to:
Connect
White Supply Wire to:
Black White
*Parallel cord (round & smooth) *Parallel cord (square & ridged)
Clear, Brown, Gold or Black
without tracer
Clear, Brown, Gold or Black
with tracer
Insulated wire (other than green)
with copper conductor
Insulated wire (other than green)
with silver conductor
*Note: When parallel wires (SPT I & SPT II)
are used. The neutral wire is square shaped
or ridged and the other wire will be round in
shape or smooth (see illus.)
Neutral Wire
Conectar el alambre de
suministro negro o rojo al
Conectar el alambre de
suministro blanco al
Negro Blanco
*Cordon paralelo (redondo y liso)
*Cordon paralelo (cuadrado y estriado)
Claro, marrón, amarillio o negro
sin hebra identificadora
Claro, marrón, amarillio o negro
con hebra identificadora
Alambre aislado (diferente del verde)
con conductor de cobre
Alambre aislado (diferente del
verde) con conductor de plata
*Nota: Cuando se utiliza alambre paralelo
(SPT I y SPT II). El alambre neutro es de forma
cuadrada o estriada y el otro alambre será de
forma redonda o lisa. (Vea la ilustracíón).
Hilo Neutral
DateIssued:5/13/11 IS-10439-US
MOUNTINGSTRAP
PLANCHAPARAMONTAR
GREEN GROUND
SCREW
CUPPED
WASHER
A
B
OUTLET BOX
GROUND
FIXTURE
GROUND
DIMPLES
WIRE CONNECTOR
(NOT PROVIDED)
OUTLET BOX
GROUND
GREEN GROUND
SCREW
FIXTURE
GROUND
ARANDELA
CONCAVA
A
B
TIERRA DE LA
CAJA DE SALIDA
TORNILLO DE TIERRA,
VERDE
DEPRESIONES
TIERRA
ARTEFACTO
CONECTOR DE ALAMBRE
(NO SE PROVEE)
TIERRA DE LA
CAJA DE SALIDA
TORNILLO DE TIERRA,
VERDE
TIERRA
ARTEFACTO
DIFFUSER
DIFUSOR
SCREW
TORNILLO
TOPACRYLICDISC
DISCOACRÍLICO
SUPERIOR
BOTTOMACRYLIC
DISC
DISCOACRÍLICOINFE-
RIOR
/


