Page is loading ...

Model # ATVUSB05
User’s Manual
VER. 1A

1
Table of Contents
CHAPTER 1 INSTALLING HARDWARE ......................................................................................................2
1.1 Package Contents.................................................................................................................................2
1.2 Minimum System Requirements..........................................................................................................2
1.3 Upgrading USB 2.0 Host Controller Driver ........................................................................................2
1.4 Hardware Installation...........................................................................................................................3
CHAPTER 2 INSTALLING Airlink101 TV BOX DRIVER............................................................................3
CHAPTER 3 INTSTALLING PVR PLUS........................................................................................................6
CHAPTER 4 USING PVR PLUS......................................................................................................................9
CHAPTER 5 USING TVR ..............................................................................................................................10
5.1 Setting TV system and scanning channels.........................................................................................10
5.2 Main Panel Functions.........................................................................................................................12
5.3 Schedule Function..............................................................................................................................15
5.4 Setup Utility.......................................................................................................................................17
5.5 Channel Preview................................................................................................................................20
5.6 Snapshot.............................................................................................................................................20
5.7 Sleeping Timer...................................................................................................................................20
CHAPTER 6 USING MPEG ENCODER .......................................................................................................21
6.1 Interface Explanation.........................................................................................................................21
6.2 Streaming Video Translation..............................................................................................................21
6.3 Translation Option Dialog..................................................................................................................23
CHAPTER 7 USING VIDEO EDITOR ..........................................................................................................26
7.1 Menu Area..........................................................................................................................................27
7.2 Display Area.......................................................................................................................................28
7.3 Original and Staging Clips.................................................................................................................28
7.4 Frame Edit Mode ...............................................................................................................................30
CHAPTER 8 USING DVD MAKER..............................................................................................................31
8.1 Adding Files.......................................................................................................................................31
8.2 Burning...............................................................................................................................................32
8.3 Video Specifications...........................................................................................................................33
CHAPTER 9 FAQ............................................................................................................................................35
Appendix A ......................................................................................................................................................37
Product Specifications..............................................................................................................................37
Appendix B ......................................................................................................................................................38
Technical Support.....................................................................................................................................38

2
CHAPTER 1 INSTALLING HARDWARE
1.1 Package Contents
Unpack your Airlink101 TV box and make sure that all the items are intact. The following
items should be included in your package:
Airlink101 TV box
Audio Cable
Composite to S-Video Converter Cable
Power Adapter
Quick Installation Guide
Installation CD
Remote Control [requires two AAA batteries (not included)]
1.2 Minimum System Requirements
Intel Pentium 4 2.0GHz or above CPU
256 MB RAM
200 MB available hard disk space
One available USB port (USB 2.0 recommended)
Microsoft Windows 2000/XP
VGA with 800x600 16-bit resolution (DirectX 9 supported)
AC 97 compatible sound card
Speakers for audio output
CD-ROM drive
1.3 Upgrading USB 2.0 Host Controller Driver
Before you plug the Airlink101 video capture adapter into your computer’s USB 2.0 port,
please check your USB 2.0 device driver first. If your USB 2.0 host controller driver is not
the latest version or provided by Microsoft, we strongly recommend you use our “USB 2.0
Updater” utility from the autorun page on the CD. It will help you to upgrade your USB 2.0
driver to the latest version released by Microsoft in order to avoid some compatibility issues.
Note: DO NOT connect the Airlink101 TV box to your computer when you are using the
USB update utility.

1.4 Hardware Installation
After you have updated the USB 2.0 host controller driver to the latest version, you can
install the Airlink101 TV box. Please refer to the diagram below as you follow the
installation procedures.
Note: Be sure to follow the steps carefully and plug in the USB 2.0 connector last.
1. Connect the coaxial cable for the TV antenna/cable to the TV port of the TV box.
2. Connect the S-Video cable from you video source to the S-Video port of the TV box. If
you don’t have an S-Video cable, use the provided Composite to S-Video converter
cable.
3. Connect the audio cable from your audio source to the AUD-IN port of the TV box.
4. Connect one end of the provided Audio Cable to the AUD-OUT port of the TV box and
connect the other end to the Line In port of your sound card.
5. Connect one end of the power adapter to the Power Adapter port of the TV box and
connect the other end to an electrical outlet.
6. Connect the USB 2.0 connector from the TV box to an USB 2.0 port on your computer.
CHAPTER 2 INSTALLING Airlink101 TV BOX DRIVER
Before installation, it is highly recommended that all background applications such as
antivirus software and system monitoring programs be disabled first.
1. When you plug in the USB 2.0 connector to the USB 2.0 port of your computer, the
Found New Hardware Wizard will appear. Click Cancel to quit the wizard and insert
the provided Installation CD.
3
2. The setup menu will automatically appear. Select Driver Install to start the driver

installation.
Note: If the setup menu does not appear automatically, go to Start, Run, and type
D:\autorun.exe (where D is the letter of your CD-ROM drive) and click OK.
3. Click Next to install the driver for the Remote Control.
4. Click Next to install the driver for the TV box.
4

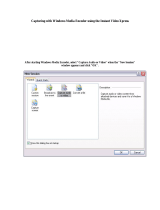
5. Click Next to launch the TVSetup utility.
6. Click Country to configure the setting.
7. For U.S.A., select one of the following.
5

8. Unplug the USB 2.0 connector from your computer, re-plug the connector, and click OK.
9. Select Yes, I want to restart my computer now and click Finish to restart your computer.
Note: If you want to re-configure the TV system, you can run the “TVSetup” utility to
change the setting. Click Start, Programs, Airlink101, ATVUSB05 Utilities, TVSetup to
execute the program.
CHAPTER 3 INTSTALLING PVR PLUS
PVR PLUS is a set of utilities that allow you to watch TV on your computer, edit video clips,
burn DVDs, and more. Before installation, it is highly recommended that all background
applications such as antivirus software and system monitoring programs be disabled first.
1. Insert the provided Installation CD.
6
2. Select PVR PLUS at the setup menu. If the setup menu does not appear automatically, go
to Start, Run, and type D:\autorun.exe (where D is the letter of your CD-ROM
drive) and click OK.

3. Click Next to begin installation.
4. Click Next to accept the default Destination Location or click Browse to choose a new
location.
7

5. Click Next to accept the default Program Folder.
6. Click Finish to complete the installation.
8

CHAPTER 4 USING PVR PLUS
Double-click the PVR Plus icon on your desktop to run PVR PLUS. After you started PVR
PLUS, you can select the application you want to use. Click on each icon to start the
application.
9
• TVR: TVR turns your PC into a
full-featured video recorder. (For detailed
instructions, please refer to chapter 5).
• MPEG Encoder: MPEG Encoder
converts DV/AVI files into MPEG/DVD format.
(For detailed instructions, please refer to chapter
6).
• Video Editor: Video Editor allows you to
edit MPEG/DVD videos. (For detailed
instructions, please refer to chapter 7).
• DVD Maker: DVD Maker lets you create
VCD, SVCD, and DVD that can be played on a
PC or DVD player. (For detailed instructions,
please refer to chapter 8).
Note: You can also view and edit pictures using PVR Plus. For detailed information about
how to view/edit the pictures, click the ? button on the PVR Plus console.

CHAPTER 5 USING TVR
TVR is a powerful and easy-to-use TV application that provides feature-rich video/audio
entertainment. TVR allows you to watch and record TV or video on your computer and
playback the recordings as well.
5.1 Setting TV system and scanning channels
Note: The first time you start TVR, it will run the TV Frequency Table Setup Wizard.
1. For U.S.A., select Country and then select one of the following
2. Select the cable type and audio source for your TV and Recording sound and click
Next. For example, if you connect the provided audio cable to Line In of your sound
card, then you would choose Line In as your audio source.
10

3. Click Start to auto-scan for all available channels.
4. Click Finish to complete the TV Frequency Table Setup Wizard.
Note:
1. TVR depends on current country codes provided by Windows OS to give you a default
value of each country. However, this may not work in some cases so you should check
and select a valid option for your TV system; otherwise you will not be able to view all
TV programs.
2. When you want to reconfigure your current TV frequency table, you can choose Reset
TV Option on the popup menu of the display window.
11

5.2 Main Panel Functions
The display window shows live TV or recorded videos. You can drag it anywhere on the
screen or adjust its size by double-clicking it to switch to full-screen and double-clicking the
screen again to return to its original size. The TVR has six major parts.
5.2.1 Information Window
The Information Window displays the current status of the TVR, including video status,
(Live, REC, Playback, Time Shifting) sound status, (Mono, Stereo, or SAP), recording time,
recording file size, and the current time.
5.2.2 Basic Tool Part
The Basic Tool has seven buttons. You can click on each button for more specific functions.
For detailed instructions on each button, please refer to the following sub-sections.
: Input source switch: click on this button to switch your video source
: Scheduling: schedules recording date/time
: Setup: opens the TV Setup Utility
: Channel preview: previews all available channels
: Snapshot: takes a snapshot of the current image in the display window
: Sleeping timer: configures the sleeping timer
: TV sound switching: select from Mono, Stereo, or SAP (for TV only)
12

5.2.3 Channel Adjust Part
You can select the channels by clicking the number keys
, or on your computer’s
keyboard when the video source is set to Antenna, Cable, or Memory. You can also select
the channels with the remote control.
Note: The remote control requires two AAA batteries (not included).
Channel Up
: Goes to previous channel
Channel Down
: Goes to next channel
Note: You must first set the channels by auto-scanning for them as described in section 5.1
before you can switch the channels.
Recall Channel
: Returns to the last selected channel
5.2.4 Input Source Part
There are five video input sources to choose from: Antenna, Cable, Memory, Composite, and
S-Video. You can change the video source by clicking on the video source switch button
(like
or ), or choose Switch Video Source from the popup menu of the
display window. When the video source is changed successfully, the Input Source Switch
will show the corresponding source.
5.2.5 Volume Adjust Part
Volume adjusting:
: Increase volume
: Decrease volume
: Mute or restore sound
5.2.6 Record, Playback, TimeShifting Part
13
1. Record

At Live mode, you can start recording the current broadcast by clicking on the capture button
. Once you are capturing, click the stop button to stop recording. You can
review your recorded files in the Play list after recording.
2. Playback
You can playback the recorded files by clicking on the play button
. A playback
dialog box will appear, showing all the captured files and recently played files. Select the
files you want to playback and click Add to add them to the Play list. You can add more
than one file at a time, and you can also import files from other locations. Once you have
added all the files to the Play list, click OK to begin playback.
While playing, you can use following functions:
• Play button : If the video is paused, resume playback
• Pause button : If the video is playing, pause it
• Stop button : Stop current playback and go to Live mode
• Backward button : Go backward
14
• Forward button : Go forward

3. Time Shifting Function
The Time Shifting function allows you to record and playback videos at the same time. At
Live mode, you can perform time shifting by clicking on the time-shifting button
. Once
you are in time-shifting mode, you need to wait at least 10 seconds before you can playback
the recorded video by clicking on the play button
. If you want to stop time-shifting,
click the stop button
. During time-shifting, you can switch between the current
video and the recorded video by selecting Real Screen from the popup menu of the display
window.
5.3 Schedule Function
Click on the Schedule button
to configure the Scheduled Recording Agent. Click OK
when you are done configuring.
Capture
15
Capture Source: Select the video input
source (Antenna, Cable, Memory,
Composite, or S-Video).
Channel: Select the channel that you w
to record.
ant
ou
,
Capture audio option: Select from “Capture aud ”, or
Capture format (profile): Select the
video format you want to use. Note: If y
want to burn your captured videos to DVD
be sure to set the capture format to DVD
(NTSC) and not MPEG 2.
Capture size: Set the video capture size.
Bit rate (Kbps): Set the capture bit rate.
Capture quality: Set the capture quality.
Frame rate: Select the frame rate.
io”, “Capture audio only, No video
“No audio”.

File name option: You can use the date/time as your capture file name or assign a name
yourself.
Time option
Current time: Shows the current time.
Starting time: Enter the date and time when you want to start recording.
Duration: Enter the length that you want to record.
Recording rule: Select the recording rule you want to use. The default is "Once only.”
When you enter a record schedule, it will be added t
the Open tab of the Scheduled Recording Agent.
o
Insert: Insert a new record schedule.
Edit: Edit the record schedule.
Delete: Delete a record schedule.
Delete All: Delete all record schedules.
Execute TVR: Starts the TVR program.
Today To-do List: displays all of today’s record
schedules. Click Refresh to update the list.
Log: If your record schedule has failed, the error
message will be recorded in the Log. You can check
for any message in the Log. Click Clear to clear the
log.
16

Setup:
Output folder: Assign a destination folder to
store your scheduled recorded files.
Auto-execute at start up: Allows the Scheduled
Recording Agent to start at Windows start up.
Default is enabled.
5.4 Setup Utility
Click on the Setup button to enter the Setup Utility.
5.4.1 TV Tuner
The TV Tuner tab allows you to customize and configure your TV channels or edit your
favorite memory channels. You can auto scan your cable or antenna signals for any available
channels, or you can label and identify your favorite channels as well as include or exclude
channels from the channel list. In the channel list, you can double-click on each column to
change channel settings, like video standard, MTS option, channel name, and frequency fine
tune.
Normal Group: Switch TV source to Antenna or
Cable.
Memory Group: In Memory mode, you can assign
each channel with a memory number and exclude the
channels you don’t want to watch.
Auto Scan: Starts to auto scan for all available
channels.
17

5.4.2 Preview
The Preview tab allows you to customize and
configure your preview settings.
Standard: Follows the standard channel order
Custom: Allows you to set the video source of each
channel. Click on the numbers below and set your
video source.
Preview dimension: Select from 2x2, 3x3, 4x4,
and 5x5.
Preview time interval: Set the time interval
between each preview.
5.4.3 Capture
Video capture device: Select your video capture
device.
18
ormat.
or as
a custom name defined by you.
Video input format: Select your video input
format (UYVY, YUY2, RGB24).
Capture format (profile): Select the video format
you want to record as. Note: If you want to burn
your captured videos to DVD, be sure to set the
capture format to DVD (NTSC) and not MPEG 2.
Capture Size: Set the video capture size.
Bit Rate (Kbps): Set the capture bit rate.
Capture quality: Set the video capture quality.
Frame Rate: Set the capture frame rate.
Capture location: Set the folder to store your
captured videos.
Capture filename: Set the capture file name f
Choose either to name the files with date/time
Enable time limit: Check this box to set a time limit for the video capture.
Capture audio option: Select from “Capture audio”, “Capture audio only, No Video”, or
“No audio”.
Audio capture device: Select the audio capture device you want to use.

Audio Source: Select the audio input source. (Recommended using Line In)
Audio format: Select the audio format. For DVD, be sure to select 48000 Hertz.
Recording level: Adjust the audio recording level.
5.4.4 Video
Color: Move the slide bar to adjust the
Brightness, Contrast, Hue, and
Saturation of the video. Click Default to
reset the settings to factory default.
Video System: Select the video system for
your Composite and S-Video inputs.
Always on Top: The preview window will
always be displayed on top of other
windows.
Enable high quality preview: Enables high
quality preview mode.
Don't use overlay as display surface: If
your VGA card doesn't support Overlay
mode, click on this option.
Display Aspect Ration: Set the display
aspect ratio to 4:3, 16:9, or free mode.
5.4.5 Other
Multi language option: Select the language for the
user interface.
Enable PIP playback: Enables Picture-In-Picture
function when you playback recorded videos.
MPEG4 Codec: Select the appropriate MPEG4 codec
to use while capturing videos in the MPEG4 format.
(Choose from DivX, Microsoft MPEG4 Codec V1, V2,
and V3).
19
/