Page is loading ...

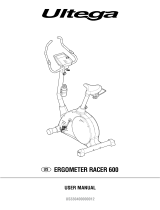
MANUAL FOR
939 novo
EN


Product Information ���������������������������������������������������������������������� 6
Facts......................................................................................6
Initial operation ...................................................................... 7
Cycle adjustments ................................................................. 7
Operating instruction �������������������������������������������������������������������� 8
How the bike works ............................................................... 8
Power on crank or ywheel ................................................... 8
Pulse measurement .............................................................. 8
If you use chest belt ............................................................ 8
Daily check ������������������������������������������������������������������������������������ 9
Checking the pulse function .................................................. 9
Validation of force .................................................................. 9
Monark novo Contol Unit ����������������������������������������������������������� 10
Connection to external Control Unit .................................... 10
Communication protocol (command type)........................... 11
Command type settings....................................................... 12
Monark test software ........................................................... 13
Other external PC software ................................................. 13
Terminal mode PC ...............................................................13
Monark novo Display Unit ���������������������������������������������������������� 14
Start training ........................................................................ 14
Stop / pause training ........................................................... 15
Workload control ................................................................. 16
Menu ...................................................................................17
Set a target ..........................................................................17
Exercise target achieved ..................................................... 19
Pulse settings ...................................................................... 20
Settings general .................................................................. 21
Connect Bluetooth SMART heart rate monitor ....................22
Calibration ����������������������������������������������������������������������������������� 24
Mechanical calibration ......................................................... 24
Calibration electronics - with the pendulum......................... 25
Adjustment / reset scale ...................................................... 25
Testing with 939 novo ���������������������������������������������������������������� 26
Test person enforcement .....................................................26
Reviewing results ................................................................ 27
Troubleshooting guide ��������������������������������������������������������������� 28
Service ����������������������������������������������������������������������������������������� 30
Note! ....................................................................................30
Warranty .............................................................................. 30
Service check and Maintenance ......................................... 30
Batteries ..............................................................................31
Flywheel bearing ................................................................. 31
Crank bearing ...................................................................... 31
Transportation ..................................................................... 31
Replacement of brake belt .................................................. 31
Brake belt contact surface ................................................... 31
Chain 1/2“ x 1/8“ .................................................................. 32
Freewheel sprocket ............................................................. 33
Spare parts list ���������������������������������������������������������������������������� 34
2017 MONARK EXERCISE AB, Vansbro, Sweden
Contents
Important
Read the manual carefully before using the cycle
and save it for future use.

939 novo
4
Monark Exercise AB
Monark has 100 years’ experience of bicycle production. The Monark tradition has yielded
know-how, experience, and a real feel for the product and quality. Since the early 1900s,
Monark bikes have been living proof of precision, reliability, strength and service. Those are
the reasons why we now are the world leader in ergometer bikes and the market leader in
Scandinavia in transport bikes.
We manufacture, develop and market ergometers and exercise bikes, transport bikes and
specialized bikes. Our largest customer groups are within health care, sports medicine, public
authorities, industry and postal services.
For more information: http://www.monarkexercise.se

939 novo
5
Congratulations on your new Ergometer!
Monark 939 novo is designed to perform stress tests when connected to an ECG device. When
connected to a PC or terminal, the bike can be used to perform Max and SubMax cardiovascular
tests, calculate VO
2
capacity and more. The bike can also be used for normal exercise.
Each 939 novo is calibrated at the factory. This means that you can begin to use the ergometer
directly after assembly. But as usual when the bike has been moved, an electronic calibration must
be done, see instruction for “Calibration” in this manual.

1
939 novo
6
Facts
• Controlled digital by ECG or PC via RS232 cable
or USB cable
• Wiring connections at ground level
• Large, well-balanced flywheel, 20 kg
• A pendulum that is easy to calibrate, both static
and electronically
• Rpm independent
• Workload 0-1400 W (depending on rpm)
• Adjustable saddle height with quick release lever
• Adjustable handlebar with quick release lever
• Stable frame with low entry
• Rust protection and powder paint
• Wheels for easy transport
Width
550 mm at handlebar
620 mm at support tubes
Length
1240 mm
Height
1260 mm at handlebar
790-1160 mm at seat
Weight
58 kg
Max user weight 250 kg
PC software
If you need a pc software to do exercise tests on the
bike, our software is available for free download from
our website: www.monarkexercise.se.
Fig: Serial number (1)
Serial number
The serial number is placed according to Fig: Serial
number.
Product Information
Technical data power adaptor
Input voltage: 100-240 V AC; 50-60 Hz; 1.4-0.7 A
Output voltage: 12 V DC; 5.0 A; 60 W max.
Art. No: 9311-9311-1
Polarity: + in the middle, see Fig: Polarity.
NOTE!
If you replace the original power adaptor, the
replacement must be CE marked or equivalent. It
must also have the correct polarity and voltage.
Fig: Polarity
Pulse registration
The bike has a module that registers the heart rate
data from heart rate belts, or similar, with ANT+
or Bluetooth SMART profile. We recommend, for
example, "Polar H7", which we have tested and that
works well.
Included
• Calibration weight 4 kg
• Chest belt Polar H7, Bluetooth SMART
• Tool kit
• Power adaptor
• 0-modem cable (RS232)
• USB - serial adaptor
NOTE!
Use of the product may involve considerable
physical stress. It is therefore recommended that
people who are not accustomed to cardiovascular
exercise or who do not feel completely healthy,
should consult a physician for advice.

2
2
3
1
4
1
939 novo
7
Initial operation
Each 939 novo is mechanically calibrated at the
factory. The user can always verify this by performing
the mechanical calibration of the pendulum. See
section ”Mechanical calibration”.
Connect power to the bike by first connecting the
cable from the power adaptor to the bike into the
power connector (2) in the front of the bike, see Fig:
Connections. Then plug the power adaptor into the
wall outlet. Turn on the power switch (4) and a green
LED lights up.
Perform the electrical calibration as specified in
section "Calibration electronics”. Test by pedalling
the bike. If the bike is working properly, it is ready
for use.
Fig: Adjustments
1) Locking knob, saddle
2) Locking handle, handlebar
Cycle adjustments
The seat height should be adjusted to a comfortable
position. The appropriate height is when you have the
knee slightly bent when the sole of the foot is centred
over the pedal axle with the pedal in the bottom
position. When adjusting the saddle height, do not
sit on the saddle, stand next to the bike. Loosen the
locking knob (1) on the seat post by rotating it about
one turn counterclockwise and pull it out. Adjust
the seat height, and when you have found the right
height it is important that you tighten the locking
knob securely (clockwise until it stops). See Fig:
Adjustments.
The handlebar setting should be in a comfortable
position when cycling. During longer exercise sessions
it is recommended to occasionally change handlebar
position. To adjust the handlebar, loosen the quick
release lever (2). See Fig: Adjustments.
Fig: Connections
1) On-o switch with LED
2) USB-B port
3) Power connection (left side)
4) RS232 port

939 novo
8
Power on crank or flywheel
Monark bikes measure the effect of the flywheel, so it
will be a friction of 6-8% if you measure the impact of
the pedals (if the effect is measured on the crankshaft,
the difference is 4-5 %). The losses will be primarily
due to friction in the chain, pedals and bearings in the
wheels and crank.
939 novo is designed for fitness tests and are set
to measure the power at the flywheel, which is the
traditional way in submaximal exercise. The bike can
be set to work with effect in the pedals / crankshaft
(the cycle constant).
Here you find instructions for connection and options
for connection to external devices. If advanced
technical documentation / data protocol for system
builders or similar are required, please contact
Monark Exercise AB.
Operating instruction
How the bike works
939 novo is built on a stable frame, a large well-
balanced flywheel, a break belt and a pendulum weight
which measures the force. The pedals operate around
the flywheel via a chain, while a stretch mechanism
tightens the brake belt to regulate the braking force
to affect the flywheel. This braking force can be read
directly by the pendulum on the scale on the left side
of the bike.
All changes in the friction between the brake belt
and the flywheel are compensated automatically by
Monark's unique construction.
New on 939 novo is that you can control the bike
from the display but the bike can, as earlier models,
even be controlled externally from PC or other
equipment. The display functions are described in
section "Monark novo Display Unit". The computer
system consists of Monark novo Control Unit (built
in the bike) and Monark novo Display Unit, PC or
other external equipment. Monark novo Control
Unit registers pedal speed and braking force, and also
registers the test person's heart rate if a chest belt or
similar is used. Monark novo Control Unit activates
an actuator that adjusts the brake belt tension, which
regulates the work load. This work load is varied
automatically in relation to changes in pedal speed,
so that a constant power is maintained. The bike is
standard rpm independent but can be set to also be
rpm dependent (constant force).
The control is performed over a serial line using
ANSI/ISO/ASCII format commands. The connector is
a 9-stick D-sub (male).
For information about how respective Control Units
work, see section "Connection to external Control
Unit".
Pulse measurement
The person's heart rate ("pulse") can be measured by
a chest belt or similar heart rate monitor that register
the pulse signal from your heart and sends it to the
bike with ANT+ or Bluetooth SMART technology.
More information is available in section "Monark
novo Display Unit".
The heart rate can be displayed in Monark novo
Display Unit, in Monark test software or in other
external equipment.
If you use chest belt
Heart rate monitoring requires that the chest belt is
correctly placed. When it is correctly fitted the logo
on the belt will be central and readable, outward and
upright, by another person. Before putting on the
belt, clean the skin where the belt is to be placed. The
chest belt should be secured at a comfortable tension
around the mid section, just below the breast muscle,
see Fig: Placement chest belt. Moisten the electrodes
before use, see Fig: Moistening the electrodes.
The images above are used with permission of Polar Sweden.
Fig: Placement of the chest belt
Fig: Fig: Moistening the electrodes (1)

1
2
3
939 novo
9
Checking the pulse function
The heart rate can be displayed in Monark novo
Display Unit, in Monark test software or in other
external equipment.
While the patient rests, with the heart rate monitor
on, compare the displayed heart rate (Monark novo
Display Unit, PC or other) with the manually taken
pulse. If it does not correspond, check the chest belt
contact area and if necessary moisten the electrode
surfaces with water.
The following points should also be checked to ensure
the bike's function:
• Check the adjustment / zero of the scale
• Check the pulse function
• Check the braking force
• Test by pedalling and check that a reasonable rpm
is obtained - verify by a clock. Feel if the pedals
move smoothly. Listen for unusual sounds. Adjust
if necessary.
• Adjust the handlebar and saddle and make sure
they are securely attached and that the adjustment
is working properly.
• Make sure the support legs are in position by
rocking the bike. Tighten if necessary.
If something unusual is found during the daily
inspection that you cannot resolve, please call
customer service.
Daily check
Validation of force
Start Monark test software in your PC (the software
is available for free download from our web site:
www.monarkexercise.se) and select a test programme
from the menu "Test". In the dialogue box that opens
is a box showing the braking force in Newton, see
Fig: Force and HR display. You do not have to press
"Start" (1) to get the heart rate showed (2), but you
must press "Start" to show the force (3).
1. With the pendulum pointer at 0, the display should
read "00N".
2. Move the pendulum pointer to 4 kp and the display
should show "39N".
If the braking force is not displayed correctly, an
calibration of the pendulum must be done. See section
"Calibration".
NOTE!
After this verification, the brake belt will be loose.
This means that it will take some seconds before the
regulating device has tensed the brake belt to normal
again after you have started pedalling. If it then heavy
to pedal, add force on the pedals and the bike will
decrease the workload until it is possible to pedal
around.
Fig: Force and HR display
1) Start
2) Heart rate display
3) Force in software (manual test)
The following procedure will assure the user that the
ergometer is performing properly on a daily basis.
The control includes test of the mechanical braking,
pedalling and speed systems as well as computer
control and sensing capability of the mechanical
system. Additionally, if a calibrated ECG simulator
is available, it may be used to verify the heart rate
measuring system. Whether the simulator is used or
not, the heart rate system may be validated by simply
taking a pulse point rate measurement at the neck
for example. While a patient is at rest and has been
prepared for chest belt or other heart rate monitor,
the pulse indicator flashes once per pulse beat.
The flashing heart rate must be consistent with the
manually recorded pulse. If it does not correspond,
check the chest belt contact area and moisten if
necessary the electrode surfaces with water. If this
fails, please call customer service.

2
3
1
4
939 novo
10
Connection to external Control Unit
No tests can be performed at Monark novo Display
Unit, then you must connect your bike to a PC, via
the Monark novo Control Unit, and use a special test
software. A suitable one is available to download
from our website: www.monarkexercise.se.
The bike do not need to be switched off when connecting
external components, but it is recommended, to
prevent transmission of incorrect data.
Be careful when connecting different types of external
devices to prevent flash-over and subsequent injury.
The user must ensure that the correct cables are
used, otherwise you risk serious injury or equipment
damage.
Connect external device via RS232
Make sure the power adaptor is connected to the
bike. Turn off the power switch on the bike.
Connect the RS232 cable to the port on the bike, see
Fig: Connections. Connect the other end of the RS232
cable to the external device. Set the bike power switch
to "on" and then start the external device.
Connect external device via USB
Make sure the power adaptor is connected to the
bike. Turn off the power switch on the bike.
Connect the USB-B cable to the port on the bike, see
Fig: Connections. Connect the other end of the cable
to the external device. Set the bike power switch to
"on" and then start the external device.
By using a USB A-B cable, you can connect external
devices that only have USB-A connections to this port.
Fig: Connections
1) On-o switch with LED
2) USB-B port
3) Power connection (left side)
4) RS232 port
Monark novo Contol Unit

939 novo
11
Communication protocol (command type)
The bike's two free ports can be set in various
command types to suit different standards and
external equipments. The four available command
types are:
0: Standard command set or ”PC-mode”
Command type "0" is default for both of the free
ports. As default the baud is 4800, but can be changed
by external control. The protocol is used by Monark
Exercise software and some external controllers
that are prepared to fully benefit from the advanced
capabilities of the bike.
2: Ergoline compatible (recommended for ”er900”)
This command type is used when the bike is
controlled by an external device that uses Ergoline's
"er900" protocol, baud rate is locked to 4800. If the
external device "asks" the bike about current power,
the bike responds with the set power. This setting
is recommended before the command type 3 which
removes the risk of the device trying to "chase" a
value.
3: Ergoline compatible (alternative)
This command type is used when the bike is controlled
by an external device that uses Ergoline's "er900"
protocol, baud rate is locked to 4800. If the external
device "asks" the bike about current power, the bike
responds with the set power.
4: 839 compatible
This command type is very similar to command type
"0", the only difference is that if an external device
requests the ID, the bike responds as if it was an 839-
bike of newer model. The setting is used for older
external Control Units that are not yet adapted to
Monark novo series ("backwards compatible").
All commands for external devices are active regardless
of the command type that is selected in addition to
the small differences presented above. The parts in
Ergoline protocol that handle blood pressure and its
parameters are not implemented.
The two free ports can have different settings.
When connecting to multiple devices, it is important
to ensure that one device does not sets a new target
without the other devices note it (master - slave).
NOTE!
The bike can not be controlled by the handheld
controller (Art. No.: 9339-51) used on previous
models.

939 novo
12
Command type settings
Default for the two free ports is command type 0,
which will work in most cases. If you need to change
you can do it in settings in terminal mode in the
Monark Exercise software.
Ensure that you are connected to the bike. Type ping
in the command line in the window. Then the bike
beep once and answer pong in the text window above
the command line, see Fig: Terminal window.
You can set the command type for both ports
regardless of which port the bike is connected to.
Fig: Terminal window
Command
line
Bike answer
Use the following commands:
• cmdtypers232 # and press ENTER to set the
RS232 port to the command type #, where # is
0, 2, 3 or 4
• cmdtypeusb # and press ENTER to set the USB
port to the command type #, where # is 0, 2, 3
or 4
If you only send the command cmdtypers232
alternatively cmdtypeusb without digit, the bike
responds with the current command type (0, 2, 3 or
4) for the connection.
When power is turned on to the bike it gives an
indication of what command type the RS232 port is
set to. First, a long beep followed by the same number
of short beeps is the command type settings for the
RS232 port. In default ("0") you do not hear a short
beep, but at normal Ergoline setting ("2"), you hear
two short beeps after the long beep.
0 — A long beep
2 — A long beep followed by two short beeps
3 — A long beep followed by three short beeps
4 — A long beep followed by four short beeps

939 novo
13
Monark test software
Monark test software is available for free download
from our website: www.monarkexercise.se. If you
use a PC with touch screen, we recommend that you
also download the Monark Touch software which
is adapted for that type of screens with a custom
graphics with larger and clearer buttons.
Insert the desired cable between the bike and the
computer and start the PC software. Normally the
bike and computer connect automatically. If not,
read the software reference information or contact
software support by writing an email in English to
the software developer HUR Labs support: support@
hurlabs.com.
Other external PC software
Other external PC software that is compatible with
the bike can also be used. Normally you have to
choose the correct COM port in the PC software, see
the software manual.
Terminal mode PC
A variety of settings can be made from the software.
For more information about this see the software's
help file.
Settings can also be made directly from the PC through
the terminal mode, see the Technichal Manual which
is available from Monark Exercise AB.

939 novo
14
Via the display, you can perform manual training with full precision and performance!
With Monark novo Display Unit, you can control the bike via the touch screen. The display shows the current
rpm, time, power and pulse (if any heart rate monitor is used).
You can also set up target based training regarding distance, time and calories. If you want to do fitness tests,
etc., you can download Monark test software to your PC from our website, www.monarkexercise.se, and then
connect your PC to Monark novo Control Unit on your bike.
Start training
The display will start automatically after you have
turned on the power to the bike.
Then the display shows the Start view. Now if you
want to start, press the "Start" button, the display
will show normal mode and the time starts counting.
If autostart is enabled, the time starts count ten
seconds after you have started to pedalling, without
you have to press "Start". Autostart is set in "Settings
general".
This is "Normal mode" that can be displayed in
two versions, complete and simple. You can switch
between them by pressing the arrow keys (change
screen) in the middle of the short sides on the display.
If you want to change the type of workload and
the unit, press the icon for the current selection, see
section "Workload control".
Fig: Start view
Start
Menu
Monark novo Display Unit
NOTE!
To change workload the rpm has to be at least 30.
If rpm is lower, the value is displayed in red. It returns
automatically to normal view when rpm is more than
30.
Unit
Current
rpm
Time
Auto-
scaling
Target
bar
Workload
Menu
Change
screen
Current
heart rate
Pause
Decrease
workload
Increase
workload
Menu
Increase
workload
Decrease
workload
Unit
Workload
Pause
Time
Change
screen
Change
screen
Fig: Normal mode, complete Fig: Normal mode, simple

939 novo
15
Distance
Calories
Average power
Max. power
Min. power
Total time
Average workload
Max. workload
Min. workload
Total distance
Average rpm
Max. rpm
Min. rpm
Calories
Average speed
Max. speed
Min. speed
End heart rate
Average heart rate
Max. heart rate
Min. heart rate
Below you can see how the results is displayed, and you can switch between the two different views by pressing
the arrow keys (change screen).
The results can be displayed in both km and km / h or miles and mph, depending on what you selected in the
"Settings general" (Metric units: Yes / No).
Stop / pause training
If you want to stop training, press "Pause" or just stop pedalling. After you have pressed "Pause", or about 10
seconds after you have stopped pedalling, the display is changed to "Workout paused", and the workload goes
down to "base power".
If you wish to continue the already initiated training, press "Start" and time counting is continuing and the
workload returns to the last value. To cancel press "Stop" and the display is reset.
Change
screen
Start
Stop
Time
Average power
Start
Stop

939 novo
16
If you press the symbol for unit a menu appears, "Set
unit", where you can change which workload unit
you want to use.
The workload unit you can choose is: l / min, kpm /
min, Watt, Newton and kp.
Rpm-independent - l / min (calculation, see below)
- kpm / min
- Watt
Workload control
Rpm-dependent - Newton
- kp
When you have chosen which workload unit you
want to use, the display returns to "Normal mode".
If you press "Home" the display returns to normal
mode without any changes.
If you press "Locked mode" in the view "Set unit"
you lock the display to show only the current rpm
instead of the current workload, see Fig: Locked
mode. You can also choose to display only the current
rpm with only a digit, see Fig: Locked mode, simple.
To cancel the "Locked mode", press the "Locked
mode" and then you will return to "Set unit". There
you can choose optional workload unit. When you
have chosen unit the display returns to normal mode.
If you are in the "Locked mode", press "Menu", you
can choose "Settings pulse" or "Settings general", see
further details under each title. .
You can always, even during training, change control
mode.
NOTE!
The text turns red when the set power not can
be reached with the current rpm with maximum
workload. Please reduce the workload level or
pedalling faster (increase rpm) until the text
turns white again.
Calculation l / min:
Monark novo Display Unit uses a formula (cubic
equation)to calculate VO
2
at different workloads.
The result is according to Astrand's table between
150 W and 300 W, and a good approximation for 15-
700 W and a cadence of about 50-65 rpm.
These values should only be regarded as an indication
to meet Åstrand, for further details see the current
literature!
Change
screen
Menu
Unit
Fig: Normal mode
Fig: Locked mode
Current
rpm
Menu
Locked
mode
Fig: Locked mode,
simple
Current
rpm
Menu
Locked
mode
kpm/
min
l/min Watt Newton kp
Locked
mode
Home

939 novo
17
In the display is a menu where you can make different
settings. You can find it by pressing the Menu icon.
Then a menu is showed to the right in the display
where you can select the following:
Set a target
(Set target)
Heart rate settings
(Pulse settings)
Settings general
(Settings)
Menu
You can at any time during the training open the
menu to e.g. search for a heart rate monitor.
Press, increase value
(1, 2, 3...)
Press, decrease value
(9, 8, 7...)
Set a target
Here you can choose your settings if you want to train
against a specified target - distance, time or consumed
calories.
If you want to train for a specific distance, a specific
time or a specific amount of calories consumed, set
the value and then the bike counts down / up.
When you train against a specific target, a "target
bar" is showed in the display. It shows how far you
have left until your set target has been achieved.
The figure below is displayed when you choose
"custom" no matter what target you want to set up.
When you press the arrow up increases the value
from 1, when you press the arrow down decreases the
value from 9. At the same time, the value that appears
above "home" is changed to show the value you set.
Target
Heart
rate
Settings
Menu
Distance CaloriesTimeHome
Target
bar

0.1 km1 km10 km100 km
939 novo
18
Set distance target
Here you can choose how long distance you want to
train. There are some preset distances, but you can
also select "custom" and then you choose a distance.
The distance can be displayed in both km and miles,
depending on what you selected in the "Settings
general" (Metric units: Yes / No).
The distance is not exactly, but it is a calculation:
50 rpm = 20 km / h, others rpm linear.
1 rpm 2/5 km / h
1 km / h 5/2 rpm
"Target bar" appears in the display.
Set time target
Here you can choose how long time you want to
train. There are some preset times, but you can also
select "custom" and then you choose how long time
you want to train.
The time in the display will count down to zero.
"Target bar" appears in the display.
Press, increase value
(1, 2, 3...)
Press, decrease value
(9, 8, 7...)
Press, increase value
(1, 2, 3...)
Press, decrease value
(9, 8, 7...)
Home StartOne step
back
Home
Start
One step
back
Home
Home
1 min
10 min
1 hour10 hours

939 novo
19
Home Start
One step
back
Home
Set target in kCal
Here you can choose how many calories you want
to burn during your training. There are some preset
values, but you can also select "custom" and then you
choose how many calories you want to burn during
your training.
"Target bar" appears in the display.
As a standard calculation, when we display calories
on our calibrated bikes, we use: 1 minute with 100W
gives 7 kcal.
We have chosen the calculation above, which we
believe is consistent with what the body consumes
during a normal cycle position (not the "consumption"
on the flywheel).
Average power
Max. power
Min. power
Total time
Average workload
Max. workload
Min. workload
Total distance
Average rpm
Max. rpm
Min. rpm
Calories
Average speed
Max. speed
Min. speed
End heart rate
Average heart rate
Max. heart rate
Min. heart rate
When you have achieved your target, the display shows "Target achieved". There can you can see your results,
and you can switch between the two different views by pressing the arrow keys (change screen).
The results can be displayed in both km and km / h or miles and mph, depending on what you selected in the
"Settings general" (Metric units: Yes / No).
Exercise target achieved
Change
screen
Distance CaloriesStop
Time
Average power
Restart
Stop
Restart
1 kcal10
kcal
100
kcal
1000
kcal
Press, increase value
(1, 2, 3...)
Press, decrease value
(9, 8, 7...)

939 novo
20
Pulse settings
Here you can choose what heart rate standard you
want the bike to search for, Bluetooth SMART, ANT+
or both.
Current
heart rate
Lock to
bluetooth
Lock up
bluetooth
Home
ANT+
(ANT+ is always active)
ANT+ uses "proximity pairing" which means that
you should be close to the display for it to start
listening to it. When the display and the heart rate
monitor is paired, you can be relatively far from the
bike with retained function. This process ensures that
the display is listening on the correct belt.
If you have connected to an ANT+ heart rate monitor
it says "connected" at "ANT+ status:" and the current
heart rate is displayed at "Pulse".
The person's heart rate ("pulse") can be measured
by, for example, a chest belt that detects your pulse
from your heart and sends the pulse to the bike with
Bluetooth SMART or ANT+ technology.
Fig: Placement chest belt
Fig: Moistening the electrodes
The images above are used with permission of Polar Sweden.
Bluetooth SMART
When the bike and a Bluetooth SMART heart rate
monitor have been paired the heart rate monitor
Bluetooth ID and the current heart rate is displayed
at "Pulse". You can choose to actively lock the heart
rate monitor by pressing "Lock". Then the bike is
only searching for that particular heart rate monitor.
Press "Reset" if you want to release the lock to only
a specific heart rate monitor and lock with a new or
continue to search freely.
You can use several Bluetooth SMART heart rate
monitors to the bike, but you can only lock to one at
a time.
The bike locks to the heart rate monitor that it finds
first (within 10 m). If more heart rate monitors are
used, we therefore recommended to lock into a
specific Bluetooth ID to ensure that the correct heart
rate appears.
NOTE! (for Bluetooth SMART)
It must be ensured that no other belts in
addition to the belt that should be paired to
the bike is active OR that any other device (cell
phone, bike computer, etc.) that could connect
to the belts are active during the process!
If you use chest belt
Heart rate registration requires that the heart rate
monitor is positioned correctly. When it is correctly
fitted the logo on the belt will be central and readable,
outward and upright, by another person. Before
putting on the belt, clean the skin where the belt is
to be placed. The chest belt should be secured at a
comfortable tension around the mid section, just
below the breast muscle, see Fig: Placement chest belt.
Moisten the electrodes before use, see Fig: Moistening
the electrodes.
/