Page is loading ...

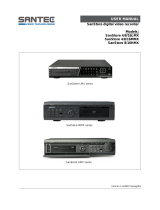
DVR-4N
DVR-8N
DVR-16N
4/8/16 Camera DVR
INSTRUCTIONS
6
;
FF
;
REW
MENU
STATUS
ESC
PIP
MULTI
ALARM
RESET
HOME
D-ZOOM
978
CAMERA /NUMBER INPUT
+10
0
4
1
5
2
6
3
REC
PLAY
STANDBY
!
RX/TX
HDD
PRESET"'''
SPOT SEARCHFREEZEFUNCTION AUTO PTZ COPY LIVE/PB
DIRSLOW FAST PLAY/ PAUSE RE C

W
ARNING
This symbol is intended to alert the user to the presence of unprotected
“Dangerous voltage" within the product's enclosure that may be strong
enough to cause a risk of electric shock.
This symbol is intended to alert the user to the presence of
important operating and mainten nce (servicing) instructions i t e literature
accompanying the applia ce.
WARNING
TO REDUCE THE RISK OF FIRE OR ELECTRIC SHOCK, DO NOT EXPOSE THIS
APPLIANCE TO RAIN OR MOISTURE.
NOTE: This equipment has been tested and found to comply with the limits for a class digital
device, pursuant to part 15 of the FCC Rules. These limits are designed to provide
reasonable protection against harmful interference when the equipment is operated in
a commercial environment. This equipment generates, uses, and can radiate radio
frequency energy and, if not installed and used in accordance with the instruction
manual, may cause harmful interference to radio communications. Operation of this
equipment in a residential area is likely to cause harmful interference in which case the
user will be required to correct the interference at his own expense.
Disposal of Old Electrical & Electronic Equipment (Applicable in the European
Union and other European countries with separate collection systems)
This symbol on the product or on its packaging indicates that this product shall not be treated as
household waste. Instead it shall be handed over to the applicable collection point for the
recycling of electrical and electronic equipment. By ensuring this product is disposed of correctly,
you will help prevent potential negative consequences for the environment and human health,
which could otherwise be caused by inappropriate waste handling of this product. The recycling
of materials will help to conserve natural resources. For more detailed information about
recycling of this product, please contact your local city office , your household waste disposal
service or the shop where you purchased the product.
1

PRECAUTION
All the safety and operating instructions must be read before the unit is operated.
• Make sure to switch the power off before you install the DVR.
• There is the danger of an electric shock if the DVR is opened by an unqualified service
engineer or installer.
• Avoid using the DVR outside of the reference temperature and humidity indicated in the
specification.
• Avoid exposing the DVR to violent movement or vibration.
• Do not use or store the DVR in direct sunlight or near to any source of heat.
• Do not place any object into the holes used for air circulation.
• Always use the DVR in a well ventilated location to prevent overheating.
• Risk of explosion if battery is replaced by an incorrect type.
• Dispose of used batteries according to the instructions.
• When the system is overheated, the below warning message will be displayed at the
monitor.
“ SYSTEM IS OVERHEATED, TURN THE POWER OFF AND CHECK COOLING FAN” In this
case, do the power off right away and check the cooling fan working.
• The HDD is recommended to use enhanced IDE Hard Disc Drive type made by Maxtor,
Western Digital, Hitachi and IBM.
2

CONTENTS
CONTENTS
CHAPTER 1 FEATURES..............................................................................4
CHAPTER 2 PACKING DETAIL....................................................................6
CHAPTER 3 LOCATION AND CONTROL .....................................................7
3.1 FRONT PANEL CONTROLS............................................7
3.2 REAR PANEL CONNECTORS.........................................8
CHAPTER 4 INSTALLATION........................................................................9
4.1 TOTAL CONNECTION LAY-OUT........................................9
4.2 INDIVIDUAL CONNECTION.............................................10
CHAPTER 5 OPERATION..........................................................................14
5.1 FACTORY DEFAULT.....................................................14
5.2 FRONT PANEL CONTROLS..........................................17
5.3 REMOTE CONTROLLER...............................................35
5.4 MOUSE CONTROL .......................................................36
CHAPTER 6 MENU SETUP........................................................................37
6.1 QUICK SETUP..............................................................37
6.2 SCREEN.......................................................................39
6.3 RECORD ......................................................................46
6.4 EVENT..........................................................................53
6.5 SYSTEM.......................................................................57
6.6 LINK.............................................................................65
6.7 SEARCH.......................................................................72
6.8 COPY ...........................................................................72
6.9 EXIT.............................................................................73
CHAPTER 7 EXTERNAL TERMINAL INFORMATION..................................74
7.1 RS-422/485...................................................................74
7.2 T.ADJ ...........................................................................74
7.3 RELAY OUT..................................................................75
7.4 ALARM .........................................................................75
7.5 VGA..............................................................................76
7.6 SERIAL.........................................................................76
7.7 ETHERNET / USB.........................................................77
7.8 REMOTE ......................................................................77
CHAPTER 8 SPECIFICATIONS..................................................................78
8.1 INSTALLL THE INTERNAL HARD DISK DRIVE(S).........81
CHAPTER 9 NETWORK VIEWER...............................................................82
9.1 INSTALLATION OF NETWORK VIEWER SOFTWARE ...82
9.2 CONNECTING TO DVR.................................................82
9.3 DVR Search..................................................................84
9.4 HDD Search..................................................................84
9.5 File Search ...................................................................85
9.6 ARRANGE THE SCREEN..............................................85
9.7 Option...........................................................................86
9.8 Control..........................................................................87
9.9 Key Information.............................................................93
The author assumes no responsibility for any errors or omissions that may appear in this
document nor does the author make a commitment to update the information herein.
VER.: 0.1, P/N: 040136
3

FEATURES
Chapter 1 Features
Operation
Playback, recording, backup and transmission simultaneously
Real time single or multi-screen display
Pan & Tilt, 2X/4X digital zoom and PIP display
Easy operation by Jog shuttle, IR remote controller, external keypad controller and
USB 2.0 Mouse
Hidden camera option (covert)
User-friendly setup menu and operation
Playback
Multi-screen playback (Full, Quad,4/ 9/16 split)
Search by date, time and camera
Preview window on event search mode
Playback mode(frame/ field) setup automatically
Recording
Select of the recording quality grade for each channel
Individual camera frame rate can be set by user
The recording speed of max.120 images per second (NTSC)
Manual, schedule and event recording
Pre & Post-alarm recording
Select of the recording image size for each channel
4 channels audio recording
Select of the event mode for each channel
Network
Live and playback viewing
Remote control on a networked PC with the exclusive client viewer
(The viewer software is supplied for free.)
Flexible connections - 10/ 100 Mbps Ethernet/ ADSL
Up to 16 network users access simultaneously
Audio transmission between DVR and Client
Dynamic IP is available
4

FEATURES
Audio
4 channels audio recording in real time
Copy
USB 2.0 external HDD
USB 2.0 memory stick
CD-RW/ DVD-RW (option)
General
Software downloading facility via network and USB memory stick
Auto detection of PAL / NTSC
Built-in hardware Watchdog
Automatic time adjustment through Network
VGA output for PC monitor(Option)
Optional Removable HDD,CD-RW or DVD-RW
Loop-through connections
Graphic User Interface for the MENU screen
5

PACKING DETAIL
Chapter 2 Packing Detail
4. Remote controller
3. User’s Manual
1. DVR
2. Network Viewer Program CD
5. R-HDD Rack Key (option)
7. Battery 6. Power Cord
1. DVR
2. Network Viewer Program CD
3. User’s Manual
4. Remote Controller
5. R-HDD Rack Key(option)
6. Power Cord
7. Batteries
CONTENTS
FFREW
MENU
STATUS
ESC
PIP
MULTI
ALARM
RESET
HOME
D-ZOOM
978
CAMERA / NUMBER INPUT
+10
0
4
1
5
2
6
3
REC
PLAY
STANDBY
RX/TX
HDD
PRESET
SPOT SEARCHFREEZEFUNCTION AUTO PTZ COPY LIVE/PB
DIRSLOW FAST PLAY/PAUSE REC
6

LOCATION AND CONTROL
Chapter 3 Location and Control
3.1 FRONT PANEL CONTROLS
1 SPOT / ESC Button to control spot monitor/ return to the previous menu
2 FUNCTION Using this button when you select “USER” in Relay 4
3 AUTO / F / ( - ) Button to begin the auto sequence mode/ decrease the value/ focus in PTZ mode
4 LED Display
Display of the status of power(STANDBY), HDD(HDD) , network(RX / TX),REC,P
LAY(PLAYBACK)
5 PTZ Button to control PTZ camera
6 SEARCH(PRESET) Button to display the search menu/ preset in PTZ mode
7 LV / PB Button to convert the screen into real view mode or into playback mode
8 SLOW( ) Button to slow down the playback speed
9 FAST( ff ) Button to speed up the playback speed
10 DIRECTION( ef )
Button to release the event signal/ move the left direction/ PAN left in PTZ
mode
11 PLAY / PAUSE( ) Button to start the playback. If press again, a still picture is displayed during
playback.
12 REC( ) Button to begin and stop recording
13 R.HDD RACK Removable HDD rack (Option: Built-in Removable HDD or CD-RW or DVD RW)
14 USB port USB 2.0 port to use a USB memory stick, Mouse or USB external devices
15 FREEZE / F / ( + ) Button freeze image/ increase the value/ focus in PTZ mode
16 COPY(AF) Button to display the copy menu/ automatically focus in PTZ mode
17 CHANNEL SELECT Buttons to select the camera or input the password
18 MULTI Multi-channel select button
19 ALARM RESET / § Button to release the event signal/ move the left direction/ PAN left in PTZ mode
20 «/ STATUS/ ( HOME ) Button to enter the next step/ display the status/ return to home position in PTZ mode
21 PIP / ª Button to control PIP function/ move to the lower direction/ TILT down in PTZ mode
22 D-ZOOM / ¨ Button to control the digital zoom/ move to the right direction/ PAN right in PTZ mode
23 MENU / © Button to display the setup menu/ move to the upper direction/ TILT up in PTZ mode
24 JOG SHUTTLE
To make easy search in playback and menu setup/ control the playback speed/
control the zoom of PTZ camera
7

LOCATION AND CONTROL
3.2 REAR PANEL CONNECTORS
Port Name Description
1 CAMERA IN
BNC input ports for cameras
2 AUDIO IN
RCA input ports for an audio signal(4CH Line input)
3 AUDIO OUT
RCA output port for an audio signal
4 TERM ON / OFF
Switch to use the terminal block connectors of RS-422 or RS-485
5 T-ADJ
Input and output terminal blocks for time synchronization among DVR
6 RS-422 / 485
Terminal blocs of RS-422 or RS-485
7 422 / 485
Switch to convert into RS-422 or RS-485
8 RELAY OUT 4 relay output terminal blocks
9 POWER
POWER ON/OFF
10 CAMERA OUT
BNC output(looping) ports for cameras
11 SPOT OUT
BNC input port for spot monitor(Not used in all DVR models)
12 VIDEO OUT(Option)
BNC output port for the main monitor
(Same as the RCA video output of the front panel)
13 S-VIDEO OUT
Connector for debugging. This DVR can be controlled by the other device
through this connector(RS-232C).
14 SERIAL
Input and output terminal blocks for time synchronization among DVRs
15 VGA OUT
Output port for the VGA monitor
This DVR is compatible with TFT LCD monitor in PAL mode.
16 ETHERNET
Port for 10/ 100Mbps Ethernet/ xDSL
17 USB1 / USB2
USB 2.0 ports to use USB memory stick, Mouse or the external devices
18 REMOTE Reserved
19 ALARM IN
Input terminal blocks for alarm signals
20 POWER IN
Socket for a 220/ 110VAC power cord
8

INSTALLATION
Chapter 4 Installation
4.1 TOTAL CONNECTION LAY-OUT
9

INSTALLATION
4.2 INDIVIDUAL CONNECTION
4.2.1 Camera
* Connect a female BNC connector of each camera to a male BNC connector, “CAMERA IN” port.
* Connect the looping BNC output to other inputs as required.
10

INSTALLATION
4.2.2 Audio (*Refer to the specification)
Audio Input
- AUDIO IN : Connect the RCA Line Jack of the relevant equipment (for example, a camera with
a built-in microphone) to the AUDIO IN port.
Audio Output
- AUDIO OUT : Connect the RCA Line output to a monitor with a built-in speaker.
NOTE
This DVR can be connected only with a line audio and not support a microphone for audio input and output.
To record audio should be enable in the AUDIO setup at the MENU setup.
As the audio is linked to a camera, it is required that linked camera viewed, either in multi-screen view during
playback to hear the audio.
11

INSTALLATION
4.2.3 Monitor
- Connect the female BNC for monitor output.
EO monitor output.
.2.4 Power
- Auto-detect the correct voltage of power (110~240 VAC)
- Connect the male Y/C cable socket for S-VID
4
- Connect the power cord.
AC110~240V 50/60Hz
TO REDUCE THE RISK OF
FIRE OR ELECTRIC SHOCK
DO NOT OPEN
WARNING:
CAUTION
RISK OF ELECTRIC SHOCK
12

INSTALLATION
4.2.5 USB 2.0 ports
1
Three USB ports are provided to connect a USB memory stick, external storage devices and
CD-RW/DVD-RW for video clip copying. One USB port is on the front panel and the other two
are on the rear panel.
2
A USB mouse can be connected to one of the ports. You can use the mouse to navigate
through the screens and menus much like you would on a computer.
Installation Process
Connect the desired device to the DVR, as shown above.
( For example, USB memory stick, mouse, external storage device etc.)
Note: 1. Most USB memory stick brands are compatible, problem occurs only to some brands.
Therefore, when data is unable to be achieved from the USB memory stick, please try
again using other brands.
2. Most CD-RW disks are compatible using CD-RW device, problem occurs only to some
brands. Therefore, when data is unable to be achieved from the CD-RW DVR, please try
again using other brand CD-RW disks.
3. When compatibility problem occurs using DVD-RW device, please try again using other
brand DVD-RW disks (CDs not supported: DVD-R, DVD+R, and DVD+RW).
13

OPERATION
Chapter 5 Operation
5.1 FACTORY DEFAULT
MENU Setup>
QUICK SETUP>
QUICK SETUP…………………………..………OFF
IMAGE SIZE………………………………………720x240
RECORD FRAME…………………………………60
EVENT……………………….…..…………...........ALL
PRE RECORD TIME……….……………………..5 sec
POST RECORD TIME………………………..…..10 sec
IMAGE QUALITY.. ………………………………FINE
AUDIO RECORD ………………………………….OFF
REMOTE CONTROL ID.…………….………..… ..ALL
SCREEN>
POSITION
HORIZONTAL POSITION………………….0
VERTICAL POSITION.……………………..0
AUTO SEQUENCE
QUAD-A~E/ SIX/ SEVEN/ NINE-A~B/
TEN/ THIRTEEN/ SIXTEEN.…….. ……...3SEC
ADD AUTO SINGLE….…………………...OFF
AUTO-SINGLE CH1~16………………..…3SEC
DISPLAY
HDD FREE SPACE.………………………..ON
HDD FREE SPACE MODE..…...………….PERCENT
RECORD STATUS..…..…………………...ON
CLOCK DISPLAY…….………………….…ON
DATE & TIME MODE..………………….….NUMBER
TITLE DISPLAY………………………….….ON
TITLE MODE…..……………………….…...TEXT
BORDER COLOR.…………………….……WHITE
REMOTE CONTROL ID..…………….……OFF
SPOT DISPLAY……………………….…….ON
TITLE
CH 1~CH 16………………………………....CH 1~CH16
MULTI SCREEN
LIVE 4E………………………………… ....2/ 4/ 6/ 8
LIVE 7……………………………………….1/ 2/ 3/ 4/ 5/ 6/ 7
LIVE 9B………………………………… ....10/11/12/13/14/15/16/1/2
LIVE 10………………………………………1/ 2/ 3/ 4/ 5/ 6/ 7/ 8/ 9/ 10
LIVE 13………………………………………1/ 2/ 3/ 4/ 5/ 6/ 7/ 8/ 9/ 10/ 11/ 12/ 13
COVERT
CH 1~16……………………………………....OFF
SELECT…………………………………..…..LV&PB&NW
SPOT
SPOT MODE……………………………………..MANUAL
SPOT SEQ. TIME….…………………………....3SEC
14

OPERATION
ADD SPOT MULTI……………………………....OFF
RECORD>
RECORD SETUP
RECORD PROGRAM..………………….……......6
RECORD PROGRAM (Refer to page 52)
IMAGE QUALITY
RECORD QUALITY……………………….…….....FINE
AUDIO RECORD
AUDIO 1………………..…………………….…...... OFF
AUDIO 2………………..…………………….…...... OFF
AUDIO 3………………..…………………….…...... OFF
AUDIO 4……………..……………………….…...... OFF
REPEAT RECORD
REPEAT RECORD..………………………………..ON
REPEAT RECORD ALARM.…………………..…..5%
PLAY MODE.…………………………………….……........FRAME
BACKUP MODE..……………………………….……........OFF
HOLIDAY
HOLIDAY RECORD…………………………….….OFF
HOLIDAY SETUP(MM/DD) ………………………..00/00
EVENT>
MOTION DETECTION
CHANNEL……………………………………..1
SENSITIVITY………………………………….5
AREA SETUP
TEST MOTION
EVENT SCREEN MODE………………………….…SCREEN HOLD
EVENT CHECK.………………………………………OFF
EVENT MESSAGE..………………………………....OFF
EVENT MESSAGE RESET……………………..…..5SEC
EVENT BUZZER..……………………………….…...OFF
SENSOR INPUT
SENSOR 01~16 INPUT TYPE..……………..NOT USED
RELAY OUTPUT
CH 1~16: ALARM/ V-LOSS/ MOTION..….…1/ 2/ 3
RELAY 1~3 OUTPUT TIME..…………………1SEC
RELAY 4 SELECT.….…………………………POWER
SYSTEM>
HDD
HDD CONFIGURATION
REMOVABLE/ FIXED-01~04……..……….….NO HDD
REC HDD INITIALIZE
BACKUP HDD INITIALIZE
CLOCK
DATE & TIME
TIME ADJUST
INTERNET TIME ADJUST...…………………OFF
DAYLIGHT SAVING TIME..…….………..…..OFF
PASSWORD
MASTER PASSWORD…..…………….……………..11111111
SUPERVISOR PASSWORD.………….……………..22222222
MENU DISPLAY CHECK.……………….……………OFF
POWER OFF CHECK...………………….……………OFF
15

OPERATION
REC/PLAY CHECK…..………………….……………....…OFF
VIDEO STANDARD…………….…………………………..AUTO
LANGUAGE……………….………..………………….…….ENGLISH
REMOTE CONTROL ID.…………….………..…………….ALL
KEY ECHO…..………………….……………………………ON
DVR INITIALIZE.………………….………..………………..NO
FIRMWARE UPGRADE………………….…………………NO
LINK>
NETWORK
DHCP……..……………………………………………OFF
RS-232
BAUD RATE..………………….……………………..115200
DATA BIT……..……………………………………….8
PARITY BIT….……..…………………………………NONE
STOP BIT……..……………………………………….1
RS-422/485
SYSTEM ID……..…………………………………….1
OUTPUT MODE.…………………………………….RS-485
BAUD RATE..………………….……………………..115200
DATA BIT……..……………………………………….8
PARITY BIT….……..…………………………………NONE
STOP BIT……..……………………………………….1
PTZ
CH 1~16: MODEL/ ID….………………….…….... NONE/ 9600/ 1
E-mail
SEARCH>
CALENDAR SEARCH
HDD ID………………………………………………..NORMAL
CHANNEL…………………..………………….…….ALL
SEARCH & COPY
HDD ID………………………………………………..NORMAL
CHANNEL…………………..………………….…….ALL
TIME SEARCH
HDD ID………………………………………………..NORMAL
CHANNEL…………………..………………….…….ALL
EVENT SEARCH
HDD ID………………………………………………..NORMAL
CHANNEL…………………..………………………..ALL
EVENT…………………..……………………………ALL
BLOCK SEARCH
HDD ID………………………………………………..NORMAL
FILE SEARCH
MEDIA………………………………………………...USB_FRONT
BOOKMARK SEARCH
LOG FILE SEARCH
COPY>
COPY
COPY STATUS
COPY START/ END/ CUR TIME.…………………2000/00/00 00:00:00
MEDIA FORMAT
FORMAT MEDIA..…………………………………..USB_FRONT
EXIT> ………………………………………………………....SAVE ONLY
………………………………………………………....SAVE AND EXIT
………………………………………………………....EXIT WITHOUT SAVE
16

OPERATION
5.2 FRONT PANEL CONTROLS
5.2.1 POWER ON/ OFF SWITCH(located in rear panel)
After the connection of power cord and other devices(HDDS) with this DVR, turn the power on.
a. The video signal system (NTSC or PAL) is automatically
detected.
b. Power Failure Recovery
This DVR automatically reverts back to programmed record
parameters upon power restoration.
c. If the power key is protected by password, the power on/off
cannot be executed before input the correct password.
(Refer to the PASSWORD in the SYSTEM menu).
• If there is no video signal, the video signal system is set to NTSC. Do not input the PAL type video signal or it may
cause the DVR’s malfunction. In this case, turn off and on again.
5.2.2 SCREEN DISPLAY
5.2.2.1 Multi-Display & Full Screen display
a. Multi display
The example is display by 16CH DVR
To change a single camera display to the multi camera, press the MULTI button.
b. Full screen display
Press the desired camera number button to display on the monitor.
17

OPERATION
Use the +10 Button when you select two digit camera numbers.
EX) Camera Number 12 = Press the +10 Button, and then press the No. 2 Button.
CAMERA/NUMBER INPUT buttons are used to input the password in the password lock function.
5.2.2.2 Auto Sequence Display
<ADD AUTO SINGLE : ON> example for 16CH
according to the
- OFF” in the AUTO SEQUENCE setup menu, the single
- ay, set up “ADD AUTO SINGLE : ON” in the AUTO SEQUENCE setup
-
.2.2.3 Freeze
MULTI SCREEN MODE
e, press the FREEZE button and then select the desired camera
REEZE button again to release the FREEZE mode.
INGLE SCREEN MODE
ter the desired channel is selected.
- Press the AUTO button, each screen display will be automatically switching
AUTO SEQUENCE setup.
If you set up “ADD AUTO SINGLE :
display will be skipped.
To view the single displ
menu and the single display will be included in the auto sequence display.
Press the AUTO button again to exit the AUTO mode.
akes place, the AUTO SEQUENCE mode will be cancelled.
re information.(Page 40)
If an event t
Please refer to the AUTO SEQUENCE of Chapter 6 MENU setup for mo
5
At the Multi display mod
number.
Press the F
S
Press the FREEZE button af
Press the FREEZE button again to release the FREEZE mode.
- If you press the MULTI button after pressing the FREEZE button, all the channels will display
still images.
- FREEZE function is not available, when auto mode is selected.
formation) (Refer to AUTO SEQUENCE in the SCREEN menu for further in
18

OPERATION
5.2.3 RECORD
Press the REC button and the following message will be displayed as below;
MANUAL MODE
Press the REC button to begin recording.
To stop recording, press the REC button again. The screen will be turned into real time display
mode.
SCHEDULE MODE
When Schedule mode is selected, the recording will be automatically executed according to the
recording schedule. (Please refer to the RECORD PROGRAM in the RECORD setup, page 47.)
5.2.4 SEARCH & PLAYBACK
Press the SEARCH button, the SEARCH menu screen appears.
TIME SEARCH
The color of record indication ( ) on the screen will be changed according to the type of
recording and refer to the following.
- “ (Yellow) ” : Manual recording status.
- “ (Green) ” : Schedule recording status.
- “ (Red) ” : Event recording status. (Motion detection/ Video loss/ Sensor)
- “ (White) ” : Not recording.
All channels will be displayed by red lights even if an event happened just on one channel. Red light will be
displayed because this unit enters the event record mode when event happened. If a channel has an event,
all channels will be recorded by event recording frame rate to be set in RECORD PROGRAM menu.
If you press the PLAY button in the real time screen mode, playback will be executed from the end of
the previous time search and press the desired channel select button.
To exit the playback mode and see the live screen again, press LV/PB button.
19
/