Page is loading ...

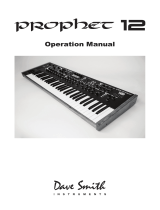
POLYPHONIC ANALOG SYNTHESIZER


Tested to Comply
With FCC Standards
FOR HOME OR OFFICE USE
This device complies with Part 15 of the FCC Rules. Operation is subject to
the following two conditions: (1) This device may not cause harmful inter-
ference and (2) this device must accept any interference received, including
interference that may cause undesired operation.
This Class B digital apparatus meets all requirements of the Canadian
Interference-Causing Equipment Regulations.
Cet appareil numerique de la classe B respecte toutes les exigences du
Reglement sur le materiel brouilleur du Canada.
For pluggable equipment, the socket-outlet must be installed near the equipment
and must be easily accessible.
For Technical Support, email: [email protected]

Table of Contents
Welcome Back, Old Friend .................................. x
Chapter 1: Getting Started ...................................1
Rear Panel Connections .......................................2
Using USB ................................................4
Setting Up the Prophet-5 .......................................5
Calibrating the Oscillators and Filters ............................5
Sound Banks ..............................................6
Selecting Programs .........................................6
Editing Programs ...........................................7
How to Check a Parameter Setting in a Preset ....................7
Comparing an Edited Program to its Original State .................8
Creating a Program from Scratch ...............................8
Live Panel Mode ............................................9
Saving a Program ...........................................9
Canceling Save. . . . . . . . . . . . . . . . . . . . . . . . . . . . . . . . . . . . . . . . . . . . 10
Comparing Before You Save ...................................10
Exploring the Prophet-5 .......................................11
Chapter 2: Prophet-5 Controls ...............................12
Global Settings ..............................................12
Globals - Top Row .........................................13
Globals - Bottom Row .......................................14
Oscillators ..................................................17
Oscillator Controls .........................................18
Mixer ....................................................21
Filter ....................................................22
Filter Controls ..............................................24
Filter Envelope ............................................25
Filter Envelope Controls .....................................26
Amplier Envelope ...........................................28
Amplier Envelope Controls .................................29
Low Frequency Oscillator ......................................31
LFO Controls .............................................32
Wheel-Mod Controls. . . . . . . . . . . . . . . . . . . . . . . . . . . . . . . . . . . . . . . . . . 32
Using LFO and Wheel-Mod ..................................33
Poly Mod ..................................................34
Poly Mod Parameters .......................................35

Using the Vintage Knob .......................................36
Pitch and Mod Wheels ........................................37
Pitch Wheel. . . . . . . . . . . . . . . . . . . . . . . . . . . . . . . . . . . . . . . . . . . . . . . 37
Mod Wheel ...............................................38
Adding Aftertouch ............................................38
Glide Rate .................................................39
Unison ....................................................40
Using Chord Memory .......................................41
Master Tune ................................................42
The Release Switch ..........................................43
The Tune Button .............................................44
Key Priority Modes ...........................................45
About Voice Assignment .....................................45
Chapter 3: Creating Sounds .........................................46
Synth Bass .................................................46
Short Version .............................................46
Long Version ..............................................47
Creating Synth Brass .........................................50
Turning Synth Brass into a String Pad ..........................51
Creating a Hard-Sync Lead ....................................51
A Final Word ................................................52
Chapter 4: Using CVs and Gates ............................ 53
Using Prophet-5’s CV Out .....................................53
Adjusting the Prophet-5’s CV Output Scaling: ......................53
Adjusting the Prophet-5’s CV Input Scaling: .......................54
Using Prophet-5’s Gate In and Gate Out ..........................55
Appendix A: Troubleshooting and Support ................... 57
Troubleshooting .............................................57
Resetting the Global Parameters ................................59
Contacting Technical Support ...................................59
Warranty Repair .............................................60
Appendix B: Calibrating the Prophet-5 .......................61
Calibrating the VCOs and Filters ................................61
Calibrating the Pitch and Mod Wheels ............................61
Resetting the Global Parameters ................................62

Appendix C: Exporting and Importing Programs/Banks .......62
Importing Programs and Banks .................................63
Appendix D: Alternative Tunings ............................64
1. 12-Tone Equal Temperament (non-erasable) .....................64
2. Harmonic Series ...........................................64
3. Carlos Harmonic Twelve Tone ................................64
4. Meantone Temperament ....................................64
5. 1/4 Tone Equal Temperament ................................64
6. 19 Tone Equal Temperament .................................65
7. 31 Tone Equal Temperament .................................65
8. Pythagorean C ............................................65
9. Just Intonation in A with 7-Limit Tritone at D# ....................65
10. 3-5 Lattice in A ...........................................65
11. 3-7 Lattice in A ...........................................65
12. Other Music 7-Limit Black Keys in C ..........................65
13. Dan Schmidt Pelog/Slendro .................................66
14. Yamaha Just Major C ......................................66
15. Yamaha Just Minor C ......................................66
16. Harry Partch 11-Limit 43 Note Just Intonation ...................66

viii
Sequential

ix
Prophet-5 User’s Guide
THE SEQUENTIAL CREW
Art Arellano, Gerry Bassermann, Gus Callahan, Fabien Cesari, Bob Coover, Carson Day,
Chris Hector, Tony Karavidas, Mark Kono, Justin Labrecque, Andy Lambert, Michelle Marshall,
Andrew McGowan, Joanne McGowan, Julio Ortiz, Denise Smith, Brian Tester, Tracy Wadley,
and Mark Wilcox
PROPHET-5 SOUND DESIGN
John Bowen, Peter Dyer, Tim Koon, Kurt Kurasaki, Drew Neumann, Julian Pollack/J3PO,
Francis Preve, Robert Rich, Paul Schilling, Nicholas Semrad, Mitchell Sigman, Matia Simovich,
Huston Singletary, James Terris, and Mitch Thomas
Special thanks to Robert Rich for the alternative tunings content.

x
Welcome Back, Old Friend
Sequential
Welcome Back, Old Friend
It’s not often you get to revisit your past with the accumulated knowledge and
experience of the intervening years. Even rarer is the opportunity to retrieve some
of the magic of those days and give it new life.
I was 28 when I created the original Prophet-5. Silicon Valley was just taking
shape and I had the notion that these new-ish things called microprocessors
might be useful in designing an electronic instrument — a fully programmable
polyphonic synthesizer — the rst of its kind.
It turned out I was right. The Prophet-5 changed many things: the basic concept
of the polyphonic synth, how musicians used them, and even the sound of music
back then.
Fast forward to 2020. I’ve just turned 70, and after contemplating the how and
why, decided the time was right to welcome an old friend back to the musical
stage. So let me present, once again, the Prophet-5. Or as we call it around here,
the Prophet-5 Rev4.
Without going into a lot of technical details, I’ll tell you that we designed the new
Prophet-5 with the original, genuine Curtis VCOs and lters used in the Prophet-5
Rev3, and the new, Dave Rossum- designed SSI 2140 lter, which is the modern
counterpart of the original SSM 2040 Dave designed in the Prophet-5 Rev1 and
Rev2.
This is why you’ll nd a “Rev” switch to choose your preferred lter and a
“Vintage” knob that will loosen up the oscillators and envelopes just like they
were in the good old days. It lets you dial in progressively more vintage character
as you go from a stable 4 (as in Prophet-5 Rev4) all the way to 1 (as in Prophet-5
Rev1, the rarest and most temperamental of all Prophet-5s).
We’ve even included the original factory sounds. (Listen to programs 511-558.)
It’s been a labor of love. So grab those knobs and make some analog magic.
Cheers,

xi
Prophet-5 User’s Guide
Welcome Back, Old Friend

1
Prophet-5 User’s Guide
Chapter 1: Getting Started
Chapter 1: Getting Started
The Prophet-5 is a ve-voice, polyphonic analog synthesizer with analog
voltage-controlled oscillators, lters, and ampliers. It faithfully repro-
duces the vintage sound and features of all three revisions of the original
Sequential Circuits Prophet-5. It does this through the use of genuine
Curtis VCOs and lters as well as Dave Rossum’s newly designed SSI
2140 lter — the modern counterpart of his original SSM 2040, which
was used in vintage Prophet-5-Rev1 and Rev2 synths. The Prophet Rev3
featured CEM 3320 Curtis lters. By featuring both types of lters, the
new Prophet-5 provides the best of all worlds — and all Prophet-5s.
The Prophet-5 is rst and foremost a performance instrument. All of its
sound-shaping controls are immediately accessible on its front panel,
packing a tremendous amount of power and versatility into a compact,
easy-to-use format.
This chapter of your user’s guide provides an overview of essential tasks
such as how to make basic audio connections and how to edit and save
sounds. Later chapters explain each of the parameters of the Prophet-5
as well as how to program sounds and how to use the global menu to
manage its overall behavior.
All of the Prophet-5’s essential controls are within easy reach on its
front panel, so go ahead and dive in and start turning knobs and pressing
buttons to explore its sound and capabilities. Then, when you’re ready,
dig into this user’s guide to explore the deeper parts of the synth.
Prophet-5 front panel

2
Rear Panel Connections
Sequential
Rear Panel Connections
The rear panel of the Prophet-5 has connectors for power, USB, MIDI,
audio, and pedals.
1. Power On/Off—This rocker switch controls power on and off to the
Prophet-5.
2. AC Power Connector—Accepts a standard, grounded IEC power
cord. Operates over a range of 100 to 240 volts and 50 to 60 Hz.
3. USB—For bidirectional MIDI communication with a computer. The
Prophet-5 is a Class Compliant USB device and does not require addi-
tional drivers when used with Mac OS or Windows. See “Using USB” on
page 4 for more information.
4. MIDI In, Out, Thru—Standard 5-pin MIDI DIN connectors for
communicating with MIDI-equipped devices.
5. Release—Accepts a momentary, normally open or normally closed
footswitch to control sustain.
6. Pedal —These two connectors accept a standard expression pedal
that has a variable resistor on a TRS (tip-ring-sleeve) ¼ inch phone plug.
Connecting a pedal to the amp connector controls volume. Connecting a
pedal to the filter connector controls lter cutoff.
1 2
3 4
5 6 7 8 9 10 11 12

3
Prophet-5 User’s Guide
Rear Panel Connections
7. Control Voltage Out—Standard ¼ inch connector. This jack outputs a
0- +5V signal for interfacing with modular synthesizers and other devices
that support this type of connectivity. It is congured for 1-volt-per-
octave operation for gear that recognizes that standard. The CV output
tracks the last note played on the Prophet-5 keyboard.
8. Gate Out—Standard ¼ inch connector. This jack outputs a 15-volt
on/off signal typically used to gate the envelopes of an external synth
that supports this type of connectivity. The Gate Out signal is triggered
whenever a key is pressed on the Prophet-5.
9. Control Voltage In—Standard ¼ inch connector. This jack accepts
a 0 to + 5V signal for interfacing with modular synthesizers and other
devices that support this type of connectivity. They are congured for
1-volt-per-octave operation for gear that recognizes that standard. A CV
In signal affects only a single voice of the Prophet-5.
10. Gate In—Standard ¼ inch connector. This jack accepts a 1.5 to
15-volt on/off signal to gate the envelopes of a single voice on the
Prophet-5. Whenever a ¼ inch connector is inserted into the rear-panel
gate in jack on the Prophet-5, its keyboard polyphony is reduced to
4 voices. The envelopes of the fth voice are triggered by the gate in
signal.
11. Phones — ¼ inch stereo headphone jack. Headphone volume is
controlled by the volume knob on the front panel.
12. Audio Out—Unbalanced, ¼ inch audio output.
1 2
3 4
5 6 7 8 9 10 11 12

4
Rear Panel Connections
Sequential
Using USB
The Prophet-5’s USB 2.0 port enables bidirectional MIDI communica-
tion with a computer. A MIDI interface and MIDI cables are not neces-
sary, just a USB cable. The Prophet-5 is a Class Compliant USB device.
That means it does not require any additional drivers to be installed to
communicate with a Mac or Windows computer. The Prophet-5 transmits
and receives MIDI data via USB, but does not transmit audio.
MIDI In and USB should not be used at the same time, as overlapping
messages from different sources may cause the Prophet-5 to respond unpredictably.
MIDI Out and USB can be used at the same time and transmit the same data.
Under Mac OS, “Prophet-5/10” will appear as a MIDI port when
connected via USB and can be congured using the Mac’s Audio MIDI
Setup utility (typically found in Applications/Utilities).
Under Windows, the rst time the Prophet-5 is connected via USB, the
“Found new hardware” alert appears and it is automatically installed as
“Prophet-5.”
In Windows, if you unplug the USB cable and plug it back in while a
program has the Prophet-5 port open, you may have to resync. That
usually means going to the Prophet-5 Keyboard Properties — in the
Windows Device Manager under “Sound, video, and game controllers”
— and clicking OK. If Prophet-5 is no longer listed in the Device Manager,
turn off the Prophet-5 then turn it back on again while it is connected via
USB. It should be detected on power up.

5
Prophet-5 User’s Guide
Setting Up the Prophet-5
Setting Up the Prophet-5
Here’s how to get your Prophet-5 up and running:
1. Plug the power cable into the AC power connector on the back panel of
the Prophet-5.
2. If you have an expression pedal, connect it to amp (for volume) or
filter (for filter cutoff)
on the back of the Prophet-5. If you have a
sustain pedal, connect it to the release jack.
3. Turn on the Prophet-5.
4. Connect the audio out connector on the back of the Prophet-5 to your
amp/mixer/powered speakers using an unbalanced, ¼ inch audio cable.
This is the main (mono) output for the synth.
5. Turn up the volume on your amp/mixer/powered speakers.
6. Turn up the volume on the Prophet-5.
7. Use the group, bank, and program switches to explore factory sounds.
Calibrating the Oscillators and Filters
The rst time you use the Prophet-5, please run its built-in calibration
procedure. Repeat the calibration procedure as needed over the next few
days of use. The Prophet-5 learns the range of temperatures at your loca-
tion and will keep itself in tune over this range.
Later, if you use the Prophet-5 in a different environment that is measur-
ably warmer or cooler (on stage, in an air-conditioned studio, and so on)
run the calibration procedure again.
To calibrate the oscillators and lters:
1. Press the tune button. The program select button LEDs begin ash-
ing in sequence and the numeric display indicates the tuning sequence
while the Prophet-5 performs its auto-calibration procedure. Don’t turn
off the power while it’s doing this.
2. When nished, the front panel controls return to normal and you can
play the Prophet-5.

6
Setting Up the Prophet-5
Sequential
Sound Banks
The Prophet-5 contains a total of 400 programs. 200 are permanent
“Factory” programs and 200 are “User” programs that can be over-
written. You can edit the programs of either set, but you can only save
sounds to the User set.
When the factory switch is enabled, the permanent Factory sound set is
active. When the factory switch is disabled, the User sound set is active.
As shipped from the factory, both sound sets are identical.
Group, Bank, and Program Number selectors
Selecting Programs
Use the group, bank, and program selector buttons to select and recall
programs.
To choose a program:
1. Press the group select button to specify the “hundreds” bank of the
program. Each time you press the button, the number increments and
cycles through Groups 1-5.
2. Press the bank select button to specify the “tens” bank of the program.
Each time you press the button, the number increments and cycles
through Banks 1-5.
3. Press the a program selector button (1-8) to specify the “ones” digit of
the program.
To choose program 123, for example:
1. Press the group select button as many times as needed to cycle around to
1.
2. Press the bank select button as many times as need to cycle around to 2.
3. Press program selector button 3.

7
Prophet-5 User’s Guide
Setting Up the Prophet-5
It’s not always necessary to enter all 3 digits of a program number to
recall it.
For example:
• If the current program is 111 and you want to recall program 118,
simply press “8.”
• If the current program is 111 and you want to recall program 121,
simply press the bank select button as many times as necessary to
cycle around to “2.”
• If the current program is 111 and you want to recall program 211,
simply press the group select button as many times as necessary to
cycle around to “2.”
Pressing the globals button three times in a row saves the current program as
the default program that appears when you turn on the Prophet-5.
Editing Programs
Because all of the sound-shaping controls of the Prophet-5 appear on its
front panel, editing an existing program is simple: just turn a knob and listen
to its effect. Keep turning knobs and pressing buttons and if you like what
you’ve created, save the program. (See “Saving a Program” on page 9.)
How to Check a Parameter Setting in a Preset
When you’re editing a preset, the Prophet-5 has a convenient way of indicat-
ing the programmed (saved) value for any knob parameter: Whenever you
turn a knob and reach the saved value of a given parameter, an LED dot in
the main Prophet-5 display will illuminate.
This dot illuminates
The dot illuminates when a knob position matches a preset’s saved parameter value

8
Setting Up the Prophet-5
Sequential
Comparing an Edited Program to its Original State
When editing a program, it’s often useful to compare its edited state to
its original state to evaluate your edits. Alternatively, before saving a
program to a new location you may want to check the program in the
target location before you overwrite it.
To compare an edited program to a saved version:
1. Edit a program.
2. Press the record button. It starts ashing.
3. Press the global button. Both LEDs on the button light up, indicating
compare mode.
4. Play the keyboard to hear the saved version of the sound.
5. To disable the compare function and return to the edited sound, turn off
the global button. Programs can’t be written while in compare mode.
6. If you want to save the edited sound, the record button is still ash-
ing and ready to save, so enter a location with the program selector
buttons. The sound is saved.
7. Alternatively, if you want to cancel saving and continue editing, press
the record button. It stops ashing and saving is canceled.
Creating a Program from Scratch
An existing program can be very useful as a jumping off point for new
sounds. But it’s also useful (and educational) to create a new sound from
scratch. The Prophet-5 makes this easy by providing a “Basic Preset”
that you can quickly recall at any time. This preset is very simple, with a
single oscillator as its basis.
To recall the Basic Preset:
1. Hold down the record button.
2. Press the preset button.

9
Prophet-5 User’s Guide
Setting Up the Prophet-5
Live Panel Mode
The Prophet-5 also features a “live panel” mode in which its sound
switches to the current settings of its knobs and switches. In other words,
the current preset is ignored and what you see on the front panel is what you
hear. This is a great mode for learning, experimentation, and instant gratication.
To enter live panel mode:
• Press the preset button to toggle it off. Changing Groups, Banks or
Programs with Preset off won’t affect the sound.
To return to preset mode:
• Press the preset button again to toggle it on.
PRESET
Toggling off the preset button enables “live panel” mode
Saving a Program
If you’ve created a sound that you like, you’ll probably want to save it.
Saving a program overwrites a previously saved program. Sound design-
ers often save many incremental versions of a program as they continue
to rene it. These intermediate versions often make good jumping off
points for new sounds.
To save an edited program to the same preset location:
1. Press the record button. Its LED begins blinking.
2. Press a program selector button (1-8) to specify the “ones” digit of the
program.
3. The record button LED stops blinking and the program is saved into
the User sound set.
Be careful when record is enabled. You can change groups and banks without
executing write, but once you press a program selector button (1-8) for the “ones”
digit, the record command is executed and the program at that location is overwritten.
/