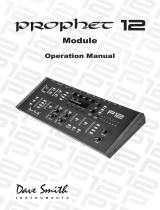
Prophet Rev2

Sequential Prophet Rev2, Prophet Rev2 Desktop User manual

  • Hello! I am an AI chatbot trained to assist you with the Sequential Prophet Rev2 User manual. I’ve already reviewed the document and can help you find the information you need or explain it in simple terms. Just ask your questions, and providing more details will help me assist you more effectively!
8/16-Voice Polyphonic Synthesizer
User’s Guide
Version 1.2
Feb 2019
Sequential LLC
1527 Stockton Street, 3rd Floor
San Francisco, CA 94133
USA
©2019 Sequential LLC
www.sequential.com
Tested to Comply
With FCC Standards
FOR HOME OR OFFICE USE
This device complies with Part 15 of the FCC Rules. Operation is subject to
the following two conditions: (1) This device may not cause harmful inter-
ference and (2) this device must accept any interference received, including
interference that may cause undesired operation.
This Class B digital apparatus meets all requirements of the Canadian
Interference-Causing Equipment Regulations.
Cet appareil numerique de la classe B respecte toutes les exigences du
Reglement sur le materiel brouilleur du Canada.
For pluggable equipment, the socket-outlet shall be installed near the equipment
and shall be easily accessible.
For Technical Support, email: [email protected]
CALIFORNIA PROP 65 WARNING
This product may expose you to chemicals including BPA, which is known to the State of California
to cause cancer and birth defects or other reproductive harm. Though indepen-dent laboratory
testing has certified that our products are several orders of magnitude below safe limits, it is our
responsibility to alert you to this fact and direct you to: https://www.p65warnings.ca.gov for more
information.
Table of Contents
A Few Words of Thanks ...............................ix
Getting Started ........................................1
Sound Banks ...........................................1
Selecting Programs ......................................2
Editing Programs ........................................2
Comparing an Edited Program to its Original State ..............3
Creating a Program from Scratch ............................3
Saving a Program ........................................4
Canceling Save ..........................................4
Naming a Program .......................................5
Working with Stacked or Split Programs ......................6
Moving to the Next Level .................................10
Connections .........................................12
Global Settings ......................................14
Oscillators ..........................................20
Oscillator Parameters ....................................21
Filter ...............................................23
Filter Envelope .......................................25
Amplier Envelope ...................................27
Auxiliary Envelope ...................................29
Low Frequency Oscillators. . . . . . . . . . . . . . . . . . . . . . . . . . . . .31
Modulation ..........................................33
Modulation Parameters ...................................34
Modulation Examples ....................................34
Effects. . . . . . . . . . . . . . . . . . . . . . . . . . . . . . . . . . . . . . . . . . . . . .36
Effects Parameters ......................................38
Arpeggiator .........................................40
Arpeggiator Beat Sync ...................................41
Arpeggiator “Momentary Sustain” Mode ...................... 42
MIDI Note Output from the Arpeggiator and Sequencer ..........42
Arpeggiator Parameters ..................................43
Clock Parameters .......................................44
Sequencer ..........................................45
Changing Presets While the Poly Sequencer is Running .........46
Programming the Polyphonic Sequencer .....................47
Editing a Polyphonic Sequence ............................48
Copying a Polyphonic Sequence Between Layers ..............49
Programming the Gated Sequencer. ..............................50
Using Slew ............................................51
Sequencer Parameters ................................... 52
Clock Parameters .......................................53
Unison .............................................54
Using Chord Memory ....................................55
Master Volume/Program Volume ........................57
Pan Spread ..........................................58
Transpose. . . . . . . . . . . . . . . . . . . . . . . . . . . . . . . . . . . . . . . . . . .58
Hold ................................................59
Glide ...............................................59
Pitch and Mod Wheels ................................61
Pitch Wheel ............................................61
Modulation Wheel .......................................62
Adding Aftertouch ....................................62
Exporting Programs and Banks .........................67
Importing Programs and Banks .........................68
Calibrating the Prophet Rev2 ...........................69
Calibrating the Oscillators and Filters ........................69
Calibrating the Pitch and Mod Wheels ..........................69
Resetting the Global Parameters ...........................70
Using USB ..........................................70
Appendix A:
Modulation Sources ..................................72
Appendix B:
Modulation Destinations ...............................73
Appendix C: Alternative Tunings ........................74
Appendix D: Troubleshooting and Support ...............78
Troubleshooting ........................................78
Contacting Technical Support ..............................80
Warranty Repair ........................................81
Appendix E: MIDI Implementation .......................82
MIDI Messages ......................................... 83
NRPN Messages .......................................87
Control NRPN Data .....................................95
SysEx Messages .......................................95
Packed Data Format ....................................98
SOUND DESIGN
Joseph Akins, Rory Dow, Peter Dyer, Josh Eustis, Peter Gorges, Mike Hiegemann,
Tim Koon, Kurt Kurasaki, Kevin Lamb, Cord Mueller, Drew Neumann, Bob Oxley,
Francis Preve, Lorenz Rhode, Nick Semrad, Huston Singletary, James Terris, and
Mitch Thomas.
THE SEQUENTIAL CREW
Art Arellano, Fabien Cesari, Bob Coover, Carson Day, Chris Hector, Tony Karavidas,
Mark Kono, Justin Labrecque, Andy Lambert, Michelle Marshall, Andrew McGowan,
Joanne McGowan, Julio Ortiz, Tracy Wadley, and Mark Wilcox.
Special thanks to Robert Rich for the alternative tunings content.
A Few Words of Thanks
Thank you for purchasing the Prophet Rev2, the successor to our popular Prophet ’08
synthesizer, which has been a workhorse in the music industry for nearly 10 years.
As enduringly popular as the Prophet ’08 has been, we felt it was time to update it
with new technology and new features.
To that end, we designed the Prophet Rev2 by enhancing and improving every
-
thing we could about the original Prophet ’08 and, in many cases, doubling its
power. We took the classic sound of the Prophet ’08’s DCO and Curtis-lter-based
voice and added powerful new features that the original never had, such as wave-
shape modulation, digital effects, an expanded modulation matrix, a polyphonic step
sequencer (in addition to its original gated step sequencer), a more intuitive user inter-
face, USB connectivity, and more. The result is a modern classic revisited.
Creating the Prophet Rev2 has been a very satisfying adventure in making a good
synth even better. Create some great sounds with it!
Cheers,
1
Prophet Rev2 User’s Guide
Getting Started
Getting Started
The Prophet Rev2 is a 8/16-voice polyphonic synthesizer with analog
oscillators, lters, and ampliers. The majority of its sound-shaping
controls are located on its front panel, putting a tremendous amount of
power and versatility within easy reach.
This chapter of your users guide provides a brief overview of the Rev2,
including such essential tasks as how to edit and save sounds. Later
sections of this manual explain each of the Prophet Rev2’s parameters.
Don’t hesitate to dive right in and start turning knobs and pressing
buttons before you begin reading. Start exploring and let your ears guide
you!
OSC 1 FREQ
SYNC
FINE TUNE
SHAPE
SOURCE
DESTINATION
SHAPE MOD SUB OCTAVE
OSC MIX
CUTOFF
PROGRAM
BANK
PARAMETER
VALUE
RESONANCE ENV AMOUNT VELOCITY
Edit Layer B
Stack A+B
MISC PARAMS
show
Split A | B
Compare
Write
Global
U1 P1
Filter Sweep
Osc 1 Freq
C2
120
Phones Left
MAIN/A OUTPUT B OUTPUT
Right Left Right Pedal/CV Sustain Sequencer MIDI Thru MIDI Out MIDI In USB On/OffAC In
KEY AMOUNT AUDIO MOD
SHAPE MOD
NOISE
OSC SLOP
1 2
Triangle
Sawtooth
Rev Saw
Square
Random
SHAPE 4 POLE DELAY ATTACK DECAY SUSTAIN RELEASE
Sawtooth
Saw+Tri
Triangle
Pulse
SHAPE
KEY SYNC
CLK SYNC
Sawtooth
Saw+Tri
Triangle
Pulse
OSC 2 FREQ
FREQUENCY
AMOUNTDESTINATION
PITCH MOD
1
2
3
4
FINE TUNE
OSCILLATORSLOW FREQUENCY OSCILLATORS LOW-PASS FILTER
AUXILIARY ENVELOPEEFFECTCLOCK ARPMODULATION
DESTINATIONMASTER VOLUME
ATTACK
ENV AMOUNT
DECAY
SELECT
AMOUNT
RATE
GLIDE
HOLDUNISON
VELOCITY
SUSTAIN
DELAY
TAP TEMPO ON/OFF
MODEBPM DIVIDE
RELEASE
SELECTON/OFF
CLK SYNC
MIX
PARAM 1 PARAM 2
AMPLIFIER
PAN SPREAD
ATTACK
ENV AMOUNT
DECAY
VELOCITY
SUSTAIN
DELAY
RELEASE
TYPE MODE
rest
DESTINATION
tie
RECORD
Gated
Poly Seq
Only
TRACK
Poly
SEQUENCER
TRANSPOSE
Down
Up
Prophet Rev2 front panel
Sound Banks
The Prophet Rev2 contains a total of 1024 programs. Banks U1-U4 are
user banks that can be overwritten. Banks F1-F4 are factory banks that
are permanent. As shipped, user banks U1-U4 are identical to permanent
factory banks F1-F4. Each bank has 128 programs (x 4 banks = 512
programs each). You can edit the programs of either bank, but you can
only save them to user banks U1-U4.
Why do we include banks of non-rewritable permanent sounds? So
that they are always available, to be used as is, or as templates for new
sounds of your own. It’s easy to design a new sound by tweaking an
existing one.
2 Getting Started
Sequential
OSC 1 FREQ
SYNC
FINE TUNE
SHAPE
SOURCE
DESTINATION
SHAPE MOD SUB OCTAVE
OSC MIX
CUTOFF
PROGRAM
BANK
PARAMETER
VALUE
RESONANCE ENV AMOUNT VELOCITY
Edit Layer B
Stack A+B
MISC PARAMS
show
Split A | B
Compare
Write
Global
U1 P1
Filter Sweep
Osc 1 Freq
C2
120
Phones Left
MAIN/A OUTPUT B OUTPUT
Right Left Right Pedal/CV Sustain Sequencer MIDI Thru MIDI Out MIDI In USB On/OffAC In
KEY AMOUNT AUDIO MOD
SHAPE MOD
NOISE
OSC SLOP
1 2
Triangle
Sawtooth
Rev Saw
Square
Random
SHAPE 4 POLE DELAY ATTACK DECAY SUSTAIN RELEASE
Sawtooth
Saw+Tri
Triangle
Pulse
SHAPE
KEY SYNC
CLK SYNC
Sawtooth
Saw+Tri
Triangle
Pulse
OSC 2 FREQ
FREQUENCY
AMOUNTDESTINATION
PITCH MOD
1
2
3
4
FINE TUNE
OSCILLATORSLOW FREQUENCY OSCILLATORS LOW-PASS FILTER
AUXILIARY ENVELOPEEFFECTCLOCK ARPMODULATION
DESTINATIONMASTER VOLUME
ATTACK
ENV AMOUNT
DECAY
SELECT
AMOUNT
RATE
GLIDE
HOLDUNISON
VELOCITY
SUSTAIN
DELAY
TAP TEMPO ON/OFF
MODEBPM DIVIDE
RELEASE
SELECTON/OFF
CLK SYNC
MIX
PARAM 1 PARAM 2
AMPLIFIER
PAN SPREAD
ATTACK
ENV AMOUNT
DECAY
VELOCITY
SUSTAIN
DELAY
RELEASE
TYPE MODE
rest
DESTINATION
tie
RECORD
Gated
Poly Seq
Only
TRACK
Poly
SEQUENCER
TRANSPOSE
Down
Up
Program and Bank controls
Selecting Programs
Use the bank and program knobs to select and recall programs.
To choose a program:
1. Turn the bank knob to select the bank you want.
2. Turn the
program knob to select a program within that bank.
Editing Programs
Because the majority of the sound-shaping controls of the Prophet Rev2
appear on its front panel, editing an existing program is simple: just turn a
knob and listen to its effect. Keep turning knobs and pressing buttons. If you
like what you’ve created, save the program. (See “Saving a Program” on
page 4.)
The rotary controls on the front panel are a mixture of “endless” rotary encoders
(which have no position indicator) and potentiometers or “pots,” which have a position
indicator and a nite travel range from left to right. You can choose between three
different modes that determine how the synth reacts when you edit its parameters with
a pot. For details, see “Pot Mode” on page 16.
3
Prophet Rev2 User’s Guide
Getting Started
Comparing an Edited Program to its Original State
When editing a program, it is often useful to compare its edited state
to its original state to evaluate your edits. Alternatively, before saving
a program to a new location you may want to check the program in the
target location before you overwrite it.
To compare an edited program to a saved version:
1. Edit a program.
2. Press the compare button. It lights up, indicating compare mode.
3. Play the keyboard to hear the saved version of the sound.
4. To disable the compare function and return to the edited sound, press
the compare button again to turn it off. Programs can’t be written while
in compare mode.
It’s also useful to be able to check the value of a parameter for reference.
Normally, to make a parameter value appear in the display, you have to
turn the parameters knob — which will change the parameter value. But
there is a way to do this without changing the value:
To check the value of a parameter without changing it:
1. Press and hold the misc parameter button.
2. Turn any parameter knob. The value appears in the display.
3. To check additional parameter values, continue holding down the misc
parameter button and turn other knobs to check their value.
Creating a Program from Scratch
An existing program can be very useful as a jumping off point for new
sounds. But it’s also useful (and educational) to create a new sound from
scratch. The Prophet Rev2 makes this easy by providing a “basic preset”
that you can quickly recall at any time. This preset is very simple, with a
single oscillator as its basis.
To recall the basic preset:
In the transpose section, press and hold the down and up buttons simul-
taneously, then press the hold button.
4 Getting Started
Sequential
To recall the basic preset using the Global Menu:
1. Press the global button.
2. Use the
parameter knob to select basic program.
3. Press the write button.
Saving a Program
If you’ve created a sound that you like, you’ll probably want to save it.
Saving a program overwrites a previously saved program. Sound design-
ers often save many incremental versions of a program as they continue
to rene it. These intermediate versions often make good jumping off
points for new sounds.
To save a program to the same preset location:
1. Press the write button. Its LED begins blinking.
2. Press the write button again. Its LED stops blinking and the program is
saved.
To save a program to a different location:
1. Press the write button. Its LED begins blinking.
2. Turn the
bank or program knobs to select a new location. You can only
save to
banks U1-U4.
3. Press the
write button again. Its LED stops blinking and the program is
saved.
Saving a program saves any edits to programs on both Layer A and Layer B.
Canceling Save
Sometimes you may want to cancel saving a program before you commit.
To cancel the save process before you commit:
If the write button LED is ashing, press the global button. The write
LED stops ashing and saving is canceled. You can return to editing if
you want.
5
Prophet Rev2 User’s Guide
Getting Started
Comparing Before You Save
Before saving a program to a new location, it’s a good idea to listen to the
program in the target location to make sure you really want to overwrite it.
To evaluate a program before you overwrite it:
1. Get ready to save by pressing the write button. It starts ashing.
2. Press the compare button. Its LED lights up.
3. Use the bank and program knobs to navigate to the sound you want to
compare and play the keyboard to hear the sound.
4. To disable the compare function and go back to the edited sound, press
the compare button again to turn it off. (Programs can’t be written
while in compare mode.)
5. If you want to save the edited sound, the write button is still ashing
and ready to save, so navigate to a location with the bank and program
knobs and press write. The sound is saved.
6. Alternatively, if you want to cancel saving and continue editing, press
the global button. Saving is canceled.
Naming a Program
You can rename a program when the write command is active.
To rename a program:
1. Press the write button. Its LED begins blinking.
2. Turn the parameter knob to move the cursor forward or backward
3. Turn the value knob to select a character.
4. When you’re done naming the program, press the write button again.
Its LED stops blinking and the program is saved.
6 Getting Started
Sequential
Working with Stacked or Split Programs
The Prophet Rev2 is bi-timbral, meaning that it can produce two
different sounds/programs at the same time, either by stacking them, or
by allowing you to split the keyboard and assign one sound to the upper
section of the keyboard and a different sound to the lower section of the
keyboard.
The two layers are referred to as Layer A and Layer B. By default, Layer
A is always active when you recall a program. If either the
split a|b
button or the stack a+b button is lit, then Layer B is also active.
Each Layer can have different Effect, Unison, Arpeggiator, and
Sequencer settings. This allows for some very interesting combinations
of sounds.
As you scroll through various factory programs, you can tell which are
stacked and which are split. On stacked sounds, the
stack a+b button is
lit. On split sounds, the split a|b button is lit.
All factory programs have a “B” layer, even if that layer isn’t currently enabled.
To hear Layer B in isolation, press the edit layer b button and disable stack or split (if
active) by turning off the stack a+b btutton or split a|b button. Pressing edit layer b a
second time enables Layer A again.
PROGRAM
BANK
Edit Layer B
Stack A+B
Split A | B
Compare
Write
Global
Button is lit when
split is active
Button is lit when
stack is active
Press to enable
Layer B editing
Split and Stack buttons
7
Prophet Rev2 User’s Guide
Getting Started
Stacked Programs
Stacking two programs allows you to create extra fat sounds, since you
can have two completely different programs layered on top of each other.
Polyphony is halved in Stack mode, so if you have a 16-voice Prophet
Rev2, in Stack mode, it functions as an 8-voice because it uses two
voices for each key played.
To turn Stack mode on:
If it’s not currently lit, press the stack a+b button. The button becomes
lit. The program on Layer B is stacked with the program on Layer A.
Polyphony is halved since two voices are used per note.
To turn Stack off:
If it’s currently lit, press the stack a+b button. The button becomes
unlit. Only the program on Layer A is heard.
To edit Layer B:
1. Press the edit layer b button. Layer B editing is enabled.
2. Change any parameters to change the sound of Layer B.
3. Press the edit layer b button again to turn off Layer B editing.
To edit Layer A and B simultaneously:
1. With Stack mode on (stack a+b button is lit) press and hold the edit
layer b button. It begins ashing, indicating that you are in “Link”
mode.
2. Change any parameters. The parameters are changed on both Layer A
and Layer B.
3. To turn off Link mode, press the edit layer b button again. It stops
ashing.
Saving a program saves any edits to programs on both Layer A and Layer B.
8 Getting Started
Sequential
To copy Layer A to Layer B:
1. Press both the split a|b button and the stack a+b button simultaneously.
2. Turn the parameter knob and select copy layer a to b.
3. Press the write button. Layer A is copied to Layer B.
To copy Layer B to Layer A:
1. Press both the split a|b button and the stack a+b button simultaneously.
2. Turn the parameter knob and select copy layer b to a.
3. Press the write button. Layer B is copied to Layer A.
To swap Layer A and Layer B:
1. Press both the split a|b button and the stack a+b button simultaneously.
2. Turn the parameter knob and select swap a and b.
3. Press the write button. Layer A and B are swapped.
9
Prophet Rev2 User’s Guide
Getting Started
Split Programs
In split mode, playing a key on the left side of the keyboard will play the
Layer A sound and playing a key on the right side will play the Layer B
sound. Polyphony is allocated equally between the two sounds, with half
of the available voices on Layer A and half on Layer B.
The specic key that starts the Layer B sound is called the split point,
and is saved with the program.
All factory programs have a “B” layer, even if that layer isn’t currently enabled.
To turn Split on:
If it’s not currently lit, press the split a|b button. The button becomes
lit. The left side of the keyboard plays the Layer A sound and the right
side of the keyboard plays the Layer B sound.
To turn Split off:
If it’s currently lit, press the split a|b button. The button becomes unlit.
Only the program on Layer A is heard across the full range of the
keyboard.
To set the split point:
1. Make sure the split a|b button is lit.
2. Press and hold the split a|b button and press a key on the keyboard.
This sets the start point for Layer B.
3. Release the split a|b button.
To swap Layer A and Layer B sounds:
1. Press both the split a|b button and the stack a+b button simultaneously.
2. Turn the parameter knob and select swap a and b.
3. Press the write button. Layer A and B are swapped.
10 Getting Started
Sequential
Moving to the Next Level
Before you start exploring the sound creation capabilities of the Prophet
Rev2 we’d like to point you toward a few things that will help you tailor
the instrument to your needs.
First, check out the Global Settings section of this manual. Read about
Pot Modes and determine which works best for you when you’re editing
sounds. You’ll also nd information about MIDI setup. Read this to more
effectively integrate the Prophet Rev2 into your MIDI rig. To get the
most out of the Prophet Rev2’s live performance capabilities, read up on
using a footswitch or expression pedal.
And nally, be on the lookout for tips and notes scattered throughout
this manual to gain a better working knowledge of the Prophet Rev2.
The better you know it, the more you’ll get out of it. We wish you many
hours of musical exploration!
11
Prophet Rev2 User’s Guide
Getting Started
/