Page is loading ...

ENFORCER Slimline Illuminated Square Request to Exit Plates
2 SECO-LARM U.S.A., Inc.
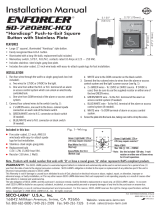
• Square illuminated push button with caption
“PUSH TO EXIT”
• Message language can be easily changed in the
field to Spanish or French
• CE and UL approved switch is rubber-sealed to
prevent liquid penetration
• Includes stainless-steel slimline plate
- Dimensions: 4
1
/
2
"x1
1
/
2
"x1
15
/
16
" (114x38x49 mm)
• Includes six colored 12-inch wire leads with easy-
to-attach spade lugs for fast installation
• Long-life green LED 12/24 VAC/VDC (Approx.
35,000 hrs)
• Weather resistant when properly installed
• SD-7103GC-PEQ Includes:
- Momentary switch, DPST, NO/NC contacts
rated 5A@24VAC max.
• SD-7103GC-PTQ Includes:
- Timed output from 1~180 s
- SPDT Switch rated 3A@24VDC
- Buzzer output for audio status
NOTE
:
This should be done before connecting any wires.
1. If the steel plate is already mounted, it must be removed from the mounting surface.
2. Disassemble the switch as follows (see fig. 2):
a. Pop off the clear plastic protector (A) at the rear of the switch assembly.
b. Unscrew the black plastic nut (B) holding the assembly together.
c. Remove the small black rubber O-ring (C).
d. Separate the switch assembly from the slimline steel plate.
3. Insert the end of a large paper clip or other similar wire into any of the four corner holes (D) found at the
back of the black switch housing and push until the green switch lens (G) pops off.
4. Replace the “PUSH TO EXIT” message plate (F) with the language of choice. Be careful not to lose the
rubber seal (E). Make sure the message plate direction is correct.
5. Snap the lens back on and reassemble the switch and plate assembly, installing as directed above.
Installation:
(for SD-7103GC-PTQ please see next page)
Changing the Message Plate:
Features:
1.
Run four wires through the wall to a
slimline
back
-
box:
a. Two wires, 12VDC or 24VDC, for the light.
b. Two wires each from the N.O. and/or N.C. terminals of an alarm or access control system which can
unlock an electrically controlled lock.
2. Connect four colored wires (included) to the switch as below (see fig. 1):
a. RED wire to the brass-colored spade connector marked “+”.
b. BLACK wire to the brass-colored spade connector marked “-”.
c. GREEN wires to the N.C. connectors marked “1” and “2” (if needed).
d. BLUE wires to the N.O. connectors marked “3” and “4” (if needed).
3. Connect the colored wires to wires from the alarm or access control system and to the light’s power
source (see fig. 1):
a. RED and BLACK wires – To a 12VDC or 24VDC source. For 24VDC operation, connect the
supplied 680Ω, 0.5W resistor inline with either the red or black wire.
b. GREEN wires – To the N.C. terminals of the alarm or access control system (if needed).
c. BLUE wires – To the N.O. terminals of the alarm or access control system (if needed).
4. For weatherproof installation, use a waterproof back box and apply a bead of silicone sealant (not
included) around the rim of the back box and faceplate edge. Apply a small amount of sealant bel
ow each
screw head.
5. Screw the plate into the back-box, taking care not to crimp the wires and ensuring a good seal.

ENFORCER Slimline Illuminated Square Request to Exit Plates
SECO-LARM U.S.A., Inc. 3
Figures:
Wiring
for SD
-
7103GC
-
PTQ
:
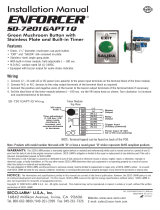
(with timer module)
1.
Connect the RED wire to the “+”
spade connector
and the BLACK wire to the “
-
”
spade connector
(see
Fig. 1).
2. Connect 12~24 VAC or VDC (non-polar) to the power input terminal block of the timer module (see
Fig. 3).
3. Connect a N.O. or N.C. device to the relay output terminal block as desired.
4. Connect the positive and negative wires of the buzzer to the buzzer output terminal block if desired.
5. Set the timer module between 1~180 s via the trimpot as shown. Turn clockwise to increase and
counterclockwise to decrease. Test to ensure the timer is set correctly.
6. Complete installation as directed in the "Installation:" on page 2.
Figure 1 - Wiring
Green
wire
for N.C.
+
-
1
2
3
4
Red
wire
for LED*
Blue wire for N.O.
Green wire for N.C.
Black wire for LED*
Blue wire for N.O.
*IMPORTANT: For 24VDC operation, use the included 680Ω, 0.5W resistor in line with
the red wire or the black wire
.
Figure 2 – Removing the Switch
Figure 3 – Timer Outputs (SD-7103GC-PTQ only)
G
F
E
D
C
B
A
A.
Plastic
Protector
B. Plastic Nut
C. Rubber O-ring
D. Lens Access
Holes
E. Rubber Seal
F. Message Plate
G. Lens
Timer Adjustment
Trimpot
To adjust time (1~180
sec.), turn trimpot
clockwise to increase,
counterclockwise to
decrease.
Timer Module Top View
Buzzer
Output
Relay
Output*
Trigger Input
(Factory prewired)
Power Input 12~24 VAC
or VDC (non-polar)
NOTE:
Terminal legend can be found on back of PCB.
*Relay rated 3A@24VDC
(
–
)
(+)
(N.C.)
(N.O.)
(COM)
(COM)
(N.O.)
(N.C.)

ENFORCER
8 SECO-LARM U.S.A., Inc.
NOT
A:
La póliza de SECO
-
LARM es una que se continúa a desarrollar y mejorar; por lo tanto, SECO
-
LARM se reserva el derecho a
cambiar las especificaciones sin previo aviso. SECO-
LARM tampoco es responsable por los errores de impresión. Todas las Marcas
registradas son propiedad de SECO-LARM U.S.A., Inc. o de sus respectivos propietarios. Copyright © 2019 SECO-
LARM U.S.A., Inc. Todos
los derechos reservados.
GARANTÍA:
Producto de SECO
-
LARM tiene garantía en contra de defectos de material y mano de obra siempre y cuando se utilice en un
servicio normal por un periodo de un (1) año a partir de la fecha de venta al cliente consumidor final. La obligación de SECO-
LARM está
limitada a reparar o reemplazar cualquier parte defectuosa si la unidad se regresa a SECO-
LARM, con el costo de transporte pagado por
adelantado. Esta Garantía se invalidará
si se causa algún daño o se atribuye a actos de Dios, mal uso o abuso físico o eléctrico, negligencia,
reparación o alteración, uso no apropiado o anormal, o por una instalación defectuosa, o si por cualquier otra razón que SECO-
LARM
determina que dicho e
quipo no está operando de manera apropiada como resultado de causas distintas a los defectos del material o la
mano de obra. La única obligación de SECO-
LARM y el resarcimiento exclusivo del comprador deberá limitarse sólo al reemplazo o
reparación, de acuerdo con la opción que brinde SECO-LARM. Bajo ninguna circunstancia, SECO-
LARM será responsable de cualquier
daño especial, colateral, incidental o consecuencial personal o daños de propiedad de cualquier tipo al comprador o a cualquier otro.
AVIS:
SECO
-
LARM a une politique de développement et d’amélioration continue. Pour cette raison, SECO
-
LARM se réserve le droit de
modifier les spécifications sans préavis. SECO-LARM n’est pas responsable des erreurs d’impression. Droit d’auteur © 2019 SECO-
LARM
U.S.A., Tous droits réservés. Il est interdit de reproduire ou copier ce matériel, en totalité ou en partie, sans la permissi
on écrite de
SECO-LARM.
IMPORTANT WARNING:
For a weatherproof installation, ensure the unit is installed in a waterproof backbox, and that the faceplate and
faceplate screws are properly sealed. Incorrect mounting may lead to expo
sure to rain or moisture in the enclosure which could cause a
dangerous electric shock, damage the device, and void the warranty. Users and installers of this product are responsible for
ensuring this
product is properly installed and sealed.
GARANTIE:
Ce produit SECO
-
LARM est garanti contre les défauts de matériaux et de fabrication lors de son utilisation normale pendant un
(1) an à compter de la date de la vente au client d'origine. L'obligation de SECO-LARM se limite à réparer ou remplacer toute piè
ce
défectueuse si celle-ci est retournée à SECO-
LARM en port payé. Cette Garantie est nulle si les dommages sont causés ou attribués à des
actes de Dieu, une utilisation matérielle ou électrique mauvaise ou abusive, une négligence, une réparation ou une al
tération, une utilisation
incorrecte ou anormale ou une installation défectueuse ou si, pour toute autre raison, SECO-
LARM détermine que l'équipement ne
fonctionne pas correctement en raison de causes autres que des défauts de matériaux et de fabrication. La seule obligation de SECO-
LARM
et le recours exclusif de l'acheteur, se limitera au remplacement ou à la réparation uniquement, au choix de SECO-LARM. SECO-
LARM ne
peut en aucun cas être tenu pour responsable de dommages particuliers, collatéraux, fortui
ts ou consécutifs de quelque nature que ce soit à
l'acheteur ou à quiconque.
ADVERTENCIA IMPORTANTE:
Para una instalación resistente
a la intemperie, asegure que la unidad se instale en una caja posterior
resistente al agua y que la placa y los tornillos se sellen correctamente. Montaje incorrecto puede provocar una exposición a
la lluvia o la
humedad en el recinto que puede causar una
descarga eléctrica peligrosa, dañar el dispositivo y anular la garantía. Usuarios e instaladores
de este producto son responsables de asegurar que este producto este instalado y sellado correctamente.
IMPORTANT AVERTISSEMENT:
S'assurer, pour l'étanchéité de l'installation, d'installer l'unité dans une boîte arrière étanche et que la
plaque frontale et ses vis soient correctement étanchéifiées. Tout montage incorrect de l'enceinte peut exposer celle-
ci à l'eau de pluie ou à
l'humidité, ce qui pourrait provoquer un choc électrique grave, endommager l'appareil et annuler la garantie. Les utilisateurs e
t installateurs
de ce produit sont responsables de sa bonne installation et étanchéification.
SECO-LARM
®
U.S.A., Inc.
16842 Millikan Avenue, Irvine, CA 92606
Website:
www.seco
-
larm.com
Phone: (949) 261
-
2999 | (800) 662
-
0800
Email: sales@seco
-
larm.com
®
PITSW1
Order Part# 763
-
148
-
6
%
MI_SD
-
7103GC
-
PxQ_190916_ML.docx
NOTICE:
The SECO-LARM policy is one of continual development and improvement. For that reason, SECO-
LARM reserves the right to
change specifications without notice. SECO-LARM is also not responsible for misprints. All trademarks are the property of SECO-LARM
U.S.A., Inc. or their respective owners. Copyright © 2019 SECO-LARM U.S.A., Inc. All rights reserved.
WARRANTY:
This SECO-
LARM product is warranted against defects in material and workmanship while used in normal service for one (1)
years from the date of sale to the original customer. SECO-
LARM’s obligation is limited to the repair or replacement of any defective part if
the unit is returned, transportation prepaid, to SECO-
LARM. This Warranty is void if damage is caused by or attributed to acts of God,
physical or electrical misuse or abuse, neglect, repair or alteration, improper or abnormal usage, or faulty installation, or if for any other
reason SECO-LARM determines that such equipment is not operating properly as a result of causes other than defects in material and
workmanship. The sole obligation of SECO-
LARM and the purchaser’s exclusive remedy, shall be limited to the replacement or repair only,
at SECO-LARM’s option. In no event shall SECO-LARM be liable for any special, collateral, incidental, or consequential
personal or property
damage of any kind to the purchaser or anyone else.
IMPOR
TANT:
Users and installers of this product are responsible for ensuring that the installation and configuration of this product com
plies
with all national, state, and local laws and codes related to locking and egress devices. SECO-LARM will not be held re
sponsible for the use
of this product in violation of any current laws or codes
IMPORTANTE:
Los usuarios e instaladores de est
e producto son responsables de garantizar que la instalación y configuración de este
producto cumpla con todas las leyes y códigos nacionales, estatales y locales relacionados con los dispositivos de cierre y e
greso.
SECO-LARM no será responsable por el uso de este producto en violación de las leyes o códigos vigentes.
IMPORTANT:
Un montage incorre
ct entraînant une exposition à la pluie ou à l'humidité à l'intérieur du boîtier peut provoquer un choc
électrique dangereux, endommager l'appareil et annuler la garantie.
/


