Page is loading ...

Page 1 of 7
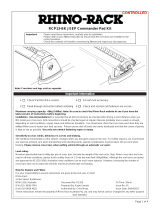
- Please refer to your vehicle manufacturers handbook for maximum roof load capacity.
- Any load transported on Roof Racks must be evenly distributed.
- Donotattempttottheroofrackstoyourvehicleunlessyoufullyreadandunderstandthettinginstructionsprovided.
- Please direct any questions to the dealer from where the roof racks were purchased.
- Checkthecontentsofkitbeforecommencingtmentandreportanydiscrepancies.
!
!
!
ü
km/h
WARNING!
? kg
2 x Crossbars = 5kg
CONTROLLED

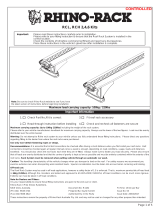
Maximum carrying capacity: 45kg (99lbs) includingweightoftheroofracks5kg (11lbs).
Load must be evenly distributed over the crossbars.
Use only non-stretch fastening ropes or straps.
Recommendations:
Allboltconnectionsmustbecheckedafterdrivingashortdistancewhenyourstinstallyourroofracks.Boltconnectionsshould
becheckedagainatregularintervals(onceaweekisenough,dependingonroadconditions,usage,loadsanddistancestravelled).
Youshouldalsochecktheconditionofyourroofrackseachtimetheyarere-tted.Alwaysmakesuretofastenyourloadsecurely.
Pleasealsoensurethatallloadsareevenlydistributedandthatthecentreofgravityiskeptaslowaspossible.Longloads(e.g.
canoesandkayaks)mustbesecuredfrontandrearwithnon-stretchfasteningropesorstraps.
Roof racks must be removed when putting vehicle through an automatic car wash.
Caution: The handling characteristics of the vehicle changes when you transport a load on the roof. For safety reasons we
recommendyouexerciseextremecarewhentransportingwind-resistantloads.Specialconsiderationmustbetakenintoaccount
whencorneringandbraking.
Off-road use:
Maximumpermissibleloadis45kg(99lbs)on2crossbarsincludingweightoftheroofracks,5kg(11lbs).Whenroofracksareto
beusedinoff-roadconditions,pleasebuildasafetyfactorof1.5intothisloadlimit.30kg(66lbs)foroff-roaduse.Althoughthe
roofracksaretestedandapprovedtoAS1235-2000,off-roadconditionscanbemuchmorerigorous.However,increasingthe
numberofcrossbarsdoesnotincreasethevehiclesmaximumpermissibleroofloading.
Note for Dealers and Fitters:
Itisyourresponsibilitytoensurethesettinginstructionsaregiventotheenduserorclient.
Placetheseinstructionsinthevehicle’sgloveboxafterinstallationiscomplete.
Rhino-Rack
3PikeStreet,Rydalmere, DocumentNo:R194
NSW2116,Australia. PreparedBy:CraigJones IssueNo:05
(Ph)(02)96384744 AuthorisedBy:ChrisMurty IssueDate:09/03/2015
(Fax)(02)96384822
These instructions remain the property of Rhino-Rack Australia Pty. Ltd. andmaynotbeusedorchangedforanyotherpurposethan intended.
Page 2 of 7
Jeep Wrangler JK MY11 hardtop
Rhino Track Mount - Jeep Wrangler JK MY11 Hardtop
XAU08220RRJK2 (2 door). XAU08220RRJK4 (4 door).
Hardtopmustberemovedfromvehicletotthetracksystem

Page 3 of 7
1Remove hardtop.
Refertovehiclemanufacturer’smanualforremovingthehardtop.
Jeep Wrangler JK MY11 hardtop Jeep Wrangler JK MY11 hardtop
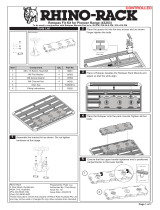
Parts List
Tools required:
Maskingtape.
Tape measure.
Markingpen.
Power or battery drill.
6.5mmdrillbit.
T40Torxkey.
C840(optional-soldseparately)
C840
3a,b
1
4
2
5
6
7
Item Component Name Qty 2d Qty 4d Part No.
1 EndCap(FL/RR) 2 2 M526
2 EndCap(FR/RL) 2 2 M525
3a RhinoTrack800mm 2 0 A256-800
3b RhinoTrack1200mm 0 2 A256-1200
4 M6x50mmSquareheadbolt 8 12 B143
5 Knob&M6nylocnut 8 12 M175
6 6mmx3mmO-ring 4 8 C347
7 ButylPatches 8 12 CA1266
8 Fittinginstruction 1 1 R194

Page 4 of 7
Track positioning.
Edgeoftrackcanbeusedtomarkastraightline.
a. Measure 24mmfromtangentofhardtopradiusfrontandrear.Markdrillingcentreline.
b. Frontoftrack.Measure160mm from front where the rubber seal meets.
2dr hardtop
24mm
24mm
160mm
3
Front
Front
Rear
Rear
800mm
24mm
C/L
24mm
2Masking tape.
Applymaskingtapetocurvedoutersurfaceof
hardtop.
Front
Jeep Wrangler JK MY11 hardtop

Page 5 of 7
4dr hardtop
5
Track positioning.
Edgeoftrackcanbeusedtomarkastraightline.
a. Measure 16mmfromtangentofhardtopradiusatfront,frontedgeoftrackhangsoveroninsidealittle.
Measure 26mmfromtangentofhardtopradiusatrear.Markdrillingcentreline.
b. Frontoftrack.Measure140mm from front where the rubber seal meets.
140mm
FrontRear
1200mm
26mm
C/L
16mm
26mm
16mm
Front Rear
42dr track mounting holes.
Drill4holesthroughhardtopatmeasurementsshown.
18mm 18mm250mm 250mm264mm
FrontRear
Jeep Wrangler JK MY11 hardtop Jeep Wrangler JK MY11 hardtop

Page 6 of 7
4dr track mounting holes.
Drill6holesthroughhardtopatmeasurementsshown.
FrontRear
6
18mm 18mm230mm 230mm244mm230mm 230mm
7Drilling of hardtop.
Drillthroughperpendiculartothesurfaceusinga
6.5mmdrillbit.Removemaskingtape.Cleanhardtop.
Attach O-rings.
Install rubber O-rings onto each square head bolt.
LocateboltsintheC-grooveonundersideoftrack.
8
O-ringsitsbetween
underside of track and
roof.
90°
1:Removethebackingtapefromthe
ButylPatches.
2:Placeoverholesdrilled.Oncein
place remove the rest of the protective
tape from the top of the patches.
Thispatchwillprovidethewatertight
seal
1.
9
Jeep Wrangler JK MY11 hardtop

Page 7 of 7
Fasten Track.
Fingertightenallsquareheadboltstolocatethetrack.Onceallthreadshaveengagedstarttighteningfromthe
centre and work towards the ends. DO NOT OVER TIGHTEN.
13
1
135
2
2 46
3 4
Tighten knobs
in order shown
(2 dr)
Tighten knobs
in order shown
(4 dr)
End caps.
Insert end caps into each end of the track.
Backing tape.
Peelwhitebackingtapeoffundersideoftrack.
10 11
Attach track.
Aligneachboltsothatitdropsintoitscorrespondinghole.
12
Slottorear.
Curvededge of track
faces outside of vehicle.
FrontRear
Jeep Wrangler JK MY11 hardtop Jeep Wrangler JK MY11 hardtop
/


