Page is loading ...


Quick Start Guide FELIX Pro L / XL
10 December 2019
Page 1
1 Safety
General safety
- Keep children under the age of 14 out of reach of the printer
- FELIXprinters are only suitable for professional use.
Considerations when in operation.
- Don’t leave the printer unattended, before making sure the
first layer is printed properly
- Don’t lean on the printer.
- Be careful with long hair and wide clothes.
- Don’t transport the printer.
- Make sure all moving parts can move without any obstructions.
- Don’t remove any objects from the hot plate while printing.
- Caution with any moving parts that move in the X, Y and Z
direction. Moving parts can have a pinching hazard.
Electronic safety
- Only use the power supplies and cables supplied by FELIXprinters.
Always turn off and unplug the printer before performing
maintenance or modifications.
- The power supply meets all CE mark regulations and is protected
against short-circuit, overload, over voltage and over
temperature.
Printer placement
- Place the FELIXprinter on a stable surface.
- Place the printer out of reach of children. Use the FELIXprinter in a
dry environment at room temperature.
Ventilate
- Good ventilation while printing is advised. When printing ABS,
small concentrations of styrene vapor can be released. This can
(in some cases) cause headaches, fatigue, dizziness, confusion,
drowsiness, malaise, difficulty in concentrating, and a feeling of
intoxication.
- We recommend using filament types shown on the
FELIXprinters website. Examples PLA, PETG, ABS-X, Glassbend
etc. Other types may be toxic; please follow instructions from
the filament supplier.
Caution with heater elements
- There is a potential risk of burn, as the print head can reach
temperatures of up to 275°C and the heated bed of up to 120°C.
- Don’t place objects on the heated bed, not even when the
printer is turned off.
- Always let the printer cool down for at least 5 minutes before
doing maintenance or modifications.
- Never try to print without a buildplate in the machine, this can
cause damage to the machine and heated bed.

Quick Start Guide FELIX Pro L / XL
10 December 2019
Page 2
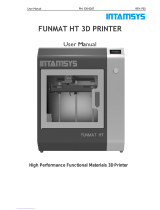
2 Introduction
Thank you for choosing FELIXprinters!
It is highly recommended to at least read this manual. It explains in short how to make your first print and contains important
information to operate the printer properly.
Kind regards, FELIXprinters
3 Contents
1 SAFETY ..................................................................................................................... 1
2 INTRODUCTION ...................................................................................................... 2
3 CONTENTS ............................................................................................................... 2
4 PRINTER SPECIFICATIONS ...................................................................................... 1
5 FELIX PRO L / XL AT A GLANCE.............................................................................. 1
6 WHAT’S IN THE BOX? .............................................................................................. 2
INSTALLING TEFLON TUBES ..................................................................................... 3
POWER ON.............................................................................................................. 4
7 DISPLAY OVERVIEW ................................................................................................ 5
CALIBRATION. ............................................ FOUT! BLADWIJZER NIET GEDEFINIEERD.
ERRORS DURING LEVELING .................................................................................... 11
8 Z CALIBRATION ..................................................................................................... 12
ERRORS................................................................................................................. 13
9 XY CALIBRATION .................................................................................................. 15
LOAD FILAMENT ................................................................................................... 17
CLEAN THE PRINT SURFACE ................................................................................... 18
10 PRINTING ........................................................................................................ 19
11 PRINT AND CONTROL PRINTER VIA WIFI OR LAN ...................................... 20
CONNECTING TO WIFI OR WLAN................................................................... 20
REMOTE CONTROL ......................................................................................... 20
PRINT VIA WEB INTERFACE. ............................................................................. 24
12 POWER LOSS RECOVERY ................................................................................ 26
13 TIPS AND TRICKS ............................................................................................ 29
FLEXIBLE FILAMENTS ...................................................................................... 29
MAINTENANCE ................................................................................................................. 30
HOW TO MAINTAIN/EXCHANGE HOT-ENDS ...................................................... 30
DUST CLEANERS ............................................................................................. 33
MOTION SYSTEM ............................................................................................ 33
14 DISPLAY MESSAGES ........................................................................................ 34

Quick Start Guide FELIX Pro L / XL
10 December 2019
Page 1
4 Printer specifications
System specifications
- Printer dimensions (L, W, H) 600 x 666 x 776 mm (XL)
- Printer dimensions (L, W, H) 906 x 666 x 966 mm (L)
- Weight 65 kg (L), 80 kg (XL)
- Power requirements: 220 V
Capabilities
- Build volume (L, W, H) 300 x 400 x 400 mm (L)
- Build volume (L, W, H) 600 x 400 x 600 mm (XL)
- Layer height range 0.05 - 0.25 mm (L) 0.05 – 0.35 (XL)
- Bed temperature: max. 110 °C
- Flex plate
- Software bed leveling
- Automatic nozzle calibrations
Extruders
- Diameter nozzle: 0.35 mm (L) 0.5 (XL) (optional 0.5 and
0.7mm)
- Nozzle temperature: max. 275 °C
- Full metal hot-ends
- Filament flow detection
Interface
- Capacitive Touchscreen, with embedded 1.2 Ghz quad
core processor.
- Print server (Repetier-Server)
- Webcam
- Print file management
- 16GB memory
Print materials
- Open source 1.75 mm filaments
- Tolerance: ± 0.15 mm
- PLA, PET(G), Flex, ABS-X, PVA, Wood, Glass
Connectivity
- USB flash drive
- WIFI
- Wired Ethernet
Software
- Simplify3D
- Open source Repetier-Host for FELIXprinters.

Quick Start Guide FELIX Pro L / XL
10 December 2019
Page 1
5 FELIX Pro L / XL at a glance
Display unit
Extruder
Heated bed
Filament roll
Power switch
Power plug
LAN port
Filament guide
USB port

Quick Start Guide FELIX Pro L / XL
10 December 2019
Page 2
6 What’s in the box?
A
1x Tweezers
F
1x Spatula
B
1x Power cable
G
3x Bed calibration tool
C
1x MicroSD card +
USB reader
H
1x Allen key set
D
2x Teflon tubes
I
1x Premium PLA roll
E
1x Wrench 14mm
Recommended tools:
NB: The box could contain extra materials like filament you have ordered.

Quick Start Guide FELIX Pro L / XL
10 December 2019
Page 3
Installing Teflon tubes

Quick Start Guide FELIX Pro L / XL
10 December 2019
Page 4
Power on
1. Insert the power cable.
2. Flip ON the UPS (optional) to activate power dip/loss recovery function. Battery will start to charge if not
fully charged already. For this to function properly, the battery needs to be charged.
NOTE: When this switch is on, the battery will charge itself until full even when the power switch is turned
off.
3. Flip ON the power switch.
- The lights of the print-head turn on immediately
- The screen boots up in about 40 seconds.
Power switch
UPS Switch
(power dip/loss recovery)
Ethernet port

Quick Start Guide FELIX Pro L / XL
10 December 2019
Page 5
7 Display Overview
Shutdown button: To properly shutdown the printer. First press the shutdown button before turning the power
switch off. This ensures proper shutting down of the operating system on the Display unit.

Quick Start Guide FELIX Pro L / XL
10 December 2019
Page 6
8 Printer calibration
For 3d printing, the first layer is the most important
layer. It is the basis of a print job (which can take
more than 70 hours in some cases). An improperly
printed first layer is mostly the cause of a failed
print. With the automatic calibration features
properly executed, the chance of failure will be
minimized. Also see the QuickStart guide for more
in depth calibration.
The calibration mechanism is dependent upon the
following features on the printer.
- The probe sensor in each hot-end.
- The leveling software.
So, when one of the above two systems is not
working properly, the printer will not be able to
calibrate.
What does the calibration do?
For the FELIX Pro L/XL to properly operate the calibrations
described in this chapter need to be performed.
8.1.1 Software based leveling the build plate.
To ensure the distance between the bed and the nozzles is the
same over the whole build plate. This is done automatically.
When to do this calibration?
- When changing to a new bed.
- When the first layer is not sticking to the bed
- When you see that the lines on the first layer,
significantly differ in thickness from one side to the
other side of the build plate.
- After transporting the printer.
When the auto bed leveling routine is started. The following
steps are performed.
1. The hot-ends heat up to 185 ˚C
2. The currently active extruder will touch the bed at a
couple of points.
3. The bed leveling software turn the Z spindles to make
the bed level. (Level in this case means that the
distance between the build plate and the hot-end is the
same over the whole bed surface).
4. After this the software will compensate the first couple
of layers to ensure a proper first layer.

Quick Start Guide FELIX Pro L / XL
10 December 2019
Page 7
8.1.2 Detecting the height difference between
the two hot-ends. (automated)
The extruders must operate at the same height. Due to
production tolerances and rotating mechanism of the right
extruder, this has to be calibrated. The printer will do this in an
automated way.
When to do this calibration?
- After changing one of the two hot-ends or nozzles.
- When you see the first purge lines are significantly
different in thickness.
The extruder height calibration routine performs the following:
1. The hot-ends heat up to 185 ˚C.
2. The printer homes all axes.
3. The Extruder moves to a certain position and probes
both extruders a couple of times.
8.1.3 Adjusting the x, y distance between two
hot-ends. (assisted)
The distance between two extruders need to be calibrated
properly in order for a dual head print to successfully finish. If
this is not done properly printed lines from both extruders might
overlap too much and cause a printed failure.
When to do this?
- After exchanging/servicing a hot-end
- When adjacent features printed with both extruders do
no not properly aligning.

Quick Start Guide FELIX Pro L / XL
10 December 2019
Page 8
How to do the automatic
calibration?
Please consult the instructions below.
Pro XL and L
For the XL and L the bed leveling works a little
differently from the Pro 2 and 3, follow these steps.
Touchscreen
Follow these steps to start the bed leveling, make
sure the bed is clean before starting.

Quick Start Guide FELIX Pro L / XL
10 December 2019
Page 9
Bed leveling itself
After this the machine will probe the bed and adjust
the bed to level the bed to the head of the machine,
this will insure a smooth first layer.
After this the machine should be ready to go If you
see the first layer being too far away from the bed
you can adjust it, follow these steps.
Touchscreen
Follow these steps to adjust the height of the first
layer.
By adjusting the coating thickness you can bring the
nozzle closer or farther away from the bed, - brings
it closer and + moves farther.

Quick Start Guide FELIX Pro L / XL
10 December 2019
Page 10
Examples
Too far away, set it closer. You can see the loose layers
Perfect first layer.
Just a little too close. You can see it start to build up at the edges

Quick Start Guide FELIX Pro L / XL
10 December 2019
Page 11
Errors during leveling
The machine uses the probe in the extruder to measure the build plate and adjust it accordingly to make the
bed itself leveled, during this process the probes are monitored and if they trigger you can get an error report
that says bed leveling failed or g33 leveling failed. If this happens first check if the machine can home normally if
the machine refuses to go up check our Z triggered manual, bed calibration manual.

Quick Start Guide FELIX Pro L / XL
10 December 2019
Page 12
9 Z calibration
Intro
The z calibration involves probing both heads so the machine knows what level both extruders are at, this is
crucial to avoid collision and make a successful dual or multi material print.
To start the process see the instructions below.
After this the machine will heat up and begin probing the heads and comparing the results.

Quick Start Guide FELIX Pro L / XL
10 December 2019
Page 13
Errors
Normally the machine’s Z offset is calibrated after this point but sometimes, a small change between them can
be observed. This is usually caused by having 2 probes which probe at different strengths which leads to them
not being calibrated correctly, this is easily adjusted see the instructions. This can only be done in the
touchscreen or when connected to the machine by USB.
You can see the red one is higher than the white one.

Quick Start Guide FELIX Pro L / XL
10 December 2019
Page 14
Adjust the Z offset to make the right head print higher or lower the machine calculates this and compares it to
the left nozzle and makes them print on the same level as each other. To make it easier – is further away + is
closer to the bed so if we were to change the value of -0.908 with 0.05 to make it 0.858 it would print 0.05 closer
than before

Quick Start Guide FELIX Pro L / XL
10 December 2019
Page 15
10 XY calibration
Intro
The process of aligning the X and Y offsets of the 2 extruders is crucial for dual color and multi material printing.
With this calibration the machine will print an example that you can match together, after it’s done the machine
will ask which point from 1 to 9 matches the best and stores these offsets. You should do this before dual color
printing and after changing a hot end.
See the instructions, on how to do this but first load both extruders with PLA.
After this the machine will heat up and start printing the example. Insert the best matching points into the
screen, you usually have to do this twice to match the offset correctly.

Quick Start Guide FELIX Pro L / XL
10 December 2019
Page 16
The middle point or 5 in this case should match, press
the number that best matches, into the screen and
repeat the process if it’s not 5.
/