MANUZOID
Explore
Explore
Bookmarks
Lexmark
X950 Series
Lexmark X950 Series Administrator's Manual
Type
Administrator's Manual
Brand
Lexmark
Size
874.08 KB
Category
Networking
Pages
79
Language
English
Table of contents
Contents
2
Devices covered in this guide
4
Simple-security devices
4
Advanced-security devices
4
Managing authentication and authorization methods
5
Understanding the basics
5
Authentication and authorization
5
Groups
7
Access Controls
7
Security Templates
7
Accessing the Embedded Web Server
7
Simple-security device access controls
8
Creating a Web page password and applying access control restrictions
8
Creating a PIN and applying access control restriction
9
Limiting access using basic security setup
10
Advanced-security building blocks
10
Configuring advanced building blocks from the control panel
10
Creating a password building block for advanced security setup
11
Creating a PIN building block for advanced security setup
11
Setting up internal accounts
12
Connecting your printer to an Active Directory domain
14
Using LDAP
15
Using LDAP+GSSAPI
17
Configuring Kerberos 5 for use with LDAP+GSSAPI
19
Using a security template to control function access
20
Managing certificates and other settings
24
Installing a Certificate Authority certificate on the device
24
Configuring the device for certificate information
24
Sample certificate request data
25
Creating a new device certificate
26
Viewing, downloading, and deleting a certificate
26
Setting certificate defaults
27
Managing devices remotely
28
Using HTTPS for device management
28
Setting a backup password
28
Setting up SNMP
29
Configuring security audit log settings
30
Updating firmware
31
Managing other access functions
33
Configuring confidential printing
33
Setting login restrictions
34
Enabling and disabling USB host ports
34
Enabling the security reset jumper
35
Enabling holding faxes
36
Enabling Operator Panel Lock
36
Securing network connections
38
Configuring 802.1X authentication
38
Configuring IP security settings
39
Configuring the TCP/IP port access setting
41
Setting the restricted server list
41
Securing data
42
Physical lock
42
Disk encryption
43
Checking disk encryption status
44
Erasing settings (non-volatile memory)
44
Disk file wiping
46
Erasing hard disk data
48
Out-of-service wiping
49
Statement of volatility
50
Disposing of a hard disk
51
Erasing volatile memory
51
Erasing non-volatile memory
51
Security solutions
52
Print Release
52
Secure Held Print Jobs
52
Card Authentication
52
Smart Card authentication
52
Security scenarios
54
Scenario: Printer in a public place
54
Scenario: Standalone or small office
55
Scenario: Network running Active Directory
56
Scenario: More security-aware environment (802.1X) and SNMPv3
57
Scenario: Network-based usage restrictions using access card
57
Troubleshooting
59
Login troubleshooting
59
USB device is not supported
59
Make sure that a supported smart card reader is attached
59
Printer home screen fails to return to a locked state when not in use
59
Make sure that the authentication token is installed and running
59
Make sure that PKI Authentication is installed and running
59
Login screen does not appear when a smart card is inserted
59
Make sure that the smart card is recognized by the reader
59
KDC and MFP clocks are out of sync
60
Make sure that the date and time settings on the printer are correct
60
Kerberos configuration file is not uploaded
60
Make sure that the Kerberos file has been uploaded
60
Cannot authenticate users
60
Make sure that the Realm specified in the Kerberos settings is in uppercase
60
Domain controller certificate is not installed
60
Make sure that the correct certificate is installed on the printer
60
KDC does not respond within the required time
61
Make sure that the IP address or host name of the KDC is correct
61
Make sure that the KDC is available
61
Make sure that Port 88 is not blocked by a firewall
61
Cannot find user realm in the Kerberos configuration file
61
Make sure that the Windows Domain is specified in the Kerberos settings
61
Cannot find realm on card in the Kerberos configuration file
61
Upload a Kerberos configuration file and make sure that the realm has been added to the file
61
Client is unknown
62
Make sure that the domain controller information is correct
62
Login does not respond at “Getting User Info”
62
User is logged out automatically
62
Increase the Panel Login Timeout interval
62
LDAP troubleshooting
62
LDAP lookups take a long time and then fail
62
Make sure that Port 389 (non-SSL) and Port 636 (SSL) are not blocked by a firewall
62
Make sure that the LDAP search base is not too broad in scope
62
LDAP lookups fail almost immediately
63
Make sure that the Address Book Setup contains the host name for the LDAP server
63
Make sure that the Address Book Setup settings are correct
63
Narrow the LDAP search base to the lowest possible scope that includes all necessary users
63
Make sure that the LDAP attributes for the user e-mail address and home directory are correct
63
Held Jobs/Print Release Lite troubleshooting
63
Cannot use the Held Jobs feature
63
Add the user to the appropriate Active Directory group
63
Cannot determine Windows user ID
64
Make sure that PKI Authentication sets the user ID for the session
64
No jobs are available for the user
64
Make sure that PKI authentication is set to the correct user ID
64
Make sure that the jobs were sent to the correct printer and were printed
64
Jobs are printing immediately
64
Make sure that PKI Held Jobs is installed and running
64
Make sure that all jobs are required to be held
65
Appendix
66
Appendix A: CA file creation
66
Appendix B: CA-Signed Device Certificate creation
66
Appendix C: Access controls
66
Glossary of Security Terms
76
Index
77
View document
Lexmark X950 Series Compatibility Manual
Type
Compatibility Manual
Brand
Lexmark
Size
3.08 MB
Category
Laser/LED printers
Pages
179
Language
English
Table of contents
Contents
3
Overview
7
Introduction
7
General information
8
Paper and label industry
8
Printing volumes
8
Testing print material
8
Design factors
9
Pick roller technology
11
Maintenance procedures
14
Troubleshooting
14
Card stock
16
Weight
16
Grain orientation
17
Coatings
18
Offset powders
19
Labels
20
Label characteristics
20
Printing on labels
20
Duplexing paper labels
20
Primary rib pattern design guidelines for reference edge alignment
22
Label components
23
Label design guidelines
25
Printer specifications
32
Lexmark C500n
32
Lexmark C510
33
Lexmark C520, C522, and C524
34
Lexmark C530, C532, and C534
36
Lexmark C540, C543, C544, and C546dtn
38
Lexmark C720
40
Lexmark C734 and C736
42
Lexmark C746 and C748
44
Lexmark C750
46
Lexmark C752
48
Lexmark C760 and C762
51
Lexmark C770, C772, C780, and C782
53
Lexmark C792e, C792de, C792dte, and C792dhe
54
Lexmark C910
56
Lexmark C912
58
Lexmark C920
59
Lexmark C925
61
Lexmark C935
62
Lexmark C950
64
Lexmark CS310n, CS310dn, CS410n, CS410dn, and CS510de
65
Lexmark CX310n, CX310dn, CX410e, CX410de, CX410dte, CX510de, CX510dhe, and CX510dthe
67
Lexmark E120
69
Lexmark E220
70
Lexmark E230, E232, E234(n), E330, and E332n
71
Lexmark E238, E240, E240n, E340, and E342n
72
Lexmark E250, E350, and E450n
73
Lexmark E260, E260d, E260dn, E360d, E360dn, E460dn, E460dw, and E462dtn
74
Lexmark E320, E322
75
Lexmark E321, E323
76
Lexmark MS310d, MS310dn, MS410d, MS410dn, MS510dn, MS610dn, and MS610de
77
Lexmark MS710 and MS711
79
Lexmark MS810, MS811, and MS812
82
Lexmark MX310dn, MX410de, MX510de, MX511de, MX511dhe, MX610de, MX611de, and MX611dhe
84
Lexmark MX710, MX711, MX810, MX811, and MX812
86
Lexmark T420
89
Lexmark T430
91
Lexmark T520, T522
93
Lexmark T620, T622
96
Lexmark T630, T632, T634
99
Lexmark T640, T642, T644
102
Lexmark T650, T652, T654, and T656dne
104
Lexmark W812
107
Lexmark W820
108
Lexmark W840
109
Lexmark W850
111
Lexmark X203n and X204n
113
Lexmark X215
114
Lexmark X264dn, X363dn, X364dn, and X364dw
116
Lexmark X422
118
Lexmark X463de, X464de, X466dte, and X466dtwe
119
Lexmark X500 and X502n
121
Lexmark X543, X544, and X546dtn
122
Lexmark X548
124
Lexmark X560
125
Lexmark X642e
127
Lexmark X644e, X646e
129
Lexmark X651de, X652de, X654de, X656de, and X658de
132
Lexmark X734, X736, and X738
135
Lexmark X746 and X748
137
Lexmark X782
139
Lexmark X792de, X792dte, X792dtfe, X792dtpe, X792dtme, and X792dtse
141
Lexmark X850, X852e, and X854e
143
Lexmark X860e, X862e, and X864e
145
Lexmark X925
147
Lexmark X940 and X945
149
Lexmark X950
150
Optra plus, 4039, 4029, 4019, WinWriter 600 printers
151
Optra C
155
Optra C710
155
Optra Color 1200
157
Optra E, Ep
158
Optra E310, E312
159
Optra Es special media printer
160
Optra K 1220
161
Optra M410, M412
162
Optra N
164
Optra S
165
Optra SC 1275
168
Optra T
169
Optra W810
172
Glossary
174
Index
178
View document
Lexmark X950 Series Datasheet
Type
Datasheet
Brand
Lexmark
Size
2.98 MB
Category
Multifunctionals
Pages
8
Language
English
View document
Lexmark X950 Series Datasheet
Type
Datasheet
Brand
Lexmark
Size
3.44 MB
Category
Multifunctionals
Pages
8
Language
English
View document
Lexmark X950 Series Driver Manual
Type
Driver Manual
Brand
Lexmark
Size
7.75 MB
Category
Multifunctionals
Pages
27
Language
English
View document
Lexmark X950 Series Fax Manual
Type
Fax Manual
Brand
Lexmark
Size
84.26 KB
Pages
4
Language
English
View document
Lexmark X950 Series Ftp Manual
Type
Ftp Manual
Brand
Lexmark
Size
72.21 KB
Pages
3
Language
English
View document
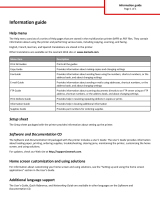
Lexmark X950 Series Information Manual
Type
Information Manual
Brand
Lexmark
Size
67.01 KB
Pages
1
Language
English
View document
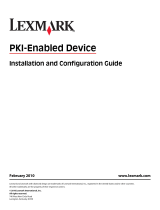
Lexmark X950 Series Installation And Configuration Manual
Type
Installation And Configuration Manual
Brand
Lexmark
Size
331.86 KB
Pages
38
Language
English
Table of contents
Contents
3
Configuring PKI-enabled devices
5
Overview
5
Supported devices
5
Before configuring the printer
5
Installing the firmware and applications
6
Verifying and updating the firmware
6
Installing the authentication token application
7
Installing PKI applications
7
Configuring printer settings for use with PKI applications
8
TCP/IP settings
8
Date and time
9
Panel login timeout
9
Certificate management
10
Configuring Scan to Email
10
SMTP settings
10
E-mail settings
11
Address Book setup
11
Configuring PKI Authentication
12
Logon screen
12
Active Directory Configuration
13
User Session and Access Control
14
Advanced Settings
14
Configuring PKI S/MIME Email
15
PKI S/MIME settings
15
Configuring PKI Scan to Network
16
General Settings
16
Default Scan Settings
17
Creating file shares
17
Editing or deleting a file share
19
Configuring PKI Held Jobs
19
PKI Held Jobs settings
19
Troubleshooting
21
Login Issues
21
“Unsupported USB Device” error message
21
The printer home screen does not return to a locked state when not in use
21
Login screen does not appear when a SmartCard is inserted
22
“The KDC and MFP clocks are different beyond an acceptable range; check the MFP's date and time” err ...
22
“Kerberos configuration file has not been uploaded” error message
22
Users are unable to authenticate
22
“The Domain Controller Issuing Certificate has not been installed” error message
23
“The KDC did not respond within the required time” error message
23
“User's Realm was not found in the Kerberos Configuration file” error message
23
“Realm on the card was not found in the Kerberos Configuration File” error message
24
“Client [NAME] unknown” error message
24
Login hangs for a long time at “Getting User Info...”
24
User is logged out almost immediately after logging in
24
LDAP issues
24
LDAP lookups take a long time, and then may or may not work
24
LDAP lookups fail almost immediately
25
Scan to Email issues
26
“Email cannot be sent because an error occurred trying to get your email address” error message
26
“Email cannot be sent because you are not authorized to perform this function” error message
26
“The email cannot be sent because a valid digital signature could not be found on your card” error m ...
26
“The email cannot be sent because it cannot be digitally signed when a manual login is performed” er ...
26
“Email cannot be sent. Unable to find valid encryption certificate for [E-mail address]” error message
27
Unable to send E-mail (SMTP-related issues)
27
Scan to Network issues
28
“You are not authorized to use this feature” Scan to Network error message
28
“This feature is not available because no file shares have been configured by the system administrat ...
28
“This feature is not available because you are not authorized to scan to any of the available file s ...
28
“An LDAP error occurred trying to retrieve the selected file share destination” error message
28
“No UNC Path has been defined for this destination” error message
29
“The scanned file size and saved file size do not match” error message
29
“User does not have read access to the file share; unable to verify the file size” error message
29
“Invalid filename specified” error message
30
“An error occurred connecting or writing to the File Share” error message
30
“The network share name does not exist on the specified file server” error message
30
Held Jobs/Print Release Lite issues
31
“You are not authorized to use this feature” Held Jobs error message
31
“Unable to determine Windows User ID” error message
31
“There are no jobs available for [USER]” error message
31
Jobs are printing out immediately
32
Notices
33
GNU Lesser General Public License
33
LEXMARK SOFTWARE LICENSE AGREEMENT
33
Additional copyrights
35
Index
37
View document
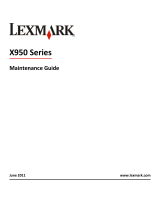
Lexmark X950 Series Maintenance Manual
Type
Maintenance Manual
Brand
Lexmark
Size
1.95 MB
Category
Print & Scan
Pages
34
Language
English
Table of contents
Contents
2
Maintaining the printer
3
Cleaning the exterior of the printer
3
Cleaning the scanner glass
4
Cleaning the printhead lenses
5
Emptying the hole punch box
9
Storing supplies
10
Checking the status of parts and supplies
11
Checking the status of parts and supplies on the printer control panel
11
Checking the status of parts and supplies from a network computer
11
Ordering parts and supplies
11
Ordering toner cartridges
11
Ordering a photoconductor unit
12
Ordering a waste toner bottle
12
Ordering staple cartridges
12
Ordering a maintenance kit
13
Replacing parts and supplies
13
Replacing a maintenance kit
13
Replacing a photoconductor unit
13
Replacing a toner cartridge
19
Replacing the waste toner bottle
21
Replacing a staple cartridge
26
Moving the printer
34
Before moving the printer
34
Moving the printer to another location
34
Shipping the printer
34
View document
Lexmark X950 Series Owner's manual
Type
Owner's manual
Brand
Lexmark
Size
327.90 KB
Category
Software
Pages
49
Language
English
Table of contents
Contents
3
Learning about the printer drivers
7
Using the printer drivers with UNIX and Linux
7
Installing the printer drivers
8
Before installing the printer drivers
8
Supported operating systems
8
System requirements
9
Installing on HP-UX
9
Installing on IBM AIX
10
Installing on Red Hat, Red Flag, Linpus, or SUSE Linux
11
Installing on Linspire, Debian, or Ubuntu Linux
11
Installing on Sun Solaris SPARC
11
Installing on Sun Solaris x86
12
Finding space to install the printer drivers package
13
Removing the printer drivers package
13
Removing remaining directories
14
Performing tasks
15
Opening the printer driver
15
Print Drivers Setup
15
Administrative Group
15
Web Browser
15
Paper Size
15
Desktop Integration
16
Asian Drivers
16
CUPS
16
Changing an administrative group name
16
Linux
17
Solaris and HP-UX
17
IBM AIX
17
Adding or removing a user from the administrative group
17
Creating virtual devices
17
Before creating virtual devices
17
Creating virtual devices using the Device Manager
17
Creating virtual devices from the command line
18
Creating a print queue
19
Creating print queues using the Add Print Queue Wizard
19
Creating print queues from the command line
19
Changing the print queue status
20
Changing the print queue properties
21
Working with printer aliases
22
Introduction to printer aliases
22
Creating a print queue with an alias
22
Displaying the alias of a print queue
22
Working with printer classes
22
Introduction to printer classes
22
Creating a class
23
Adding to a class
23
Removing a queue from a class
23
Managing printer groups
23
Creating a printer group
23
Adding a print queue to My Printers or another printer group
23
Removing a printer group
24
Printing from the command line
24
Printing a file
25
Printing a test page
25
Printing a duplex job
26
Printing multiple pages on one sheet
26
Printing multiple copies of a document
26
Changing the orientation of a print job
27
Changing the Lines Per Page setting
27
Defining the printable area when printing text files
27
Using the Print and Hold setting
28
Creating custom banner pages
29
Writing a banner program
29
Using a banner program
29
Changing a virtual device
29
Removing a virtual device
30
Changing a print queue to print to a different printer
30
Removing a print queue
30
Plugin Manager utility (software updates)
31
Using the Plugin Manager utility
31
Installing plugins from the printer driver
31
Removing plugins from the printer driver
31
Using the Plugin Manager utility from the command line
31
Frequently asked questions
33
Command line
33
Print queue management
33
Normal user or administrator
34
Default settings for the program or queue
34
Related topics
35
Troubleshooting
36
The print queue is empty but my document did not print
36
Jobs appear in the print queue for an extended time
36
The print queue does not receive print jobs
37
The print queue is disabled or down
37
The file I sent to the print queue came out as garbage
38
The hostname does not resolve
38
The printer driver is unable to find the network printer
39
My printer model is not listed
39
Jobs are not printing
39
Additional problems
40
Editions and Trademarks
41
Edition notice
41
UNITED STATES GOVERNMENT RIGHTS
41
Trademarks
41
Additional Licenses
42
Glossary
44
Index
48
View document
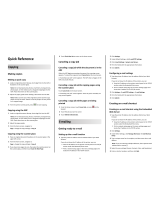
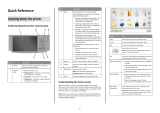
Lexmark X950 Series Quick Reference Manual
Type
Quick Reference Manual
Brand
Lexmark
Size
118.57 KB
Category
Multifunctionals
Pages
4
Language
English
View document
Lexmark X950 Series Reference guide
Type
Reference guide
Brand
Lexmark
Size
3.63 MB
Category
Laser/LED printers
Pages
24
Language
English
View document
Lexmark X950 Series Setup Manual
Type
Setup Manual
Brand
Lexmark
Size
223.45 KB
Category
Multifunctionals
Pages
37
Language
English
View document
Lexmark X950 Series Setup Manual
Type
Setup Manual
Brand
Lexmark
Size
629.50 KB
Category
Multifunctionals
Pages
38
Language
English
Table of contents
Notices
2
Table of Contents
3
Customer Support
6
Equipment Requirements and Specifications
4
1. iSeries and AS/400 LAN Printing Using the Printer Standard Network Port or MarkNet Internal Print Server
7
2. PSF/MVS LAN Printing Using the Standard Network Port or Internal Print Server
15
3. PSF/2 LAN Printing Using an Internal LAN Print Server
23
4. Printer and Host Timeout Values
30
5. Printer Messages and Problems
32
View document
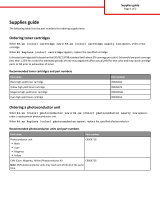
Lexmark X950 Series Supplies Manual
Type
Supplies Manual
Brand
Lexmark
Size
52.33 KB
Pages
2
Language
English
View document
Lexmark X950 Series Tech Note
Type
Tech Note
Brand
Lexmark
Size
71.79 KB
Pages
3
Language
English, French
View document
Lexmark X950 Series Technical Reference Manual
Type
Technical Reference Manual
Brand
Lexmark
Size
1.19 MB
Pages
170
Language
English
View document
Lexmark X950 Series Technical Reference Manual
Type
Technical Reference Manual
Brand
Lexmark
Size
706.83 KB
Category
Laser/LED printers
Pages
23
Language
English
Table of contents
Contents
2
Introduction
3
Supported devices
3
Installing the PRESCRIBE emulation option
3
Flash memory and hard disk support
4
Memorex printer compatibility mode
4
Overview of limitations
5
Certification test process
6
PRESCRIBE commands
7
Command support for P41G
7
Command explanations
11
BARC: draw BAR Code
11
CASS: CASSette
12
FRPO: Firmware RePrOgram
13
Fonts
20
Bitmap font simulation
20
Notices
22
Edition notice
22
Trademarks
22
Index
23
View document
Lexmark X950 Series Technical Reference Manual
Type
Technical Reference Manual
Brand
Lexmark
Size
916.90 KB
Category
Laser/LED printers
Pages
23
Language
English
Table of contents
Contents
2
Introduction
3
Supported devices
3
Installing the PRESCRIBE emulation option
3
Flash memory and hard disk support
4
Memorex printer compatibility mode
4
Overview of limitations
5
Certification test process
6
PRESCRIBE commands
7
Command support for P41F
7
Command explanations
11
BARC: draw BAR Code
11
CASS: CASSette
12
FRPO: Firmware RePrOgram
13
Fonts
20
Bitmap font simulation
20
Notices
22
Edition notice
22
Trademarks
22
Index
23
View document
Lexmark X950 Series Technical Reference Manual
Type
Technical Reference Manual
Brand
Lexmark
Size
706.03 KB
Category
Laser/LED printers
Pages
22
Language
English
Table of contents
Contents
2
Introduction
3
Supported devices
3
Installing the PRESCRIBE emulation option
3
Flash memory and hard disk support
3
Memorex printer compatibility mode
4
Overview of limitations
4
Certification test process
5
PRESCRIBE commands
6
Command support for P41G
6
Command explanations
10
BARC: draw BAR Code
10
CASS: CASSette
11
FRPO: Firmware RePrOgram
12
Fonts
19
Bitmap font simulation
19
Notices
21
Edition notice
21
Trademarks
21
Index
22
View document
Lexmark X950 Series User manual
Type
User manual
Brand
Lexmark
Size
387.07 KB
Pages
29
Language
English
View document
Lexmark X950 Series User manual
Type
User manual
Brand
Lexmark
Size
12.66 MB
Category
Multifunctionals
Pages
364
Language
English
Table of contents
Contents
2
Safety information
7
Learning about the printer
9
Finding information about the printer
9
Selecting a location for the printer
10
Printer configurations
11
Basic functions of the scanner
13
Understanding the ADF and scanner glass
14
Understanding the printer control panel
15
Understanding the home screen
16
Understanding the home screen
16
Using the touch-screen buttons
18
Setting up and using the home screen applications
21
Accessing the Embedded Web Server
21
Showing or hiding icons on the home screen
21
Activating the home screen applications
22
Setting up Forms and Favorites
22
Setting up Scan to Network
22
Setting up My MFP
23
Understanding WS-Scan
23
Setting up Remote Operator Panel
23
Exporting and importing a configuration
24
Additional printer setup
25
Turning on the printer
25
Installing internal options
26
Available internal options
26
Accessing the system board
26
Installing a memory card
28
Installing a flash memory or firmware card
30
Installing an Internal Solutions Port
31
Installing a printer hard disk
34
Removing a printer hard disk
38
Installing hardware options
40
Order of installation
40
Installing optional trays
41
Attaching cables
43
Verifying printer setup
44
Printing a menu settings page
44
Printing a network setup page
45
Setting up the printer software
45
Installing the printer software
45
Updating available options in the printer driver
46
Setting up wireless printing
47
Preparing to set up the printer on a wireless network
47
Installing the printer on a wireless network (Windows)
48
Installing the printer on a wireless network (Macintosh)
49
Installing the printer on an Ethernet network
52
Changing port settings after installing a new network Internal Solutions Port
55
Setting up serial printing
56
Minimizing your printer's environmental impact
59
Saving paper and toner
59
Using recycled paper
59
Conserving supplies
59
Saving energy
60
Using Eco-Mode
60
Reducing printer noise
60
Adjusting Sleep Mode
61
Using Hibernate Mode
62
Adjusting the brightness of the display
62
Recycling
63
Recycling Lexmark products
63
Recycling Lexmark packaging
63
Returning Lexmark cartridges for reuse or recycling
63
Loading paper and specialty media
64
Setting the paper size and type
64
Configuring Universal paper settings
64
Loading the standard or optional 520-sheet tray
64
Loading the optional 850- and 1,150-sheet trays
67
Loading the 2000-sheet high-capacity feeder
70
Loading the multipurpose feeder
72
Linking and unlinking trays
75
Linking trays
75
Unlinking trays
75
Creating a custom name for a paper type
76
Assigning a custom paper type name
76
Configuring a custom name
76
Paper and specialty media guide
77
Paper guidelines
77
Paper characteristics
77
Unacceptable paper
78
Selecting paper
78
Selecting preprinted forms and letterhead
79
Using recycled paper and other office papers
79
Storing paper
80
Supported paper sizes, types, and weights
81
Supported paper sizes
81
Supported paper types and weights
83
Supported finishing features
85
Setting the finisher exit bin
87
Printing
88
Printing a document
88
Printing a document
88
Printing in black and white
88
Adjusting toner darkness
88
Using Max Speed and Max Yield
89
Printing from a mobile device
89
Printing from a flash drive
90
Printing from a flash drive
90
Supported flash drives and file types
91
Printing on specialty media
92
Tips on using letterhead
92
Tips on using transparencies
92
Tips on using envelopes
93
Tips on using labels
93
Tips on using card stock
94
Printing confidential and other held jobs
94
Storing print jobs in the printer
94
Printing confidential and other held jobs
95
Printing information pages
95
Printing a font sample list
95
Printing a directory list
96
Canceling a print job
96
Canceling a print job from the printer control panel
96
Canceling a print job from the computer
96
Copying
97
Making copies
97
Making a quick copy
97
Copying using the ADF
97
Copying using the scanner glass
98
Copying film photos
98
Copying on specialty media
98
Copying on transparencies
98
Copying on letterhead
98
Customizing copy settings
99
Copying to a different size
99
Making copies using paper from a selected tray
99
Copying different paper sizes
100
Copying on both sides of the paper (duplexing)
100
Reducing or enlarging copies
101
Adjusting copy quality
101
Collating copies
102
Placing separator sheets between copies
102
Copying multiple pages onto a single sheet
103
Creating a custom copy job (job build)
103
Placing information on copies
104
Placing the date and time at the top of each page
104
Placing an overlay message on each page
104
Canceling a copy job
104
Canceling a copy job while the document is in the ADF
104
Canceling a copy job while copying pages using the scanner glass
104
Canceling a copy job while pages are being printed
105
Understanding the copy screens and options
105
Copy from
105
Copy to
105
Copies
105
Scale
105
Darkness
106
Sides (Duplex)
106
Collate
106
Content
106
Color
106
Advanced Options
107
Save As Shortcut
107
E-mailing
108
Getting ready to e-mail
108
Setting up the e-mail function
108
Configuring e-mail settings
108
Creating an e-mail shortcut
109
Creating an e-mail shortcut using the Embedded Web Server
109
Creating an e-mail shortcut using the touch screen
109
E-mailing a document
110
Sending an e-mail using the touch screen
110
Sending an e-mail using a shortcut number
110
Sending an e-mail using the address book
110
Customizing e-mail settings
111
Adding e-mail subject and message information
111
Changing the output file type
111
Canceling an e-mail
112
Understanding e-mail options
112
Recipients
112
Subject
112
Message
112
File Name
112
Original Size
112
Resolution
113
Color
113
Content
113
Darkness
113
Send As
113
Page Setup
114
Scan Preview
114
Advanced Options
114
Faxing
115
Getting the printer ready to fax
115
Initial fax setup
116
Choosing a fax connection
117
Connecting to an analog telephone line
117
Connecting to a DSL service
118
Connecting to a PBX or ISDN system
118
Connecting to a distinctive ring service
119
Connecting to an adapter for your country or region
119
Setting the outgoing fax or station name and number
120
Setting the date and time
120
Configuring the printer to observe daylight saving time
121
Creating shortcuts
121
Creating a fax destination shortcut using the Embedded Web Server
121
Creating a fax destination shortcut using the touch screen
121
Sending a fax
122
Sending a fax using the touch screen
122
Sending a fax using the computer
122
Sending a fax using shortcuts
123
Sending a fax using the address book
123
Customizing fax settings
124
Changing the fax resolution
124
Making a fax lighter or darker
124
Sending a fax at a scheduled time
124
Viewing a fax log
125
Blocking junk faxes
125
Canceling an outgoing fax
125
Canceling a fax while the original documents are still scanning
125
Canceling a fax after the original documents have been scanned to memory
126
Understanding fax options
126
Content
126
Resolution
126
Darkness
127
Color
127
Page Setup
127
Scan Preview
127
Delayed Send
127
Advanced Options
127
Holding and forwarding faxes
128
Holding faxes
128
Forwarding a fax
128
Scanning
130
Scanning to an FTP address
130
Creating shortcuts
130
Creating an FTP shortcut using the Embedded Web Server
130
Creating an FTP shortcut using the touch screen
131
Scanning to an FTP address
131
Scanning to an FTP address using the touch screen
131
Scanning to an FTP address using a shortcut number
131
Scanning to an FTP address using the address book
131
Understanding FTP options
132
FTP
132
File Name
132
Original Size
132
Send As
132
Color
132
Resolution
132
Darkness
133
Page Setup
133
Content
133
Scan Preview
133
Advanced Options
134
Scanning to a computer or flash drive
134
Scanning to a computer
134
Scanning to a flash drive
135
Understanding the Scan Center features
135
Using the ScanBack Utility
136
Understanding scan profile options
136
Original Size
136
Resolution
136
Color
136
Content
136
Darkness
137
Page Setup
137
Scan Preview
137
Advanced Options
137
Understanding printer menus
139
Menus list
139
Supplies menu
140
Paper menu
142
Default Source menu
142
Paper Size/Type menu
143
Configure MP menu
146
Substitute Size menu
146
Paper Texture menu
146
Paper Loading menu
148
Custom Types menu
150
Custom Names menu
150
Custom Scan Sizes menu
151
Universal Setup menu
151
Bin Setup menu
152
Reports menu
153
Reports menu
153
Network/Ports menu
154
Active NIC menu
154
Standard Network or Network [x] menus
154
Network Reports menu
156
Network Card menu
156
TCP/IP menu
157
IPv6 menu
158
Wireless menu
159
AppleTalk menu
159
Standard USB menu
160
Parallel [x] menu
162
Serial [x] menu
164
SMTP Setup menu
166
Security menu
167
Editing Security Setups menu
167
Miscellaneous Security Settings menu
168
Confidential Print menu
169
Disk Wiping menu
169
Security Audit Log menu
171
Set Date and Time menu
171
Settings menu
173
General Settings menu
173
Copy Settings menu
182
Fax Settings menu
187
Fax Mode (Analog Fax Setup) menu
187
Fax Mode (Fax Server Setup) menu
195
E-mail Settings menu
197
FTP Settings menu
202
Flash Drive menu
206
Print Settings
211
Setup menu
211
Job Accounting menu
213
Finishing menu
214
Quality menu
216
Utilities menu
220
XPS menu
221
PDF menu
221
PostScript menu
221
PCL Emul menu
222
HTML menu
224
Image menu
225
Booklet Adjustments menu
226
Help menu
227
Securing the hard disk and other installed memory
228
Statement of Volatility
228
Erasing volatile memory
228
Erasing non-volatile memory
229
Erasing printer hard disk memory
229
Configuring printer hard disk encryption
230
Maintaining the printer
231
Cleaning the exterior of the printer
231
Cleaning the scanner glass
232
Cleaning the printhead lenses
233
Emptying the hole punch box
237
Storing supplies
238
Checking the status of parts and supplies
239
Checking the status of parts and supplies on the printer control panel
239
Checking the status of parts and supplies from a network computer
239
Ordering parts and supplies
239
Ordering toner cartridges
239
Ordering a photoconductor unit
240
Ordering a waste toner bottle
240
Ordering staple cartridges
240
Ordering a maintenance kit
241
Replacing parts and supplies
241
Replacing a maintenance kit
241
Replacing a photoconductor unit
241
Replacing a toner cartridge
247
Replacing the waste toner bottle
249
Replacing a staple cartridge
254
Moving the printer
262
Before moving the printer
262
Moving the printer to another location
262
Shipping the printer
262
Administrative support
263
Finding advanced networking and administrator information
263
Checking the status of the printer
263
Checking the virtual display
263
Setting up e-mail alerts
263
Viewing reports
264
Restoring factory default settings
264
Clearing jams
265
Avoiding jams
265
Understanding jam numbers and locations
265
201–202 paper jams
267
203 paper jam
268
230 paper jam
270
231 paper jam
270
24x paper jam
272
250 paper jam
278
281 paper jam
279
4yy.xx paper jams
281
455 staple jam
286
28y.xx paper jams
288
Troubleshooting
289
Understanding printer messages
289
Adjusting color
289
Bin 2 is unable to lower, remove paper and check for an obstruction
289
Change [paper source] to [custom type name]
289
Change [paper source] to [custom type name] load [orientation]
289
Change [paper source] to [custom string]
289
Change [paper source] to [custom string] load [orientation]
290
Change [paper source] to [paper size]
290
Change [paper source] to [paper size] load [orientation]
290
Change [paper source] to [paper size] [paper type]
290
Change [paper source] to [paper size] [paper type] load [orientation]
290
Check [src] orientation or guides
291
Close cover [x]
291
Close door [x]
291
Disk corrupted
291
Empty the hole punch box
291
Error reading USB drive. Remove USB.
291
Error reading USB hub. Remove hub.
291
Fax memory full
291
Fax partition inoperative. Contact system administrator.
292
Fax server 'To Format' not set up. Contact system administrator.
292
Fax Station Name not set up
292
Fax Station Number not set up
292
Insert Tray [x]
292
Insert the hole punch box
292
Install Tray [x]
292
Load [src] with [custom type name]
293
Load [src] with [custom string]
293
Load [src] with [size]
293
Load [src] with [type] [size]
293
Load Manual Feeder with [custom type name]
294
Load Manual Feeder with [custom string]
294
Load Manual Feeder with [paper size]
294
Load Manual Feeder with [paper type] [paper size]
294
Load staples
294
Manual feeder expects [paper size]. Check [paper source] guides
295
Memory full, cannot print faxes
295
Power off, wait 2 seconds, power on
295
Remove paper from standard output bin
295
Remove paper from bin [x]
295
Remove paper from [linked set bin name]
295
Remove paper from all bins
295
Restore held jobs?
295
Scanner ADF Cover Open
296
Scan Document Too Long
296
SMTP server not set up. Contact system administrator.
296
Some held jobs were not restored
296
Unsupported disk
296
31.xx Missing or defective [color] cartridge
296
32.xx [color] cartridge part number unsupported by device
296
34 Incorrect paper size, check [paper source]
296
34 Incorrect paper type, check [paper source]
297
35 Insufficient memory to support Resource Save feature
297
36 Printer service required
297
37 Insufficient memory to collate job
297
37 Insufficient memory for Flash Memory Defragment operation
297
37 Insufficient memory, some Held Jobs were deleted
298
37 Insufficient memory, some held jobs will not be restored
298
38 Memory full
298
39 Complex page, some data may not have printed
298
40 [color] invalid refill, change cartridge
298
51 Defective flash detected
298
52 Not enough free space in flash memory for resources
298
53 Unformatted flash detected
299
54 Network [x] software error
299
54 Serial option [x] error
299
54 Standard network software error
299
55 Unsupported option in slot [x]
299
56 Parallel port [x] disabled
300
56 Serial port [x] disabled
300
56 Standard USB port disabled
300
56 Standard parallel port disabled
300
56 USB port [x] disabled
300
58 Too many disks installed
300
58 Too many flash options installed
301
58 Too many trays attached
301
59 Incompatible tray [x]
301
61 Remove defective disk
301
62 Disk full
301
63 Unformatted disk
301
80.xx Fuser life warning
302
80 Replace fuser
302
80 Scanner maintenance required, use ADF kit
302
80 Scheduled maintenance [x]
302
80 Replace paper pick rollers in [paper source], use parts and instructions in tray 1 compartment
302
82.xx Replace waste toner bottle
302
82.xx Waste toner bottle missing
302
82.xx Waste toner bottle nearly full
303
84 unsupported [color] photoconductor
303
84.xx [color] photoconductor missing
303
84.xx [color] photoconductor nearly low
303
84.xx [color] photoconductor low
303
83.xx Transfer module missing
303
84.xx Replace [color] photoconductor
303
88.2x Replace [color] cartridge
303
88.xx [color] cartridge low
304
88.xx [Color] cartridge very low
304
2yy.xx Close flatbed cover and load originals if restarting job
304
280.06 Paper missing
304
840.01 Scanner disabled by admin
305
840.02 Scanner disabled. Contact system administrator if problem persists.
305
1565 Emulation error, load emulation option
305
Solving basic printer problems
305
Solving printing problems
305
Multiple-language PDF files do not print
305
Printer control panel display is blank or displays only diamonds
305
Error message about reading USB drive appears
306
Print jobs do not print
306
Make sure there is no problem with your printer
306
Make sure the printer is ready to print
306
Check if a supply is missing or needs replacement
306
Check if the standard exit bin is full
306
Check if the paper tray is empty
306
Make sure the correct printer software is installed
306
Make sure the internal print server is working properly
306
Make sure you are using a recommended USB, serial, or Ethernet cable
306
Make sure printer cables are securely connected
307
Confidential and other held jobs do not print
307
Partial job, no job, or blank page prints
307
Make sure the printer has sufficient memory
307
Print job takes longer than expected
307
Reduce the complexity of the print job
307
Turn off the Page Protect setting
307
Change the environmental settings
307
Job prints from the wrong tray or on the wrong paper
308
Check the paper type and paper size settings
308
Incorrect characters print
308
Tray linking does not work
308
Load the same size and type of paper
308
Use the same Paper Size and Paper Type settings
308
Large jobs do not collate
308
Make sure Collate is set to On
308
Reduce the complexity of the print job
308
Make sure the printer has enough memory
309
Unexpected page breaks occur
309
Increase the Print Timeout value
309
Solving copy problems
309
Copier does not respond
309
Check the display for error messages
309
Check the power
309
Scanner unit does not close
309
Poor copy quality
309
Clear any error messages
310
Replace the toner or print cartridge
310
Clean the scanner glass
310
Adjust the toner darkness of the copy
310
Make sure the quality of the original document is satisfactory
310
Place the original document properly
310
Make sure to use the appropriate Copy settings
310
Partial document or photo copies
311
Check the document placement
311
Check the paper size setting
311
Solving scanner problems
312
Checking an unresponsive scanner
312
Scan was not successful
312
Check the cable connections
312
An error may have occurred in the program
312
Scanning takes too long or freezes the computer
312
Other software programs may be interfering with scanning
312
The scan resolution may be set too high
312
Poor scanned image quality
312
Check the display for error messages
312
The scanner glass may be dirty
313
Adjust the scan resolution
313
Check the quality of the original document
313
Check the document placement
313
Partial document or photo scans
313
Check the document placement
313
Check the paper size setting
313
Cannot scan from a computer
313
Check the display for error messages
313
Check the power
313
Check the cable connections
313
Solving fax problems
314
Fax and e-mail functions are not set up
314
Caller ID is not shown
314
Cannot send or receive a fax
314
Check the display for error messages
314
Check the power
314
Check the printer connections
314
Check the telephone wall jack
315
Review this digital phone service checklist
315
Check for a dial tone
315
Temporarily disconnect other equipment
315
Check for jams
315
Temporarily disable Call Waiting
315
Voice Mail service may be interfering with the fax transmission
315
The printer memory may be full
316
Can send but not receive faxes
316
Load paper
316
Check the ring count delay settings
316
Replace the toner or print cartridge
316
Can receive but not send faxes
316
The printer is not in Fax mode
316
The document is not loaded properly
316
Make sure the shortcut number is set up properly
317
Received fax has poor print quality
317
Resend the document
317
Replace the cartridge
317
Make sure the fax transmission speed is not set too high
317
Solving home screen applications problems
317
An application error has occurred
317
Check the system log for relevant details
317
Make sure the file name you want to scan to is not already in use
318
Adjust the scan settings
318
Contact customer support
318
Solving option problems
318
Option does not operate correctly or quits after it is installed
318
Reset the printer
318
Check to see if the option is connected to the printer
318
Make sure the option is installed correctly
318
Make sure the option is selected
319
Paper tray problems
319
Make sure the paper is loaded correctly
319
Reset the printer
319
Make sure the paper tray is installed correctly
319
2,000-sheet drawer problems
319
Check the drawer connection
319
Load paper
319
Clear any jams
319
Avoid paper jams
319
Memory card
320
Cannot detect flash memory card
320
Cannot detect printer hard disk
320
Internal Solutions Port does not operate correctly
320
Check the Internal Solutions Port (ISP) connections
320
Check the cable
320
Make sure the network software is configured correctly
320
Internal print server does not operate correctly
320
Check the print server connections
320
Make sure the network software is configured correctly
320
USB/parallel interface card does not operate correctly
321
Check the USB/parallel interface card connection
321
Check the cable
321
Solving paper feed problems
321
Paper frequently jams
321
Check the paper
321
Make sure there is not too much paper in the paper tray
321
Check the paper guides
321
The paper may have absorbed moisture due to high humidity
321
Paper jam message remains after jam is cleared
321
Check the paper path
321
Jammed pages are not reprinted
322
Turn on Jam Recovery
322
Solving print quality problems
322
Characters have jagged or uneven edges
322
Clipped images
322
Check the guides
322
Check the paper size setting
322
Fine horizontal lines appear on color pages
323
Shadow images appear on prints
323
Check the paper type and weight settings
323
Make sure the print cartridge is not low on toner
323
Gray background
324
Check the Toner Darkness setting
324
The toner cartridge may be worn or defective
324
Incorrect margins
324
Check the paper guides
324
Check the paper size setting
324
Light colored line, white line, or incorrectly colored line appears on prints
325
Make sure there is no defective toner cartridge
325
Make sure the photoconductor unit is not defective
325
Make sure the transfer module is not defective
325
Clean the printhead lenses
325
Paper curl
325
Check the paper type and weight settings
325
Load paper from a fresh package
325
Print irregularities
326
Load paper from a fresh package
326
Check the paper type and weight settings
326
Avoid textured paper with rough finishes
326
Make sure there is no defective toner cartridge
326
Make sure the transfer module is not defective
326
Make sure the fuser is not defective
326
Print is too dark
327
Check the darkness, brightness, and contrast settings
327
Load paper from a fresh package
327
Avoid textured paper with rough finishes
327
Check the Paper Type setting
327
Print is too light
327
Check the darkness, brightness, and contrast settings
328
Load paper from a fresh package
328
Avoid textured paper with rough finishes
328
Check the Paper Type setting
328
Printer is printing blank pages
328
Make sure there is no packing material left on the toner or print cartridge
328
Make sure the toner or print cartridge is not low on toner
329
Repeating defects appear on a page
329
Make sure the photoconductor unit is not defective
329
Make sure the fuser is not defective
329
Skewed print
329
Check the paper guides
329
Check the paper
329
Make sure the printer is clean or is not contaminated with paper dust
330
Make sure the paper feed rollers are clean and are not contaminated with dust
330
Solid color pages
330
Make sure the photoconductor is not defective and is installed correctly
330
Black or white streaks appear on transparencies or paper
331
Ensure that the fill pattern is correct
331
Check the paper type
331
Make sure the print cartridge is not low on toner
331
Streaked horizontal lines appear on prints
331
Select another tray or feeder
332
Make sure there is no worn, defective, or empty toner cartridge
332
Clear the paper path around the toner cartridge
332
Streaked vertical lines appear on prints
332
Select another tray or feeder
332
Make sure there is no worn, defective, or empty toner cartridge
332
Clear the paper path around the toner cartridge
332
Make sure there is no toner in the paper path
332
Toner fog or background shading appears on the page
333
Make sure the toner cartridge is installed correctly or is not defective
333
Make sure the transfer module is not worn or defective
333
Make sure the photoconductor unit is not worn or defective
333
Make sure the fuser is not worn or defective
333
Make sure the printer has recalibrated recently
333
Make sure the application has not specified an off-white background
333
Make sure no toner is in the paper path
333
Toner rubs off
333
Check the paper type and weight settings
334
Check the paper texture setting
334
Make sure the fuser is not worn or defective
334
Toner specks
334
Make sure there is no defective toner cartridge
334
Make sure the photoconductor unit is not defective
334
Call customer support
334
Transparency print quality is poor
334
Check the transparencies
334
Check the paper type setting
335
Solving color quality problems
335
FAQ about color printing
335
Embedded Web Server does not open
338
Check the network connection
338
Check the address entered in the Web browser
338
Temporarily disable Web proxy servers
338
Contacting customer support
338
Notices
339
Product information
339
Edition notice
339
UNITED STATES GOVERNMENT RIGHTS
340
Trademarks
340
Federal Communications Commission (FCC) compliance information statement
341
Modular component notice
341
Licensing notices
341
Noise emission levels
341
Waste from Electrical and Electronic Equipment (WEEE) directive
342
Static sensitivity notice
342
ENERGY STAR
342
Temperature information
343
Power consumption
343
Product power consumption
343
Power Saver
343
Off mode
344
Total energy usage
344
European Community (EC) directives conformity
344
Radio interference notice
344
Notice to users of the US telephone network: FCC requirements
344
Notice to users of the Canadian telephone network
346
Notice to users of the New Zealand telephone network
346
Notice to Users in the European Union
347
Regulatory notices for wireless products
348
Exposure to radio frequency radiation
348
Industry Canada (Canada)
348
Notice to users in the European Union
349
Statement of Limited Warranty
351
ADOBE SYSTEMS INCORPORATED NOTICE
353
Patent acknowledgment
353
Index
354
View document
Lexmark X950 Series User manual
Type
User manual
Brand
Lexmark
Size
3.69 MB
Pages
43
Language
English
View document
Lexmark X950 Series User manual
Type
User manual
Brand
Lexmark
Size
90.42 KB
Category
Laser/LED printers
Pages
4
Language
English
View document
Lexmark X950 Series User manual
Type
User manual
Brand
Lexmark
Size
10.65 MB
Category
Multifunctionals
Pages
362
Language
English
View document
Lexmark X950 Series User manual
Type
User manual
Brand
Lexmark
Size
779.02 KB
Category
Laser/LED printers
Pages
123
Language
English
View document
Lexmark X950 Series User manual
Type
User manual
Brand
Lexmark
Size
12.74 MB
Category
Multifunctionals
Pages
371
Language
English
View document
Lexmark X950 Series User manual
Type
User manual
Brand
Lexmark
Size
12.80 MB
Category
Multifunctionals
Pages
372
Language
English
View document
Lexmark X950 Series User manual
Type
User manual
Brand
Lexmark
Size
660.41 KB
Pages
30
Language
English
Table of contents
Contents
2
Introduction
4
Overview
4
Supported devices
4
Supported fonts and bar codes
6
Supported bar codes
6
Supported fonts
10
SAP support
11
Installing SAP device types
11
Modifying device types format and default settings
11
Using the Visual Bar Code Designer
13
Supported operating systems
13
Installing the Visual Bar Code Designer
13
Generating bar code data
13
Creating and managing forms
15
Forms overview
15
Forms Card menu
15
Bar code menu
18
Storing forms on the printer
18
Capturing raw data for mapping
18
Printing forms from a flash drive
19
Identifying the version of forms on the Forms and Bar Code Card
19
Font limitations
19
Troubleshooting
20
The printer does not respond after installation
20
Make sure the option card is installed correctly
20
Forms Manager cannot detect the printer
20
Check printer connections
20
Make sure the printer is connected to the network
20
International fonts do not print as expected
20
Switch to one of the fonts available on the DLE card
20
Mismatched fonts in Forms Composer and on printed forms
21
Check Forms Composer and printer settings
21
Check that font mapping has not been altered in Forms Composer
21
Check that font mapping has not been altered on the printer
21
Change the fonts in Forms Composer
21
Install matching fonts on the Forms and Bar Code Card
22
Form did not merge
22
Remove unnecessary characters from the beginning of the form
22
Form is printed in plain text
22
Review the activation conditions in Forms Composer
22
Make sure the Formsmerge function is not deactivated by Forms Manager
22
Cannot fax or e-mail merged output
22
Check Forms Composer and printer settings
22
Characters appear as boxes in PDFs viewed with Acrobat Reader
22
Use a different program to view PDFs
22
Not all forms are listed
23
Data filters are not working
23
Cannot add new forms
23
Delete unused forms before adding new forms
23
Defragment the flash memory
23
Bar codes do not print as expected
23
Make sure the Option Card is compatible with the printer on which it is installed
23
Make sure that the Option Card is installed
23
When using a PCL 5 emulation printer driver, make sure that the escape sequence used to generate the ...
23
Cannot generate bar codes using PCL emulation printer drivers
23
Disable advanced features using a PCL XL emulation printer driver
24
Unexpected results after printing a bar code
24
Make sure the PCL 5 emulation escape sequences are complete
24
Make sure all parameters needed are fully specified
24
Printed bar code is unreadable
24
Make sure Print Quality settings are not too dark or too light
24
Check the paper
24
Notices
25
Edition notice
25
UNITED STATES GOVERNMENT RIGHTS
25
Trademarks
25
Notice to users in the European Union
26
Index
29
View document
Lexmark X950 Series User manual
Type
User manual
Brand
Lexmark
Size
2.24 MB
Category
Multifunctionals
Pages
103
Language
English
View document
Lexmark X950 Series User manual
Type
User manual
Brand
Lexmark
Size
12.83 MB
Category
Multifunctionals
Pages
371
Language
English
View document
Lexmark X950 Series User manual
Type
User manual
Brand
Lexmark
Size
628.41 KB
Category
Laser/LED printers
Pages
125
Language
English
View document
Lexmark X950 Series User manual
Type
User manual
Brand
Lexmark
Size
2.20 MB
Category
Laser/LED printers
Pages
154
Language
English
View document
Lexmark X950 Series User manual
Type
User manual
Brand
Lexmark
Size
12.36 MB
Category
Laser/LED printers
Pages
360
Language
English
View document
Lexmark X950 Series User manual
Type
User manual
Brand
Lexmark
Size
3.44 MB
Category
Multifunctionals
Pages
8
Language
English
View document
Lexmark X950 Series User manual
Type
User manual
Brand
Lexmark
Size
205.27 KB
Pages
21
Language
English
Table of contents
Contents
3
Introduction to the network scan driver
5
Installing the network scan driver
5
System requirements
5
Supported operating systems
5
Installing on Fedora, Linpus Linux, SUSE Linux, Linux openSUSE, Red Hat Enterprise Linux, or Red Fla ...
5
Installing on Debian GNU/Linux or Ubuntu Linux
6
Checking if the network scan driver is installed
6
Scanning using a network printer
6
Removing the network scan driver
6
Scanning
7
Scanning using applications
7
Scanning using XSane
7
Scanning using OpenOffice.org
7
Scanning using GIMP
8
Scanning using a terminal window
8
Scanning multiple pages
8
Scanning both sides of a page
10
Canceling a scan
11
Adjusting scan settings
12
Adjusting scan settings using XSane or OpenOffice.org
12
Adjusting scan settings using scanimage
13
Setting default scan options
17
Troubleshooting
18
Printer scans the page, but image is not displayed on the computer
18
Printer stops scanning or prints a “Profile scan failed” page
18
Disable any firewall application
18
Open the required scanning ports (tcp: 9751-9760)
18
Accept the device certificate
18
Enter a valid scan job login
18
Only one page is displayed on the computer
19
Printer not compatible
19
SANE does not recognize the network scan driver
19
XSane displays garbage characters
20
Index
21
View document
Lexmark X950 Series User manual
Type
User manual
Brand
Lexmark
Size
72.14 KB
Category
Laser/LED printers
Pages
4
Language
English
View document
Lexmark X950 Series User manual
Type
User manual
Brand
Lexmark
Size
12.49 MB
Category
Laser/LED printers
Pages
352
Language
English
View document
Lexmark X950 Series User manual
Type
User manual
Brand
Lexmark
Size
3.06 MB
Category
Laser/LED printers
Pages
170
Language
English
Table of contents
Contents
3
Overview
7
Introduction
7
General information
8
Paper and label industry
8
Printing volumes
8
Testing print material
8
Design factors
9
Pick roller technology
11
Maintenance procedures
14
Troubleshooting
14
Card stock
16
Weight
16
Grain orientation
17
Coatings
18
Offset powders
19
Labels
20
Label characteristics
20
Printing on labels
20
Duplexing paper labels
20
Primary rib pattern design guidelines for reference edge alignment
22
Label components
23
Label design guidelines
25
Printer specifications
32
Lexmark C500n
32
Lexmark C510
33
Lexmark C520, C522, and C524
34
Lexmark C530, C532, and C534
36
Lexmark C540, C543, C544, and C546dtn
38
Lexmark C720
39
Lexmark C734 and C736
41
Lexmark C746 and C748
43
Lexmark C750
45
Lexmark C752
47
Lexmark C760 and C762
49
Lexmark C770, C772, C780, and C782
51
Lexmark C792e, C792de, C792dte, and C792dhe
53
Lexmark C910
54
Lexmark C912
56
Lexmark C920
57
Lexmark C925
59
Lexmark C935
60
Lexmark C950
62
Lexmark CS310n, CS310dn, CS410n, CS410dn, and CS510de
63
Lexmark CX310n, CX310dn, CX410e, CX410de, CX410dte, CX510de, CX510dhe, and CX510dthe
65
Lexmark E120
66
Lexmark E220
67
Lexmark E230, E232, E234(n), E330, and E332n
68
Lexmark E238, E240, E240n, E340, and E342n
69
Lexmark E250, E350, and E450n
70
Lexmark E260, E260d, E260dn, E360d, E360dn, E460dn, E460dw, and E462dtn
71
Lexmark E320, E322
72
Lexmark E321, E323
73
Lexmark MS310d, MS310dn, MS410d, MS410dn, MS510dn, MS610dn, and MS610de
74
Lexmark MS710 and MS711
76
Lexmark MS810, MS811, and MS812
78
Lexmark MX310dn, MX410de, MX510de, MX511de, MX511dhe, MX610de, MX611de, and MX611dhe
80
Lexmark MX710, MX711, MX810, MX811, and MX812
82
Lexmark T420
85
Lexmark T430
87
Lexmark T520, T522
89
Lexmark T620, T622
91
Lexmark T630, T632, T634
94
Lexmark T640, T642, T644
97
Lexmark T650, T652, T654, and T656dne
99
Lexmark W812
102
Lexmark W820
103
Lexmark W840
104
Lexmark W850
106
Lexmark X203n and X204n
107
Lexmark X215
109
Lexmark X264dn, X363dn, X364dn, and X364dw
111
Lexmark X422
112
Lexmark X463de, X464de, X466dte, and X466dtwe
114
Lexmark X500 and X502n
115
Lexmark X543, X544, and X546dtn
116
Lexmark X548
118
Lexmark X560
119
Lexmark X642e
120
Lexmark X644e, X646e
123
Lexmark X651de, X652de, X654de, X656de, and X658de
125
Lexmark X734, X736, and X738
128
Lexmark X746 and X748
130
Lexmark X782
132
Lexmark X792de, X792dte, X792dtfe, X792dtpe, X792dtme, and X792dtse
134
Lexmark X850, X852e, and X854e
136
Lexmark X860e, X862e, and X864e
138
Lexmark X925
140
Lexmark X940 and X945
142
Lexmark X950
143
Optra plus, 4039, 4029, 4019, WinWriter 600 printers
144
Optra C
147
Optra C710
148
Optra Color 1200
149
Optra E, Ep
150
Optra E310, E312
151
Optra Es special media printer
152
Optra K 1220
153
Optra M410, M412
154
Optra N
156
Optra S
157
Optra SC 1275
159
Optra T
160
Optra W810
163
Glossary
165
Index
169
View document
Lexmark X950 Series User manual
Type
User manual
Brand
Lexmark
Size
12.52 MB
Category
Multifunctionals
Pages
363
Language
English
View document
Lexmark X950 Series User manual
Type
User manual
Brand
Lexmark
Size
588.47 KB
Category
Print & Scan
Pages
56
Language
English
Table of contents
Overview and first steps
5
Overview
5
Using this guide
5
Supported devices
5
Operating environment
6
Before configuring the device (required)
6
Verifying physical interfaces and installed firmware
6
Attaching a lock
7
Encrypting the hard disk
7
Disabling the USB buffer
8
Installing the minimum configuration
9
Configuring the device
9
Configuration checklist
9
Configuring disk wiping
9
Enabling the backup password (optional)
9
Creating user accounts
10
Creating security templates
11
Controlling access to device functions
12
Disabling home screen icons
14
Administering the device
15
Using the Embedded Web Server
15
Settings for network-connected devices
15
Creating and modifying digital certificates
15
Setting up IPSec
17
Disabling the AppleTalk protocol
18
Shutting down port access
18
Other settings and functions
19
Network Time Protocol
19
Kerberos
19
Security audit logging
20
E-mail
22
Configuring security reset jumper behavior
25
User access
25
Creating user accounts through the EWS
25
Configuring LDAP+GSSAPI
27
Configuring Common Access Card access
30
Creating security templates using the EWS
32
Controlling access to device functions
33
Configuring PKI Held Jobs
33
Controlling access to device functions using the EWS
34
Troubleshooting
37
Login issues
37
“Unsupported USB Device” error message
37
The printer home screen fails to return to a locked state when not in use
37
Login screen does not appear when a Smart Card is inserted
37
time” error message
38
“Kerberos configuration file has not been uploaded” error message
38
Users are unable to authenticate
38
“The Domain Controller Issuing Certificate has not been installed” error message
39
“The KDC did not respond within the required time” error message
39
“User's Realm was not found in the Kerberos Configuration file” error message
39
“Realm on the card was not found in the Kerberos Configuration File” error message
40
“Client [NAME] unknown” error message
40
Login does not respond at “Getting User Info
40
User is logged out almost immediately after logging in
40
LDAP issues
41
LDAP lookups take a long time and then fail
41
LDAP lookups fail almost immediately
41
Held Jobs/Print Release Lite issues
42
“You are not authorized to use this feature” Held Jobs error message
42
“Unable to determine Windows User ID” error message
42
“There are no jobs available for [USER]” error message
42
Jobs are printing out immediately
43
Appendix A: Using the touch screen
44
Appendix B: Acronyms
46
Appendix C: Description of access controls
47
Appendix D: Using Common Access Cards
50
Notices
51
Index
54
View document
Lexmark X950 Series Using
Type
Using
Brand
Lexmark
Size
80.62 KB
Pages
4
Language
English
View document
Lexmark X950 Series Using
Type
Using
Brand
Lexmark
Size
74.86 KB
Pages
4
Language
English
View document