Page is loading ...

Accu-Cut Replacement Guide Strips
Instructions
NK9187
Version 1 - 5/2017
ITEM# KMA2699
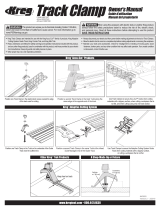
STEP 1. Remove the Starting Block from the
track. Remove the used Guide Strips (Fig. 1)
For assistance with any Kreg product, contact us through our Web site or call Customer Service.
www.kregtool.com • 800.447.8638
STEP 2. Clean the track using rubbing alcohol
before installing new Guide Strips (Fig. 2).
STEP 3. Peel away the backing from the new
Guide Strips (Fig. 3).
STEP 4. Align the new Guide Strips flush to the end of the track with the arrows (Fig. 4A & Fig. 4B). Position the Guide Strip against the shoulder and
press the new Guide Strip down on the track (Fig. 4C). The Guide Strip will be slightly shorter than the track end (Fig. 4D). Re-install the starting block
in the end of the track, and refer to Accu-Cut
TM
manual for calibration.
Fig. 1 Fig. 2 Fig. 3
Fig. 4A Fig. 4B Fig. 4C Fig. 4D
/
