Kreg Tool KFT4X8
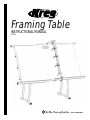
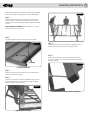
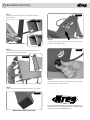
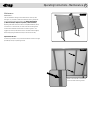
The KFT4X8 Framing Table is a versatile tool that can be used for a variety of woodworking projects, including framing, cabinetry, and furniture making. The table features a sturdy steel frame and a durable melamine surface that is resistant to glue and other chemicals. It also includes four independent clamping cylinders that provide over 400 lbs. of pressure per square inch, making it easy to hold workpieces securely in place.
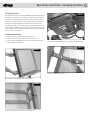
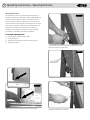
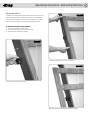
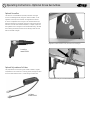
The KFT4X8 also features a squaring fence that can be easily adjusted to ensure that your workpieces are cut square and true. In addition, the fence can be retracted below the table surface for use when joining large frames. The table also includes an optional screw gun and hose, which makes it easy to drive screws into your workpieces quickly and easily.
Kreg Tool KFT4X8
The KFT4X8 Framing Table is a versatile tool that can be used for a variety of woodworking projects, including framing, cabinetry, and furniture making. The table features a sturdy steel frame and a durable melamine surface that is resistant to glue and other chemicals. It also includes four independent clamping cylinders that provide over 400 lbs. of pressure per square inch, making it easy to hold workpieces securely in place.
The KFT4X8 also features a squaring fence that can be easily adjusted to ensure that your workpieces are cut square and true. In addition, the fence can be retracted below the table surface for use when joining large frames. The table also includes an optional screw gun and hose, which makes it easy to drive screws into your workpieces quickly and easily.


-
 1
1
-
 2
2
-
 3
3
-
 4
4
-
 5
5
-
 6
6
-
 7
7
-
 8
8
-
 9
9
-
 10
10
-
 11
11
-
 12
12


Kreg Tool KFT4X8
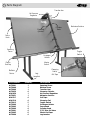
The KFT4X8 Framing Table is a versatile tool that can be used for a variety of woodworking projects, including framing, cabinetry, and furniture making. The table features a sturdy steel frame and a durable melamine surface that is resistant to glue and other chemicals. It also includes four independent clamping cylinders that provide over 400 lbs. of pressure per square inch, making it easy to hold workpieces securely in place.
The KFT4X8 also features a squaring fence that can be easily adjusted to ensure that your workpieces are cut square and true. In addition, the fence can be retracted below the table surface for use when joining large frames. The table also includes an optional screw gun and hose, which makes it easy to drive screws into your workpieces quickly and easily.
Ask a question and I''ll find the answer in the document
Finding information in a document is now easier with AI
Related papers


Other documents
-
Patio Festival PF19200 Operating instructions
-
Kreg 4′ x 8′ Face-Framing Table User manual
-
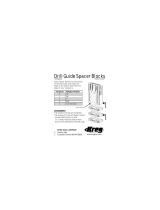 Kreg Drill Guide Spacer Block User manual
-
 Kreg MKJKIT User guide
-
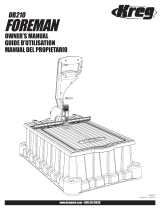 Kreg Foreman Pocket-Hole Machine User manual
-
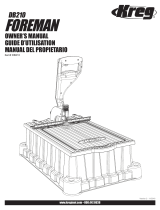 Kreg DB210 User manual
-
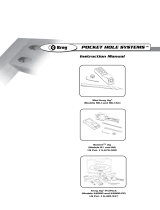
 Kreg Jig Instructional Manual
-
 Kreg Jig HD User manual
-
Grizzly Glue Gun H8175 User manual
-
 Kreg Adaptive Cutting System Project Table Replacement Top User manual


