
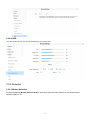
User
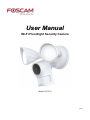
User Manual
Manual
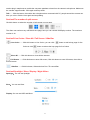
Wi-Fi Floodlight Security Camera
Model: FLC/F41
V1.0

Table of Contents
Security Warning...................................................................................................................................................................1
1 Overview............................................................................................................................................................................. 2
1.1 Key Features...........................................................................................................................................................2
1.2 Read before Use.................................................................................................................................................... 3
1.3 Packing Contents................................................................................................................................................... 3
1.4 Physical Description.............................................................................................................................................. 3
1.5 SD Card Management...........................................................................................................................................4
1.6 Add Device: Connection via the Foscam App...................................................................................................5
1.7 Installation............................................................................................................................................................... 8
2 Access the IP Camera in Foscam App.......................................................................................................................... 9
2.1 Foscam APP Surveillance Window.....................................................................................................................9
2. 2 Watch Live........................................................................................................................................................... 10
2.3 Camera Setting.................................................................................................................................................... 15
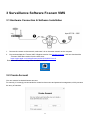
3 Surveillance Software Foscam VMS........................................................................................................................... 25
3.1 Hardware Connection & Software Installation................................................................................................ 25
3.2 Create Account.....................................................................................................................................................25
3.3 Add Device............................................................................................................................................................ 26
3.4 Surveillance Software GUI................................................................................................................................. 34
3.5 Advanced Camera Settings................................................................................................................................38
4 Appendix........................................................................................................................................................................... 70
4.1 Frequently Asked Questions..............................................................................................................................70
4.2 Default Parameters..............................................................................................................................................74
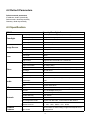
4.3 Specification..........................................................................................................................................................74
4.4 CE & FCC..............................................................................................................................................................75
4.5 WARRANTY......................................................................................................................................................... 76
4.6 Statement.............................................................................................................................................................. 78
5 Obtaining Technical Support......................................................................................................................................... 80

1
Security Warning
Please change the password of your doorbell regularly, using a combination of numbers, letters and
special characters.
We recommend that you regularly update your doorbell to the latest available software and firmware
versions to help ensure the best experience for your floodlight camera.
All electrical connections and wiring of this product must be carried out by a licensed electrician
in accordance with local and national wiring rules (e.g., AS/NZS 3000 Electrical Installations).
Check with local authorities for applicable requirements.
The product must be mounted on a flat vertical surface capable of supporting the full weight of the
product.
Ensure the voltage marked on the product is the same as the electrical power supply to be used.
Do not connect to a dimmer switch or timer.
Always turn off electricity at the main circuit breaker or fuse box before installation. Failing to do so
could result in serious injury, electrical shock, and/or risk of fire.
Do not rely on wall switch alone to turn off the power.
Do not open or disassemble the product. There are no user-serviceable parts inside.

2
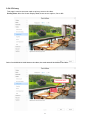
1 Overview
Welcome to use our product, Floodlight Camera. Foscam Floodlight Camera is an integrated IP Camera with a
color CMOS sensor enabling viewing in High Definition resolution.It combines a high quality digital video
camera, with a powerful free Foscam Video Management Software,to bring clear video to your desktop from
anywhere on your network or over the APP.
It supports P2P function. Thanks to the P2P easy access technology, you don’t need to do complicated Port
Forwarding and DDNS settings, you just need to scan the QR code on the side of the camera to connect it on
smart phone, or input the UID on CMS software to realize remote access.
The Floodlight supports the industry-standard H.264+ compression technology, drastically reducing file sizes
and conserving valuable network bandwidth.
The Spotlight Camera adds the bright motion-triggered LED spotlight to the IP cameras, which allows for color
night vision and powerful deterrent effect for criminals. Loading with smart features like PIR and motion
detection and siren, this outdoor spotlight cam gives you one-of-a-kind protection.
1.1 Key Features
4Megapixels Resolution
Supports WPA and WPA2 Encryption
Support full duplex real-time 2-way Audio
Floodlight brightness up to 2600lum
Supports Human detection&PIR detection
Wide Angle lens, diagonal Angle up to 156°
P2P Feature for Easy Remote Access
Support 2.4GHz&5GHz dual-band WiFi
Supports image snapshot
Supports dual-stream
Built-in IR LED, has excellent night vision image
Supports remote viewing & record from anywhere anytime
Multi-level users management with password protection
Supports multiple network protocols: IP、TCP、UDP、FTP、DHCP、RTSP
Providing Video Management Software to manage or monitor multi-cameras
Supports sound detection
Supports Alexa
Supports Google Assistant
Supports 128G Micro SD Card Storage(External) and Cloud storage

3
1.2 Read before Use
Please first verify that all contents received are complete according to the Package Contents listed below.
Before the Network Camera is installed, please carefully read and follow the instructions in the Quick Setup
Guide to avoid damage due to faulty assembly and installation. This also ensures the product is used properly
as intended.
1.3 Packing Contents
● Floodlight Camera× 1
● Junction Box × 1
● Foam Gasket × 1
● Expansion Screws× 1
● Quick Setup Guide × 1
● Power Adapter × 1
● Installation Hook× 1
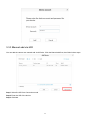
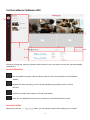
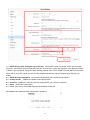
1.4 Physical Description
Junction Box:Used with floodlight camera wiring

4
Foam Gasket:Post it behind the floodlight camera
Locking Nut:Adjust the horizontal direction of the Floodlight.
Adjustment Knob:Adjust the direction of the floodlight vertically.
Floodlight:Floodlight brightness up to 2600lum.
Washer:Lock the floodlight camera with screws.
Screw:Lock the camera.
Cap:After the screw is installed, it is used to plug the screw hole.
Locking Collar:Adjust camera angle.
Microphone: Built-in Microphone.
Lens: Fixed focus lens.
LED Indicator:Infrared LED for night vision.
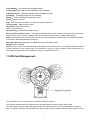
Passive Infrared motion sensor:The Passive Infrared motion sensor is electronic devices which are used in
some security alarm systems to detect motion of an infrared emitting source, usually a human body.
Reset: Press and hold on the reset button for 10 seconds. Releasing the reset button, the password will back
to the factory default administrator password.
Micro SD Card slot: Supports up to 128GB SD card for storing the video.
Speaker: Built-in speaker
NOTE: There are up to two labels located at the bottom of the camera, this is an important feature of original
Foscam cameras. If your camera does not have labels, it may be a clone. Cloned Foscam cameras can not
use original firmware and are not eligible for warranty or technical services.
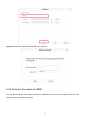
1.5 SD Card Management
The record files of the IP camera can be stored in the Micro SD Card.
This camera supports Micro SD Card and the max size of Micro SD card must be under 128G.
You need open the silicone plug, then plug the Micro SD card into Micro SD card slot inside the IP camera.
When you plug in the Micro SD card during the camera work process, please reboot the camera again, or else

5
the Micro SD Card may be cannot work well.When you re-install the cover, please ensure the tightness with
the camera.
Warning: After installing the Micro SD card, please cover the silicone plug in time to prevent water or steam
from falling into the device, causing damage or lens fog.
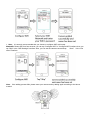
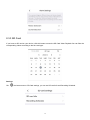
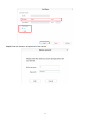
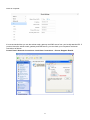
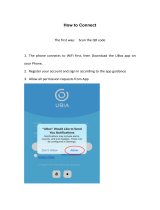
1.6 Add Device: Connection via the Foscam App
Scan the QR code below to download and install the Foscam APP.
To ensure a smoother video experience on your smart phone, it is recommended that your smart phone meet
the following specifications:
iOS: version 11 or higher.
Android: 4.1 or higher, using a device with a Graphics Processing Unit (GPU).
Note: For the best experience, please update the APP to the latest version!
1.6.1 WiFi Connection via the Foscam App
Please refer to the Quick Setup Guide.

6
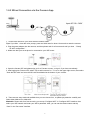
1.6.2 Wired Connection via the Foscam App
1. Connect the camera to your router with an Ethernet cable.
Tips: If you didn’t hear the voice prompt, press and hold reset for about 10 seconds to reset the camera.
2. Plug the power adapter into the camera, and then please wait for a few seconds until you hear “Ready
for WiFi configuration”.
3. Make sure that your smart phone is connected to your WiFi router.
4. Open the foscam APP and please sign up for a Foscam account, or sign in if you have one already.
5. After logging into Foscam APP, select “Tap to add a camera” or "+" icon on the upper right corner, then select
"Scan the QR code" and scan the QR code that labeled at the bottom of your camera.
6. There are two setup methods available that you can choose from, so please pay attention carefully and
follow either Method A or Method B.
Method A: Please wait for a few seconds, you can tap "Configure WiFi" in "Configure WiFi" interface, then
select your WiFi network and enter your WiFi's password. After, you can set the camera name and tap
“Save” in the "Set name" interface.

7
1. Note: It is strongly recommended that you choose to configure WiFi at this step.
Method B: Please wait for a few seconds, you can tap "Configure WiFi" in "Configure WiFi" interface, then you
tap "Skip" in the "WiFi Settings" interface. After, you can set the camera name and tap “Save”in the "Set
name" interface.
Note: If the adding process fails, please reset your camera and try adding again according to the above
method.

8
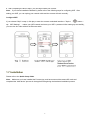
8. After completing the above steps, you can begin install your camera.
Note: If you choose installation Method B, please refer to the following steps for configuring WiFi . After
setting your WIFi, you can unplug your network cable and the camera will work normally.
Configure WiFi
If you selected "Skip" in step 6, click play to enter the camera credentials interface > Tap the “ ” button >
tap “WiFi Settings” > select your WiFi network and enter your WiFi’s password. After setting up successfully,
you can view live video without the Ethernet cable.
1.7 Installation
Please refer to the Quick Setup Guide.
Note: Make sure you have installed the Foscam App, and have scanned the camera QR code and
completed the "add device" process in the app before beginning the hardware installation process.

9
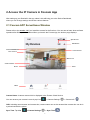
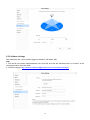
2 Access the IP Camera in Foscam App
After setting up your Doorbell in the app, select it this will bring you to the Device Dashboard,
where you can change settings and access various features.
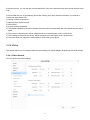
2.1 Foscam APP Surveillance Window
Please refer to the section 1.6 if you install the camera for the first time. You can start to learn about software
operation after finish quick installation.When you launch the Foscam App, the devices page displays.
Camera Name: A camera name which is displayed in the Foscam Cloud Service.
You can rename your camera’s name by tap Live > Camera Settings > Camera Info .
OSD: Including camera name and camera time, camera name can not be renamed but camera time can be in
synchronized with the phone.
Sync Time: Tap Live > Camera Settings > Sync Time .
Menu
Camera Name
Camera Date&Time
Split Screen
Cloud Service
More
Watch Live
Add Device
Face service
Share

10
Camera Date&Time: You can Sync Time, tap Live > Camera Settings > Advanced
Settings >Sync Time.
Share: You can share the camera with your family or other users to watch, tap Live > Camera Settings
> Share Camera > Family or Invite.
Cloud Service: Foscam Clound can save every alarm detection videos in ht cloud, and you can review every
event anywhere, any time.
More: Click the button to enter the more options page of the camera, Album, Alarm Settings, Playback,
Notification, Settings, Siren and Spotlight.
Add Device: Please refer to the Quick Setup Guide.
Split Screen: Click button, you can watch the live interface of 4 devices.
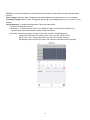
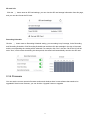
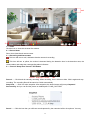
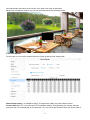
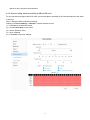
2. 2 Watch Live
Tap Live to view and listen to a live video

11
Back: To stop viewing and listening to the live feed, tap the Back.
Resolution: There are three types to identify different streams you have set. If select the QHD Mode, the
clearer video will become, and it will take up more bandwidth; If select the HD Mode, the video will not be as
clear as QHD Mode, and it will take up less bandwidth. The FHD Model is a value between FHD Mode and SD
Mode.
Resolution: Generally speaking, the larger the bit rate is, the clearer video will become. But the bit rate
configuration should combine well with the network bandwidth. When the bandwidth is very narrow, and bit rate
is large, that will lead to video can not play well.
On this screen, you can listen to a live stream, record clips, take a snapshot, activate two-way talk or full
screen.
If you want to catch the smaller details, pinch and drag any image as you do with photos on your smart phone.
Speaker / Mute the audio: Here you can see if there is a Speaker or muted.
Video:Click this button to start the recording function.
Snapshot:Click this button to Snapshot the image.
Two-way audio:Press and hold this button to enable microphone intercom.
Back
Speaker / Mute the audio
Resolution
Snapshot
Bit Rate
Camera Setting
Full screen
More Function
Two-way audio
Wired connection/
Wireless connection
Date
Timeline
Mirro
IR LED Schedule
Video
Floodlight

12
Date:Show date, Display the date, you can select the date through “<” or “>”button.
Timeline: If you have purchased cloud service, you can click the timeline to watch the storage video at the
corresponding time on the cloud.
Camera Setting: Click this button to set more.
IR LED Schedule: On this page, you can enable/disable the IR LED, and set the IR auto switch or you can
schedule it.
Auto: As default, the IR-Cut auto switch is ON, it means that the IR LED will be OFF during 9:00~18:00,
and the IR LED will be ON at the other time.
Day: it means that the IR LED will be OFF all the time.
Night: it means that the IR LED will be ON all the time.
Schedule: You can schedule the time to turn the IR LED OFF/ON.
Mirro: You can flip the image horizontally with this button.
Wired connection / Wireless connection: You can use this to see whether the current camera is in a wired or
wireless connection.
Bit Rate: You can see the current connection bit rate.
Full screen: Click this full screen button, you can live in full screen.
More Function: Here you can set Activity Detection and Sound Detection.
Note: Motion Detection and face Detection cannot be turned on at the same time.
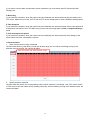
Activity Detection:To enable Activity detection, follow the steps below:

13
1 Enable Activity Detection button
2 Click Alarm when a movement is detected or Alarm only when a human is detected.
Alarm when a movement is detected: Alarm when a movement activity is detected.
Alarm only when a human is detected: Alarm only when a human is detected.
3 Sensitivity---- It supports three modes: Low, Middle and High. The higher the sensitivity, the
camera will be more easily alarmed. Select one motion sensitivity.
4 Triggered Interval----The interval time between two motion detection. Here supports
5s/6s/7s/8s/9s/10s/11s/12s/13s/14s/15s. Select one interval time.
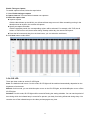
5 Schedule: Click the rectangle in the day of the week, and the corresponding time
setting will be selected. For example, click "Sun", the time "00:00~24:00"
will be set in "Sun", which means that when there is an object moving in
the detection area, the APP will receive the camera's Motion alarm Push messages.
6 Specify Detection area: Drag the selection box to select the alarm area,click back to pop up Save or
Cancel, select save.

14
.
NOTE: You must set the detection area and detection schedule, or else there is no alarm anywhere and
anytime.
Siren Linkage: When an alarm is triggered, the camera makes a sound.You can turn it on as needed.
Floodlight Linkage:When an alarm is triggered, and at night, the floodlight lights up, you can turn it on as
needed.
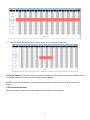
Sound Detection: To enable Sound detection, follow the steps below:
1 Enable Sound Detection button
2 Sensitivity---- It supports three modes: Low, Middle and High. The higher the sensitivity, the
camera will be more easily alarmed. Select a Sound sensitivity.
3 Schedule: Click the rectangle in the day of the week, and the corresponding time
setting will be selected. For example, click "Sun", the time "00:00~24:00"
will be set in "Sun", which means that when there is an object moving in
the detection area, the APP will receive the camera's Face alarm Push messages.

15
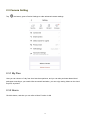
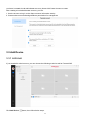
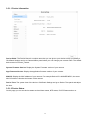
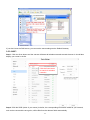
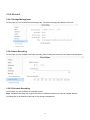
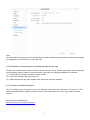
2.3 Camera Setting
Tap the button, goes to Device Settings to make advanced camera settings.
2.3.1 My Plan
Here you can choose a 7-day free cloud service experience, and you can also purchase related cloud
packages according to your needs. After successful activation, you can enjoy storing videos on the cloud
anytime, anywhere.
2.3.2 Alarm
Click this button, and then you can refer to More Function in 2.2

16
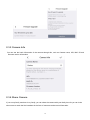
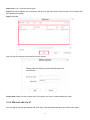
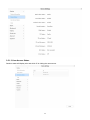
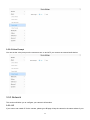
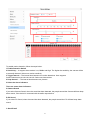
2.3.3 SD Card
If you have an SD card on your device, click this button to enter the SD-Card Video Playback.You can filter the
corresponding videos according to the time and type.
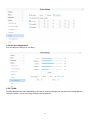
Settings
Click the button enter to SD Card settings, you can set SD card info and Recording Schedule.

17
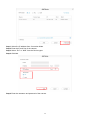
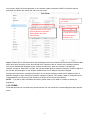
SD card info
Click the button enter to SD Card settings, you can view the SD card storage information from this page,
and you can also format the SD card.
Recording Schedule
Click the button enter to Recording Schedule setting, you can setting Loop Coverage, Voice Recording
and Recording Schedule. Click Recording Schedule set and then click the rectangle in the day of the week,
and the corresponding time setting will be selected. For example, click "Sun", the time "00:00~24:00" will be
set in "Sun", which means that during this time period, the camera will automatically record to the SD card.
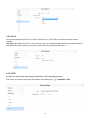
2.3.4 Firmware
You can see the current camera's firmware version and whether there is new software that needs to be
upgraded.if there is new firmware, you can click the “Upgrade” button to upgrade.

18
2.3.5 Camera Info
You can see the basic information of the camera through this, such as Camera name, UID, MAC ID and
firmware version information.
2.3.6 Share Camera
If you set up family members in my family, you can share the camera with your family here.Or you can invite
other users to watch the live broadcast in the form of username and account information.
Page is loading ...
Page is loading ...
Page is loading ...
Page is loading ...
Page is loading ...
Page is loading ...
Page is loading ...
Page is loading ...
Page is loading ...
Page is loading ...
Page is loading ...
Page is loading ...
Page is loading ...
Page is loading ...
Page is loading ...
Page is loading ...
Page is loading ...
Page is loading ...
Page is loading ...
Page is loading ...
Page is loading ...
Page is loading ...
Page is loading ...
Page is loading ...
Page is loading ...
Page is loading ...
Page is loading ...
Page is loading ...
Page is loading ...
Page is loading ...
Page is loading ...
Page is loading ...
Page is loading ...
Page is loading ...
Page is loading ...
Page is loading ...
Page is loading ...
Page is loading ...
Page is loading ...
Page is loading ...
Page is loading ...
Page is loading ...
Page is loading ...
Page is loading ...
Page is loading ...
Page is loading ...
Page is loading ...
Page is loading ...
Page is loading ...
Page is loading ...
Page is loading ...
Page is loading ...
Page is loading ...
Page is loading ...
Page is loading ...
Page is loading ...
Page is loading ...
Page is loading ...
Page is loading ...
Page is loading ...
Page is loading ...
Page is loading ...
-
 1
1
-
 2
2
-
 3
3
-
 4
4
-
 5
5
-
 6
6
-
 7
7
-
 8
8
-
 9
9
-
 10
10
-
 11
11
-
 12
12
-
 13
13
-
 14
14
-
 15
15
-
 16
16
-
 17
17
-
 18
18
-
 19
19
-
 20
20
-
 21
21
-
 22
22
-
 23
23
-
 24
24
-
 25
25
-
 26
26
-
 27
27
-
 28
28
-
 29
29
-
 30
30
-
 31
31
-
 32
32
-
 33
33
-
 34
34
-
 35
35
-
 36
36
-
 37
37
-
 38
38
-
 39
39
-
 40
40
-
 41
41
-
 42
42
-
 43
43
-
 44
44
-
 45
45
-
 46
46
-
 47
47
-
 48
48
-
 49
49
-
 50
50
-
 51
51
-
 52
52
-
 53
53
-
 54
54
-
 55
55
-
 56
56
-
 57
57
-
 58
58
-
 59
59
-
 60
60
-
 61
61
-
 62
62
-
 63
63
-
 64
64
-
 65
65
-
 66
66
-
 67
67
-
 68
68
-
 69
69
-
 70
70
-
 71
71
-
 72
72
-
 73
73
-
 74
74
-
 75
75
-
 76
76
-
 77
77
-
 78
78
-
 79
79
-
 80
80
-
 81
81
-
 82
82


Ask a question and I''ll find the answer in the document
Finding information in a document is now easier with AI
Related papers
-
Foscam B4 User manual
-
Foscam DBW5 User manual
-
Foscam F41 Quick Installation Guide
-
-
-
-
Foscam S41 User manual
-
-
-
Other documents
-
 XPARKIN B0BRJBVW24 Operating instructions
-
BACKYARD EXPRESSIONS PATIO · HOME · GARDEN 908798 Operating instructions
-
HOSAFE COM CQ1S Wireless Solar Security Camera User guide
-
OzSpy HAIXNAN2MP User manual
-
Shenzhen Luview JY683IPC Installation guide
-
GENIUSPY GS RV18CMR Series Rear View IP Camera Owner's manual
-
Tuya CR02 User manual
-
 hikam Q7 Quick Manual
-
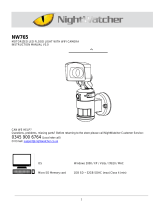 NightWatcher NW765 User manual
-
AREBI A10PLUS User manual


