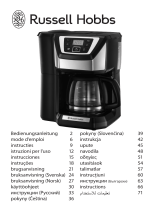
Unold 28736 Datasheet

Category
Coffee makers
Type
Datasheet
INHALTSVERZEICHNIS
Bedienungsanleitung Modell 28736
Technische Daten .................................. 8
Symbolerklärung .................................... 8
Für Ihre Sicherheit ................................. 8
Vor dem Zubereiten des ersten Kaffees .... 10
Kaffeebohnen ........................................ 10
Einstellen der Uhrzeit ............................ 11
Einstellen der Kaffeestärke ..................... 11
Einstellen des Mahlgrades ...................... 11
Kaffee zubereiten .................................. 11
Kaffee zubereiten mit Zeitvorwahl ........... 13
Reinigen und Pflegen ............................. 14
Entkalken ............................................. 14
Garantiebestimmungen .......................... 15
Entsorgung / Umweltschutz .................... 15
Informationen für den Fachhandel ........... 15
Service-Adressen ................................... 16
Bestellformular Ersatzteile ...................... 17
Instructions for use Model 28736
Technical data ....................................... 18
Explanation of symbols ........................... 18
For your safety ....................................... 18
Prior to preparing coffee for the first time 20
Coffee beans ......................................... 20
Setting the time .................................... 20
Setting the coffee strength ..................... 21
Adjusting the degree of grinding .............. 21
Brewing coffee ..................................... 21
Brewing coffee with the time preselect .... 23
Cleaning and care .................................. 23
Descaling .............................................. 24
Guarantee Conditions ............................. 24
Waste Disposal/Environmental Protection . 24
Service ................................................. 16
Notice d’utilisation modèle 28736
Caractéristiques techniques .................... 25
Explication des symboles ........................ 25
Pour votre sécurité ................................. 25
Avant la préparation du premier café ....... 27
Grains de café ....................................... 27
Réglage de l’heure ................................. 27
Réglage de l’intensité du café ................. 27
Réglage de la mouture ........................... 28
Préparation du café .............................. 28
Nettoyage et entretien ............................ 29
Détartrage ............................................. 29
Conditions de Garantie ........................... 30
Traitement des déchets/Protection de
l’environnement ..................................... 30
Service ................................................. 16
Gebruiksaanwijzing model 28736
Technische gegevens ............................. 31
Verklaring van de symbolen ..................... 31
Voor uw veiligheid .................................. 31
Voor het eerste gebruik ........................... 32
Koffiebonen .......................................... 33
Tijd instellen ......................................... 33
Koffiesterkte instellen ............................ 33
Maalgraad instellen ................................ 33
Koffie zetten ........................................ 34
Koffie zetten met een timer .................... 35
Reiniging en onderhoud ......................... 35
Ontkalken ............................................. 36
Garantievoorwaarden .............................. 36
Verwijderen van afval/
Milieubescherming ................................ 36
Service ................................................. 16
Istruzioni per l’uso modello 28736
Dati tecnici .......................................... 37
Significato dei simboli ........................... 37
Per la vostra sicurezza ............................ 37
Prima di preparare il primo caffè ............. 38
Caffè in chicchi ..................................... 39
Impostazione dell‘ora ............................. 39
Regolazione dell‘intensità del caffè ......... 39
Regolazione del grado di macinatura ....... 39
Preparazione del caffè ........................... 40
Preparazione del caffè con
temporizzazione ..................................... 41
Pulizia e cura ........................................ 41
Decalcificazione .................................... 42
Norme die garanzia ................................ 42
Smaltimento / Tutela dell’ambiente ......... 42
Service ................................................. 16
Instrucciones de uso modelo 28736
Datos técnicos ...................................... 44
Explicación de los símbolos .................... 44
Para su seguridad .................................. 44
Antes de preparar el primer café ............. 46
Granos de café ...................................... 46
Ajustar la hora ....................................... 46
Ajustar el grado de concentración
del café ................................................ 46
Ajuste del grado de molido ..................... 47
Preparar café ........................................ 47
Preparar café con preselección
de tiempo ............................................. 48
Limpieza y cuidado ................................ 49
Descalcificación .................................... 49
Condiciones de Garantia ......................... 50
7
6 D Öffnen-Taste für Schwenkarm
GB Open button for swivel arm
F Touche d'ouverture pour le bras
pivotant
NL Openen-knop voor zwenkarm
I Tasto di apertura del braccio
rotante
E Tecla de abrir para brazo giratorio
CZ Tlačítko otevření pro otočné
rameno
PL Przycisk otwierania ramienia
odchylnego
3 D Aromadeckel für Bohnenbehälter
GB Aroma protection lid for bean
container
F Couvercle à arômes pour le réservoir
à grains
NL Aromadeksel voor bonenreservoir
I Coperchio salvaroma del contenitore
chicchi
E Tapa para conservación del aroma en
el contenedor de café en granos
CZ Kryt chránící aroma na zásobník
kávových zrn
PL Pokrywa pojemnika na kawę ziarnistą
zachowująca aromat
4 D Bohnenbehälter
GB Bean container
F Réservoir à grains
NL Bonenreservoir
I Contenitore chicchi
E Contenedor de café en granos
CZ Zásobník kávových zrn
PL Pojemnik na kawę ziarnistą
5 D Deckel Wassertank
GB Water tank lid
F Couvercle du réservoir d'eau
NL Deksel watertank
I Coperchio del serbatoio dell'acqua
E Tapa del depósito de agua
CZ Kryt zásobníku vody
PL Pokrywa zbiornika wody
7 D Schwenkarm mit Filterhalter-
Aufnahme
GB Swivel arm with filter holder
receptacle
F Bras pivotant avec logement du
porte-filtre
NL Zwenkarm met filterhouder-opname
I Braccio rotante con alloggiamento
portafiltro
E Brazo giratorio con alojamiento del
soporte del filtro
CZ Otočné rameno s úchytem držáku
filtru
PL Ramię odchylne z zamocowaniem
obsady filtru
8 D Warmhalteplatte
GB Warming plate
F Plaque de maintien au chaud
NL Warmhoudplaat
I Piastra di tenuta in caldo
E Placa calentadora
CZ Ohřívací deska
PL Płyta grzejna utrzymująca ciepło
9 D Glaskanne mit Deckel
GB Glass pot with lid
F Verseur en verre avec couvercle
NL Glazen kan met deksel
I Bricco in vetro con coperchio
E Jarra de cristal con tapa
CZ Skleněná konvice s krytem
PL Dzbanek szklany z pokrywą
10 D Knopf für den Mahlgrad
GB Knob for grinding setting
F Réglage degré de finesse
NL Knop Maalfijnheid
I Regolatore grado di macinatura
E Ajustador grado de moltura
CZ Tlačítko množství mleté
PL Regulatory stopnia mielenia
16
MENAGROS SA
Route der Servion
CH - 1083 Mezières
Telefon +41 (0) 21 9 03 01-15
Telefax +41 (0) 21 9 03 01-11
Internet www.menagros.ch
SERVICE-ADRESSEN
DEUTSCHLAND
ÖSTERREICH SCHWEIZ
POLEN TSCHECHIEN
Mannheimer Straße 4
68766 Hockenheim
Kundendienst
Telefon +49 (0) 62 05/94 18-27
Telefax +49 (0) 62 05/94 18-22
Internet www.unold.de
Reparaturabwicklung, Ersatzteile:
ESC Electronic Service Center GmbH
Molitorgasse 15
A-1110 Wien
Telefon +43 (0) 1/9 71 70 59
Telefax +43 (0) 1/9 71 70 59
„Quadra-net“ Sp. z o.o.
Skadowa 5
61-888 Poznan Skadowa 5
Internet www.quadra-net.pl
befree.cz s.r.o.
Škroupova 150
537 01 Chrudim
Telefon +42 0 46 46 01 881
Sie möchten innerhalb der Garantiezeit ein Gerät zur Reparatur einsenden? Auf unserer
Internetseite www.unold.de/ruecksendung können Sie sich einen Rücksendeschein ausdrucken,
um damit das Paket kostenlos bei der Post abzugeben (nur für Einsendungen aus Deutschland
und Österreich).
18
INSTRUCTIONS FOR USE MODEL 28736
FOR YOUR SAFETY
TECHNICAL DATA
1. Please read the following instruc-
tions and keep them on hand for
later reference.
2. This appliance can be used by
children aged from 8 years and
above and persons with reduced
physical, sensory or mental capa-
bilities or lack of experience and
knowledge if they have been given
supervision or instruction concer-
ning use of the appliance in a safe
way and understand the hazards
involved. Children shall not play
with the appliance. Cleaning and
user maintenance shall not be
made by children without supervi-
sion.”
3. Children should be supervised to
ensure that they do not play with
the appliance.
4. Keep the appliance out of the reach
of children.
5. Connect appliance only to an AC
power supply with voltage corres-
ponding to the voltage on the rating
plate.
6. Do not operate this appliance with
an external timer or remote control
system.
Power: 900–1050 watt, 50 Hz, 220–240 V~
Pot: Glass pot with lid and scale
Volume: 1.5 litres, max. 12 cups
Filter size: Permanent filter or paper filter 1 x 4
Dimensions Approx. 20.8 x 31.3 x 42.2 cm (L/W/H)
Weight: Approx. 4.9 kg
Power cord length: Approx. 90 cm, permanently attached
Features: Stainless steel housing, LC display, bean container
with aroma protection lid, drip stop, integrated grinder,
integrated water tank, time preselection, time display, cup
and coffee strength selection, indicator lights
Accessories: Permanent filter, operating instructions
Equipment features, technology, colours and design are subject to change without
notice. Errors and omissions excepted
EXPLANATION OF SYMBOLS
This symbol denotes a possible hazard which could cause injury or
damage to the appliance.
This symbol indicates a potential burning hazard. Please be especially
careful at all times here.
19
7. For reasons of electrical safety,
never immerse the appliance or the
power cord in water or other liquids.
8. For reasons of electrical safety, do
not clean the appliance in the dish-
washer.
9. The switch and power cord should
never come into contact with water
or other liquids. If this ever hap-
pens, all parts must be completely
dry before operating the appliance
again.
10. Never touch the appliance or power
cord with wet hands.
11. The appliance is intended for
household use only, or for similar
areas of use, such as,
kitchenettes in businesses, offices
or other workplaces,
agricultural enterprises,
for use by guests in hotels, motels
or other lodgings,
in private guest houses or holiday
homes.
12. For safety reasons, never place the
appliance on hot surfaces, a metal
tray or a wet surface.
13. Do not place the appliance or power
cord near open flames during ope-
ration.
14. Always use the coffeemaker on a
level, uncluttered and heat-resis-
tant surface.
15. The appliance may be used only for
brewing coffee, never, under any
circumstances, for heating milk or
other liquids or keeping them warm.
16. Ensure that the power cord does not
hang over the edge of the counter
top or table, since this can cause
accidents, for example if small
children pull on the cord.
17. Route the power cord so that there
is no possibility of the cord being
pulled or tripped over.
18. Do not wrap the power cord around
the appliance and avoid kinking of
the power cord to prevent damage.
19. Only use the coffeemaker indoors.
20. Ensure that only coffee beans are in
the bean container. Foreign objects
can destroy the grinder.
21. When in use, never cover the cof-
feemaker, since this could cause
the appliance to overheat.
22. To brew coffee, use fresh, clean
water and fill the water tank to at
least the lowest mark (2 cups) or at
most to the MAX mark.
23. Do not switch on the appliance until
after you have filled the water tank
with water.
24. In case of repeated use, allow the
appliance to cool off at least 5
minutes before next use.
25. Never use the coffee pot in the mic-
rowave; it is not suitable for such
use.
26. Do not move the appliance as long
as it is in operation, to prevent inju-
ries.
27. Ensure that all users, especially
children, are aware of the danger of
injury from escaping steam and hot
splashing water – danger of burns!
28. To avoid damage, do not use the
appliance with accessories of other
manufacturers or brands.
29. Unplug the mains plug from the
electrical outlet after use and before
cleaning. Never leave the appliance
unattended when the mains plug is
plugged in.
30. Check the appliance, the plug and
the power cord regularly for wear or
damage. In the event of damage to
the power cord or other parts, ple-
ase send the appliance or the power
cord to our customer service orga-
nisation for inspection and repair.
Unauthorised repairs can result in
serious hazards for the user and
void the warranty.
31. If the power cord of this appliance
is damaged, it must be replaced
by the manufacturer or by the
manufacturer’s customer service
organisation, or by a person with
similar qualifications, to prevent
hazards.
CAUTION:
The appliance becomes very hot
during operation!
Never open the housing of the
appliance. This can result in
electric shock.
20
The manufacturer will not be liable in the event of incorrect assembly, improper or
incorrect use or if repairs are carried out by unauthorized third parties.
PRIOR TO PREPARING COFFEE FOR THE FIRST TIME
1. Remove all packaging materials
and transport safeguards.
2. Clean the glass pot (9), the per-
manent filter (1) and the filter
holder (2), as described in the
chapter, “Cleaning and Care”.
3. Wipe off the exterior of the appli-
ance with a damp cloth.
4. Fill the water tank (5) to the MAX
marking/12 cups with tap water.
Ensure that there are no beans in
the bean container (4).
5. Close the lid of the glass pot and
place it on the warming plate (8).
6. Plug the power cord into an elec-
trical outlet (220–240 V~, 50 Hz)
7. Caution: All operating entries via
the buttons will only be saved as
long as the display is illuminated
blue. As soon as the display light
goes out, you must first press a
button before additional button
entries are possible.
8. Press the button „MÜHLE AUS“
(„MILL OFF“), then „EIN/AUS“
(“ON/OFF”) and let the water run
through until the appliance indi-
cates through a signal tone repea-
ted multiple times, that the pro-
cess is concluded.
9. Please discard this water.
10. Clean the glass pot.
11. Switch off the appliance via the
„EIN/AUS“ (“ON/OFF”) button.
Before brewing coffee for the first time, please run one or two brewing cycles
with water only, to remove any residue from the manufacturing process. We
also recommend running one brewing cycle without coffee if the appliance has
not been in use for an extended period.
COFFEE BEANS
1. With the Coffeemaker Mühle, cof-
fee can be prepared from fresh
ground beans, or with off-the-
shelf coffee powder.
2. If you want to use coffee beans,
when purchasing them, ensure
that the beans are suitable for
coffee mills. Do not use beans
for fully-automatic coffee makers;
these beans do not produce a
satisfactory flavour of the coffee
due to the different roasting pro-
cess.
SETTING THE TIME
1. As soon as the coffeemaker is
connected to the power supply
the display shows 12:00.
2. Now press the „STD“ (“HOUR”)
and “MIN” buttons until the cur-
rent time is set.
3. You will see the current time and
can start brewing coffee.
4. In case of a power outage lasting
longer than about 30 seconds the
time is not saved, which means
you must reset the time whe-
never the appliance has been
unplugged.
21
SETTING THE COFFEE STRENGTH
1. Use theSTÄRKE(“STRENGTH”)
button to select the desired cof-
fee strength. Press the „Stärke“
(“STRENGTH”) button until the
desired number of coffee beans is
shown in the display.
2. You can choose from the following
degrees of strength:
Fine - shown in the display: One
coffee bean (standard setting)
Medium - shown in the display:
Two coffee beans
Strong - shown in the display:
Three coffee beans
3. Note: If the appliance is discon-
nected from the mains supply for
a longer period of time, you must
reset the degree of strength.
BREWING COFFEE
1. Plug the power cord into an elec-
trical outlet.
2. Fill the desired quantity of fresh,
clean water into the water tank.
You can use the glass pot for this;
marks specifying the number of
cups are also on the glass pot.
Water for at least two cups (270
ml) must be filled in, the maxi-
mum quantity is 12 cups (1,525
ml). Ensure that you do not over-
fill the water tank, otherwise the
excess water will flow out at the
rear of the appliance.
3. The filled in quantity of water is
always slightly higher than the
actual quantity of coffee, because
the ground coffee absorbs a little
water.
4. Open the swivel arm of the coffee-
maker by pressing the „ÖFFNEN
(“OPEN”) button on the right side
of the appliance.
5. Insert the permanent filter into
the filter basket. Alternatively you
can also use a size 4 paper filter.
6. If you use the permanent filter,
small amounts of coffee grounds
Note: All operating entries via the buttons will only be saved as long as the
display is illuminated blue. As soon as the display light goes out, you must first
press a button before additional button entries are possible.
Do not use beans for fully-automatic coffee makers; these beans do not produ-
ce a satisfactory flavour of the coffee due to the different roasting process. The-
re are various manufacturers of coffee beans on the market with products that
are suitable for coffee mills (comply with the instructions on the packaging).
ADJUSTING THE DEGREE OF GRINDING
1. If you are preparing coffee from
freshly ground beans, you can
adjust the degree of grinding bet-
ween Fine-Medium-Coarse, with
this rotary selection switch.
2. Ensure that the button „MÜHLE
AUS“ (“MILL OFF”) is not activa-
ted.
3. Prepare the appliance as descri-
bed in the chapter “Preparing cof-
fee” and switch on the appliance.
4. As soon as the appliance starts to
grind the beans, you can set the
degree of grinding switch (10) to
the desired level.
5. Caution: Do not change the degree
of grinding if the appliance is not
grinding beans at the moment.
22
can accumulate in the glass pot.
This is due to the technology and
is not a defect of the appliance.
7. Close the swivel arm with light
pressure.
8. Place the glass pot with the lid
closed on the warming plate.
9. Remove the lid of the bean con-
tainer. Fill the coffee beans into
the bean container.
10. Note that the bean container must
always be at least half full. The fill
quantity is 200 g.
11. Do not overfill the bean container,
this can damage the grinder.
12. Close the bean container with the
lid. Note that the appliance does
not detect that there are no beans
in the container.
13. Select the desired number of cups
by pressing the button „2-12
Tassen“ (“2-12 cups”) until the
desired number of cups is illumi-
nated. You can select 2, 4, 6, 8,
10 and 12 cups. Ensure that you
have selected the precise number
of cups for which you have also
filled water into the appliance. If
you fill in water for two cups, you
must select two cups, if you fill
in water for four cups, you must
select four cups, etc. This is the
only way to ensure optimal coffee
flavour. The coffeemaker grinds
the precise amount of coffee pow-
der for the number of cups that
has been set.
14. Now you can select the desired
strength of the coffee with the
„STÄRKE“ (“STRENGTH”) but-
ton.
15. If desired you can also brew cof-
fee from coffee powder. For this,
press the button „MÜHLE AUS“
(“MILL OFF”). The background
lighting of the button will be
illuminated blue, as long as the
button is active. As soon as you
conclude the brewing process, the
button „MÜHLE AUS“. (“MILL
OFF”) will be automatically deac-
tivated.
16. Now fill the desired amount of
coffee powder into the perma-
nent filter, to taste, per cup, 5-7 g
(approx. 1 measuring spoon) cof-
fee powder ground medium fine.
Coffee that is ground too fine can
clog the pores in the filter, which
can cause the coffeemaker to
overflow.
17. Press the „EIN/AUS“, (“ON/
OFF”) button and the appliance
will start to brew coffee.
18. During the brewing process the
word, “Brewing”, will be shown in
the display.
19. You can remove the pot at any
time during the brewing process.
The drip stop prevents residual
coffee from dripping out of the
filter. Put the pot back under the
filter within 30 seconds, so that
the filter does not overflow.
20. When the appliance is finished
brewing coffee, this is indicated
by a signal tone.
21. The warming plate remains swit-
ched on as long as the coffee-
maker is switched on, in order
to keep the coffee remaining in
the pot warm. After two hours
the appliance automatically swit-
ches off. If you do not want the
warming function, switch off the
appliance with the „EIN/AUS“,
(“ON/OFF”) button.
22. After pouring out all of the coffee
and emptying the pot completely,
do not place the empty coffee pot
on the hot warming plate.
23. Remove the permanent filter and
dispose of the coffee grounds.
23
BREWING COFFEE WITH THE TIME PRESELECT
1. The appliance is prepared as
described in the chapter, “Brew-
ing coffee”.
In this regard, ensure that you set
the coffee strength and the num-
ber of cups as desired.
Decide whether you want to brew
coffee from coffee powder or cof-
fee beans and if necessary press
the „MÜHLE AUS“. (“MILL
OFF”) button.
Please note that it is only pos-
sible to adjust the degree of
grinding while the appliance is
grinding the beans. Ideally have
the appliance brew coffee wit-
hout a a time preselect, and in
this process, select the desired
degree of grinding. As soon as
the appliance starts to grind the
beans, you can set the degree of
grinding switch to the desired
level. To prevent damage to the
grinder, do not change the degree
of grinding if the appliance is not
grinding beans at the moment.
2. Check whether the time in the
display agrees with the actual
time. If it does not, set the actual
time as described in the chapter
“Setting the time”.
3. Press the “PROGRAM” button
until the time shown in display
flashes.
4. Now use the buttons „STD“
(“HOUR”) und „MIN“ (“MIN”)
to set the desired time at which
the coffeemaker should start to
brew coffee. Press the respective
button until the desired time is
shown in the display.
5. Then press the “PROGRAMM”
button again. This button will now
be illuminated blue in the display
“AUTO” to indicate that the time
preselect has been switched on.
6. At the selected time the appli-
ance starts to brew coffee, the
word “BREWING” is now shown
on the display.
7. You can remove the pot at any
time during the brewing process.
The drip stop prevents residual
coffee from dripping out of the
filter. Put the pot back under the
filter within 30 seconds, so that
the filter does not overflow.
8. When the appliance is finished
brewing coffee, this is indicated
by a signal tone.
9. The warming plate remains swit-
ched on as long as the coffee-
maker is switched on, in order
to keep the coffee remaining in
the pot warm. After two hours
the appliance automatically swit-
ches off. If you do not want the
warming function, switch off the
appliance with the „EIN/AUS“
(“ON/OFF”) button.
10. After pouring out all of the coffee
and emptying the pot completely,
do not place the empty coffee pot
on the hot warming plate.
11. Remove the permanent filter and
dispose of the coffee grounds.
CLEANING AND CARE
Before cleaning, always turn
off the appliance and unplug it
from the electrical outlet.
Allow the appliance to cool
before cleaning it.
1. The appliance and the supply
cable may not be immersed in
water or any other liquid or clea-
ned in the dishwasher.
2. Open the swivel arm of the appli-
ance and remove the perma-
nent filter. Dispose of the coffee
grounds.
3. Condensation can collect above
the filter. After brewing coffee,
24
wipe off the bottom of the lid with
a dry cloth.
4. Wipe off the housing and the war-
ming plate with a damp cloth and
a little dishwashing detergent.
Do not use any abrasive scou-
ring agents, steel wool, metal-
lic objects, disinfectants or hot
cleaning agents, since they can
damage the appliance.
5. Clean the glass pot, its lid, the fil-
ter holder and filter in water with
a little dishwashing detergent
added.
6. The appliance must be comple-
tely dry before you use it again.
GUARANTEE CONDITIONS
WASTE DISPOSAL / ENVIRONMENTAL PROTECTION
Our appliances are produced on a high quality level for a long lifetime. Regular maintenance and expert
repairs by our after-sales service can extend the useful life of the appliance. If an appliance is defective and
repair is not possible we ask you to follow the following instructions for disposal.
Do not dispose this appliance together with your standard household waste. Please bring this product to an
approved collection point for recycling of electric and electronic products.
By separate collection and disposal of waste products you help to protect natural resources and ensure, that
the product is disposed in an adequate way to protect health and environment.
DESCALING
1. Regular descaling maintains the
efficiency of your coffee machine,
increases its service life and redu-
ces the energy consumption.
2. Use commercial descaling pro-
ducts following the corresponding
instructions for use.
3. Fill the water tank with descaling
solution up to the MAX mark.
4. Alternatively, you may use citric
acid. Add 25 to 50 g of citric acid
to one litre of water.
5. Put the coffee jug on the tempe-
rature maintenance plate.
6. Push the button „EIN/AUS“ and
the approximately one third of the
water run through.
7. Switch the appliance off pushing
the button „EIN/AUS“ again and
leave the descaling solution to
act approx. 15 to 30 minutes.
With resistant calcinations you
may leave the solution to act over
night.
8. Push the button „EIN/AUS“ again
and let the rest of the descaling
solution run through.
9. Pour the descaling solution away
and operate the appliance at least
twice with clear water.
We grant a 24 months guarantee, and in case of commercial use a 12 months guarantee, starting from the date of purchase
for any damage demonstrably due to manufacturing defects and when the appliance has been used according to its intended
use. Within the warranty period we will remedy defective materials or workmanship through repair or replacement, at our
option. Our warranty terms apply only to appliances sold in Germany and Austria. For other countries, please contact the re-
sponsible importer. In the event of a claim for remedy of defects, please send the appliance to our after sales service, properly
packaged and postage paid, together with a copy of the automatically generated sales receipt, which must show the date of
purchase, and a description of the defect. If the defect is covered by the warranty, the customer will be reimbursed for the
shipping costs only in Germany and Austria. The warranty does not cover damage from normal wear, improper handling and
failure to comply with the maintenance and care instructions. The warranty is void if repairs or modifications are made to the
appliance by third parties. Any claims of the end consumer vis-à-vis the retailer are not limited by this warranty.
The instruction booklet is also available for download: www.unold.de
  • Page 1 1
  • Page 2 2
  • Page 3 3
  • Page 4 4
  • Page 5 5
  • Page 6 6
  • Page 7 7
  • Page 8 8
  • Page 9 9
  • Page 10 10
  • Page 11 11
  • Page 12 12
  • Page 13 13
  • Page 14 14
  • Page 15 15
  • Page 16 16
  • Page 17 17
  • Page 18 18
  • Page 19 19
  • Page 20 20
  • Page 21 21
  • Page 22 22
  • Page 23 23
  • Page 24 24
  • Page 25 25
  • Page 26 26
  • Page 27 27
  • Page 28 28
  • Page 29 29
  • Page 30 30
  • Page 31 31
  • Page 32 32
  • Page 33 33
  • Page 34 34
  • Page 35 35
  • Page 36 36
  • Page 37 37
  • Page 38 38
  • Page 39 39
  • Page 40 40
  • Page 41 41
  • Page 42 42
  • Page 43 43
  • Page 44 44
  • Page 45 45
  • Page 46 46
  • Page 47 47
  • Page 48 48
  • Page 49 49
  • Page 50 50
  • Page 51 51
  • Page 52 52
  • Page 53 53
  • Page 54 54
  • Page 55 55
  • Page 56 56
  • Page 57 57
  • Page 58 58
  • Page 59 59
  • Page 60 60
  • Page 61 61
  • Page 62 62
  • Page 63 63
  • Page 64 64

Unold 28736 Datasheet

Category
Coffee makers
Type
Datasheet

Ask a question and I''ll find the answer in the document

Finding information in a document is now easier with AI