Sony Cyber-Shot DSC WX10 User manual

Category
Camcorders
Type
User manual
©2011 Sony Corporation Printed in China
DSC-WX10
4-270-089-52(1)
DSC-WX10
Digital Still Camera / Instruction Manual GB
Appareil photo numérique / Mode d’emploi FR
Fotocamera digitale / Istruzioni per l’uso IT
Cámara fotografía digital / Manual de instrucciones ES
Câmara fotográfica digital / Manual de instruções PT
Digitale Fotokamera / Gebrauchsanleitung DE
Digitale camera / Gebruiksaanwijzing NL
Cyfrowy aparat fotograczny / Instrukcja obsługi PL
Digitální fotoaparát / Návod k obsluze CZ
Digitális fényképezőgép / Használati útmutató HU
Digitálny fotoaparát / Návod na používanie SK
Digital stillbildskamera / Handledning SE
Digitaalikamera / Käyttöopas FI
Digitalt stillkamera / Bruksanvisning NO
Digitalt stillbilledkamera / Betjeningsvejledning DK
Digitalni fotoaparat / Priručnik za upotrebu HR
Aparat foto digital / Manual de instrucţiuni RO
TR
GR
DSC-WX10
4-270-089-52(1)
GB
2
Owner’s Record
The model and serial numbers are located on the bottom. Record the serial number in the
space provided below. Refer to these numbers whenever you call your Sony dealer
regarding this product.
Model No. DSC-WX10
Serial No. ______________________________
Model No. AC-UB10/UB10B
Serial No. ______________________________
To reduce fire or shock hazard, do not expose the unit to rain or
moisture.
IMPORTANT SAFETY INSTRUCTIONS
-SAVE THESE INSTRUCTIONS
DANGER
TO REDUCE THE RISK OF FIRE OR ELECTRIC
SHOCK, CAREFULLY FOLLOW THESE
INSTRUCTIONS
If the shape of the plug does not fit the power outlet, use an attachment plug adaptor of the
proper configuration for the power outlet.
[ Battery pack
If the battery pack is mishandled, the battery pack can burst, cause a fire or even chemical
burns. Observe the following cautions.
Do not disassemble.
Do not crush and do not expose the battery pack to any shock or force such as
hammering, dropping or stepping on it.
Do not short circuit and do not allow metal objects to come into contact with the battery
terminals.
Do not expose to high temperature above 60°C (140°F) such as in direct sunlight or in a
car parked in the sun.
Do not incinerate or dispose of in fire.
English
WARNING
CAUTION
GB
3
GB
Do not handle damaged or leaking lithium ion batteries.
Be sure to charge the battery pack using a genuine Sony battery charger or a device that
can charge the battery pack.
Keep the battery pack out of the reach of small children.
Keep the battery pack dry.
Replace only with the same or equivalent type recommended by Sony.
Dispose of used battery packs promptly as described in the instructions.
[ AC Adaptor
Connect the AC Adaptor to the nearest wall outlet (wall socket).
If some trouble occurs while using the AC Adaptor, immediately shut off the power by
disconnecting the plug from the wall outlet (wall socket).
The power cord (mains lead), if supplied, is designed specifically for use with this camera
only, and should not be used with other electrical equipment.
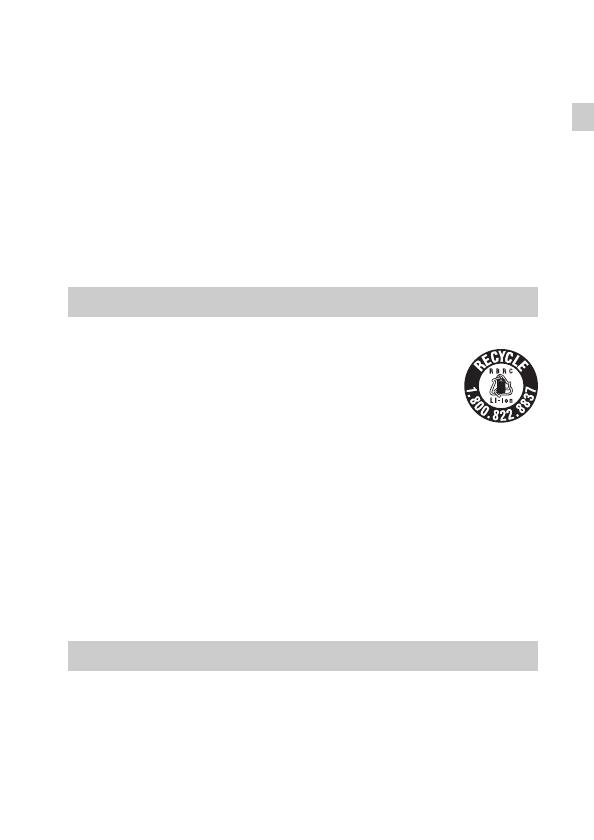
[ RECYCLING LITHIUM-ION BATTERIES
Lithium-Ion batteries are recyclable.
You can help preserve our environment by returning your used
rechargeable batteries to the collection and recycling location nearest
you.
For more information regarding recycling of rechargeable batteries,
call toll free
1-800-822-8837, or visit http://www.rbrc.org/
Caution: Do not handle damaged or leaking Lithium-Ion batteries.
[ Battery pack
This device complies with Part 15 of the FCC Rules. Operation is subject to the following
two conditions:
(1) This device may not cause harmful interference, and (2) this device must accept any
interference received, including interference that may cause undesired operation.
This Class B digital apparatus complies with Canadian ICES-003.
UL is an internationally recognized safety organization.
The UL Mark on the product means it has been UL Listed.
If you have any questions about this product, you may call:
Sony Customer Information Center
1-800-222-SONY (7669).
The number below is for the FCC related matters only.
For Customers in the U.S.A. and Canada
For Customers in the U.S.A.
GB
4
[ Regulatory Information
[ CAUTION
You are cautioned that any changes or modifications not expressly approved in this manual
could void your authority to operate this equipment.
[ Note:
This equipment has been tested and found to comply with the limits for a Class B digital
device, pursuant to Part 15 of the FCC Rules.
These limits are designed to provide reasonable protection against harmful interference in
a residential installation. This equipment generates, uses, and can radiate radio frequency
energy and, if not installed and used in accordance with the instructions, may cause
harmful interference to radio communications. However, there is no guarantee that
interference will not occur in a particular installation. If this equipment does cause harmful
interference to radio or television reception, which can be determined by turning the
equipment off and on, the user is encouraged to try to correct the interference by one or
more of the following measures:
Reorient or relocate the receiving antenna.
Increase the separation between the equipment and receiver.
Connect the equipment into an outlet on a circuit different from that to which the
receiver is connected.
Consult the dealer or an experienced radio/TV technician for help.
The supplied interface cable must be used with the equipment in order to comply with the
limits for a digital device pursuant to Subpart B of Part 15 of FCC Rules.
Declaration of Conformity
Trade Name: SONY
Model No.: DSC-WX10
Responsible Party: Sony Electronics Inc.
Address: 16530 Via Esprillo,
San Diego, CA 92127 U.S.A.
Telephone No.: 858-942-2230
This device complies with Part15 of the FCC Rules. Operation is subject to the
following two conditions: (1) This device may not cause harmful interference, and (2)
this device must accept any interference received, including interference that may cause
undesired operation.
GB
5
GB
[ Notice for the customers in the countries applying EU Directives
The manufacturer of this product is Sony Corporation, 1-7-1 Konan Minato-ku Tokyo,
108-0075 Japan. The Authorized Representative for EMC and product safety is Sony
Deutschland GmbH, Hedelfinger Strasse 61, 70327 Stuttgart, Germany. For any service or
guarantee matters please refer to the addresses given in separate service or guarantee
documents.
This product has been tested and found compliant with the limits set out in the EMC
Directive for using connection cables shorter than 3 meters (9.8 feet).
[ Attention
The electromagnetic fields at the specific frequencies may influence the picture and sound
of this unit.
[ Notice
If static electricity or electromagnetism causes data transfer to discontinue midway (fail),
restart the application or disconnect and connect the communication cable (USB, etc.)
again.
[ Disposal of Old Electrical & Electronic Equipment (Applicable in
the European Union and other European countries with separate
collection systems)
This symbol on the product or on its packaging indicates that this product
shall not be treated as household waste. Instead it shall be handed over to
the applicable collection point for the recycling of electrical and electronic
equipment. By ensuring this product is disposed of correctly, you will help
prevent potential negative consequences for the environment and human
health, which could otherwise be caused by inappropriate waste handling
of this product. The recycling of materials will help to conserve natural
resources. For more detailed information about recycling of this product,
please contact your local Civic Office, your household waste disposal service or the shop
where you purchased the product.
For Customers in Europe
GB
6
[ Disposal of waste batteries (applicable in the European Union
and other European countries with separate collection systems)
This symbol on the battery or on the packaging indicates that the battery
provided with this product shall not be treated as household waste.
On certain batteries this symbol might be used in combination with a
chemical symbol. The chemical symbols for mercury (Hg) or lead (Pb) are
added if the battery contains more than 0.0005% mercury or 0.004% lead.
By ensuring these batteries are disposed of correctly, you will help prevent
potentially negative consequences for the environment and human health which could
otherwise be caused by inappropriate waste handling of the battery. The recycling of the
materials will help to conserve natural resources.
In case of products that for safety, performance or data integrity reasons require a
permanent connection with an incorporated battery, this battery should be replaced by
qualified service staff only. To ensure that the battery will be treated properly, hand over
the product at end-of-life to the applicable collection point for the recycling of electrical
and electronic equipment.
For all other batteries, please view the section on how to remove the battery from the
product safely.
Hand the battery over to the applicable collection point for the recycling of waste batteries.
For more detailed information about recycling of this product or battery, please contact
your local Civic Office, your household waste disposal service or the shop where you
purchased the product.
A moulded plug complying with BS 1363 is fitted to this equipment for your safety and
convenience.
Should the fuse in the plug supplied need to be replaced, a fuse of the same rating as the
supplied one and approved by ASTA or BSI to BS 1362, (i.e., marked with an or
mark) must be used.
If the plug supplied with this equipment has a detachable fuse cover, be sure to attach the
fuse cover after you change the fuse. Never use the plug without the fuse cover. If you
should lose the fuse cover, please contact your nearest Sony service station.
Notice for customers in the United Kingdom
GB
7
GB
For details on advanced operations, please read “Cyber-shot User Guide”
(HTML) on the CD-ROM (supplied) using a computer.
For Windows users:
1 Click [User Guide] t [Install].
2 Start “User Guide” from the shortcut on the desktop.
For Macintosh users:
1 Select the [User Guide] folder and copy [eng] folder stored in [User Guide]
folder to your computer.
2 After copying is complete, double-click “index.html” in [eng] folder.
Rechargeable battery pack NP-BG1 (1)/Battery case (1)
Multi-use terminal USB cable (1)
AC Adaptor AC-UB10/UB10B (1)
Power cord (mains lead) (not supplied in the USA and Canada) (1)
Wrist strap (1)
•CD-ROM (1)
Cyber-shot application software
“Cyber-shot User Guide”
Instruction Manual (this manual) (1)
Refer to “Cyber-shot User Guide” (HTML) on
supplied CD-ROM
Checking the accessories supplied
Insert the CD-ROM into the CD-ROM drive.
GB
8
A Shutter button
B For shooting: W/T (Zoom) lever
For viewing: (Playback
zoom) lever/ (Index) lever
C Flash
D ON/OFF (Power) button
E Power/Charge lamp
F Microphone
G Self-timer lamp/Smile Shutter
lamp/AF illuminator
H Lens
I Speaker
J LCD screen
K (Playback) button
L Mode dial
M MOVIE (Movie) button
N HDMI connector
O Hook for wrist strap
P Control wheel
Q / (In-Camera Guide/Delete)
button
R MENU button
S (TransferJet™) mark
T Battery insertion slot
U Tripod receptacle
Use a tripod with a screw less
than 5.5 mm (7/32 inches) long.
Otherwise, you cannot firmly
secure the camera, and damage to
the camera may occur.
V Battery eject lever
W Access lamp
X Memory card slot
Y Multi connector (Type3b)
Z Battery/memory card cover
Identifying parts
GB
9
GB
Inserting the battery pack
1
Open the cover.
2
Insert the battery pack.
While pressing the battery eject lever, insert the battery pack as
illustrated. Make sure that the battery eject lever locks after insertion.
Charging the battery pack
Eject lever
Power cord
(Mains lead)
For customers in the USA
and Canada
For customers in countries/regions
other than the USA and Canada
Power/Charge lamp
Lit: Charging
Off: Charging finished
Flash: Charging error
GB
10
When the Power/Charge lamp on the camera does not lit even if the AC Adaptor is
connected to the camera and the wall outlet (wall socket), it indicates that the
charging stops temporarily on standby. The charging stops and enters the standby
status automatically when the temperature is outside of the recommended
operating temperature. When the temperature gets back within the appropriate
range, the charging resumes. We recommend charging the battery pack in an
ambient temperature of between 10°C to 30°C (50ºF to 86ºF).
Connect the AC Adaptor (supplied) to the nearest wall outlet (wall socket). If any
malfunctions occur while using the AC Adaptor, disconnect the plug from the wall
outlet (wall socket) immediately to disconnect the power source.
When charging is finished, disconnect the AC Adaptor from the wall outlet (wall
socket).
Be sure to use only genuine Sony brand battery packs, multi-use terminal USB
cable (supplied) and AC Adaptor (supplied).
1
Connect the camera and the AC Adaptor (supplied),
using the multi-use terminal USB cable (supplied).
2
Connect the AC Adaptor to the wall outlet (wall socket).
The Power/Charge lamp lights orange, and charging starts.
Turn off the camera while charging the battery.
You can charge the battery pack even when it is partially charged.
When the Power/Charge lamp flashes and charging is not finished,
remove and re-insert the battery pack.
Notes
GB
11
GB
x
Charging by connecting to a computer
The battery pack can be charged by connecting the camera to a computer using
a multi-use terminal USB cable.
Note the following points when charging via a computer:
If the camera is connected to a laptop computer that is not connected to a power
source, the laptop battery level decreases. Do not charge for an extended period
of time.
– Do not turn on/off or restart the computer, or wake the computer resume from
sleep mode when a USB connection has been established between the computer
and the camera. The camera may cause a malfunction. Before turning on/off, or
restarting the computer or waking the computer from sleep mode, disconnect the
camera and the computer.
– No guarantees are made for charging using a custom-built computer or a
modified computer.
x
Charging time
The charging time is approximately 270 min. using the AC Adaptor
(supplied).
The above charging time applies when charging a fully depleted battery pack at a
temperature of 25°C (77°F). Charging may take longer depending on conditions of
use and circumstances.
Note
Note
GB
12
x
Battery life and number of images you can record and
view
The above number of images applies when the battery pack is fully charged. The
number of images may decrease depending on the conditions of use.
The number of images that can be recorded is for shooting under the following
conditions:
– Using Sony “Memory Stick PRO Duo” (Mark2) media (sold separately)
– The battery pack is used at an ambient temperature of 25°C (77°F).
The number for “Shooting (still images)” is based on the CIPA standard, and is for
shooting under the following conditions:
(CIPA: Camera & Imaging Products Association)
– DISP (Display Setting) is set to [ON].
– Shooting once every 30 seconds.
– The zoom is switched alternately between the W and T ends.
– The flash strobes once every two times.
– The power turns on and off once every ten times.
The battery life for movies applies shooting under the following conditions:
– Movie quality: AVCHD HQ
– When continuous shooting ends because of set limits (page 22), press the
MOVIE (Movie) button again and continue shooting. Shooting functions such as
the zoom do not operate.
Battery life Number of images
Shooting (still images) Approx. 180 min. Approx. 360 images
Viewing (still images) Approx. 280 min. Approx. 5600 images
Shooting (movies) Approx. 85 min.
Notes
GB
13
GB
x
Supplying power
The camera can be supplied with power from the wall outlet (wall socket) by
connecting to the AC Adaptor, using the multi-use terminal USB cable
(supplied).
You can import images to a computer without worrying about wearing down
the battery pack by connecting the camera to a computer using the multi-use
terminal USB cable.
Power cannot be supplied when the battery pack is not inserted in the camera.
Power supply from the wall outlet (wall socket) is available only when the camera
is in playback mode or when a connection is made between the camera and a
computer. If the camera is in shooting mode or while you are changing the settings
of the camera, power is not supplied even if you make a USB connection using the
multi-use terminal USB cable.
If you connect the camera and a computer using the multi-use terminal USB cable
when the camera is in playback mode, the display on the camera is changed from
the playback screen to the USB connection screen. Press (Playback) button to
switch to the playback screen.
Notes
Inserting a memory card (sold separately)
1
Open the cover.
2
Insert the memory card (sold separately).
With the notched corner facing as illustrated, insert the memory card
until it clicks into place.
3
Close the cover.
Closing the cover with the battery inserted incorrectly may damage the
camera.
Ensure the notched corner faces
correctly.
GB
14
x
Memory cards that you can use
In this manual, products in A are collectively referred to as “Memory Stick Duo”
media, and products in B are collectively referred to as SD card.
x
To remove the memory card/battery pack
Memory card: Push the memory card in once.
Battery pack: Slide the battery eject lever. Be sure not to drop the battery pack.
Never remove the memory card/battery pack when the access lamp (page 8) is lit.
This may cause damage to data in the memory card/internal memory.
Memory card For still images For movies
A
Memory Stick PRO Duo aa (Mark2 only)
Memory Stick PRO-HG Duo aa
Memory Stick Duo a
B
SD memory card aa (Class 4 or faster)
SDHC memory card aa (Class 4 or faster)
SDXC memory card aa (Class 4 or faster)
Note
GB
15
GB
Setting the clock
1
Press the ON/OFF (Power) button.
Date & Time setting is displayed when you press the ON/OFF (Power)
button for the first time.
It may take time for the power to turn on and allow operation.
2
Select a desired language.
3
Select the desired area following the instructions on the
screen, then press z.
4
Set [Date & Time Format], [Daylight Savings] or
[Summer Time] and [Date & Time], then select [OK] t
[OK].
Midnight is indicated as 12:00 AM, and noon as 12:00 PM.
5
Select the desired display color, following the
instructions on the screen.
6
When an [In-Camera Guide] introductory message is
appeared on the screen, select [OK].
Control Wheel
Power/Charge lamp (green)
ON/OFF (Power)
Select items: v/V/b/B
Set the numeric value of date and
time: /
Set:
z
GB
16
Shooting still images
Shooting movies
The sound of the lens and lever operating will be recorded when the zoom function
operates while shooting a movie. The sound of the MOVIE button operating may
also be recorded when movie recording is finished.
Continuous shooting is possible for approximately 29 minutes at one time at the
camera’s default settings and when the temperature is approximately 25°C (77°F).
When movie recording is finished, you can restart recording by pressing the
MOVIE button again. Recording may stop to protect the camera depending on the
ambient temperature.
Shooting still images/movies
1
Press the shutter button halfway down to focus.
When the image is in focus, a beep sounds and the z indicator lights.
2
Press the shutter button fully down.
1
Press the MOVIE (Movie) button to start recording.
Use the W/T (zoom) lever to change the zoom scale.
2
Press the MOVIE button again to stop recording.
Notes
Mode dial
Shutter button
W: zoom out
T: zoom in
: Intelligent Auto
: Movie Mode
MOVIE
GB
17
GB
x
Selecting next/previous image
Select an image by pressing B (next)/b (previous) on the control wheel or by
turning the control wheel. Press z in the center of the control wheel to view
movies.
x
Deleting an image
1 Press / (Delete) button.
2 Select [This Image] with v on the control wheel, then press z.
x
Returning to shooting images
Press the shutter button halfway down.
Viewing images
1
Press the (Playback) button.
When images on a memory card recorded with other cameras are played
back on this camera, the registration screen for the data file appears.
(Playback)
Control wheel
/ (Delete)
W: zoom out
T: zoom in
Select images: B (next)/b (previous) or turn
the control wheel
Set: z
GB
18
This camera contains an internal function guide. This allows you to search the
camera’s functions according to your needs.
In-Camera Guide
1
Press the / (In-Camera Guide) button.
When viewing images, [Delete/In-Camera Guide] is displayed. Select
[In-Camera Guide].
2
Select a search method from [In-Camera Guide].
Shoot/ playback guide: Search for various operation functions in
shooting/viewing mode.
Icon guide: Search the function and meaning of displayed icons.
Troubleshooting: Search common problems and their solution.
Objective guide: Search functions according to your needs.
Keyword: Search functions by key words.
History: Display the last 12 items displayed in [In-Camera Guide].
/ (In-Camera Guide)
GB
19
GB
Other functions used when shooting or playing back can be operated using the
control wheel or MENU button on the camera. This camera is equipped with a
Function Guide that allows you to easily select from the functions. While
displaying the guide, try the other functions.
x
Control wheel
DISP (Display Setting): Allows you to change the screen display.
(Self-Timer): Allows you to use the self-timer.
(Burst Settings): Allows you to use the burst shooting mode.
(Flash): Allows you to select a flash mode for still images.
x
Menu Items
Shooting
Introduction of other functions
Movie shooting
scene
Select movie recording mode.
3D Shooting Select the 3D image shooting mode.
Scene Selection Select pre-set settings to match various scene conditions.
Easy Mode Shoot still images using minimal functions.
Defocus Effect
Set the level of background defocus effect when
shooting in Background Defocus mode.
Still Image Size/
Panorama Image
Size/Movie Size/
Movie Quality
Select the image size and the quality for still images,
panoramic images or movie files.
EV Adjust the exposure manually.
MENU
Control wheel
Function Guide
GB
20
Viewing
ISO Adjust the luminous sensitivity.
White Balance Adjust color tones of an image.
White Balance
Shift
Adjust color tones according to the adjusted value set
based on the selected White Balance tone.
Focus Select the focus method.
Metering Mode
Select the metering mode that sets which part of the
subject to measure to determine the exposure.
Burst Shooting
Interval
Select the number of images taken per second for Burst
shooting.
Bracket Setting Set the type of the bracket shooting.
Scene Recognition Set to automatically detect shooting conditions.
Soft Skin Effect Set the Soft Skin Effect and the effect level.
Smile Shutter
Set to the camera automatically release the shutter when
a smile is detected.
Smile Detection
Sensitivity
Set the Smile Shutter function sensitivity for detecting
smiles.
Face Detection
Select to detect faces and adjust various settings
automatically.
Color Mode
Select the vividness of the image, accompanied by
effects.
Color Saturation Adjust the vividness of the image.
Contrast Adjust the contrast of the image.
Sharpness Adjust the sharpness of the image.
Anti Blink
Set to automatically shoot two images and select image
in which the eyes are not blinking.
Movie SteadyShot Set the strength of SteadyShot in Movie Mode.
In-Camera Guide Search the camera’s functions according to your needs.
Slideshow Select a method of continuous playback.
3D Viewing Set to play back images shot in 3D mode on a 3D TV.
Send by
TransferJet
Transfer data by closely aligning two products equipped
with TransferJet.
  • Page 1 1
  • Page 2 2
  • Page 3 3
  • Page 4 4
  • Page 5 5
  • Page 6 6
  • Page 7 7
  • Page 8 8
  • Page 9 9
  • Page 10 10
  • Page 11 11
  • Page 12 12
  • Page 13 13
  • Page 14 14
  • Page 15 15
  • Page 16 16
  • Page 17 17
  • Page 18 18
  • Page 19 19
  • Page 20 20
  • Page 21 21
  • Page 22 22
  • Page 23 23
  • Page 24 24
  • Page 25 25
  • Page 26 26
  • Page 27 27
  • Page 28 28
  • Page 29 29
  • Page 30 30
  • Page 31 31
  • Page 32 32
  • Page 33 33
  • Page 34 34
  • Page 35 35
  • Page 36 36
  • Page 37 37
  • Page 38 38
  • Page 39 39
  • Page 40 40
  • Page 41 41
  • Page 42 42
  • Page 43 43
  • Page 44 44
  • Page 45 45
  • Page 46 46
  • Page 47 47
  • Page 48 48
  • Page 49 49
  • Page 50 50
  • Page 51 51
  • Page 52 52
  • Page 53 53
  • Page 54 54
  • Page 55 55
  • Page 56 56
  • Page 57 57
  • Page 58 58
  • Page 59 59
  • Page 60 60
  • Page 61 61
  • Page 62 62
  • Page 63 63
  • Page 64 64
  • Page 65 65
  • Page 66 66
  • Page 67 67
  • Page 68 68
  • Page 69 69
  • Page 70 70
  • Page 71 71
  • Page 72 72
  • Page 73 73
  • Page 74 74
  • Page 75 75
  • Page 76 76
  • Page 77 77
  • Page 78 78
  • Page 79 79
  • Page 80 80
  • Page 81 81
  • Page 82 82
  • Page 83 83
  • Page 84 84
  • Page 85 85
  • Page 86 86
  • Page 87 87
  • Page 88 88
  • Page 89 89
  • Page 90 90
  • Page 91 91
  • Page 92 92
  • Page 93 93
  • Page 94 94
  • Page 95 95
  • Page 96 96
  • Page 97 97
  • Page 98 98
  • Page 99 99
  • Page 100 100
  • Page 101 101
  • Page 102 102
  • Page 103 103
  • Page 104 104
  • Page 105 105
  • Page 106 106
  • Page 107 107
  • Page 108 108
  • Page 109 109
  • Page 110 110
  • Page 111 111
  • Page 112 112
  • Page 113 113
  • Page 114 114
  • Page 115 115
  • Page 116 116
  • Page 117 117
  • Page 118 118
  • Page 119 119
  • Page 120 120
  • Page 121 121
  • Page 122 122
  • Page 123 123
  • Page 124 124
  • Page 125 125
  • Page 126 126
  • Page 127 127
  • Page 128 128
  • Page 129 129
  • Page 130 130
  • Page 131 131
  • Page 132 132
  • Page 133 133
  • Page 134 134
  • Page 135 135
  • Page 136 136
  • Page 137 137
  • Page 138 138
  • Page 139 139
  • Page 140 140
  • Page 141 141
  • Page 142 142
  • Page 143 143
  • Page 144 144
  • Page 145 145
  • Page 146 146
  • Page 147 147
  • Page 148 148
  • Page 149 149
  • Page 150 150
  • Page 151 151
  • Page 152 152
  • Page 153 153
  • Page 154 154
  • Page 155 155
  • Page 156 156
  • Page 157 157
  • Page 158 158
  • Page 159 159
  • Page 160 160
  • Page 161 161
  • Page 162 162
  • Page 163 163
  • Page 164 164
  • Page 165 165
  • Page 166 166
  • Page 167 167
  • Page 168 168
  • Page 169 169
  • Page 170 170
  • Page 171 171
  • Page 172 172
  • Page 173 173
  • Page 174 174
  • Page 175 175
  • Page 176 176
  • Page 177 177
  • Page 178 178
  • Page 179 179
  • Page 180 180
  • Page 181 181
  • Page 182 182
  • Page 183 183
  • Page 184 184
  • Page 185 185
  • Page 186 186
  • Page 187 187
  • Page 188 188
  • Page 189 189
  • Page 190 190
  • Page 191 191
  • Page 192 192
  • Page 193 193
  • Page 194 194
  • Page 195 195
  • Page 196 196
  • Page 197 197
  • Page 198 198
  • Page 199 199
  • Page 200 200
  • Page 201 201
  • Page 202 202
  • Page 203 203
  • Page 204 204
  • Page 205 205
  • Page 206 206
  • Page 207 207
  • Page 208 208
  • Page 209 209
  • Page 210 210
  • Page 211 211
  • Page 212 212
  • Page 213 213
  • Page 214 214
  • Page 215 215
  • Page 216 216
  • Page 217 217
  • Page 218 218
  • Page 219 219
  • Page 220 220
  • Page 221 221
  • Page 222 222
  • Page 223 223
  • Page 224 224
  • Page 225 225
  • Page 226 226
  • Page 227 227
  • Page 228 228
  • Page 229 229
  • Page 230 230
  • Page 231 231
  • Page 232 232
  • Page 233 233
  • Page 234 234
  • Page 235 235
  • Page 236 236
  • Page 237 237
  • Page 238 238
  • Page 239 239
  • Page 240 240
  • Page 241 241
  • Page 242 242
  • Page 243 243
  • Page 244 244
  • Page 245 245
  • Page 246 246
  • Page 247 247
  • Page 248 248
  • Page 249 249
  • Page 250 250
  • Page 251 251
  • Page 252 252
  • Page 253 253
  • Page 254 254
  • Page 255 255
  • Page 256 256
  • Page 257 257
  • Page 258 258
  • Page 259 259
  • Page 260 260
  • Page 261 261
  • Page 262 262
  • Page 263 263
  • Page 264 264
  • Page 265 265
  • Page 266 266
  • Page 267 267
  • Page 268 268
  • Page 269 269
  • Page 270 270
  • Page 271 271
  • Page 272 272
  • Page 273 273
  • Page 274 274
  • Page 275 275
  • Page 276 276
  • Page 277 277
  • Page 278 278
  • Page 279 279
  • Page 280 280
  • Page 281 281
  • Page 282 282
  • Page 283 283
  • Page 284 284
  • Page 285 285
  • Page 286 286
  • Page 287 287
  • Page 288 288
  • Page 289 289
  • Page 290 290
  • Page 291 291
  • Page 292 292
  • Page 293 293
  • Page 294 294
  • Page 295 295
  • Page 296 296
  • Page 297 297
  • Page 298 298
  • Page 299 299
  • Page 300 300
  • Page 301 301
  • Page 302 302
  • Page 303 303
  • Page 304 304
  • Page 305 305
  • Page 306 306
  • Page 307 307
  • Page 308 308
  • Page 309 309
  • Page 310 310
  • Page 311 311
  • Page 312 312
  • Page 313 313
  • Page 314 314
  • Page 315 315
  • Page 316 316
  • Page 317 317
  • Page 318 318
  • Page 319 319
  • Page 320 320
  • Page 321 321
  • Page 322 322
  • Page 323 323
  • Page 324 324
  • Page 325 325
  • Page 326 326
  • Page 327 327
  • Page 328 328
  • Page 329 329
  • Page 330 330
  • Page 331 331
  • Page 332 332
  • Page 333 333
  • Page 334 334
  • Page 335 335
  • Page 336 336
  • Page 337 337
  • Page 338 338
  • Page 339 339
  • Page 340 340
  • Page 341 341
  • Page 342 342
  • Page 343 343
  • Page 344 344
  • Page 345 345
  • Page 346 346
  • Page 347 347
  • Page 348 348
  • Page 349 349
  • Page 350 350
  • Page 351 351
  • Page 352 352
  • Page 353 353
  • Page 354 354
  • Page 355 355
  • Page 356 356
  • Page 357 357
  • Page 358 358
  • Page 359 359
  • Page 360 360
  • Page 361 361
  • Page 362 362
  • Page 363 363
  • Page 364 364
  • Page 365 365
  • Page 366 366
  • Page 367 367
  • Page 368 368
  • Page 369 369
  • Page 370 370
  • Page 371 371
  • Page 372 372
  • Page 373 373
  • Page 374 374
  • Page 375 375
  • Page 376 376
  • Page 377 377
  • Page 378 378
  • Page 379 379
  • Page 380 380
  • Page 381 381
  • Page 382 382
  • Page 383 383
  • Page 384 384
  • Page 385 385
  • Page 386 386
  • Page 387 387
  • Page 388 388
  • Page 389 389
  • Page 390 390
  • Page 391 391
  • Page 392 392
  • Page 393 393
  • Page 394 394
  • Page 395 395
  • Page 396 396
  • Page 397 397
  • Page 398 398
  • Page 399 399
  • Page 400 400
  • Page 401 401
  • Page 402 402
  • Page 403 403
  • Page 404 404
  • Page 405 405
  • Page 406 406
  • Page 407 407
  • Page 408 408
  • Page 409 409
  • Page 410 410
  • Page 411 411
  • Page 412 412
  • Page 413 413
  • Page 414 414
  • Page 415 415
  • Page 416 416
  • Page 417 417
  • Page 418 418
  • Page 419 419
  • Page 420 420
  • Page 421 421
  • Page 422 422
  • Page 423 423
  • Page 424 424
  • Page 425 425
  • Page 426 426
  • Page 427 427
  • Page 428 428
  • Page 429 429
  • Page 430 430
  • Page 431 431
  • Page 432 432
  • Page 433 433
  • Page 434 434
  • Page 435 435
  • Page 436 436
  • Page 437 437
  • Page 438 438
  • Page 439 439
  • Page 440 440
  • Page 441 441
  • Page 442 442
  • Page 443 443
  • Page 444 444
  • Page 445 445
  • Page 446 446
  • Page 447 447
  • Page 448 448
  • Page 449 449
  • Page 450 450
  • Page 451 451
  • Page 452 452
  • Page 453 453
  • Page 454 454
  • Page 455 455
  • Page 456 456
  • Page 457 457
  • Page 458 458
  • Page 459 459
  • Page 460 460
  • Page 461 461
  • Page 462 462
  • Page 463 463
  • Page 464 464
  • Page 465 465
  • Page 466 466
  • Page 467 467
  • Page 468 468
  • Page 469 469
  • Page 470 470
  • Page 471 471
  • Page 472 472
  • Page 473 473
  • Page 474 474
  • Page 475 475
  • Page 476 476
  • Page 477 477
  • Page 478 478
  • Page 479 479
  • Page 480 480
  • Page 481 481
  • Page 482 482
  • Page 483 483
  • Page 484 484
  • Page 485 485
  • Page 486 486
  • Page 487 487
  • Page 488 488
  • Page 489 489
  • Page 490 490
  • Page 491 491
  • Page 492 492
  • Page 493 493
  • Page 494 494
  • Page 495 495
  • Page 496 496
  • Page 497 497
  • Page 498 498
  • Page 499 499
  • Page 500 500
  • Page 501 501
  • Page 502 502
  • Page 503 503

Sony Cyber-Shot DSC WX10 User manual

Category
Camcorders
Type
User manual

Ask a question and I''ll find the answer in the document

Finding information in a document is now easier with AI