Acer AT1927ML User manual

Category
LCD TVs
Type
User manual

This manual is also suitable for

1
AT1927ML
AT2227ML
User Guide
Acer LCD TV
Contents
Important safety instructions ------------------------------------- 3
Disposal instructions --------------------------------------------------------------- 4
Your LCD TV overview -----------------------------------------5
Front and side panels -------------------------------------------------------------- 5
Rear panel view --------------------------------------------------------------------- 6
Remote control -------------------------------------------------7
General keys ------------------------------------------------------------------------ 7
Teletext and Multimedia ------------------------------------------------------------ 8
Basic connections ----------------------------------------------9
Connecting the power cord -------------------------------------------------------- 9
Setting up the remote control------------------------------------------------------ 9
Enjoying analog and digital TV --------------------------------9
Connecting an antenna/cable ----------------------------------------------------- 9
Getting started watching your TV ------------------------------------------------ 10
Connecting external audio/video devices ----------------- 11
Connecting a DVD, VCR, STB or audio/video equipment --------------------- 11
Connecting a camera, camcorder or game console --------------------------- 12
Connecting a PC or notebook computer ---------------------------------------- 13
Connecting a USB storage device ----------------------------------------------- 13
Selecting the input source -------------------------------------------------------- 14
Playing multimedia files from a USB storage device ----- 15
Connecting a USB storage device ----------------------------------------------- 15
Navigating in the multimedia screen --------------------------------------------- 15
Channel controls --------------------------------------------- 18
Channel list ------------------------------------------------------------------------- 18
Favourite channel list -------------------------------------------------------------- 19
Programme information ----------------------------------------------------------- 20
Electronic programme guide ------------------------------------------------------ 20
Time shifting (digital channels only) ---------------------------------------------- 22
Record programs to a USB storage device (digital channels only) ------------ 22
OSD navigation ----------------------------------------------- 23
Navigating the OSD with the remote control ------------------------------------ 23
Adjusting the OSD settings ------------------------------------------------------- 24
OSD menus --------------------------------------------------- 26
Picture settings --------------------------------------------------------------------- 26
Sound settings --------------------------------------------------------------------- 28
TV settings-------------------------------------------------------------------------- 29
Country ----------------------------------------------------------------------------- 29
Settings ----------------------------------------------------------------------------- 30
Parental ----------------------------------------------------------------------------- 31
Troubleshooting ---------------------------------------------- 33
PC Input Signal Reference Chart --------------------------- 34
Product specifications --------------------------------------- 35
Wall mount preparation / removing the base -------------- 37
2
HDMI, the HDMI logo and High-Definition Multimedia Interface are trademarks or registered trademarks of
HDMI Licensing LLC.
DVB is a registered trademark of the DVB Project.
© 2011 All Rights Reserved.
Acer LCD TV User Guide
Original Issue: 06/2011
Model Number:
Serial Number:
Purchase Date:
Place of Purchase:
English
3
Important safety instructions
Read these instructions carefully. Please put them somewhere safe for future reference.
1. Only use attachments/accessories specified by the manufacturer.
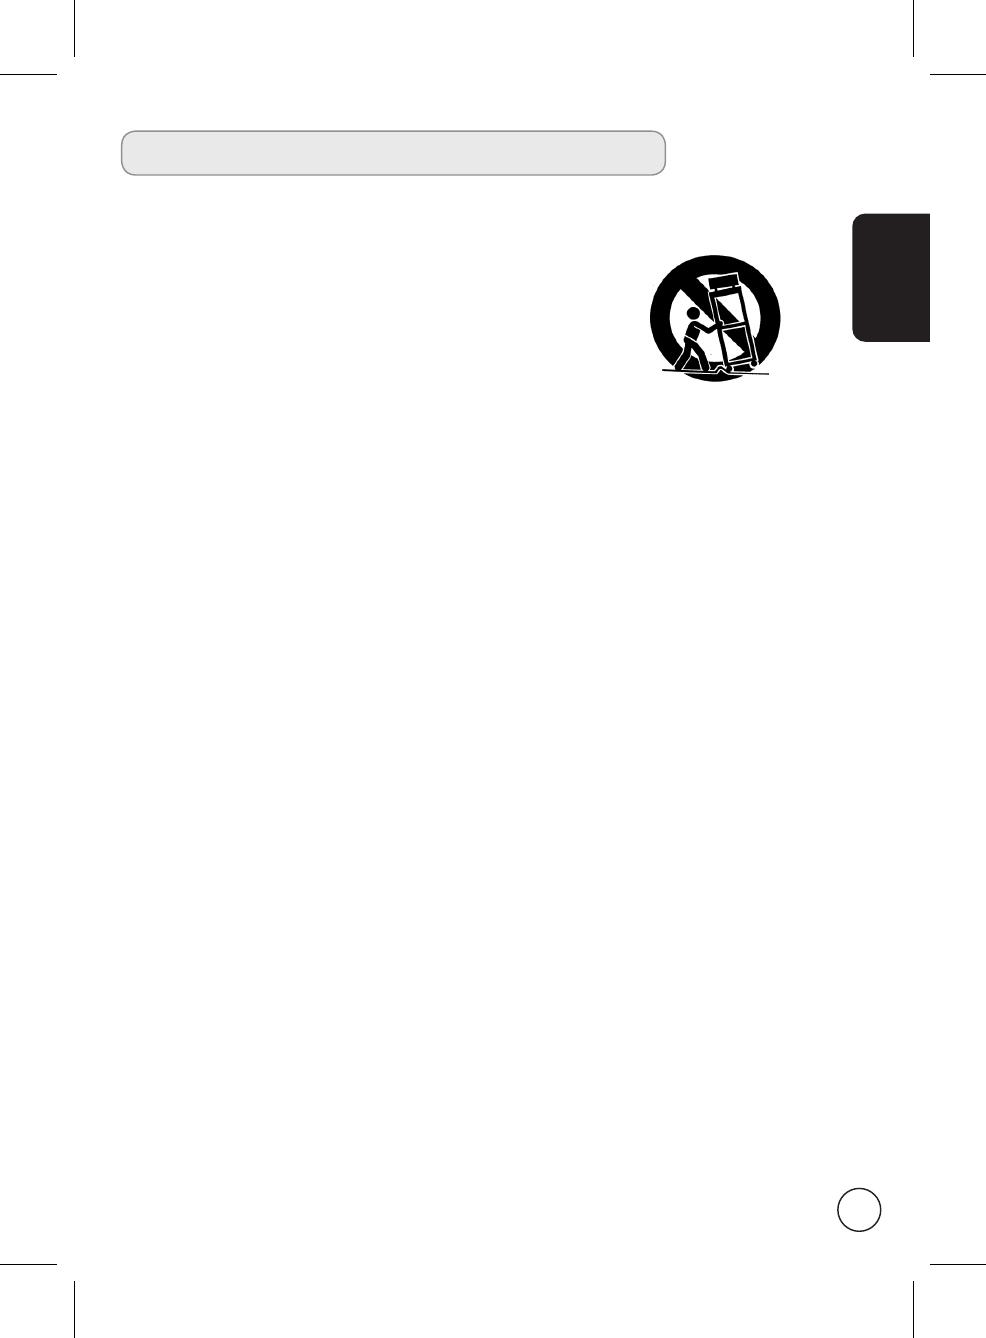
2. Use only with the cart, stand, tripod, bracket, or table specified by
the manufacturer, or sold with the apparatus. When a cart is used,
use caution when moving the cart/ apparatus combination to avoid
injury from tip-over.
3. Unplug this apparatus during lightning storms or when unused for
long periods of time.
4. Do not install this equipment in a confined space such a book case
or similar unit.
5. No naked flame sources, such as lighted candles, should be placed on the apparatus.
6. If the remote control will not to be used for a long time, remove the batteries. Use the remote
control carefully. Do not drop the remote control on the floor. Keep it away from moisture,
direct sunlight, and high temperatures.
7. Used or discharged batteries must be properly disposed of or recycled in compliance with all
applicable laws. For detailed information, contact your local solid waste disposal authority.
8 Follow all warnings and instructions marked on the product.
9 Unplug this product from the wall outlet before cleaning. Do not use liquid cleaners or aerosol
cleaners. Use a damp cloth for cleaning.
10 Do not use this product near water.
11 Do not place this product on an unstable cart, stand or table. The product may fall, sustaining
serious damage.
12 Slots and openings are provided for ventilation; to ensure reliable operation of the product
and to protect it from overheating, these openings must not be blocked or covered. The
openings should never be blocked by placing the product on a bed, sofa, rug or other similar
surface. This product should never be placed near or over a radiator or heat register or in a
built-in installation unless proper ventilation is provided.
13 This product should be operated from the type of power indicated on the marking label. If
you are not sure of the type of power available, consult your dealer or local power company.
14 Do not allow anything to rest on the power cord. Do not locate this product where the cord
will be stepped on.
15 If an extension cord is used with this product, make sure that the total ampere rating of the
equipment plugged into the extension cord does not exceed the extension cord ampere
rating. Also, make sure that the total rating of all products plugged into the wall outlet does
not exceed the fuse rating.
16 Never push objects of any kind into this product through cabinet slots as they may touch
dangerous voltage points or short-out parts, which could result in a fire or electric shock.
Never spill liquid of any kind on the product.
17 Do not attempt to service this product yourself, as opening or removing covers may expose
you to dangerous voltage points or other risks. Refer all servicing to qualified service
personnel.
18 Unplug this product from the wall outlet and refer servicing to qualified service personnel
under the following conditions:
a. When the power cord or plug is damaged or frayed.
b. If liquid has been spilled into the product.
English
4
The grounding pin is an important safety feature. It is possible to receive an electric shock from a
system that is not properly grounded.
The grounding pin is also providing good immunity ability against unexpected noise that interferes
performance of this product and is produced by other nearby electrical devices.
Disposal instructions
Do not throw this electronic device into the rubbish bin / container when discarding. To minimize pollution
and ensure utmost protection of the global environment, please recycle.
For more information regarding WEEE, please refer to
http://global.acer.com/about/environmental.htm
Соответствует сертификатам, обязательным в РФ
(
Compliant with Russian regulatory certification)
c. If the product has been exposed to rain or water.
d. If the product does not operate normally when the operating instructions are followed.
Adjust only those controls that are covered by the operating instructions.Improper
adjustment of other controls could result in damage; extensive work by a qualified
technician might then be required to restore the product to normal condition.
e. If the product has been dropped or the case has been damaged.
f. If the product exhibits a distinct change in performance, indicating a need for service.
19 Use only the proper type of power supply cord set (provided in your accessories box) for this
unit. Always disconnect the power cord from the wall outlet before servicing or disassembling
this equipment.
20 Do not overload an electrical AC outlet, power strip, or convenience receptical. The overall
system load must not exceed 80% of the branch circuit rating. If power strips are used, the
load should not exceed 80% of the power strip input rating.
21 Some products are equipped with a three-wire electrical grounding-type plug that has a third
pin for grounding. This plug only fits into a grounded electrical outlet. This is a safety feature.
Make sure the AC outlet is properly grounded. Do not defeat the safety purpose of the
grounding-type plug by trying to insert it into a non-grounded outlet. If you cannot insert the
plug into the outlet, contact your electrician to replace the obsolete outlet.
22 Do not use this LCD TV in the workplace in accordance with BildscharbV, and maintain ample
distance from it when watching. Watching a big-screen TV too close can cause eyestrain.
23 This TV is designed for home entertainment purposes only. Make sure there is sufficient
distance between you and the TV when you are viewing content to avoid harming your eyes.
English
5
Your LCD TV overview
Front and side panels
1 Common interface
2 AV in-COMPOSITE + Audio L/R
3 USB port
4 Earphone
5 Volume up When the OSD is on, functions the same as the Right arrow.
6 Volume down When the OSD is on, functions the same as the Left arrow.
7 Channel up When the OSD is on, functions the same as the Up arrow.
8 Channel down When the OSD is on, functions the same as the Down arrow.
9 Menu key Turns the OSD menu ON and OFF.
10 Source (Input) key
Press to change input source. When the OSD is on, press this
button to confirm selection.
11 Power button
1
4
2
5
6
7
8
9
10
11
3
English
6
Rear panel view
1 AC-in 5 AV in-COMPONENT + Audio L/R
2 HDMI port 6 SPDIF out
3 VGA-in + PC Audio-in 7 Tuner (hybrid)
4 SCART
321 6 754
English
7
General keys
Remote control
OK
DISPLAY GUIDE
WIDESOURCE
MENU
MUTE
TELETEXT
INDEX SIZE HOLD REVEAL
SUBTITLE
BACK
CANCEL
FAV
MPX
1
8
4
10
7
2
3
5 WIDE
Press to toggle scaling mode between
Auto, Normal, Zoom1, Zoom2 and Wide
modes.
6 MPX
Press to display and select the audio
signal.
7 MENU
Press to open or close the Menu.
8 Back/CANCEL
Press to back to previous Menu.
9 Directional keys
On certain models, the left and right
directional keys also function as rewind
and fast-forward keys when viewing
multimedia files.
10 OK/ENTER/CH LIST
ENTER: Press to confirm channel
number selection.
CH LIST: Press to launch the channel
list. See page 33.
11 MUTE
Press to toggle audio on and off.
12 FAV
Press to display the favorite channel list.
13 VOL (+/-)
Press to increase or decrease the
volume.
14 CH (up/down)
Press to sequentially select the TV
channel.
15 Number keys.
16 TELETEXT/MIX
Press to switch from TV/AV to Teletext
mode.
Press again to overlay teletext page on
the TV image.
17 SUBTITLE
Press to view subtitles on the screen.
11
9
5
6
12
13
14
15
16
17
1 POWER
Press to turn your TV on/off.
2 DISPLAY
Press to display or change input/channel
information (dependent on input/source
type).
3 GUIDE
Press to launch Electronic Programme
Guide (EPG) mode
(Digital TV mode only). See page 34.
4 SOURCE
(TV/YPbPr/AV/SCART/PC/HDMI/USB)
Press to select correct input mode.
English
8
OK
DISPLAY GUIDE
WIDESOURCE
MENU
MUTE
TELETEXT
INDEX SIZE HOLD REVEAL
SUBTITLE
BACK
CANCEL
FAV
MPX
Teletext
1 Colour buttons (R/G/Y/B)
Operates corresponding button on the
teletext page.
2 INDEX
Press to go to the index page.
3 SIZE
Press once to zoom teletext page to 2X.
Press again to resume.
4 HOLD
Press to pause the current teletext page.
5 REVEAL
Press to reveal hidden teletext
information.
Multimedia
1 Colour buttons (R/G/Y/B)
No function when using the mutimedia
interface.
2 Previous Track
Press to go to the beginning of a track,
or the previous track.
3 Stop
Press to stop playback.
On certain televisions the remote control
can start recording programmes. This
feature is not available on your television.
4 Play/Pause
Press to start playing the selected track,
or pause a track if it is already playing.
5 Next track
Press to skip to the next track if multiple
tracks have been selected.
* You may use the left and right directional
buttons to avance or rewind in a track.
Press the button again to increase how
fast the track advances (x2/x4/x8/x16).
Press the Play/Pause button to resume
playback.
The left and right directional keys also
function as rewind and fast-forward keys
when viewing multimedia files.
Teletext and Multimedia
3
1
5
4
2
English
9
Connecting the power cord
1 Connect the AC cord into the AC input on the back of the set.
2 Connect the plug to the wall outlet as shown.
Basic connections
Enjoying analog and digital TV
Connecting an antenna/cable
Connect the antenna cable to the appropriate antenna terminal on the back of the TV set as
shown below.
Setting up the remote control
1 Open the cover on the bottom of the remote unit.
2 Insert two AA batteries (supplied) to match the polarity indicated inside the battery
compartment.
Tuner
English
10
Getting started watching your TV
You can also adjust these settings using the front control panel. Please see "Front panel
view" on page 8 for details.
1
Power
a. Turn on the power switch.
b. Press the power button or channel up/down button on the remote control.
2
Installation Guide
The first time you switch on the TV, you will be asked to select the language and scan for
channels.
Press the OK key to begin the setup process.
Step 1. Select the setup language you prefer.
Step 2. Please select the correct country for signal reception.
Step 3. Select Home mode.
Step 4. Ensure that your co-axial cables are connected correctly before proceeding.
Step 5. Scan for digital channels and analog channels.
Step 6. Setup is now complete. You are ready to begin watching TV.
3
Changing channels
a. Press 0 - 9 on the remote control to select a channel. The channel changes after 2
seconds. Press OK to select the channel immediately.
b. Pressing the channel ( CH ) up / down button on the remote control will also change the
channel.
4
Adjusting the volume
Adjust the volume level using the ( VOL ) up/down button on the remote control.
2
4
1
3
Setup may vary due to local broadcast differences.
1
English
11
Connecting external audio/video
devices
Connecting a DVD, VCR, STB or audio/video
equipment
Connect your DVD player, VCR or audio/video equipment using the SCART port located at the
rear of your LCD TV as shown below.
Source-in
Y
Yellow
Red
White
Blue
Green
R
W
or
DVDPC VCR STB
or
HDMI
HDMI
D-Sub
D-Sub
VGA
RBG
RBG
R
W
R
W
COMPONENT
SCART
AV
AUDIO
PC-Audio in
Y
R
W
W
R
AUDIO
AV
COMPOSITE
Y
B
G
* Acer recommends the following priority for connection types:
HDMI -> COMPONENT -> SCART -> Composite.
English
12
TV-out
AV
Recorder
SPDIF
SCART
Connecting a camera, camcorder or game console
Connect your camera or camcorder to the video/audio ports on the left of the TV set as shown
below.
HDMI
RBG
RBG
R
W
R
W
COMPONENT
AV
AUDIO
Y
R
W
W
R
AUDIO
AV
COMPOSITE
Y
English
13
Connecting a PC or notebook computer
To display PC output on your TV, connect your PC or notebook computer to the TV as shown
below.
For VGA connections, Acer recommends setting your PC’s external monitor resolution
to 1920 x 1080 pixels @ 60 Hz refresh rate.
D-Sub
D-Sub
Connecting a USB storage device
To display multimedia content on your TV, connect the USB device to the TV as shown below.
Handy drive
English
14
Selecting the input source
Once you have connected your antenna or external equipment to the TV, you need to select the
correct input source.
Press the SOURCE button on the remote control to select the correct input source
(TV/YPbPr/AV/SCART/PC/HDMI/USB).
SOURCE
English
15
Playing multimedia files from a USB
storage device
Connecting a USB storage device
Connect the USB storage device to the USB port on your computer.
Press the Source button on the remote control and select USB.
SOURCE
Navigating in the multimedia screen
There are three main areas of the multimedia screen:
a
b
c
a. Status bar
The top of the screen shows the type of media being viewed: Photo, Music or Movie, with some
information about the selected file. Press the MENU button and select Media Type to change
the type of media being shown: Select Photo, Music or Video and press the OK button.
English
16
Photo files
Select a photo and press OK to open it. Photo files will be shown in a slideshow, each photo will
be displayed for a short duration. Press Play/Pause to pause the display on a specific photo.
Press Previous (‘Index’) or Next (‘Reveal’) to return to the previous photo, or to view the next
photo.
Press BACK or return to the folder navigation list
Music files
Select a music file and press OK to open it. Press Play/Pause to pause a track.
Press Previous (‘Index’) or Next (‘Reveal’) to skip to the previous track or advance to the next
track in the folder.
Press and hold the left and right directional buttons to advance or rewind in a track. Press BACK
to return to the folder navigation list and preview screen.
b. Navigation menu
The middle of the screen shows the contents of the USB device. Use the directional keys and
press OK to open a file or folder.
Note: Only files that match the selected media type are displayed.
Press the BACK button to return to the folder that contains the folder being viewed.
c. File option bar
The bottom of the screen shows addition options for the file being viewed, such as volume level
or special functions for the coloured buttons on the remote control.
Note: When playing a movie or viewing photos, the top and bottom bars will disappear
after a short delay.
English
17
Movie files
Select a movie file and press OK to open it. Press Play/Pause to pause a movie.
Press Previous (‘Index’) or Next (‘Reveal’) to skip to the previous movie or advance to the next
movie in the folder.
You may use the left and right directional buttons to advance or rewind in a movie. Press the
button again to increase how fast the track advances or rewinds (x2/x4/x8/x16).
Press BACK to return to the folder navigation list and preview screen.
Leaving multimedia storage display
Simply stop playback and press Source to select a different source type.
Warning: Do not remove the USB storage device while a media file is playing. Stop
playback and switch to a different source before removing the device from the USB
port.
English
18
Channel controls
To open the channel list feature:
1
OK
Press the OK key on the remote control. This will bring
up the channel list menu.
2
The current channel will be highlighted.
3
Use the directional keys to navigate the list and select
the channel you wish to watch.
Use the red key to switch between the digital and
analogue channel lists.
Use the green key to exit the list.
Channel list
Channel list allows you to quickly find the TV channel you are searching for.
OK
DISPLAY GUIDE
WIDESOURCE
MENU
MUTE
TELETEXT
INDEX SIZE HOLD REVEAL
SUBTITLE
BACK
CANCEL
FAV
MPX
OK
English
19
Storing favourite channels
1
FAV
Press the FAV key on the remote control. This will bring up
the favourite channel list.
2
The Favourite list will be shown. Press OK to select, delete or
add a favourite channel.
3
Back
Press the BACK key on the remote control to exit.
Viewing your favourite channels
FAV
On the remote control, if you press the FAV key, the TV will
display a list of favourite TV channels. Use the up or down
directional keys to select a channel, and then press OK.
Favourite channel list
The favourite channel list allows you to store your favourite TV channels and flick between them
at the touch of a button.
To set a favourite channel, follow the steps described on this page.
English
20
Electronic programme guide
The electronic programme guide (EPG) is an onscreen service available on digital and cable TV
that provides information about scheduled broadcast programmes on all digital channels by time,
title and channel.
GUIDE
Programme information
Press the DISPLAY key to see information about the current programme (if available).
a. Programme title
b. Programme schedule
c. Subtitle
If ‘Subtitle’ is displayed press the SUBTITLE key to see a list of available subtitles.
d. Audio language
e. Programme summary
d
c
e
a
b
  • Page 1 1
  • Page 2 2
  • Page 3 3
  • Page 4 4
  • Page 5 5
  • Page 6 6
  • Page 7 7
  • Page 8 8
  • Page 9 9
  • Page 10 10
  • Page 11 11
  • Page 12 12
  • Page 13 13
  • Page 14 14
  • Page 15 15
  • Page 16 16
  • Page 17 17
  • Page 18 18
  • Page 19 19
  • Page 20 20
  • Page 21 21
  • Page 22 22
  • Page 23 23
  • Page 24 24
  • Page 25 25
  • Page 26 26
  • Page 27 27
  • Page 28 28
  • Page 29 29
  • Page 30 30
  • Page 31 31
  • Page 32 32
  • Page 33 33
  • Page 34 34
  • Page 35 35
  • Page 36 36
  • Page 37 37

Acer AT1927ML User manual

Category
LCD TVs
Type
User manual
This manual is also suitable for

Ask a question and I''ll find the answer in the document

Finding information in a document is now easier with AI