7 For more information, visit global.irobot.com
Braava jet
®
m6 Owner’s Guide 8
ENEN
Cleaning
Use your robot frequently to maintain well-conditioned floors.
• Your robot will automatically explore and clean your home, moving in
a methodical manner across the floor, with some overlap from one
pass to the next to ensure that every spot on the floor is cleaned three
times. If you are looking for a quicker clean or a deeper clean than this
default setting, or if you want to adjust the amount of water sprayed,
you can change your cleaning preferences from the iRobot HOME App.
• Your robot will return to the charging station at the end of a
cleaning job, whenever it needs to recharge, or when the tank
needs to be refilled.
Note: Note: If the “CLEAN” text is pulsing while charging, your robot is in
the middle of a cleaning job and will automatically resume where it left o
once recharged.
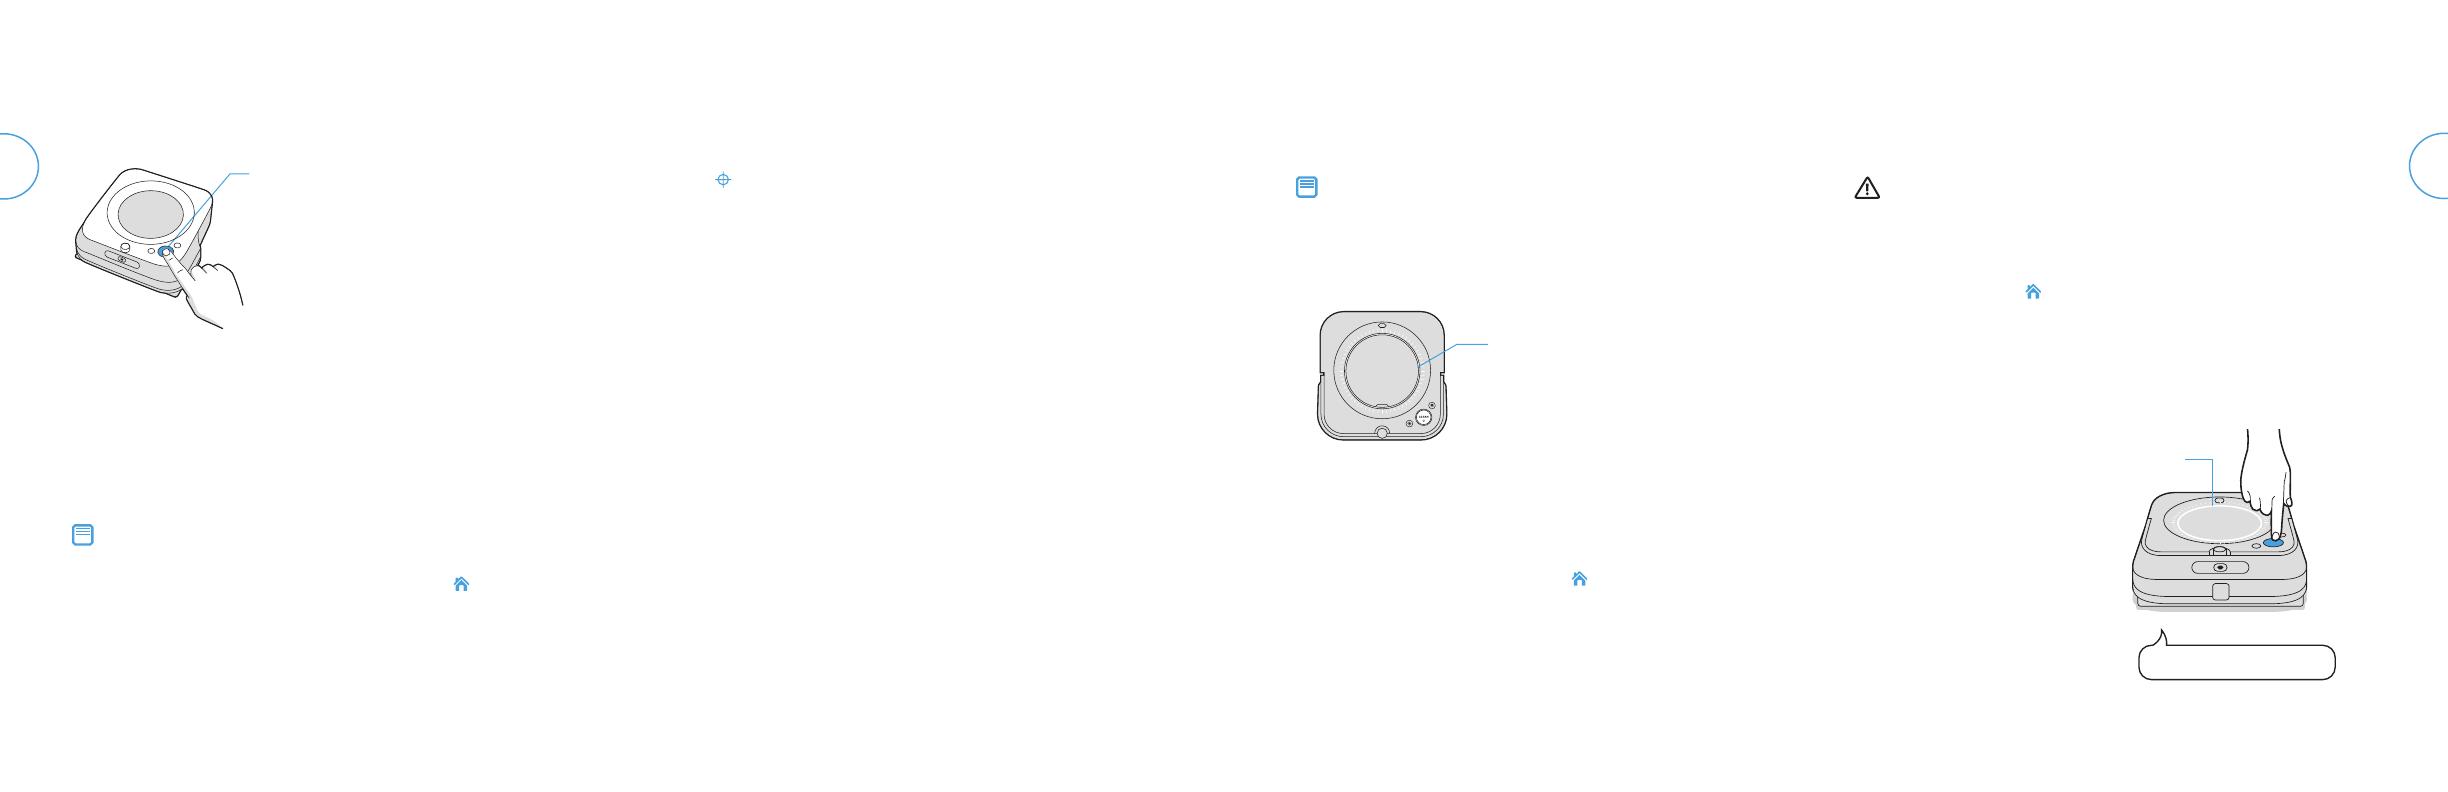
• To send the robot back to its charging station, tap (home). A blue
light ring pattern will indicate that the robot is seeking the charging
station. This feature will only work if your robot started the job from the
charging station.
• When the robot senses its tank needs to be filled, the light ring
indicator will illuminate in a red sweeping motion toward the lid latch.
Using Your Braava jet
®
m6 Robot Mop
Charging
• Slide your robot onto the charging station contacts to activate
the battery.
Note: Your robot comes with a partial charge, but we recommend that
you charge the robot for 3 hours prior to starting the first cleaning job.
• The light ring indicator will show the current charging status.
This will turn o after 1 minute to save power, but can be shown
again if you press CLEAN. This can also been seen in the iRobot
HOME App.
• Your robot uses a small amount of power whenever it is on the
charging station. You can put the robot in a further-reduced
power state when not in use. For instructions and more details on
this Reduced Power Standby Mode, refer to the iRobot
HOME App.
• For long-term storage, turn o your robot by removing it from the
charging station and holding down (home) for 10 seconds.
Store your robot in a cool, dry place.
Light Ring While Charging
Solid: fully charged
Pulsing: charging
Just Press CLEAN
Tap to Start / Pause / Resume
Hold for 3 seconds to end a job
and put the robot to sleep
Hold for 10 seconds to reboot
Lithium Ion Battery
For best results, only use the iRobot Lithium Ion Battery that comes with
your Braava jet
®
m6.
WARNING: Lithium ion batteries and products that contain lithium ion
batteries are subject to stringent transportation regulations. If you need to
ship this product (with the battery included) for service, travel or any other
reason, you MUST follow these shipping instructions.
• Battery MUST be turned o before shipping.
• Turn o the battery by removing the robot from the charging station
and holding down (home) for 10 seconds. All indicators will turn o.
• Package the product in its original packaging.
• Ship via ground transportation only (no air shipping).
• If you need further assistance, contact our Customer Care team.
Red Light
Ring
Low battery. Please charge.
Troubleshooting
• Your robot will tell you something
is wrong by playing an audio alert
and turning the light ring indicator
red. Press CLEAN for details.
Further support and instructional
videos are available in the iRobot
HOME App.
• After 90 minutes of inactivity o the
charging station, your robot will
automatically end its cleaning job.
Tips for Optimizing Performance
• Your robot works best when used with the iRobot HOME App.
• For optimal mopping performance, we recommend that you
vacuum first to pick up large dirt and debris before running
Braava jet
®
.
• Your robot will only run with Braava jet
®
m Series pads, which are
made specifically for Braava jet
®
m Series robots.
• Use a new pad for each cleaning job, and do not pre-wet the
pads prior to use.
• Keep your charging station plugged in and the area around it
clear of clutter.
• You can use a Dual Mode Virtual Wall
®
Barrier to help keep your
robot in places you want to be cleaned, and out of the ones you
don’t. (Sold separately)
• Within the iRobot HOME App, you can adjust cleaning
preferences to modify cleaning power, speed, and coverage.
• Clean smaller designated areas (3.3 ft
2
/ 1 m
2
) by placing your
robot at the bottom center of the space you’d like to focus on.
Tap (spot clean) to start cleaning.


