NOV 2014INSTALLATION GUIDE ronbow.com
INSTALLATION SHEET
SELF RIMMING SINKSMODEL: 200360
200361
CERAMIC VESSEL
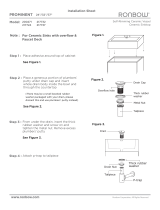
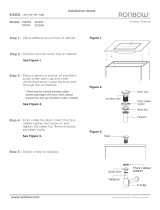
STEP 1: Position countertop opening to ensure
clearance between the lavatory, faucet, and
backsplash.
See Figure 1.
After dropping in the sink, push the sink all the
way back towards the faucets holes.
Note: If cutting a custom top, please follow our standard
stone top cutout size
STEP 2: Place a generous portion of plumbers’
putty under drain cap and insert whole drain body
inside the bowl and through the countertop.
(There may be a small beveled rubber washer packaged
with your drain, please discard this and use plumbers’
putty instead)
See Figure 2.
STEP 3: From under the drain, insert the thick
rubber washer and screw on and tighten the metal
nut. Remove excess plumbers’ putty.
See Figure 3.
Note: Line up drain overflow to sink overflow.
STEP 4: Attach p-trap to tailpiece.
STEP 5: Place ceramic drain cover over drain.
Note: 200361 can be used with RONBOW pop-up drains.
Figure 1.
MATERIALS NEEDED:
PHILIP SCREWDRIVER
PLUMBERS' PUTTY/ SEALANT
Figure 3.
Drain Nut
Ceramic
Drain Cover
Tailpiece
P-trap
Drain
Thick rubber
washer
Counter Top
Figure 2.
Drain Nut
Overflow Hole
Drain
Thick rubber
washer
/


