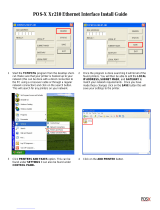
Page is loading ...

PC Setup 3-1
CHAPTER 3 — PC Setup
This chapter covers connecting the printer and installing utilities, drivers, and related
files on PC hosts.
Port Connections
This section covers parallel and Ethernet connections.
Parallel Connection
To connect via the parallel port
1. Turn off your printer and PC.
36-pin Connector
To Printer
25-pin Connector
To Host Computer
Fig. 3.1 Parallel Cable
2. Plug the cable’s 36-pin connector into the printer’s parallel port (fig. 3.1) and
the 25-pin connector into the computer’s parallel port.
3. Turn on your printer and computer.
4. Verify that the printer’s parallel interface is enabled and configured for ECP or
bi-directional parallel port mode in your computer setup (i.e. BIOS or CMOS).
See your computer documentation for how to access your BIOS/CMOS setup.
Before using your printer, install and configure the Adobe PostScript printer driver
and your printer’s PPD using the appropriate procedures later in this chapter.
Ethernet Connection
To connect via the Ethernet port
1. Turn off your printer.

3-2 PC Setup
2. Connect the printer to the appropriate port for the cable used on your network
(fig. 3.2).
RJ-45
Connector
Ethernet Port
Fig. 3.2 Connect to the Ethernet Port
Before using your printer, set it up for your network environment and configure the
Ethernet interface using the appropriate procedures later in this chapter.
USB Connection (for PC only*)
To connect to the USB (Universal Serial Bus) port
Connector
To Host Computer
Connector
To Printer
Fig. 3.3 USB Cable
1. Plug the USB cable’s square, smaller connector into the printer’s USB port (fig.
3.3).
2. Plug the thin, larger connector into the computer’s USB port.
It is not necessary to turn off your printer or your computer before plugging in the
USB.
Installing Adobe PostScript Printer Drivers
If you did a custom install during setup and did not install the printer drivers and
support files, you must install the Adobe PostScript driver and your printer’s PPD
before using your printer.

PC Setup 3-3
This section describes loading the printer driver manually and starting the installer.
See “Installing Utilities" for the appropriate Windows environment later in this
chapter to load XANTÉ Utilities manually. See “PDFs Folder" later in this chapter to
load QuarkXPress PDF files manually.
Deleting Previous Driver Versions
Normally, you do not have to delete previous Adobe PostScript printer drivers or any
previously installed Adobe PostScript printers. However, if you suspect installation
problems, first remove your installed printers from the Printers dialog box in the
Windows Control Panel and reinstall them via the Adobe PostScript Printers dialog
box which is also in the Windows Control Panel.
If after removing and reinstalling your printers, you still experience problems, delete
all previous driver versions and reinstall your printers using the Adobe PostScript
Printers dialog box.
To delete a previous driver version
1. Select Start: Settings: Control Panel. Then, double-click Add/Remove Programs.
2. Select XANTÉ Accel-a-Writer 4G/4N Utilities in the scroll box on the Install/
Uninstall tab in the Add/Remove Program Properties Window (fig. 3.4).
Fig. 3.4 Add/Remove Program Properties Window
3. Click Add/Remove.

3-4 PC Setup
4. Click Yes in the warning window to proceed with removal. Then, click OK.
5. Scroll through and verify that the XANTÉ Accel-a-Writer 4G/4N Utilities were
removed from the scroll box on the Install/Uninstall tab. Then, click OK.
Adobe Drivers
For Windows 98 and Me, the AdobePS 4.4 driver supports Adobe PostScript 3 and
earlier.
Installing AdobePS Printer Driver and Printer PPD
Windows 98 and Me
This section covers installing utilities, setting up a parallel or network connection,
configuring a remote printer running in LPR mode, and creating NDPS printers at
the server console in a Windows 98 or Me environment.
Installing Utilities
This section covers installing utilities on Windows 98 and Me based computers. This
process installs your printer’s PPD and selected application PDFs or PPDs; then, it
launches the Adobe PostScript Printer Driver installer.
XANTÉ Utilities CD-ROM Documentation is in Adobe Acrobat Portable
Documentation Format (PDF). Use Adobe Acrobat Reader (included on the utilities
CD-ROM) to read this documentation. See “Adobe Acrobat Reader" later in this
chapter for details.
XANTÉ Utilities Installer runs properly only on an Intel based computer system
running Windows 98 or Me. To load the Adobe PostScript printer drivers manually,
see the CD-ROM’s Readme.pdf file and “Installing Adobe PostScript Printer Drivers"
earlier in this chapter. To load QuarkXPress PDFs manually, see “PDFs Folder" later in
this chapter.
To Install Utilities and Drivers
1. Insert the XANTÉ Utilities CD-ROM into your PC. XANTÉ Utilities Installer
should launch automatically. If not, select Start: Run: XInstall/xt_prinst.exe.
The XANTÉ Utilities Main window appears (fig. 3.5).
Even if you are installing this printer to a Network, you must first install as a Parallel
Connection. This is to ensure you can configure the printer’s IP address, Subnet
address, and Gateway address.

PC Setup 3-5
Fig. 3.5 XANTÉ Utilities Main Window Fig. 3.6 Installation Preferences Window
2. Click Install Printer (fig. 3.4). The Installation Preferences window appears (fig. 3.6).
3. Make the following selections in the Installation Preferences window (fig. 3.6).
a. Select your printer from the Select Product drop-down menu.
b. Select the appropriate program(s) for which you want to download the
drivers from the Application Drivers section.
Even if you are installing this printer to a Network, you must first install as a Parallel
Connection. This is to ensure you can configure the printer’s IP address, Subnet
address, and Gateway address.
c. Click OK if you chose an application in step 3b; when a window appears
asking if you want to continue, click Yes. The Copy Files window appears
(fig. 3.7).
Fig. 3.7 Copy Files Window Fig. 3.8 Language Preference Window

3-6 PC Setup
4. Review the application destination folder(s) if applicable (fig. 37); then, click
Yes. The Language Preference window appears (fig. 3.8).
5. Select the appropriate language (fig. 3.8); then, click OK. The Adobe PostScript
Printer program launches and the Adobe Welcome window appears (fig. 3.9).
Fig. 3.9 Adobe Welcome Window Fig. 3.10 License Agreement Window
After you click Next, Windows launches the Adobe PostScript Printer Driver setup
program. This may take a few moments.
6. Read the Adobe Welcome Window (fig. 3.9); then, click Next. The Adobe
License window appears (fig. 3.10).
7. Read the license agreement (fig. 3.9); then, click Accept. The Printer
Connection Type window appears (fig. 3.11).
Fig. 3.11 Printer Connection Type Window
8. Select the type of printer connection you want to setup (fig. 3.11); then, click
Next.

PC Setup 3-7
Parallel Connection or Network Installation
Use the following procedure to finish the utilities and drivers installation process.
When you selected the Local Printer option in the previous procedure, the Port
window appears (fig. 3.12).
If you choose a networked printer, you must type in a network path for your printer.
Then, skip to step 2 to continue with installation.
1. Select the appropriate port (fig. 3.12); then, click Next. The Select Printer
Model window appears (fig. 3.13).
Fig. 3.12 Port Window Fig. 3.13 Select Printer Model Window
2. Select Browse to find your printer (fig. 3.13). Search the disk drive and the
appropriate folder until you find your printer (fig. 3.14); then, click OK. The
Select Printer Model window reappears (fig. 3.15).
Fig. 3.14 Browse Window Fig. 3.15 Select Printer Model Window
3. Select your printer model (fig. 3.15); then, click Next. The Printer Information
window appears (fig. 3.16).

3-8 PC Setup
Fig. 3.16 Printer Information Window Fig. 3.17 Setup Information Window
4. Enter the printer name, set the default option, and select Yes to print the test
page (fig. 3.16); then, click Next. The Setup Information window appears (fig.
3.17).
Printing the test page confirms that your printer is connected and communicating
with your computer correctly.
5. Verify that the setup information is correct (fig. 3.17); then, click Install. The
Printer Configuration window appears (fig. 3.18).
Fig. 3.18 Printer Configuration Window
6. Select Yes or No to configure the printer now; then, click Next and take the
following appropriate step.
a. If you selected Yes, the Properties Device Options window appears (fig.
3.19); continue to step 7.

PC Setup 3-9
b. If you selected No, the Setup Complete window appears (fig. 3.20); skip
to step 11.
Fig. 3.19 Properties Device Options Window Fig. 3.20 Setup Complete Window
7. Configure the printer by selecting each tab and setting the appropriate options
for your system setup; click Apply; then, click OK. The Setup Complete window
appears (fig. 3.20).
8. Select Yes, I want to view the ReadMe file. When the file opens, read it.
9. Close the ReadMe file; then, click Finish.
10. If you chose to read the ReadMe file, read it when it comes up and then close it.
The Main Screen window appears (fig. 3.21). Select Exit (or close) the Main
Screen. The Web Registration window appears (fig. 3.22).

3-10 PC Setup
Fig. 3.21 Main Screen Fig. 3.22 Web Registration Window
11. Select Yes or No (fig. 3.22). Then, go to the appropriate following step.
a. If you selected Yes, the Registration Form window appears (fig. 3.23). Fill out
and submit the form.
Fig. 3.23 Registration Form
b. If you select No, you return to the Windows desktop.
Configuring the PPD
If you selected Yes to configure your printer in “Installing AdobePS Printer Driver and
Printer PPD," some of the following PPD options are set already. In this case, simply
verify those settings and make new ones required in this procedure.
1. Select Start: Settings: Printers. The Printers window appears.
2. Highlight your printer and click the right mouse button. Select Properties from
the drop-down menu.

PC Setup 3-11
3. Click the Device Options tab, highlight the option in the Installable Options
section, and then select the setting under Change Setting (fig. 3.24).
Fig. 3.24 Device Options Tab
a. Select Installed for each Optional Tray (optional paper feeder) if that
upgrade was added to your printer.
b. Select Installed for the Duplexer if that upgrade was added to your
printer.
c. Select the amount of RAM installed on your printer using the Installed
Memory Option..
4. Click the Details tab (fig. 3.25) and under Timeout, make sure the settings are
as follows for a local printer. These options are not available for a networked
printer.
• Not selected: 300
• Transmission retry: 900

3-12 PC Setup
5. Click the PostScript tab (fig. 3.25).
Fig. 3.25 PostScript Tab
a. In the PostScript output format box, select PostScript (optimized for
speed) if you have a Pentium processor. If not, select Poq!3cript
(optimized for portability-ADSC).
b. Under PostScript header, select Download header with each print job.
c. Under PostScript timeout values, make sure the settings are
• Job timeout: 0
• Wait timeout: 240
6. Click the General tab if you want to print a test page; next, click Apply and then
Print Test Page.
7. Click OK. The Printer Properties window closes.
8. Select File: Close. The Printers window closes.
Configuring Printer Options
Various printer specific options become available through your software applications
after you install the printer’s PPD. This section covers these options and suggested
settings for them.

PC Setup 3-13
Fast Imaging
Adobe PostScript 3’s Fast Imaging feature allows you to select from two methods of
image data compression for faster printing when image quality is not the primary
concern.
Set Fast Imaging from your application Print dialog box.
• None, the factory default, prints at normal speed and with no data compression.
• Optimized for Quality compresses image data for faster printing than normal but
with some (usually not noticeable) loss of image quality.
• Optimized for Speed implements a greater degree of data compression to provide
the fastest print time but with the possibility of a noticeable loss of data quality.
Optimize selections do not function if the print job contains an image that is masked
or rotated to anything other than 0°, 90°, 180°, or 270°.
Gamma
The Gamma feature allows you to adjust printer output for ink, media, file, and
environmental conditions. For example, if a scanned image is too dark, you can select
a new gamma setting to lighten and enhance the details. XANTÉ provides seven
standard gamma curves available through the Gamma menu in the Print dialog box.
Gamma curves 1 through 5 progressively lighten the midrange values in an image.
Gamma 0 (the factory default) makes no change to the image, and Gamma 6
produces a reverse (negative) image without changing the image in the application.
Graphs in figure 3.26 show the change to the midrange gray levels.
Depending on the application being used, a Printer’s Default option may be available.
When this option is selected, the current printer setting is used for the job.

3-14 PC Setup
1
10
Output Levels
Black White
Input Levels
Gamma 6
Black White
1
10
Output Levels
Black White
Input Levels
Gamma 5
Black White
1
10
Output Levels
Black White
Input Levels
Gamma 4
Black White
1
10
Output Levels
Black White
Input Levels
Gamma 3
Black White
1
10
Output Levels
Black White
Input Levels
Gamma 2
Black White
1
10
Output Levels
Black White
Input Levels
Gamma 1
Black White
1
10
Output Levels
Gamma 0
Black White
Input Levels
Black White
Fig. 3.26 Gamma Corrections 0 through 6
Optimized Output For
The Optimize Output For feature allows you to choose between Quality (the factory
default) and Speed. When quality output is more important than the printing speed,
select Quality. When speed is the more important, select Speed but be aware that
output quality may be slightly lower.
Depending on the application being used, a Printer’s Default option may be available.
When this option is selected, the current printer setting is used for the job.
Screen (LPI)
The Screen LPI (lines per inch) feature allow you to control the number of gray levels
and enhance the resolution quality of your printed image.

PC Setup 3-15
Usually you set lines per inch through your application. However, when LPI is not a
software option, you can use the Screen option provided by your printer’s PPD in the
Print dialog box. Options include 30 LPI, 75 LPI, 85 LPI, 95 LPI, 110 LPI, 115, 120,
and 133 LPI.
Depending on the application being used, a Printer’s Default option may be available.
When this option is selected, the current printer setting is used for the job.
Screen Shape (Dot Shapes)
The Screen Shape feature allows you to select the shape of dots that make up the
screen pattern for your printed image. This feature is controlled by your printer’s PPD
that is loaded on your system during printer setup.
Set the Screen Shape menu option in your application Print dialog box. Options are
Enhanced (the factory default), None, Euclidean, Round, Line, and Ellipse. The choice
of shape depends on the type of print job. For example, round usually is used for
traditional offset printing, while screen printers may choose line or ellipse.
Depending on the application being used, a Printer’s Default option may be available.
Smooth Shading
Smooth Shading allows you to use the Adobe PostScript 3 method of rendering
gradient blends. Smooth Shading produces the highest quality image at the selected
resolution. For some images, PostScript files created with Smooth Shading are smaller
and print faster than those created using PostScript Level 2.
Set Smooth Shading from your application Print dialog box. Off, the factory default,
disables this feature. Options of Maximum, High, Medium, Low are available.
Additional Printer Specific Options for Adobe PageMaker
Several additional printer specific options are available through PageMaker’s Printer
Features in the Print dialog box. They include TraySwitch, Installed Memory, and
Optional Tray.
TraySwitch (Tray Chaining)
TraySwitch allows you to select the printer’s tray chaining feature on a per job basis.
Tray chaining on your printer is controlled via the printer’s PPD Tray Switch feature.
Options are False (the factory default) which disables chaining and True which
enables it. When True is selected, your printer automatically switches to another
media source when the current source runs out of media as long as the following
conditions are met.

3-16 PC Setup
• All selected media sources must contain the same size media. If the printer detects
a different size media when it switches to a new tray, the printer stops printing.
• All trays must be inserted properly. When Tray Switch is set to True, an
incorrectly positioned tray prevents the printer from printing.
Tray Chaining only applies to the cassette(s), not to the Multipurpose tray.
Installed Memory
The Installed Memory feature must be set to agree with your printer and Chooser
memory configurations. Options include 64 MB (the factory default), 128 MB, and
256 MB. If your printer has an installed memory upgrade, it will not appear in your
application’s Resolution menu unless Installed Memory is configured properly.
Optional Tray
The Optional Tray setting must be set to agree with your printer and Chooser
configurations. Otherwise, the tray will not appear or be selectable from within your
application. Options include Not Installed (the factory default) and Installed.
XANTÉ Win98 and Me LPR Tool
The LPR Tool allows you to communicate with your printer through the LPR port.
This must be installed to connect your printer via the Ethernet.
1. Click Software Utilities in the XANTÉ Utilities Main window (fig. 3.27). The
Select Utility window appears (fig. 3.28).
Fig. 3.27 XANTÉ Main Menu Fig. 3.28 Select Utility Window
2. Highlight Xanté Win98 and Me LPR Tool (fig. 3.28); then, click OK. Xanté
Win95/98/Me LPR Tool launches; then, the XantéLPR Setup window appears
(fig. 3.29).

PC Setup 3-17
Be sure you exit all Windows programs prior to running this Setup program.
Fig. 3.29 XantéLPR Setup Window Fig. 3.30 License Agreement Window
3. Read the Setup window (fig. 3.29); then, click Next. The XantéLPR License
Agreement window appears (fig. 3.30). Read it carefully and click Yes. The
Destination Location window appears (fig. 3.31).
Fig. 3.31 Destination Location Window Fig. 3.32 Select Program Folder Window
4. Select the folder(s) into which Setup will install the files (fig. 3.31); then, click
Next. The Select Program window appears (fig. 3.32).

3-18 PC Setup
5. Select the folder(s) to which you want the program icons added (fig. 3.32);
then, click Next. The Setup Complete window appears (fig. 3.33); then, click
Finish. A ReadMe file window appears.
Fig. 3.33 Setup Complete Window Fig. 3.34 Restart Computer Window
6. Click Yes to open the ReadMe file. If you don’t want to read it, click No. The
Restart Computer Window appears (fig. 3.34).
7. Wait until Setup is complete; then, click Finish (fig. 3.34).
If you did not register your printer earlier, the On-line Registration window appears
and you should register your printer now.
Configuring Your Printer’s IP, Subnet, and Gateway Addresses
1. From the ps_files folder on the XANTÉ CD-ROM, copy dhcpoff.ps to your c:\ drive.
2. Go to DOS (Command) Prompt.
3. Copy dhcpoff.ps to lpt1 port.
4. Power cycle the printer (turn off, then back on).
5. Using a word processing application, open setipsub.ps file from the ps_files
folder. Edit the file so it contains the IP, Subnet, and Gateway addresses you
obtained from your network administrator. Save the file to your c:\ drive.
6. Go to DOS (Command) Prompt.
7. Copy setipsub.ps lpt1.
8. Power cycle the printer again and verify that the start-up page contains your IP,
Subnet, and Gateway addresses.

PC Setup 3-19
9. Go to DOS (Command) Prompt to ping the printer.
c:\ping (IP Address)
If you can ping the printer, go on to step 10. If you cannot ping your printer, contact
your Network Administrator.
10. Go back to your Printer Properties (fig. 3.35) and select the Details Tab (fig.
3.36).
Fig. 3.35 Printer Properties Window Fig. 3.36 Details Tab Window
11. Select Add Port from the Details tab (fig. 3.36). The Add Port window appears
(fig. 3.37).
12. Select Other and highlight XantéLPR (fig. 3.37); then, click OK. The Configure
Port window appears (fig. 3.38).
Fig. 3.37 Add Port Window Fig. 3.38 Configure Port Window
13. Enter your printer’s IP address and Queue name (fig. 3.38); then, click OK.

3-20 PC Setup
14. Click Apply when the Printer Properties window reappears (fig. 3.35); then,
click OK.
Installing AdobePS Printer Driver and Printer PPD
Windows NT/2000/XP
This section covers installing utilities, setting up a parallel or network connection,
configuring a remote printer running in LPR mode, and creating NDPS printers at
the server console in a Windows NT, 2000, or XP environment.
Installing Utilities
This section covers installing utilities on Windows NT/2000/XP based computers.
This process installs your printer’s PPD and selected application PDFs or PPDs; then,
it launches the Adobe PostScript Printer Driver installer.
XANTÉ Utilities CD-ROM Documentation is in Adobe Acrobat Portable
Documentation Format (PDF). Use Adobe Acrobat Reader (included on the utilities
CD-ROM) to read this documentation. See “Adobe Acrobat Reader" later in this
chapter for details.
XANTÉ Utilities Installer runs properly only on an Intel based computer system
running Windows NT/2000/XP. To load the Adobe PostScript printer drivers
manually, see the CD-ROM’s Readme.pdf file and “Installing Adobe PostScript Printer
Drivers" earlier in this chapter. To load QuarkXPress PDFs manually, see “PDFs
Folder" later in this chapter.
To Install Utilities and Drivers
1. Insert the XANTÉ Utilities CD-ROM into your PC. XANTÉ Utilities Installer
should launch automatically. If not, select Start: Run: Install/xt_prinst.exe. The
XANTÉ Utilities Main window appears (fig. 3.39).
/