Page is loading ...

The eGauge is most commonly accessed through the proxy server, using an address in the form
http://DEVNAME.egaug.es or http://DEVNAME.d.egauge.net. The eGauge may also be accessed
via its IP address or hostname over the local network (commonly done to make configuration
changes). However, both cases rely on a router or other networking hardware to establish a link
between a computer and the eGauge.
In cases where it is not practical to connect the eGauge to a router, it is possible to connect to the
eGauge directly using an Ethernet cable and a laptop or desktop computer with an Ethernet port.
Connecting directly is often used for troubleshooting purposes, applying a device configuration
prior to installation, or when leaving a device at a remote location where internet access isn't
available. Tablets used in conjunction with USB to Ethernet adapters are not officially supported,
but may work.
By default, the eGauge will attempt to obtain an IP address and associated information through a
service called Dynamic Host Configuration Protocol (DHCP). If you cannot or do not wish to run this
service on your LAN, or there is no LAN or network environment, the device will default to using IP
address 192.168.1.88, so the device can be accessed at: http://192.168.1.88/.
The eGauge can be directly connected to a laptop or computer via an Ethernet to the built-in
Ethernt port (EG4xxx and EG30xx), or to the HomePlug adapter (EG301x or older model eGauge2).
This is often useful in environments with no local network, or where access to the network is
restricted. In these scenarios, the eGauge can be configured and commissioned locally and
directly; at a later time the eGauge can be retrieved and the data can be viewed and exported. On
EG4xxx meters, data can also be exported to a USB thumb drive.
Please refer to the proper walkthrough for setting up your device to communicate with the eGauge,
based on the operating system of the computer used to connect. These instructions assume that
the eGauge is configured to use DHCP (not a static IP address).
Connecting directly to the
eGauge
Overview
Introduction to connecting directly

Microsoft Windows 10
Microsoft Windows 8
Microsoft Windows 7
Mac OS X (tested on Mountain Lion 10.7)
Linux/Unix (advanced)
For advanced/experienced users:
Connect a computer to the same network as the eGauge, or directly to the HomePlug adapter or
EG30xx/EG4xxx Ethernet port as stated above.
On the computer, set an IP address of 192.168.1.11, with a netmask of 255.255.255.0. Connect to
the eGauge via device hostname, default IP of 192.168.1.88, or current static IP (if set). Note that a
different IP address may need to be used on the computer if the eGauge's static IP address is not in
the 192.168.1.xxx range.
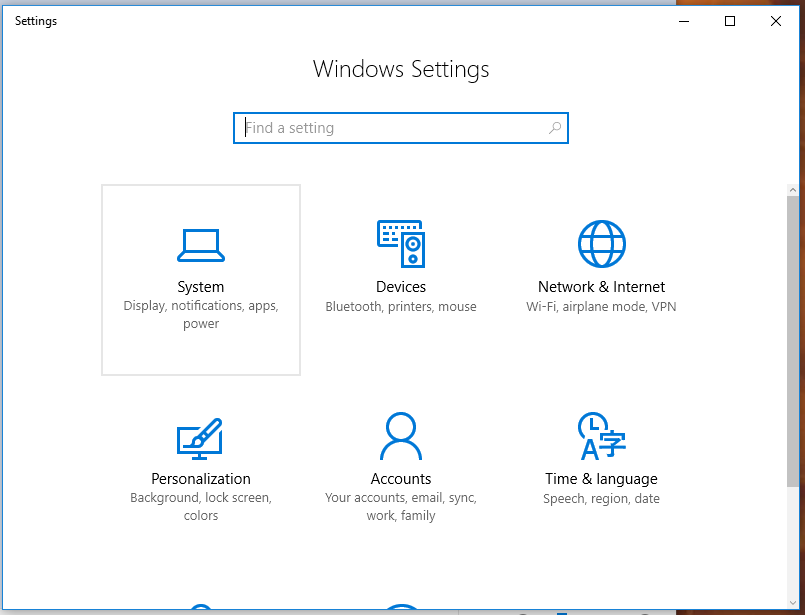
1. Open the Start menu and click the Settings icon (gear).
Microsoft Windows 10


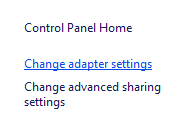
4. Select "Change Adapter Settings".
5. Disable any network connections you are not using to connect to the eGauge by right-clicking
them and choosing Disable. This should be done for all wireless adapters when connected via
Ethernet to the eGauge or HomePlug adapter.
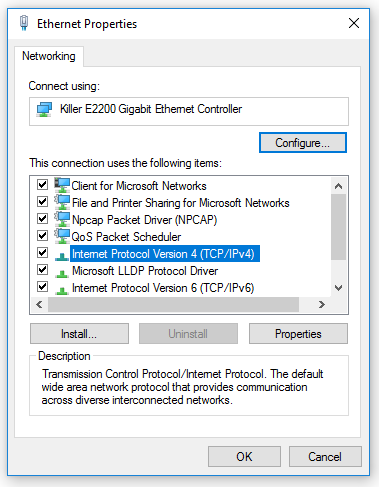
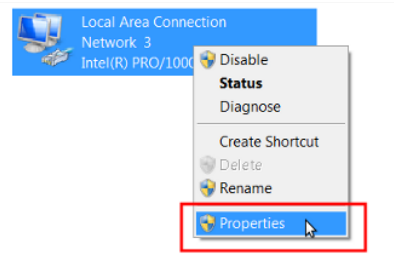
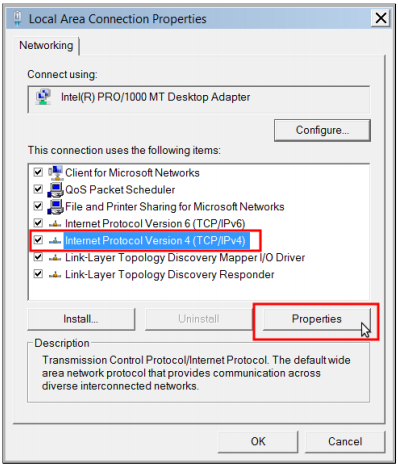
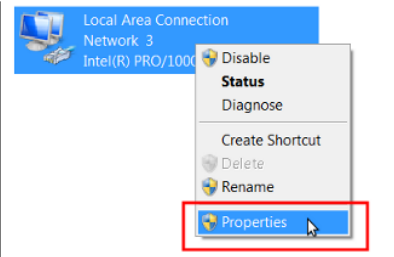
6. Right clickthe adapter you will be using to connect to the eGauge and choose Properties.
7. In the Properties window, click the item listed as Internet Protocol Version 4 (TCP/IPv4) and click
the Properties button.


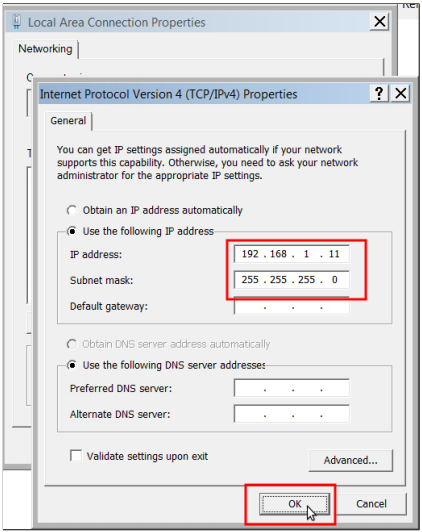
9. Click the radio button that says Use the following IP address and enter the following values:
IP address: 192.168.1.11
Subnet mask: 255.255.255.0
10. Click OK to save the changes and then click Close to close the properties window. To verify
settings, right-click again on the adapter that was modified and choose Status and then Details.
Look to see that IPv4 Address matches 192.168.1.11.
11. Access the eGauge at http://192.168.1.88. When done accessing the eGauge, revert any
adapter’s properties that you have changed during this process.
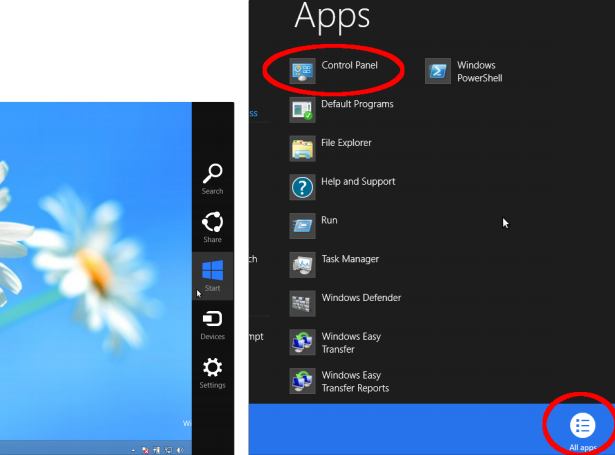
1. Open the sidebar, and choose Start.
2. Right-click and choose All apps.
Microsoft Windows 8


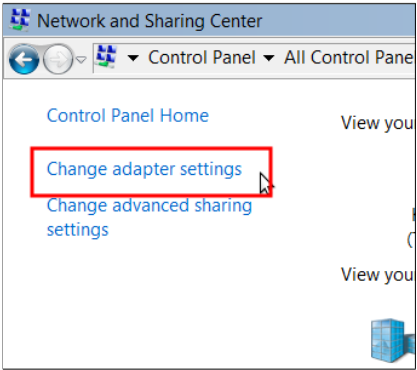
6. On the left side, open Change Adapter Settings.
7. Disable any network connections you are not using to connect to the eGauge by right-clicking
them and choosing Disable. This should be done for all wireless adapters when connected via
Ethernet to the eGauge or HomePlug adapter.
8. Right-click the adapter you will be using to connect to the eGauge and choose Properties.
9. In the Properties window, click the item listed as Internet Protocol Version 4 (TCP/IPv4) and click
the Properties button.


11. Click the radio button that says Use the following IP address and enter the following values:
IP address: 192.168.1.11
Subnet mask: 255.255.255.0
12. Click OK to save the changes and then click Close to close the properties window. To verify
settings, right-click again on the adapter that was modified and choose Status and then Details.
Look to see that IPv4 Address matches 192.168.1.11.
13. Access the eGauge at http://192.168.1.88. When done accessing the eGauge, revert any
adapter’s properties that you have changed during this process.
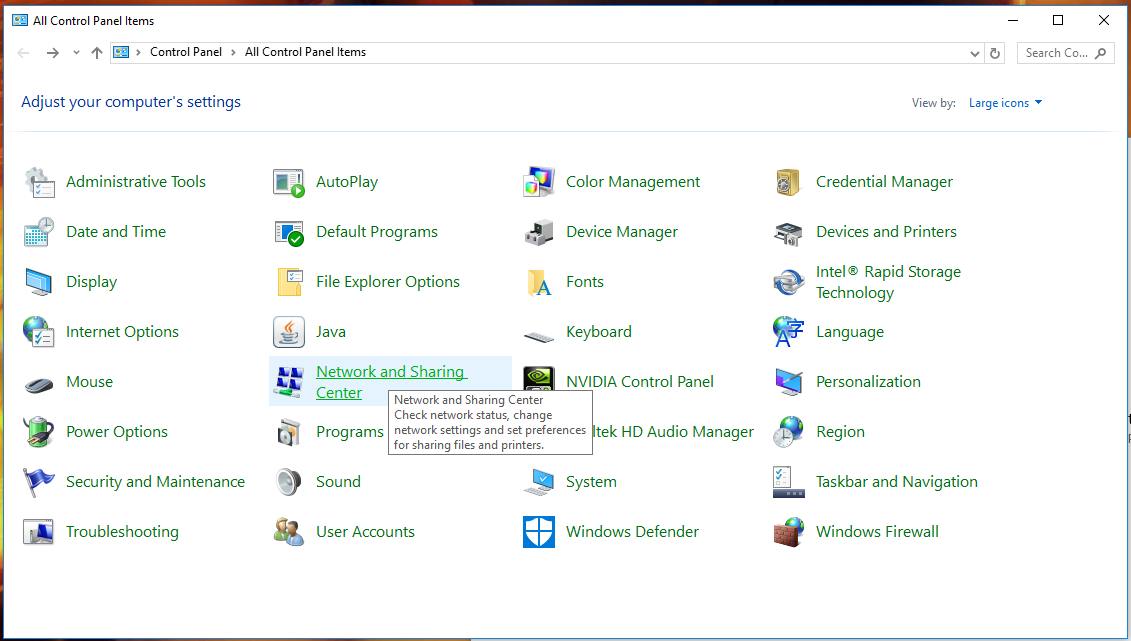
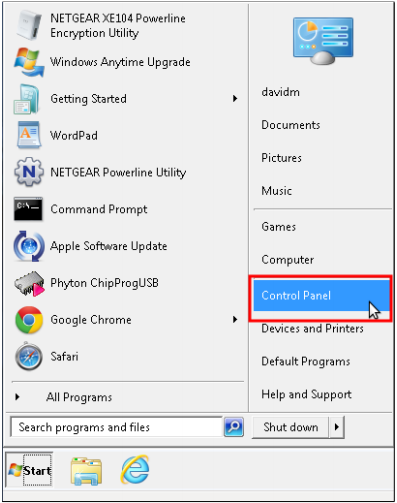
1. Open the Start Menu and choose Control Panel.
Microsoft Windows 7


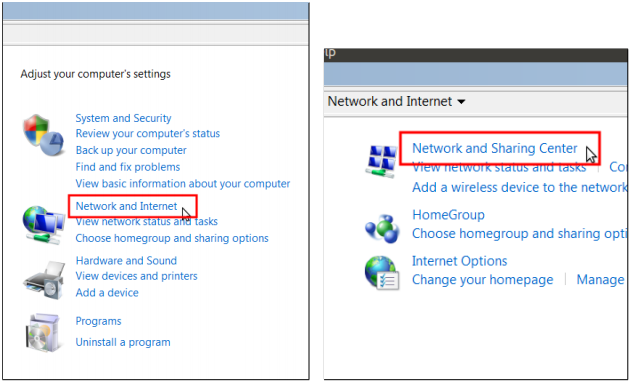
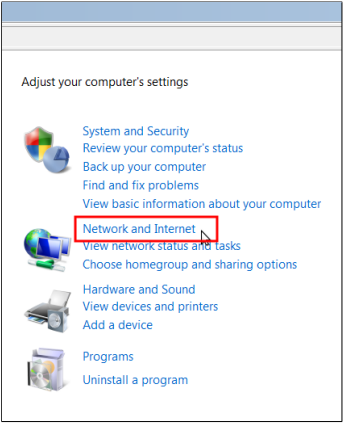
3. Choose Network and Sharing Center.
4. On the left side, open Change Adapter Settings.
5. Disable any network connections you are not using to connect to the eGauge by right-clicking
them and choosing Disable. This should be done for any wireless adapters when connected via
Ethernet to the eGauge or HomePlug adapter.

6. Right-click the adapter you will be using to connect to the eGauge and choose Properties.
7. In the Properties window, click the item listed as Internet Protocol Version 4 (TCP/IPv4) and click
the Properties button.
8. If Use the following IP address already contains values, write these down as they will be
overwritten.
9. Click the radio button that says Use the following IP address and enter the following values:

IP address: 192.168.1.11
Subnet mask: 255.255.255.0
10. Click OK to save the changes and then click Close to close the properties window. To verify
settings, right-click again on the adapter that was modified and choose Status and then Details.
Look to see that IPv4 Address matches 192.168.1.11.
11. Access the eGauge at http://192.168.1.88. When done accessing the eGauge, revert any
adapter’s properties that you have changed during this process.
1. Click the network icon in the upper right hand corner of the screen and choose Open Network
Preferences.
2. Click Wi-Fi on the left hand column and then Turn Wi-Fi Off.
Mac OS X (tested on Mountain Lion 10.7)

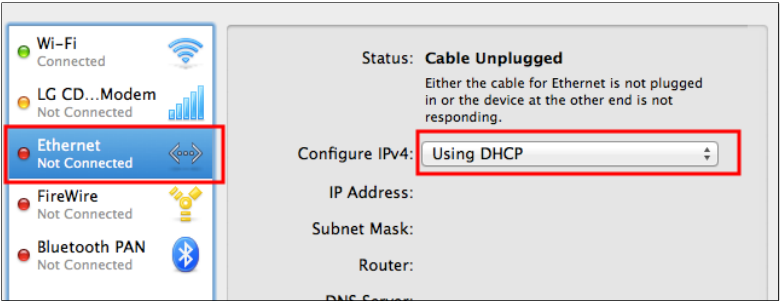
3. Click Ethernet on the left hand column, and next to Configure IPv4 choose Manually from the
drop down menu. If Manually is already selected, take note of all values as they will be overwritten
and should be restored after this process.
4. Enter the following information in the configuration boxes:
IP address: 192.168.1.11
Subnet mask: 255.255.255.0
5. Click Apply to save changes.
6. Access the eGauge at http://192.168.1.88. When done accessing the eGauge, revert any
adapter’s properties that you have changed during this process.

1. Open a terminal session
2. Locate the name of your network connections by using the command ifconfig. There should be
a device such as athX, ethX, or wlanX where X is a number with information pertaining to the
current IP address. Newer systems may use Predictable Interface Names, such as enoX, ensX,
enpXsY, and so on.
3. Enter the following commands, where [eth con] is your Ethernet connection name and [wifi con]
is your wireless connection name (if applicable).
sudo ifconfig [wifi con] down
sudo ifconfig [eth con] down
sudo ifconfig [eth con] 192.168.1.11 netmask 255.255.255.0
sudo ifconfig [eth con] up
4. The eGauge is now accessible at http://192.168.1.88.
Linux/Unix
Revision #5
Created 17 February 2020 20:25:09 by Andrew
Updated 20 October 2022 17:07:56 by aaron
/


