◈ Автотестирование
Автотестирование производится при начальной загрузке настроек в принтер и при
появлении сбоев. При этом происходит проверка:
• целостности управляющей цепи, механизмов, качества печати, версии ПЗУ и
настроек переключателей с памятью.
Если автотестирование не выявило сбоев в работе принтера, протестируйте
периферийные и другие устройства и ПО. Функция автотестирования автономна и не
способна выявить конфликты в другом аппаратном или программном обеспечении.
• Порядок осуществления автотестирования
1) Выключите принтер и закройте крышку бумажного отсека.
2) Одновременным нажатием на кнопки протяжки бумаги и питания включите
принтер.
3) После того как начнется печать, отпустите две кнопки.
4) Для вывода на печать также таблицы ASCII нажмите кнопку протяжки еще раз.
5) После того как текущая таблица кодировки ASCII будет распечатана,
автотестирование
закончится.
◈ Технические характеристики
Наст
ойка Описание
Печать
Метод печати Термопечать
Скорость печати
80 мм/сек. (чековая лента)
60 мм/сек. (бумага без подложки)
Разрешение 203 DPI
Режим подачи бумаги Простая загрузка бумаги
Размер шрифта Шрифт A: 12 × 24, Шрифт B: 9 × 17, Шрифт C: 9 × 24
Символов в строке Шрифт A: 69, Шрифт В/С: 92
Комплект шрифта
Английский: 95
Расширенная графика: стандартная (англ.) - 128 × 33 страниц
Международная символика: 32
Штрихкод
1 плоскость: UPC A, UPC E, CODE 39, CODE 93, Code 128,
EAN 8, EAN 13, ITF, Codabar
2 плоскости: PDF417, DATAMATRIX, MAXI, QR-код
Эм
ляция BXL/POS
Драйвер
Windows XP(32/64 бита)/WEPOS/
2003 Server (32/64 бита)/VISTA(32/64 бита)/
2008 Server
32/64 бита
/7
32/64 бита
/8
32/64 бита
Инструментальные
средства разработки ПО
Windows XP / WEPOS / 2003 Server /
VISTA / 2008 Server / 7 / 8 / CE 5.0 и последующие
Датчик
Конец бумаги,
датчик открытой крышки отсека бумаги,
черная метка (по лицу или изнанке этикетки)
Обрезчик бумаги Планка для отрыва
Язык Поддерживается язык по выбору пользователя
Бумага
Вид бумаги
ек Без подложки
Тип бумаги Термобумага Термобумага
Наружный диаметр
бумажного рулона
Макс. Ø57 мм (2,24”) Макс. Ø56 мм (2,2”)
Ширина
115,5 ± 0,5 мм
(4,39” ± 0,2”)
115,5 ± 0,5 мм
(4,39” ± 0,2”)
Толщина
0,07 ± 0,005 мм 0,08 ± 0,01 мм
◈ Функция печати этикеток
1. Настройка функции печати этикеток
Запечатывание этикеточной бумаги и бумаги с приводными метками доступно в
режиме печати этикеток.
• Последовательность операций при настройке
1) Включите принтер.
2) Откройте крышку отсека, где расположен бумажный рулон. Нажмите и удержите
кнопку протяжки бумаги FEED не менее 2 секунд.
3) После того, как прозвучит характерный сигнал, вставьте рулон бумаги и закройте
крышку.
4) Чтобы вернуться в режим печати чеков, повторите вышеописанные действия.
• Настройка путем переключения переключателя памяти
1) См. сведения об установке переключателя памяти в руководстве по
использованию команд.
2. Функция автокалибровки
Функция печати этикеток срабатывает в том случае, если принтер распознает
характерные пропуски между фрагментами бумаги и приводные метки черного
цвета на кромках.
Если пропуски не распознаются, рекомендуется применить функцию
автокалибровки.
• Руководство по автокалибровке
1) Выключите принтер. Учтите, до этого принтер должен был находиться в режиме
печати этикеток.
2) Нажмите и удержите кнопку протяжки бумаги, а затем нажмите кнопку питания.
3) После того, как будет выполнена нижеприведенная распечатка, нажмите кнопку
сети и выполните автокалибровку.
Выберите режим.
Автокалибровка: Кнопка «Сеть» (Power)
Автотестирование: Кнопка «Feed» (Протяжка)
4) В ходе процесса автокалибровки принтер отпечатывает одну тестовую страницу
бумаги с этикетками.
◈ Подключение периферийных устройств
1. Подключение устройства по протоколу
Bluetooth и протоколу беспроводной связи
WLAN
1) Принтер допускает подключение к
устройствам, оборудованным Bluetooth-
адаптерами (например, КПК, ПК и пр.).
2) Для подключения по протоколу Bluetooth
воспользуйтесь функцией подключения,
поддерживаемой с устройства.
3) Принтер допускается подключать к другим
устройствам, таким как КПК и ПК,
поддерживающим беспроводную связь
(WLAN) и
режим Ad Hoc, а также AP
режим инфраструктуры.
※ Примечание
Подробно о подключении см в руководстве по подключению по протоколу Bluetooth и
Wireless LAN. Параметры окружения Bluetooth (аутентификация, шифрование, режим
соединения) и окружения для wireless LAN (IP, SSID, аутентификация, шифрование)
можно посмотреть, если вывести на печать страницу автотестирования.
2. Подключение интерфейсного кабеля
1) Откройте крышку интерфейсного
разъема.
2) Подсоедините интерфейсный кабель
(поставляется отдельно) к разъему
принтера.
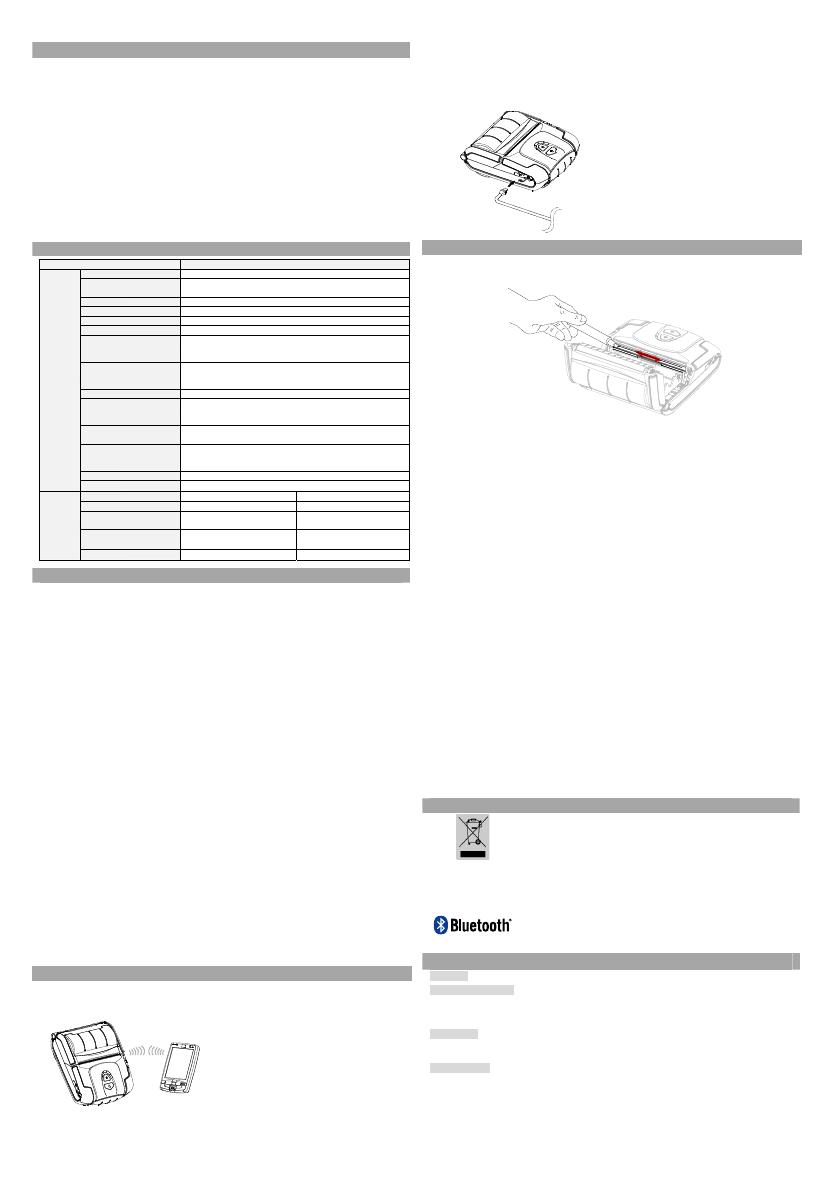
◈ Чистка принтера
Накопление пыли внутри принтера может послужить причиной ухудшения качества
печати.В таком случае рекомендуется чистка принтера согласно инструкций,
приведенных ниже.
1) Откройте крышку отсека бумажного рулона и извлеките бумагу. При помощи
приспособления для чистки очистите печатную головку в направлении от центра
головки к ее краям.
2) При помощи приспособления для чистки очистите печатную головку.
3) Не рекомендуется пользоваться принтером в течение двух-трех минут после
очистки печатной головки с использованием средства для
чистки,
использующимся в приспособлении, пока оно полностью не испарится и не
высохнет.
4) Установите бумажный рулон и закройте крышку бумажного отсека.
• ОСТОРОЖНО!
1) Прежде чем приступать к очистке печатной головки, убедитесь, что принтер
обесточен.
2) Прежде чем приступать к очистке печатной головки рекомендуется подождать
две-три минуты после выключения принтера, т
.к. во время эксплуатации головка
сильно нагревается.
3) Не касайтесь руками нагреваемого участка печатной головки во время очистки
последней.
→ Печатная головка может быть повреждена в результате воздействия
статического электричества.
4) Чрезвычайно важно не оцарапать головку.
5) Рекомендуется периодически очищать печатную головку, если используется
бумага без подложки. Рекомендуемая периодичность очистки — каждые 10
рулонов
бумаги без подложки (100 метров) или не реже чем раз в неделю.
Недостаточно регулярная очистка печатной головки способна привести к
ухудшению качества печати или сокращению срока эксплуатации принтера.
• ВНИМАНИЕ!
1) Настоятельно рекомендуется использовать специальную бумагу без подложки для
«BIXOLON». В случае использования других видов бумаги гарантия на
продукцию аннулируется.
2) Для
чистки настоятельно рекомендуется использовать приспособление для стки
(PCP-R200II), предоставляемое «BIXOLON».
◈ Сертификация
При наличии данного символа на устройстве или литературе к нему означает,
что данное устройство следует утилизировать отдельно от бытовых отходов
по истечении его срока службы. С целью ненанесения вреда окружающей
среде и здоровью человека ввиду бесконтрольной утилизации, разделяйте
отходы с целью должной их вторичной переработки. Физическим лицам,
использующим устройство для
собственных нужд, следует обратиться либо в
пункт, где было приобретено устройство, либо в соответствующее
учреждение с целью получения сведений о безопасной утилизации
переработке. Юридическим лицам следует обратиться к поставщику и
свериться с условиями договора купли-продажи. Данное устройство не
следует утилизировать вместе с другими промышленными отходами.
Следующая маркировка Bluetooth и номер QD ID B019948 применимы только
к моделям, отвечающим квалификационным требованиям специальной
группы по вопросам Bluetooth.
☎ BIXOLON Co., Ltd.
● Website http://www.
ixolon.co
● Korea Headquarters
(Add) 7~8F, (Sampyeong-dong), 20, Pangyoyeok-ro241beon-gil,
Bundang-gu, Seongnam-si, Gyeonggi-do, 13494, Korea (ROK)
(Tel.) +82-31-218-5500
● U.S. Office
(Add) BIXOLON America Inc., 3171 Fujita St, Torrance, CA 90505
(Tel.) +1-858 764 4580
● Europe Office
(Add) BIXOLON Europe GmbH, Tiefenbroicher Weg 35 40472 Düsseldorf
(Tel.) +49 (0)211 68 78 54 0


