Page is loading ...

Daylight Par Quick Start Guide V1.1 Daylight Par Quick Start Guide V1.0 PN: 147-0501
Approvals & Disclaimer
The information contained herein is offered in good faith and is believed to be
accurate. However, because conditions and methods of use of our products are
beyond our control, this information should not be used in substitution for
customer's tests to ensure that Chroma-Q products are safe, effective, and fully
satisfactory for the intended end use. Suggestions of use shall not be taken as
inducements to infringe any patent. Chroma-Q sole warranty is that the product
will meet the Chroma-Q sales specifications in effect at the time of shipment.
Your exclusive remedy for breach of such warranty is limited to refund of
purchase price or replacement of any product shown to be other than as
warranted.
Chroma-Q reserves the right to change or make alteration to devices and their
functionality without notice due to on-going research and development.
The Chroma-Q Daylight Par has been designed specifically for the professional
entertainment lighting industry. Regular maintenance should be performed to
ensure that the products perform well in the entertainment environment.
If you experience any difficulties with any Chroma-Q products please contact
your selling dealer. If your selling dealer is unable to help please contact
[email protected]. If the selling dealer is unable to satisfy your servicing
needs, please contact the following for full factory service:
Outside North America: North America:
Tel: +44 (0)1494 446000 Tel: +1 416-255-9494
Fax: +44 (0)1494 461024 Fax: +1 416-255-3514
[email protected] support@chroma-q.com
For further information please visit the Chroma-Q website at
www.chroma-q.com.
Chroma-Q is a trademark, for more information on this visit
www.chroma-q.com/trademarks.
The rights and ownership of all trademarks are recognised.
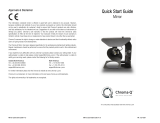
Quick Start Guide
Daylight PAR™
For a full product manual please visit www.chroma-q.com

Daylight Par Quick Start Guide V1.1 Daylight Par Quick Start Guide V1.1
1. Product Description
The Chroma-Q Daylight Par is a high output, daylight colour temperature fixture with light
source from a MSR 575 HR metal halide arc lamp and interchangeable optics. The fixture
is designed to operate on ANSI E1.11 USITT DMX 512-A data transfer protocol and
standard voltages/frequencies available worldwide.
2. Operation
Unpacking:
1. The package includes the following items: Chroma-Q Daylight Par, colour frame, set
of 4 interchangeable lenses and Quick Start Guide.
2. The unit is shipped in a specially constructed shipping carton to provide protection.
Safety:
1. The following International Symbols are indicated on the unit to identify warning and
caution messages. Failure to heed these messages could result in serious personal
injury and damage to equipment.
Caution High
Voltage
Warning
Hot Surface Explosion
Risk
Eye Protection
Required
Minimum Safe
Distance
2. Safety Instructions:
This product is for professional use only.
It is NOT intended for domestic or outdoor use.
• Please read the entire user manual before using this equipment.
• Disconnect the unit from its power source before removing or installing the lamp, fuses or any other part, performing cleaning and maintenance, and when not in use.
• Ensure the unit has the proper electrical supply connections and is grounded.
• The unit must be connected to an AC electrical supply that has suitable fault protection.
• Always rig the unit with care and use an approved means of secondary attachment e.g. a safety wire
• Do not expose the unit to rain or moisture of any kind.
• Never operate the unit with missing or damaged covers, or lenses.
• When installing or replacing the lamp always disconnect the unit, allow 15 minutes cooling, and use the recommended protective safety equipment.
• Always replace the lamp if it becomes damaged or thermally deformed. Do not run lamps for more than the manufacturers recommended number of hours.
• Do not mount the unit on, or near flammable materials, and ensure the unit is 1.5 metres (4.5ft) away from anything it is shining on.
• Allow the unit to cool for at least 5-10 minutes before handling it.
• Servicing must only be carried out by the manufacturer, or by other suitably qualified service personnel.
• Always ensure that the safety wire is connected and in good working condition.
Power:
Input Voltage Frequency Current Rating Replacement fuses
(2x) 5 x 20mm
90-130 V AC 47-63 Hz 9 A (@ 115 V) 10 A, 250 V ‘T’ type
197-260 V AC 47-63 Hz 4.5 A (@ 230 V) 5 A , 250 V ‘T’ type
Connections:
1. Connect power cord with a plug of the correct voltage/current rating to a suitable
outlet.
2. Connect data input ANSI E1.11 USITT DMX 512-A through a XLR 5-pin cable from a
lighting control console.
Lamp Install/Replace:
1. Unplug the unit from its power sources and allow it to cool down sufficiently.
2. Unscrew the lamp release screw at the rear of the lamp housing.
3. Carefully remove the lamp housing from the reflector housing by gently pulling it
straight backwards. Avoid causing the lamp to rub against the reflector opening.
4. With gloves hold the lamp by its ceramic base and remove from the holder.
5. Insert the new lamp into the holder and gently push down until seated correctly.
6. Re-insert the lamp housing onto the back of the reflector housing. Line up the guide
pin and gently push the lamp housing into position through the opening in the
reflector. Avoid causing the lamp to rub against the reflector opening.
7. Tighten up the lamp housing retaining screw.
8. The unit is ready for use. Check and optimize lamp position.
Lamp Optimising:
1. Turn the fixture on, allow for lamp to reach full brightness and aim the light towards a
flat surface. Centre the hot-spot in the projected beam using the three Philips headed
screws at the back of the lamp housing. Turn one screw at a time to move the hot-
spot across the beam or distribute light evenly.
2. Lamp is too forward when hot-spot is too pronounced. Reduce by turning all three
screws clockwise ¼-turn at a time.
3. Lamp is too far back if there is a dark spot at the centre of the beam or light output
appears dim. Reduce by turning all 3 screws counter-clockwise ¼-turn at a time.
Colour Filter:
The unit is equipped with runners designed to take a colour frame or other accessories
with 7.5”/190mm outside fitting, 6.7”/170mm minimum diameter opening and a spring-
loaded retaining clip, which prevents the accessories from falling out.
Interchangeable Lenses:
Included with the unit are four interchangeable lenses: VNSP- very narrow spot (clear
glass), NSP- narrow spot (pebbled glass), MFL- medium flood (lightly faceted) and WFL-
wide flood (heavily faceted). See full user manual for instructions on removing and
installing the lenses.
Display and Control Operation:
Access control functions using the LED display and 3 push-button switches on the rear
panel.
Control Function
Red Button Mode access and record
Black Button Decreases (-) the mode level or valve
Blue Button Increases (+) the mode level or value
3 Digit Display Displays mode, monitor or blank display
1. Power Up display: the display will show the DMX address.
2. Monitor Display: will revert to ‘Monitor Mode’ if left undisturbed for 5-7 seconds.
The 1
st
vertical bar indicates presence of Power (24V DC)
at the unit. The 2
nd
vertical bar indicates presence of
DMX Data at the unit.
The horizontal bars indicate DMX Data Signal Level.
3. Display Flip: press and hold the RED and BLACK button simultaneously.
4. Reset: press and hold the RED and BLUE button to reset to factory default settings.
Modes of Operation:
Stand-alone mode: without DMX
1. Press RED button to access lamp power mode.
2. Press BLUE or BLACK, scroll and select ‘LPL’ (low power) or ‘LPF’ (full power), and
press RED button to record.
3. Press BLUE or BLACK button, scroll and select ‘LP0’ (lamp off), and press the RED
button to record.
DMX addressing mode: press BLUE or BLACK button once to set DMX channel
Lamp power/control mode ‘LP’: press BLUE or BLACK button to select mode and switch
between Lamp OFF ‘LP0’, LOW power ‘LPL’ and HIGH power ‘LPF’.
3. Further Information
Please refer to the Chroma-Q Daylight Par manual for more detailed information. A copy of
the manual can be found at the Chroma-Q website – www.chroma-q.com – under Support.
/