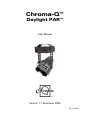
Chroma Daylight PAR User manual
- Category
- Floodlights
- Type
- User manual
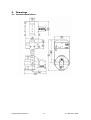
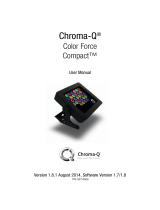
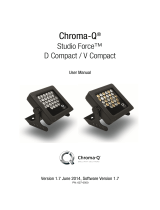
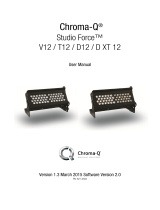
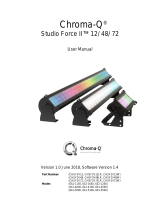
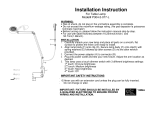
Chroma Daylight PAR is a high-output daylight colour temperature fixture with 95% CRI and 6000°K colour temperature. It features interchangeable optics, allowing you to vary the beam spread and making it versatile for use in various applications. The compact and stylish design makes it suitable for theatres, film or TV studios, exhibition centres, shopping malls, or car showrooms. The DMX control enables remote control of lamp on/off, dimming, and power-saving mode. The "Hot Restrike" facility means the lamp does not have to cool after power down and is always ready for use.
Chroma Daylight PAR is a high-output daylight colour temperature fixture with 95% CRI and 6000°K colour temperature. It features interchangeable optics, allowing you to vary the beam spread and making it versatile for use in various applications. The compact and stylish design makes it suitable for theatres, film or TV studios, exhibition centres, shopping malls, or car showrooms. The DMX control enables remote control of lamp on/off, dimming, and power-saving mode. The "Hot Restrike" facility means the lamp does not have to cool after power down and is always ready for use.


-
 1
1
-
 2
2
-
 3
3
-
 4
4
-
 5
5
-
 6
6
-
 7
7
-
 8
8
-
 9
9
-
 10
10
-
 11
11
-
 12
12
-
 13
13
-
 14
14


Chroma Daylight PAR User manual
- Category
- Floodlights
- Type
- User manual
Chroma Daylight PAR is a high-output daylight colour temperature fixture with 95% CRI and 6000°K colour temperature. It features interchangeable optics, allowing you to vary the beam spread and making it versatile for use in various applications. The compact and stylish design makes it suitable for theatres, film or TV studios, exhibition centres, shopping malls, or car showrooms. The DMX control enables remote control of lamp on/off, dimming, and power-saving mode. The "Hot Restrike" facility means the lamp does not have to cool after power down and is always ready for use.
Ask a question and I''ll find the answer in the document
Finding information in a document is now easier with AI
Related papers
-
 Chroma Daylight PAR Specification
-
 Chroma Magic Box Quick start guide
-
 Chroma 632-8205 User manual
-
 Chroma MIRROR Quick start guide
-
 Chroma Chroma-Q User manual
-
 Chroma Inspire Mini User manual
-
 Chroma Color Span 2 User manual
-
 Chroma Studio Force D Compact User manual
-
 Chroma Studio Force V12 User manual
-
 Chroma CHSF2V72W User manual


Other documents
-
 George Kovacs P304-2-077-L User manual
-
 George Kovacs P304-1-077-L User manual
-
High End Systems Studio Command Quick start guide
-
-
 UFO Mercury Slimline User guide
-
Lucci Air 21101201 Installation guide
-
Chroma-Q Chroma-Q 632-XXXX Blind Ceiling Mount User guide
-
ETC Source Four PAR User manual
-
-
 Chroma-Q VISTA 3 Software User guide


