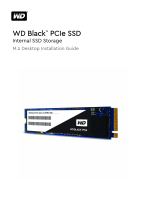
Highpoint SSD7120 Installation guide

Type
Installation guide

This manual is also suitable for

Highpoint SSD7120 is a high-performance NVMe RAID controller that supports PCIe 3.0/4.0 x8 or x16 slots. It enables the user to connect up to 4 NVMe SSDs to create RAID arrays, providing enhanced data protection and improved read/write speeds for demanding applications. With support for RAID levels 0, 1, 5, 6, 10, and JBOD, users can tailor their storage configuration to meet their specific performance and redundancy requirements.

Highpoint SSD7120 is a high-performance NVMe RAID controller that supports PCIe 3.0/4.0 x8 or x16 slots. It enables the user to connect up to 4 NVMe SSDs to create RAID arrays, providing enhanced data protection and improved read/write speeds for demanding applications. With support for RAID levels 0, 1, 5, 6, 10, and JBOD, users can tailor their storage configuration to meet their specific performance and redundancy requirements.

1
Contents
SSD7101A_SSD7204_SSD7104_SSD7120_SSD6540_SSD6540M_SSD7180_SSD7184_SSD7140_SSD
7540L Driver & Management Software Installation Guide
....................................................................
2
Prerequisites for a Data-RAID Configuration
..........................................................................................
3
Driver Installation
........................................................................................................................................
4
Installing the Device Driver
.......................................................................................................................
4
1. Verify that Windows recognizes the controller
..............................................................................
4
2. Download the Device Driver
..........................................................................................................
6
3. Install the Device Driver
.................................................................................................................
6
Updating the Device Driver
.......................................................................................................................
9
1. Check the Driver version
................................................................................................................
9
2. Download the Device Driver
..........................................................................................................
9
3. Shutdown and Remove the Device
...............................................................................................
10
4. Uninstall the old Device Driver
....................................................................................................
10
5. Install the new Device Driver
.......................................................................................................
11
Uninstalling the Device Driver
................................................................................................................
14
Installing the HighPoint RAID Management Software (WebGUI & CLI)
..........................................
16
Troubleshooting
.........................................................................................................................................
18
The WebGUI will not start after double-clicking the desktop icon.
........................................................
18
BSOD (Blue Screen of Death)
.................................................................................................................
19
How to Turn off Quick Shutdown for Windows
.................................................................................
20
Controller and Drive Detection Issues
.....................................................................................................
21
Appendix
.....................................................................................................................................................
22
How to Collect Debug View Logs
...........................................................................................................
22
How to Collect INF Logs:
.......................................................................................................................
23
How to Collect System Logs:
..................................................................................................................
24
Collecting Windows Dump Files
.............................................................................................................
25
2
SSD7101A_SSD7204_SSD7104_SSD7120_SSD6540_SSD654
0M_SSD7180_SSD7184_SSD7140_SSD7540L Driver &
Management Software Installation Guide
This guide includes important hardware/software requirements, installation & upgrade procedures, and
troubleshooting tips for using SSD7101A-
1/SSD7204/SSD7104/SSD7120/SSD6540/SSD6540M/SSD7180/SSD7184/SSD7140/SSD7540L NVMe
RAID controllers with a Windows operating system.
Prerequisites
This section describes the base hardware and software requirements for the SSD7101 A-1
/SSD7204/SSD7104/SSD7120/SSD6540/SSD6540M/SSD7180/SSD7184/SSD7140/SSD7540L PCIe 3.0
NVMe RAID controllers.
Driver Installation
This section covers driver installation, driver upgrade and driver uninstallation procedures for SSD7101-
A/SSD7204/SSD7104/SSD7120/SSD6540/SSD6540M/SSD7180/SSD7184/SSD7140/SSD7540L NVMe
RAID controllers.
Management Software Installation
This section explains how to download and install the SSD7101A-1/SSD7204/SSD7104/SSD7120/
SSD6540/SSD6540M/SSD7180/SSD7184/SSD7140/SSD7540L RAID Management Software Suite for
Windows operating systems. The download includes both the Web RAID Management Interface
(WebGUI), and the CLI (Command Line Interface).
Troubleshooting
Please consult this section if you encounter any difficulties installing or using the SSD7101A-1
/SSD7204/SSD7104/SSD7120/SSD6540/SSD6540M/SSD7180/SSD7184/SSD7140/SSD7540L NVMe
RAID controller. It includes descriptions and solutions for commonly reported technical issues.
Appendix
A selection of useful information and web links for the SSD7101A-1/SSD7204/SSD7104/SSD7120
/SSD6540/SSD6540M/SSD7180/SSD7184/SSD7140/SSD7540L NVMe RAID controllers.
3
Prerequisites for a Data-RAID Configuration
The SSD7101A-1/SSD7204/SSD7104/SSD7120/SSD6540/SSD6540M/SSD7180/SSD7184
/SSD7140/SSD7540L controllers can support Data-RAID arrays. In order to configure a Data-RAID
array, you will need the following:
1. An NVMe SSD must be installed. You must have at least one NVMe SSD installed into the
SSD7101A-1/SSD7204/SSD7104/SSD7120/SSD6540/SSD6540M/SSD7180/SSD7184/
SSD7140/SSD7540L controller.
2. A PCIe 3.0/4.0 slot with x8 or x16 lanes. The SSD7101A-1/SSD7104/SSD7120/SSD6540/
SSD6540M/SSD7180/SSD7184/SSD7140/SSD7540L must be installed into a PCIe 3.0/4.0 slot
with x16 dedicated lanes, The SSD7204 can be installed into a PCIe 3.0/4.0 x8 or x16 slot.
3. Make sure any non-HighPoint drivers are uninstalled for any SSD’s hosted by the SSD7000
series RAID controllers. 3
rd
party software and manufacturer provided drivers may prevent the
SSD7000 from functioning properly.
Warnings:
1) Failing to remove the controller and SSD’s when uninstalling the driver may result
in data loss.
2) Always make sure the SSD7000 driver is installed before moving a SSD7000 series
NVMe RAID controller & RAID array to another Windows system.
Windows operating systems will always load the default NVMe support after the SSD7000 driver has
been uninstalled, or if it detects the present of a card when no driver has been loaded this driver will
only recognize the NVMe SSD’s as separate disks.
If the SSD’s are recognized separately, any data they contain may be lost this includes RAID
configuration data.
4
Driver Installation
Installing the Device Driver
The following section discusses driver installation for a non-bootable NVMe configuration.
1. Verify that Windows recognizes the controller
After installing the SSD7000 controller into the motherboard, power on the computer, boot the
Windows operating system, and open Device Manager.
A. Expand the Disk drives tab. Each NVMe SSD’s installed into the SSD7101A-1
/SSD7120/SSD7204/SSD7104/SSD6540/SSD6540M/SSD7180/SSD7184/SSD7140/SSD7540L
controller should be displayed here.
B. Expand the Storage Controllers tab. You should see a Standard NVM Express Controller
entry for each NVMe SSD that is installed into the SSD7101A1/SSD7204/SSD7104/SSD7120/
SSD6540/SSD6540M/SSD7180/SSD7184/SSD7140/SSD7540L controller.
Example screenshot (SSD7101A-1/7104/7204/7120/6540/6540M):
A
B
5
Example screenshot(SSD7180/7184):
Example screenshot(SSD7140/SSD7540L):
6
2. Download the Device Driver
Download the appropriate SSSD7000 driver from the controller’s Software Downloads webpage.
SSD7101A-1:
https://highpoint-tech.com/USA_new/series-ssd7101a-1-download.htm
SSD7104
https://highpoint-tech.com/USA_new/series-ssd7104-download.htm
SSD7204:
https://highpoint-tech.com/USA_new/series-ssd7204-download.htm
SSD7120:
https://highpoint-tech.com/USA_new/series-ssd7120-download.htm
SSD6540:
https://highpoint-tech.com/USA_new/series-ssd6540-download.htm
SSD6540M:
https://highpoint-tech.com/USA_new/series-ssd6540m-download.htm
SSD7180:
https://highpoint-tech.com/USA_new/series-hpc-download.htm
SSD7184:
https://highpoint-tech.com/USA_new/series-hpc-download.htm
SSD7140:
https://highpoint-tech.com/USA_new/series-ssd7140-download.htm
SSD7540L:
https://highpoint-tech.com/USA_new/series-ssd7500-download.htm
3. Install the Device Driver
A. Locate the driver download and open the file.
B. Double-click setup.
Note: If installation does not start, you may have to manually start setup using Administrator
Privileges. Right-click setup, select Run as Administrator from the menu, and confirm the pop-
up window to proceed.
7
After driver installation is complete, click OK to reboot.
C. Once Windows has rebooted, open Device Manager to check the status of the driver.
Expand Storage controllers and click on the HighPoint NVMe RAID Controller entry. View
the properties and click the Driver tab:
8
Example screenshot (SSD7101A-1/7120/7104/7204/6540/6540M)
D. First, make sure the WebGUI has been installed (see page 17). Open the WebGUI and make sure
the SSD.’s / arrays are properly recognized.
Note: Please refer to Appendix A to verify that your Device Manager entries correspond with the
driver version you have installed.
9
Updating the Device Driver
Note: Before attempting to update the driver entry, ensure that the SSD7101A-1/SSD7204/
SSD7104/SSD7120/SSD6540/SSD6540M/SSD7180/SSD7184/SSD7140/SSD7540L is removed from the
motherboard.
1. Check the Driver version
Open Device Manager to check the current driver version. Expand Storage controllers and click on
the HighPoint NVMe RAID Controller entry. View the properties and click the Driver tab:
Example screenshot (SSD7101A-1/7120/7104/7204/6540/6540M)
2. Download the Device Driver
Download the latest driver from the controller’s Software Downloads webpage.
SSD7101A-1:
https://highpoint-tech.com/USA_new/series-ssd7101a-1-download.htm
SSD7104
https://highpoint-tech.com/USA_new/series-ssd7104-download.htm
SSD7204:
https://highpoint-tech.com/USA_new/series-ssd7204-download.htm
SSD7120:
https://highpoint-tech.com/USA_new/series-ssd7120-download.htm
10
SSD6540:
https://highpoint-tech.com/USA_new/series-ssd6540-download.htm
SSD6540M:
https://highpoint-tech.com/USA_new/series-ssd6540m-download.htm
SSD7180:
https://highpoint-tech.com/USA_new/series-hpc-download.htm
SSD7184:
https://highpoint-tech.com/USA_new/series-hpc-download.htm
SSD7140:
https://highpoint-tech.com/USA_new/series-ssd7140-download.htm
SSD7540L:
https://highpoint-tech.com/USA_new/series-ssd7500-download.htm
3. Shutdown and Remove the Device
A. Power down the system and remove the SSD7101A-1/SSD7204/SSD7104/ SSD7120/
SSD6540/SSD6540M/SSD7180/SSD7184/SSD7140/SSD7540L RAID controller from the
motherboard.
Note: Failing to remove the SSD7000 controller from the motherboard during the uninstall
process may result in data loss. Whenever the driver is uninstalled, Windows will attempt to
install the default NVMe support, which may corrupt the RAID configurations and any data
stored on SSD’s hosted by the SSD7000 controller.
B. Power on the system and boot Windows.
4. Uninstall the old Device Driver
A. Access Control Panel and select Programs Programs and Features, and click on the HighPoint
NVMe Driver entry.
B. Click Uninstall/Change
11
C. After uninstalling the driver, click OK to reboot.
D. After Windows has rebooted, access Control Panel to make sure the driver has been uninstalled.
If there are no HighPoint NVMe RAID/Driver entries present, the driver has been successfully
uninstalled:
5. Install the new Device Driver
E. Locate the driver download and open the file.
F. Double-click setup.
12
Note: If the update does not start, you may have to manually start setup using Administrator
Privileges. Right-click setup, select Run as Administrator from the menu, and confirm the pop-
up window to proceed.
G. Windows will notify you that the driver is already installed. Click OK to reboot.
H. After entering the system, shut down the system. In the shutdown state, connect the SSD7000
controller to the motherboard.
I. Boot into the system.
J. Once Windows has rebooted, open Device Manager to check the status of the driver. Expand
Storage controllers and click on the HighPoint NVMe RAID Controller entry. View the
properties and click the Driver tab:
13
Example screenshot (SSD7101A-1)
K. First, make sure the WebGUI has been installed (see page 17). Open the WebGUI and make sure
the SSD.’s / arrays are properly recognized.
14
Uninstalling the Device Driver
1. Power down the system and remove the SSD7101A-1/SSD7204/SSD7104/SSD7120/SSD6540/
SSD6540M/SSD7180/SSD7184/SSD7140/SSD7540L RAID controller from the motherboard.
Note: Failing to remove the SSD7000 controller from the motherboard during the uninstall
process may result in data loss. Whenever the driver is uninstalled, Windows will attempt to install
the default NVMe support, which may corrupt the RAID configurations and any data stored on SSD’s
hosted by the SSD7000 controller.
2. Power on the system and boot Windows.
3. Access Control Panel and select Programs Programs and Features, and click on the HighPoint
NVMe Driver entry.
4. Click Uninstall/Change
5. After uninstalling the driver, click OK to
reboot.
15
6. After Windows has rebooted, access Control Panel to make sure the driver has been uninstalled. If
there are no HighPoint NVMe RAID/Driver entries present, the driver has been successfully
uninstalled
16
Installing the HighPoint RAID Management Software
(WebGUI & CLI)
The HighPoint RAID Management Software (WebGUI and CLI utilities) are used to configure and
monitor NVMe SSD’s hosted by the SSD7101A-1/SSD7204/SSD7104/SSD7120/SSD6540/SSD6540M
SSD7180/SSD7184/SSD7140/SSD7540L RAID controller. Download the latest software package from
the HighPoint website:
SSD7101A-1:
https://highpoint-tech.com/USA_new/series-ssd7101a-1-download.htm
SSD7104
https://highpoint-tech.com/USA_new/series-ssd7104-download.htm
SSD7204:
https://highpoint-tech.com/USA_new/series-ssd7204-download.htm
SSD7120:
https://highpoint-tech.com/USA_new/series-ssd7120-download.htm
SSD6540:
https://highpoint-tech.com/USA_new/series-ssd6540-download.htm
SSD6540M:
https://highpoint-tech.com/USA_new/series-ssd6540m-download.htm
SSD7180:
https://highpoint-tech.com/USA_new/series-hpc-download.htm
SSD7184:
https://highpoint-tech.com/USA_new/series-hpc-download.htm
SSD7140
https://highpoint-tech.com/USA_new/series-ssd7140-download.htm
SSD7540L
https://highpoint-tech.com/USA_new/series-ssd7500-download.htm
1. Extract the package and double-click the HighPoint RAID Management program to install the
software.
2. Once installed, locate the Management icon on the desktop and double-click to start the WebGUI
interface.
17
Example screenshot (SSD7101A-1)
18
Troubleshooting
Note: When troubleshooting your SSD7101A-1/SSD7204/SSD7104/SSD7120/SSD6540/
SSD6540M/SSD7180/SSD7184/SSD7140/SSD7540L NVMe RAID controller, make sure all of the
Prerequisites have been met before proceeding.
The WebGUI will not start after double-clicking the desktop icon.
1. This is often the result of a missing driver or improperly installed driver. Open Device Manager
and check under Storage Controllers.
If the Driver is properly installed, you should see a HighPoint NVMe Controller entry for
SSD7101A-1/SSD7204/SSD7104/SSD7120/SSD6540/SSD6540M/SSD7180/SSD7184/
SSD7140/SSD7540L controller, followed by HighPoint NVMe RAID Controller entry:
Example screenshot (SSD7101A-1)
19
2. You should also check to make sure hptsvr is running under Task Management Services. If
the status of hptsvr process is Stopped, right-click on this entry and select Start from the menu:
BSOD (Blue Screen of Death)
There are three scenarios in which a BSOD may occur with
SSD7101A-1/SSD7204/SSD7104/SSD7120/SSD6540/SSD6540M/SSD7180/SSD7184/SSD7140/
SSD7540L:
1. Windows displays a BSOD when the SSD7101A-1/SSD7204/SSD7104/SSD7120/SSD6540
/SSD6540M/SSD7180/SSD7184/SSD7140/SSD7540L is installed.
If you are running Windows 10, please make sure that any Quick Shutdown options are
disabled these features can cause a BSOD when the SSD7101A-1 /SSD7204 /SSD7104 /
SSD7120 /SSD6540 /SSD6540M /SSD7180 /SSD7184 /SSD7140/SSD7540L is installed into or
removed from your motherboard. BSODs can be avoided by completely powering off your
system.
20
How to Turn off Quick Shutdown for Windows
a. Use administrator privileges to access the Command Prompt utility:
b. Enter the following command and press Enter:
powercfg / h off
c. To make sure the setting has been disabled, enter the following command and press Enter:
powercfg / a
d. Shut down the computer and remove the SSD7101A-1 /SSD7204 /SSD7104 /SSD7120
/SSD6540 /SSD6540M/SSD7180/SSD7184/SSD7140/SSD7540L from the motherboard;
e. Restart the system and open the SSD7101A-1/SSD7204 /SSD7104 /SSD7120 /SSD6540
/SSD6540M/SSD7180/SSD7184/SSD7140/SSD7540L driver download.
f. Double-click Setup to reinstall the driver; if you are prompted to uninstall the driver, you
will need to follow the prompts and restart. After rebooting, double-click Setup once
more to install the driver.
  • Page 1 1
  • Page 2 2
  • Page 3 3
  • Page 4 4
  • Page 5 5
  • Page 6 6
  • Page 7 7
  • Page 8 8
  • Page 9 9
  • Page 10 10
  • Page 11 11
  • Page 12 12
  • Page 13 13
  • Page 14 14
  • Page 15 15
  • Page 16 16
  • Page 17 17
  • Page 18 18
  • Page 19 19
  • Page 20 20
  • Page 21 21
  • Page 22 22
  • Page 23 23
  • Page 24 24
  • Page 25 25

Highpoint SSD7120 Installation guide

Type
Installation guide
This manual is also suitable for

Highpoint SSD7120 is a high-performance NVMe RAID controller that supports PCIe 3.0/4.0 x8 or x16 slots. It enables the user to connect up to 4 NVMe SSDs to create RAID arrays, providing enhanced data protection and improved read/write speeds for demanding applications. With support for RAID levels 0, 1, 5, 6, 10, and JBOD, users can tailor their storage configuration to meet their specific performance and redundancy requirements.

Ask a question and I''ll find the answer in the document

Finding information in a document is now easier with AI