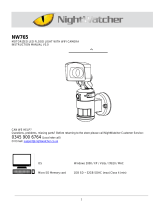
Page is loading ...

Photo Frame Camer
Huge battery camera series
Please ensure that you read the complete user manual
carefully before using any part of the product.
- Keep this copy safe for future reference in case of
operational difficulties.
-
User Manual

General overview
2
General Introduction
This photo frame camera is especially designed for long-time motion
detection and video recording as Max 24 month stand-by upon one
full-charge. So user could easily put the camera anywhere for hidden
surveillance for moths.
Besides, it has a hidden PIR sensor to catch motion accurately.
As we know, PIR is a best way to detect human moving.
Furthermore, there is a hidden huge battery as, which could support
Max 24 month stand-by to catch motion.
Main features:
- WORLD'S FIRST! 2 years battery Photo-Frame-Cam
- Easy to change! any picture of 13*18CM
- Super slim! 14mm thickness only
- Hidden PIR/LED! For better invisiblity purpose
- Hidden USB/Button/Switcher! Just like a photo frame,no any screws or
socket could be seen
- Standing-on-desk
- Hanging-on-wall supported
- Starlight Technology! Only a few invisible LEDs to record 5-8 meters in
evening
- Privacy protection! Audio record could be able/disable as you want
Important Remindings:
-Please read the user manual before using the camera.
-Please test the position/angle, playback the video in advance, to make
sure it could catch what you want
-Please do not use this camera for illegal purpose. It is important to follow
the laws in your country/state
-We could not be responsible for missing any video record due to wrong
operation/Micro-SD problem/camera angle limit

Ph oto Fr ame C amer
Hug e batte ry came ra seri es
Ple ase e nsur e that y ou re ad the c omp lete u ser m anua l
car efu lly be fore u sin g any pa rt of t he pro duc t.
- Kee p thi s copy s afe f or fut ure r efer ence i n cas e of
ope rat iona l diff icul ties .
-
User Man ual
Important notice:
If there is anything missing, please contact us immediately
Product accessories
Camera Manual
3
USB cable
Warning sticker Card reader Screws

Product structure
4
Camera lens
LED
operation:
1. take away the front frame, insert the SD and a photo size 13*18cm;
2. Set the time and date as Page8,
3. Press MD directly and it will enter PIR motion detection mode to
Stand-by Max 2 years to catch any motion.
PIR
Hole For Wall
Desk Bracket
Take front frame
from here

Detection ability
Important Notice:
- While using the camera, it should be placed in a perpendicular
direction to those objective people passing by
- Avoid using the camera in hot or extreme temperatures that
will lower down motion-detection accuracy
- Once it is switch to MD (PIR MOTION DETECTION MODE),
upon each trigger, there will be about 1.8 seconds delay to start
video record. Thus, please avoid to use it in somewhere people
passing quickly.
PIR angle 60 degrees
Camera angle 75 degrees
Motion detection distance:5-8 meters
5
Camera angle
75
Detection angle
60
5-8 meters

Charging information
It is suggested to charge it by a 2A USB power adaptor,with the
USB cable in package.
-Once it is low battery, it could not be power on at all, or the red
and blue will flash for 10 seconds and power off
-During Charging, the blue and yellow will both stay on. Once it
is fully charged, the yellow will be off while the blue stays on.
6

How to insert and take out Micro-SD card
Important notice:
- The camera has the ability to record video only when
Micro-SD is inserted.
- Please avoid by all means to insert or remove Micro-SD
when the camera is either powered ON or connected to the
computer. This can possibly cause damage to Micro-SD or
the entire camera.
- Please ensure that minimal effort is applied to the Micro-SD
when inserting it in or out of the camera. Use of force can
easily damage the Micro-SD or the product parts.
- Before using the product for the first time, ensure that the
Micro-SD is formatted. Please check for any saved data in
the Micro-SD to avoid unexpected loss.
We are not liable or responsible for malfunctions that result
from failure to follow the above guidelines.
Take Micro-SD outInsert Micro-SD card
7

First, user don't have to set time/date unless it is necessary.
Please follow the bellowing to set time/date
Step 1: Power off the camera, and connect it with PC by the
USB cable in the package. Switch the button to REC, after a
dozen of seconds, there will be a disk to open. Then please
open SETTIME.TXT
Time and date setting
8
SETTIME.TXT
file Ed it Format View Help
File name
yyyy-mm-dd,hh:mm:ss 2016-07-15,
yes
23:15:12
SETTIME.TXT
Step 2:Please change the numbers/letters
Step3: Disconnect it from PC and power on it. The time settings is
done and you will find time&date watermark in the video recordings.
yes:auto-recycle the SD
no:no auto-recycling

ParameterItem
size
Product net weight 410g
Battery LiPo
Stand-by power consumption 10uA
PIR detection angle 60 degrees
PIR detection distance 5-8 meters
Camera angle about 75 degrees
Max PIR stand-by time 2 years
Day time recording power consumption 220mA
Max day time recoridng time a b out 30 hours
Night vision recording power consumption 820mA
Max night vision continuously recording time 9-10 hours
a b out 20 hours by 2A USB power
Full-Charging time adaptor
Resolution 720P
FPS 30FPS
PIR MD video record about 1 minute per file
Record continuously about 10 minutes per file
Max SD storage 32GB
Loop recording optional
2 4.5*19.5*1.4CM
Detailed parameters
LENS J M C -EVI2C
TYPE 2 / 3 " HD CCD Quality Lens
MIN Lux 0 . 1 L UX
Main chipset J M C -X6000
Max SD storage 3 2 G B
Loop recording o p t i o nal

Indicator status and meanings
Power on
(by hold on power button for 2
seconds)
Normally the blue will stay on.
10
If no SD, the blue will flash for 10
seconds and it powers off.
It powers off after 60 seconds if
there is no any operation.
Record continuously
(Press REC after powered on)
Press REC, the blue will flash for
3 seconds and goes off, it will
record automatically for 10
minutes per record file. Or press
REC again, the blue will be on,
and it save the present video and
stops recording.
MD
(Press MD after powered on)
Red indicator will always on
In case there is people moving, the
bule will flash and goes off and the
red stays on. Now it will record the
present motion and save to SD
Press MD again, the blue and red
will flash and goes off. And it will
save present video, quit MD and
power off.
Charging by 2A usb adaptor
The yellow will stay on during
charging; once full charged, it
will be off.
Power off
(By press power button again)
The red and blue will be on for 2
seconds, and it powers off.
IMPORTANT REMINDINGS: PLS DON'T PUT SD OUT DURING RECORDING
OR IT COULD POSSIBLY CAUSE DAMAGE TO SD. WHEN THE BATTERY IS
RUNNING OUT, IT WILL SAVE THE LAST FILE AND POWER OFF
/