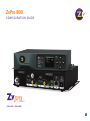
ZeeVee 810i-EU, 820i-EU User manual
- Category
- Supplementary music equipment
- Type
- User manual
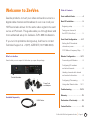
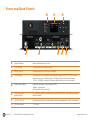
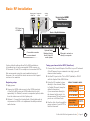
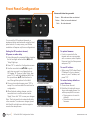
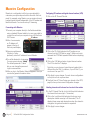
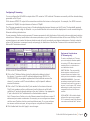
ZeeVee 810i-EU, 820i-EU is a modulator that converts video and audio source to a digital cable channel and broadcasts it over coax to HDTVs. This device enables you to broadcast two unencrypted HDMI sources on RF channels. It offers both analog audio and composite input. The modulator has an Ethernet port for configuration, remote management, and IP streaming. Additionally, you can use the front panel display to configure RF channels, RF power, and audio delay.
ZeeVee 810i-EU, 820i-EU is a modulator that converts video and audio source to a digital cable channel and broadcasts it over coax to HDTVs. This device enables you to broadcast two unencrypted HDMI sources on RF channels. It offers both analog audio and composite input. The modulator has an Ethernet port for configuration, remote management, and IP streaming. Additionally, you can use the front panel display to configure RF channels, RF power, and audio delay.


-
 1
1
-
 2
2
-
 3
3
-
 4
4
-
 5
5
-
 6
6
-
 7
7
-
 8
8
-
 9
9
-
 10
10
-
 11
11
-
 12
12
-
 13
13
-
 14
14
-
 15
15
-
 16
16


ZeeVee 810i-EU, 820i-EU User manual
- Category
- Supplementary music equipment
- Type
- User manual
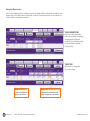
ZeeVee 810i-EU, 820i-EU is a modulator that converts video and audio source to a digital cable channel and broadcasts it over coax to HDTVs. This device enables you to broadcast two unencrypted HDMI sources on RF channels. It offers both analog audio and composite input. The modulator has an Ethernet port for configuration, remote management, and IP streaming. Additionally, you can use the front panel display to configure RF channels, RF power, and audio delay.
Ask a question and I''ll find the answer in the document
Finding information in a document is now easier with AI
Related papers
-
ZeeVee 810i-NA, 820i-NA User manual
-
-
ZeeVee 610i-EU, 620i-EU User manual
-
-
-
-
-
-
-
Other documents
-
Matrox Monarch HD User manual
-
DirekTronik 20102707 User guide
-
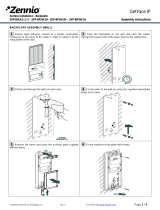 Zennio ZVP-BPxxx Assembly Instructions
-
Aaeon HSB-800I User manual
-
Ultratec CapTel 800i Installation guide
-
 Access Comm CapTel 800i Installation guide
-
-
-
 Adtec Digital EN-40 User manual
-
 Adtec Digital YUV2QAM Quick start guide


