Page is loading ...

Operating instructions
en
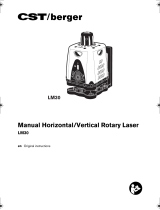
Laser LAPR-150

O
3a
3b
10

A
2
7
6
12
11
1
8
4b
4a
5b
5c
9
5a
13

F
C
B
E
D
G

I
K
L
M
s
~ 5 m
~ 17ft
H
26ft
39ft
max
1/8”
3/16”

en
+49 / 63 46 / 3 09-0
We have endeavoured to explain the unit‘s handling and functioning in as clear
and comprehensible manner as possible. If, however, you still have any unanswe-
red questions, we should be pleased to provide advice over the telephone at any
time on the following telephone number:
Operating instructions
The STABILA LAPR-150 rotation laser is an easy to operate rotation laser for hori-
zontal and vertical levelling and plumb lines. It is self-levelling in a range of ± 1°.
The laser beam can be received at distances of up to 120 m (400 ) with the use
of a receiver, even when it is no longer visible to the naked eye.
O
(3b)
(4a)
(4b)
Main components
SP1: vertical beam emission aperture
SP2: rotation beam emission aperture
ON switch
Selector switch: Rotation function
Selector switch: Scan function
LEDs for displaying:
LED red : battery voltage and overheat
Shock protection
5/8“ threaded connector for tripod
LED green : Operating mode ON or READY / OK
Rough alignment clamp
Battery compartment cover
OFF switch (for protecting during transport)
Rough adjustement vial
Splitter pentaprism SP:
(1)
(3a)
(2)
(5a)
(5b)
(5c)
(6)
(7)
(8)
(9)
(10)
(11)
(12)
(13)
A
Motor housing
Deflection optics
Protection and carrying frame
O

Leveling
Set the unit on a firm base or tripod so that the bubble in the enclosed vial (9)
does not touch the sides of the vial. This vial is used only for rough adjustment.
Tip: It is useful to set up the rotation laser safely at the same distance to the
subsequent measurement points.
Main applications:
Please note that the center
of laser dot is marked!
Getting started
Move the slider switch (3a) upwards to switch the laser ON.
If the unit is outside its self-leveling range, the laser starts to flash.
Aligning:
1.
2.
3. Re-fasten the clamp.
Tilt the upper part of the casing until the bubble
in the vial no longer touches the edge of the vial.
Release the clamp.
Adjusting and aligning the laser beam
1.
2.
The LAPR 150 can be used in 2 operating modes.
Switch ( 4a) : Rotation function
Switch(4b) : Scan function
Reduce rotation speed
= 0
1 x
3 x
1 x
scanning line is longer = 0
3 x
D
B
C

Marking out vertical areas (vertical leveling)
Tilt the motor head 90° in its end position and engage the deflection optics in the
end position. Align the unit so that the vertical plane described by the optics is
parallel or at right angles to a line of reference. Switch the laser on via the sliding
switch (3). Align the casing by turning the unit on the base plate. Because of the
vibration that this may cause, the monitoring function may cause the laser beam
to flash.
Generating parallel planes:
Creating vertical reference areas,
e.g. measuring dividing walls.
Measuring tiles, panels, parquet (floors,
ceilings, walls), measuring right angles
simply by swiveling the unit.
At right angles to the wall:
2 basic methods of vertical levelling
Swiveling
until S1 = S2
Rotational
beam
Continuous
beam
Swiveling until S1 = S2
Rotational
beam
Continuous
beam
G
F
E

Roughly align the laser using the built-in vial, i.e. set the bubble roughly in
the centre of the vial. Turn the deflector prism‘s beam emission opening by
hand in the direction of the wall.
The LAPR-150 rotation laser has been designed for building site use and leaves
our factory perfectly calibrated. As with any precision instrument, however,
its calibration must be regularly checked. The unit should be checked before
starting any new tasks, particularly when the unit has been exposed to strong
vibrations. After an impact, the unit should be checked throughout its whole
self-leveling range.
Checking the calibration
H
Horizontal check
1.
2.
3.
7.
4.
5.
6.
If the difference between the control points is less than 2mm ( 1/8”) at 5m ( 26ft )
distance and 4mm ( 3/16” ) at 10m ( 39ft ) distance the permissible tolerance
of ± 0.2 mm/m ( ± 1/4” over 100ft ) is being maintained.
Repeat steps 4 and 5 to obtain Points 3 and 4.
Mark the position of the visible laser dot on the wall (Point 2).
Mark the position of the visible laser dot on the wall - Measurement 1 (Point 1).
Because the diameter of the beam depends on the distance, you must always
only use the center of the dot!
Set up the rotation laser on a smooth, level surface or on a tripod 5m ( 26 ft )
or 10m ( 39 ft ) from a wall with the front side facing the wall.
Turn the complete unit 90° without altering the height of the laser ( i.e. the
tripod must not be altered ) and turn the deflection prism in the direction of
the wall again in the area of measurement point 1.
C
H1
H2
H3
H4

1.
2.
3.
7.
4.
5.
6.
8.
Roughly align the laser using the built-in vial, i.e. set the bubble roughly in the
center of the vial. Set the tripod height approximately as it was for position 1.
Now place laser unit on its tripod directly in front of wall B.
Mark the position of the visible laser dot on wall B (Point 2).
Switch the unit on.
Switch the unit off. Turn the complete unit 180° without altering
the height of the laser. The tripod must not be altered.
Mark the position of the visible laser dot on wall A (Point 1).
Switch the unit on.
Direct the laser beam on wall A.
10.
11.
9.
Mark the position of the visible laser dot on wall B (Point 3), plumb to Point 2)
Switch the unit on.
13.
14.
Switch the unit off. Turn the complete unit 180° without altering
the height of the laser. The tripod must not be altered.
Mark the center of the laser dot on wall A for Point 4.
Measure the corresponding heights of the points , either in relation
to the floor or to the point below, which is classed as being at 0 mm.
It is essential that the plus or minus
signs are calculated correctly.
15.
Switch the unit on.
16.
17.
18.
Direct the laser beam on wall B.
12.
E
F
G
C
I
L
M
K
I
K
C
Vertical check (motor head tilted 90°)
Roughly align the laser using the built-in vial, i.e. set the bubble roughly
in the center of the vial.
Tilt the motor head 90° in the direction of wall A.
The deflection optics should be set in the end position.
Set up the rotation laser on a tripod directly in front of wall A.
Two parallel wall surfaces at least 5m ( 17 ft ) apart are required for the vertical check.
(P4 – P1) – (P3 – P2)
2s
0,3
mm
m
>
(P4 – P1) – (P3 – P2)
2s
inch
ft
>
23/64“ over 100 ft or 1/272”

1.
2.
Mono, D , LR20
-> The temperature in the unit is over 122°F / 50°C
-> The laser diodes have been switched off to protect
against overheating
-> Place the unit in the shade to be able to continue working.
Illuminated red LED
Open the battery com-
partment (7) by moving
it in the direction of
the arrow. Insert new
batteries following the
instructions in the battery
compartment. Only use
1.5V mono cells (size D)!
Replacing the
batteries
Suitable rechargeable
batteries can also be
used.
Tip:
Remove the batteries if the unit
will not be used for a long period !
Operating status display and error messages via the LEDs
Illuminated green LED
-> laser outside the self-leveling range
-> laser in operation
-> battery voltage very low
-> battery replacement required imminently
-> battery voltage very low and the laser is also outside
the self-leveling range
Flashing green LED
+ laser beam flashing
Illuminated yellow LED
Flashing yellow LED
+ laser beam flashing

EN 60825-1: 2014
Recycling programme for our EU customers:
In accordance with the WEEE regulations, STABILA provides a disposal
programme for electronic products at the end of their service life.
For more details, please contact:
+49 / 6346 / 309-0
Do not submerge the laser.
Do not store the laser when
wet. Dry the laser and case
before putting the laser away.
Do not unscrew !
NB:
In Class II laser equipment, your
eyes are protected from accidental,
short-term exposure to the laser
beam by the lid-closing reflex and /
or the reflex reaction to turn one‘s
head. This equipment can therefore
be used without additional protective
measures. Nevertheless, you should
not look directly into the laser beam.
The laser goggles enclosed with these units
are not safety goggles. They are designed
to make the laser light easier to see.
The use of operating and adjustment equipment other than that indicated here
or the use of other procedures can lead to dangerous exposure to radiation.
LASER RADIATION
DO NOT STARE
INTO BEAM
Do not let the unit fall into children‘s hands !

Subject to technical modifications.
Laser type:
Technical data
Self-leveling range :
(horizontal)
Output:
Leveling accuracy:
Batteries:
Operating life:
Operating temperature range:
Storage temperature range:
Red diode laser, wavelength 635 nm
ca. ± 1°
horizontal: ± 0,2 mm/m / ± 1/4“ over 100ft
vertical: ± 0,3 mm/m / ± 23/64“ over 100ft
2 x 1,5 V Mono cells Alkaline, Size D, LR20
Approx. 80 hours
0°C to +50°C / or 32°F to +122°F
At temperatures > 50° C (122°F),
the unit begins to regulate automatically.
-20 °C to +60 °C / or -4°F to +140°F
• Dirty lens glass on the beam emitter detracts from the quality of the beam.
It should be cleaned with a soft cloth.
• Clean the laser unit with a damp cloth. Do not spray or immerse the unit!
Do not use solvents or thinners!
Care and maintenance
The LAPR-150 rotation laser must be handled carefully, in the same way as
any precision optical instrument.
Stabila provides a guarantee against deficiencies and faults in the assured
characteristics because of material or manufacturing faults for a period of 24 months
from date of purchase. Any faults will be eliminated at Stabila‘s own discretion
either by repairing or replacing the unit. Stabila accepts no wider claims.
No liability is accepted for any faults due to inappropriate treatment (e.g. damage
caused by the unit falling, operation with the wrong voltage or type of current, use
of unsuitable current supply sources) or for any autonomous changes made to the
unit by the purchaser or a third party.
Also no claims under guarantee are accepted for natural wear and tear or any
small faults that do not significantly affect the unit‘s operation.
Any guarantee claims must be made via the dealer on the duly completed
guarantee form (see last page) to be returned with the unit.
Guarantee terms and conditions
< 1 mW, Laser Class 2
to EN 60825-1:2014
Protection against splashes and dust
IP 54

de
nl
es
it
fr
en
pt
no
da
fi
sv
tr
ko
zh
et
lt
lv
ru
sk
cs
pl
sl
ro
hu
Ergänzung zur Garantieerklärung: Die Garantie gilt weltweit.
Addition to warranty declaration: The warranty applies world-wide.
Complément à la déclaration de garantie: La garantie est valable dans le monde entier.
Aggiunta alla dichiarazione di garanzia: La garanzia ha validità mondiale.
Ampliación de la declaración de garantía: La garantía tiene validez en todo el mundo.
Aanvulling op de garantieverklaring: De garantie is wereldwijd geldig.
Acrescento da declaração de garantia: A garantia é válida em todo o mundo.
Supplement til garantierklæringen: Garantien gjelder i hele verden.
Takuuilmoituksen täydennys: Takuu on voimassa maailmanlaajuisesti.
Supplement til garantierklæring: Garantien gælder internationalt.
Komplettering till garantiförklaring: Garantin gäller i hela världen.
Garant beyanına ek: Garant, dünya genelnde geçerldr.
Doplnění k prohlášení o záruce: Tato záruka platí po celém světě.
Doplnok k vyhláseniu o záruke: Táto záruka platí celosvetovo.
Uzupełnienie oświadczenia gwarancyjnego: Gwarancja obowiązuje na całym świecie.
Dopolnitev garancijske izjave: Garancija velja po vsem svetu.
A garancianyilatkozat kiegészítése: A garancia világszerte érvényes.
Supliment la declaraia de garanie: Garania se aplică la nivel mondial.
Дополнение к гарантийному заявлению Гарантия действует по всему миру.
Garantijas saistību papildinājums: Šī garantija ir spēkā visā pasaule.
Garantii lisa See garantii kehtib kogu maailmas.
Garantijos papildymas: Garantija galioja visame pasaulyje.
보장 진술 추가: 이 보증서는 전 세계에서 적용됩니다.
质保声明的补充信息: 该质保全球适用.
/