Elkay
2222 Camden Court
Oak Brook, IL 60523
©2008 Elkay
Printed in U.S.A.
elkayusa.com
(Rev. B 8/08) 74180028
ELKAY LIMITED LIFETIME E-GRANITE SINK WARRANTY
Elkay warrants to the original purchaser of an Elkay E-Granite sink that Elkay will,
at its option, replace or repair, without charge, such product if it fails due to a man-
ufacturing defect for a lifetime of normal residential use. Product replacement
does not include transportation cost or labor installation cost. This warranty
covers only E-Granite drop-in sinks installed in a conventional countertop surface
and E-Granite undermount sinks installed in a conventional solid surface counter-
top and applies to residential installations only. Elkay reserves the right to exam-
ine product in question and its installation prior to replacement.
WASTE FITTINGS AND ACCESSORIES ARE NOT WARRANTED
OTHER WARRANTY CONDITIONS ON SINKS
This warranty applies to sinks purchased after August 1st 2007 as shown on the
purchaser’s dated receipt. Our warranty does not cover product failure or damage
caused by abusive treatment, misuse, environmental factors, normal wear includ-
ing dents and scratches, improper care and cleaning, use of aggressive and abra-
sive cleaners, damage due to handling or failure to follow the recommended pro-
cedures for installation, care and maintenance as detailed in the installation and
care guide provided with every sink. This warranty is extended only to the original
consumer purchaser of the product. This warranty does not cover shipping costs,
labor costs, or any other charges for such items as installation or replacement of
the sink, diagnosis or replacement of any faucet or component part, or any other
expense or loss.
All incidental or consequential damages are specifically excluded. No addi-
tional warranties, express or implied are given, including but not limited to,
any implied warranty of merchantability or fitness for a particular purpose.
Some states do not allow the exclusion or limitation of incidental or consequential
damages or limitations on how long an implied warranty lasts, so the above
limitations or exclusions may not apply to you.
This warranty gives you specific legal rights, and you may also have other rights
which vary from state to state.
TO OBTAIN SERVICE UNDER WARRANTY
1. In the USA, write to: In Canada, please contact /
Elkay Manufacturing Company Au Canada, pour toute demande
Attention: Consumer Services de garantie, veuillez contacter:
2222 Camden Court ELKAY Canada Ltd
Oak Brook, IL 60523 7000 Pine Valley Drive, Unit 102
Vaughan, Ontario L4L 4Y8
2. Include a letter containing the following information:
a. Date of purchase and installation
b. Proof of Purchase (copy of original dated invoice)
c. Description of nature of defect
d. Model number or description of model and/or component part if possible.
Installation Instructions
II. UNDERMOUNT INSTALLATION
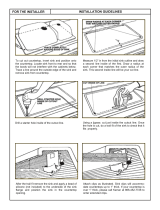
1. Position template on countertop. Locate front to rear, so sink
will not interfere with the cabinet.
2. Trace a line around the template. Cut along the inside of
this line to provide opening.
3. Locate and provide for the mounting holes (following
the countertop manufacturer’s instructions). Holes should
allow for even spacing around sink. Type of fasteners to be
as recommended by countertop supplier.
4. Fasten mounting brackets to countertop loosely.
5. Using a high quality silicone adhesive caulk, apply a bead
evenly all around the top of the sink flanges.
6. Position and align the sink in the countertop opening.
7. Tighten fasteners until mounting brackets are snug against
sink.
8. Check alignment of sink to countertop opening.
9. Tighten down fasteners evenly. Be careful not to over-
tighten. Remove excess caulk and allow caulk to cure
following the caulk manufacturer’s instructions.
CARE AND CLEANING GUIDE
Elkay E-Granite was created for a lifetime of easy care. Just
follow the simple guidelines listed below.
Routine Care
Most dirt and stains: Use soapy water and a sponge, towel dry.
Water marks: Wipe with damp cloth and towel dry.
Difficult stains: 50/50 water/bleach solution or non-abrasive
cleaners. Follow cleaning manufacturer’s instructions, rinse
thoroughly, towel dry.
Preventing Damage
• Avoid exposing Elkay E-Granite to strong chemicals, such as
paint removers, oven cleaners, etc. If contact occurs, quickly
flush the surface with water. Do not use a straight or undiluted
bleach solution.
• Do not set hot pans directly into sinks
• Run cold water when pouring boiling water into sinks.
• Do not use any abrasive cleaning products, scouring pads or
steel wool.
• Do not use caustic solutions containing ammonia or alkalis.
ATTENTION INSTALLER:
• ELKAY RECOMMENDS THAT UNDERMOUNT SINKS SHOULD BE INSTALLED BY A PROFESSIONAL EXPERIENCED
INSTALLER.
• WARNING: THE ENCLOSED CUTOUT TEMPLATE PROVIDES A SINK OPENING THAT WILL EXPOSE APPROXIMATELY
1/8" OF SINK RIM LEDGE AS SHOWN IN ILLUSTRATION F AND G.
• IT IS RECOMMENDED THAT YOU DISCUSS THIS WITH YOUR CUSTOMER AND AGREE TO WHAT THE FINISHED
EFFECT WILL BE. ELKAY IS NOT RESPONSIBLE FOR IMPROPER SINK OR COUNTERTOP INSTALLATIONS.
• ELKAY E-GRANITE UNDERMOUNT SINKS MUST BE FASTENED TO SOLID SURFACE COUNTERTOPS ONLY (I.E. GRANITE).
• ELKAY IS NOT RESPONSIBLE FOR SINK AND COUNTERTOP IF DAMAGED DURING INSTALLATION.
• FOLLOW ALL LOCAL PLUMBING AND BUILDING CODES.
COUNTERTOP
MOUNTING
B
RACKET
FASTENER
(NOT FURNISHED)
C
OUNTERTOP RECESSED
APPROX. 1/8"
SILICONE CAULK
(NOT FURNISHED)
S
INK
ILLUSTRATION G
C
OUNTERTOP
MOUNTING
BRACKET
FASTENER
(
NOT FURNISHED)
COUNTERTOP RECESSED
A
PPROX. 1/8" FLAT
S
ILICONE CAULK
(
NOT FURNISHED)
SINK
ILLUSTRATION F
MODEL ELG1515 ONLY


