InCarTec 29-UC-050-SAAB Operating instructions

Category
Motorcycle Accessories
Type
Operating instructions

The InCarTec 29-UC-050-SAAB steering wheel control interface seamlessly integrates with your SAAB, allowing you to retain steering wheel controls while upgrading to an aftermarket head unit. Compatible with SAAB models from 2006 onwards, it offers a range of features to enhance your driving experience. Connect the interface to your vehicle and head unit, and easily set it to match the brand of your head unit. Program your steering wheel buttons using the simple steps outlined in the manual, ensuring compatibility with various head unit brands.

The InCarTec 29-UC-050-SAAB steering wheel control interface seamlessly integrates with your SAAB, allowing you to retain steering wheel controls while upgrading to an aftermarket head unit. Compatible with SAAB models from 2006 onwards, it offers a range of features to enhance your driving experience. Connect the interface to your vehicle and head unit, and easily set it to match the brand of your head unit. Program your steering wheel buttons using the simple steps outlined in the manual, ensuring compatibility with various head unit brands.

29-UC-050-SAAB, SAAB Steering Wheel Control Interface
For SAAB cars 2006 onwards
Does not retian phone buttons
SAAB 9-3 (06-13)
SAAB 9-5 (06-10 Without OEM navigation)
1. Connect the cables to the interface box and to the car, and the patch lead to the 4 pole black connector (this is
attached to pins 4, 8 and 12 of the control box). Connect the two 8 pin ISO connectors and the patch lead to the
aftermarket head-unit.
When connected to the car the interface will automatically recognise the vehicle. The green LED on the interface
will repeatedly flash once followed by a pause.
2. You need to set the interface to the brand of head unit you are fitting.
The number of flashes between pauses corresponds to the make of head unit, see the table below for the number
of flashes needed for each one.
Press the VOL + and VOL - buttons on the cars steering wheel to increase or decrease the number of flashes. When
you have the correct number of flashes, press SEEK+ to confirm and the LED will go to a solid green
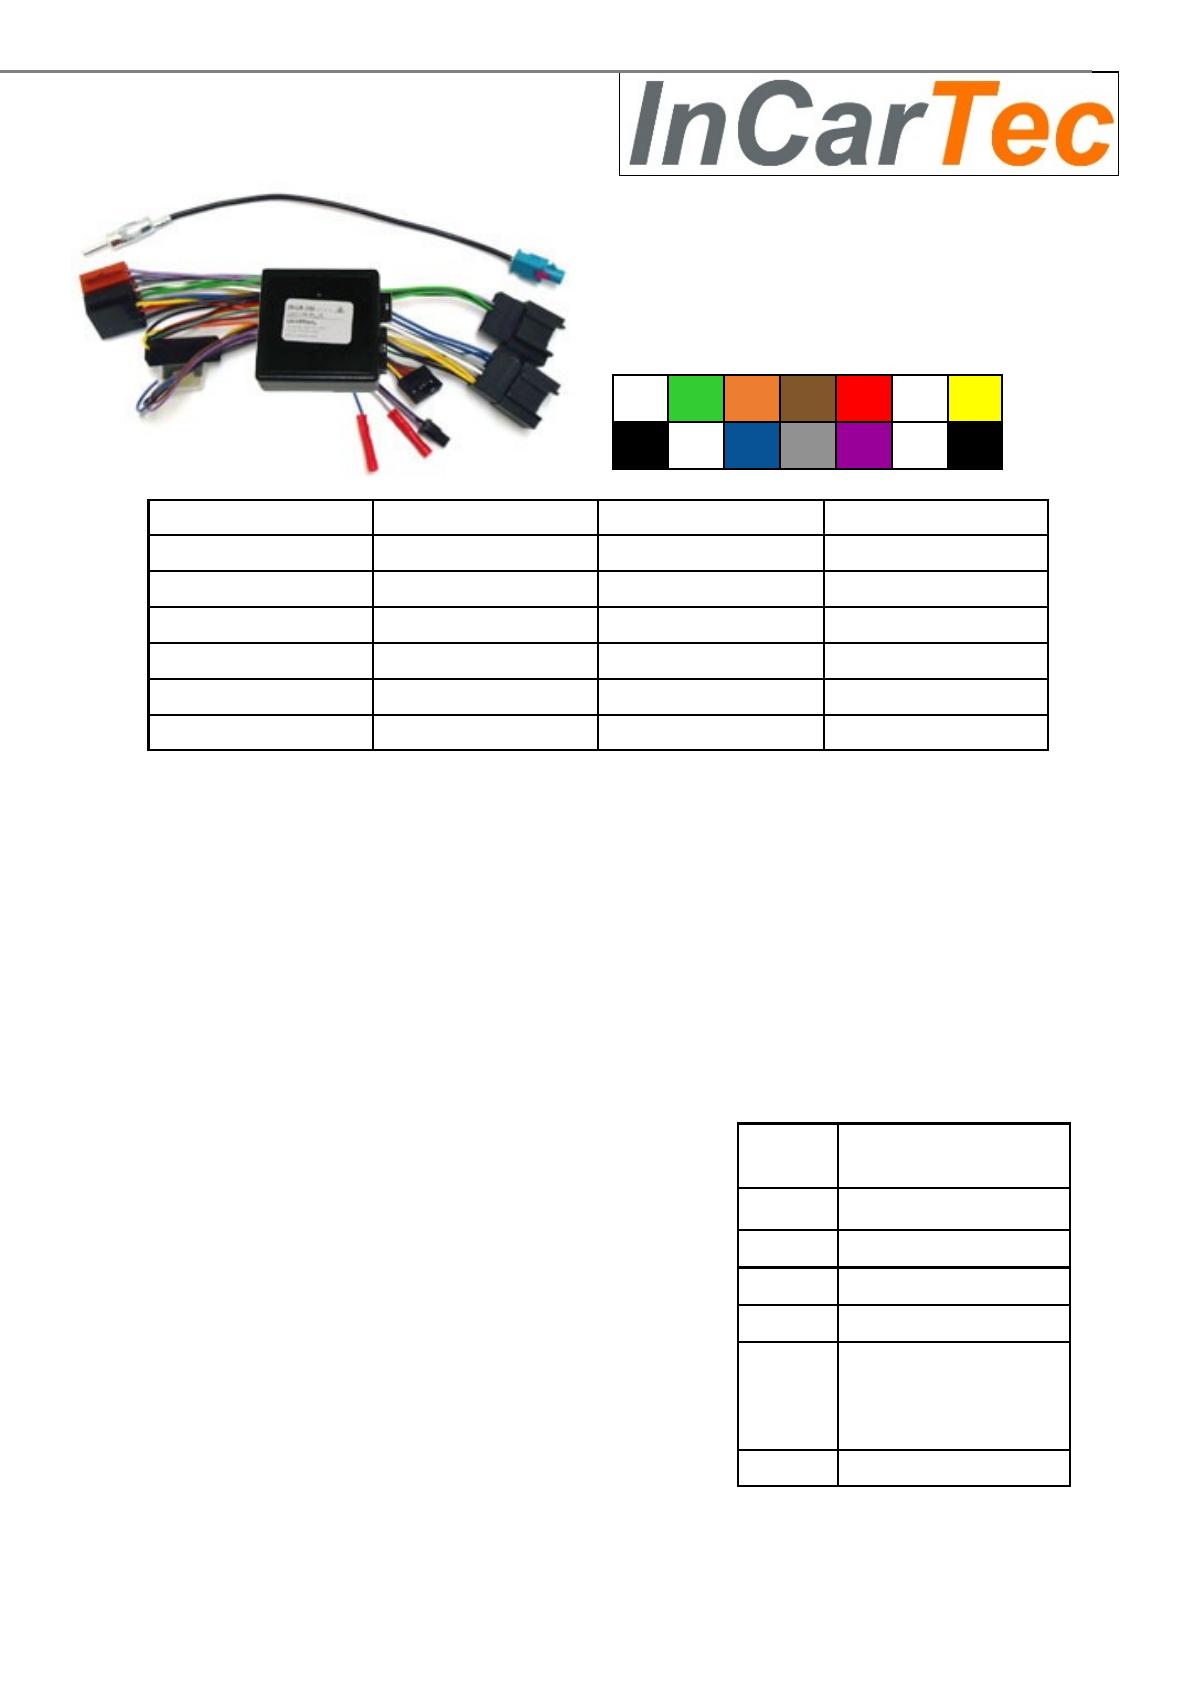
1 2 3 4 5 6 7
8 9 10 11 12 13 14
1. N/A 8. Black SWC Ground Output
2. Green GM LAN BUS Input 9. N/A
3. Orange Illumination Output 10. Blue Reverse 12v Output
4. Brown SWC Data Output 11. Grey Speed Pulse Output
5. Red 12V Ignition Output 12. Purple SWC RES Output
6. N/A 13. N/A
7. Yellow 12v Permanent Input 14. Black Ground Input
For Chinese and resistive programming head-units.
Set the number of flashes to 6. Confirm the setting by pressing
SEEK+. Now press the reset button 5 times, the interface will start to
flash yellow ( this allows prolonged pressure on the steering
controls ). Using the radios resistive learning menu you can now
learn and memorize the buttons. Wait at least 5 seconds between
each button press. When finished turn the ignition off and on and
the LED will go back to solid green.
To reprogram the interface for another head unit brand or if the
light is solid green before you have had the chance to set the head
-unit brand.
Push the reset button in and keep it pushed in for 10 seconds and
then release the button. At this point the LED should start to flash
green.
Number
of flashes
Make of head unit
1 Clarion 3.5mm jack
2 Kenwood 1 wire
3 JVC 1 wire
4 Alpine 3.5mm
6 Pioneer 3.5mm jack
Resistive 2 wire
Resistive 3.5mm jack
7 Sony 3.5mm jack
If fitting an Alpine, please set
jumper J1, please see overleaf.
VER 3.0
3. Setting the Jumpers
The Jumpers are on the PCB inside the interface box. By default they are set up to suit most vehicles and should
usually only need to be changed if fitting an Alpine head unit. The jumpers are set by moving them between
positions 1 and 2 or positions 2 and 3.
29-UC-050-SAAB, SAAB Steering Wheel Control Interface
Position 1-2 Position 2-3
J1 Alpine All other Radio Manufacturers
J2 Negative Handbrake (not all vehicles)
J3 Positive Reverse Output
J4
J5 CANbus Handling
4. The Reverse and Speed Pulse cables.
The reverse output (blue wire) is only needed when fitting a reverse camera to the new head unit. The grey speed
pulse wire is needed when fitting head units with built in satellite navigation and some Kenwoods. If not required
these can be insulated and ignored.
Make sure the patch lead is connected to the 4 pin plug on the interface and the input on the new head unit.
29-UCCAB patch lead wiring information - shown from wire entry side of connector:
Empty
BASE
RING
TIP
Empty
BASE
Empty
TIP
Empty
Empty
Empty
WIRE
Empty
WIRE
Wire
Or Tip
Empty
29-UCCAB-001 Alpine (CBL007UNA22)
29-UCCAB-007 Pioneer/Sony (CBL007UNPI12)
BLACK to BASE
WHITE to RING (13.7k resistor inline on 29-UCCAB-001 for Alpine)
RED to TIP
29-UCCAB-003 Clarion (CBL07UNJV12)
BLACK to BASE
RED to TIP
29-UCCAB-005 Kenwood/JVC (CBL007UNPN21)
BROWN single wire, connect to blue/yellow wire on Kenwood/JVC
marked “System Remote Control” or “Steering Wheel Remote Input”
29-UCCAB-000 or 29-UCCAB-016 Resistive programming and Chinese (CBL007UNCC11)
Connect the two wires (BLACK AND PURPLE) or the 3.5mm jack to the steering wheel control
inputs on the head unit. If head unit uses 2 wire system then connect to SWC1 and SWC Ground
or KEY1 and KEY Ground wires. The steering wheel controls will need to be programmed into
the head unit after setting the number of flashes. See overleaf.
RING
BASE
TIP
Connect the 3.5mm jack
plug on these patch leads
to the SWC or remote
input on the after market
head unit
VER 3.0
  • Page 1 1
  • Page 2 2

InCarTec 29-UC-050-SAAB Operating instructions

Category
Motorcycle Accessories
Type
Operating instructions

The InCarTec 29-UC-050-SAAB steering wheel control interface seamlessly integrates with your SAAB, allowing you to retain steering wheel controls while upgrading to an aftermarket head unit. Compatible with SAAB models from 2006 onwards, it offers a range of features to enhance your driving experience. Connect the interface to your vehicle and head unit, and easily set it to match the brand of your head unit. Program your steering wheel buttons using the simple steps outlined in the manual, ensuring compatibility with various head unit brands.

Ask a question and I''ll find the answer in the document

Finding information in a document is now easier with AI