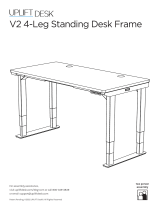
PRO-Series Electric Standing Desk

UpDown Desk PRO-Series Electric Standing Desk User guide

  • Hello! I've reviewed the user manual for the PRO-Series UpDown Desk and I'm ready to help you with your questions regarding its assembly, control panel operation, and the adjustable height settings. I'm also familiar with the included anti-collision feature and the optional cable tray installation.
  • What tools are required for assembly?
    How is the desk height adjusted?
    What is the purpose of the anti-collision feature?
PROSeriesCompleteGuidetoSimple
SetupandOperation
2
TableofContents
Contents
Introduction.........................................................................................................................................................3
ProSeriesDeskFrameAssembly........................................................................................................................4
2.1.Contents...................................................................................................................................................4
2.2Anoteaboutscrews/bolts........................................................................................................................5
2.3Step1.........................................................................................................................................................6
2.4Step2.........................................................................................................................................................7
2.5Step3.........................................................................................................................................................8
2.6Step4.........................................................................................................................................................9
DesktopInstallation...........................................................................................................................................10
ControlPanelInstallation..................................................................................................................................13
CableTrayInstallation(OptionalExtra).............................................................................................................14
CableInstallation...............................................................................................................................................15
ControlPanelOperation....................................................................................................................................16
Troubleshooting................................................................................................................................................20
Recyclingandpackagingdisposal......................................................................................................................21
3
Introduction
CongratulationsonthepurchaseofyourProSeriesUpDownDesk!You’vemadeasignificant
investmentintoyourhealthandwellbeingandyourbodywillthankyouforit.
Thisinstructionalmanualwillguideyousmoothlythroughtheprocessofassemblingtheframe,
attachingtheoptionalcabletrayandinstallingthedesktopwiththecontrolpanel.
Requiredtools:
Philipsheadscrewdriver
Measuringtape
Optionaltools(tosimplifydesktopinstallations):
Powerdrill
2.5mmdrillbit
4
ProSeriesDeskFrameAssembly
2.1.Contents
1. 2xLegs
2. 2xFeet
3. 2xWings
4. 2xAdjustabletubes
5. 1xControlbox
6. 2xMotorcables
7. 1xPowercable
8. 1xAllenkey
9. 1xBagofbolts/screws
10. 1xControlpanel
5
2.2Anoteaboutscrews/bolts
Thebagofbolts/screws(#9)isagenericpackagecoveringseveraldeskmodels.Therefore,there
maybesomeunusedbolts/screwsonceassembly/installationiscomplete.
Belowwedescribeeachboltandwhatit’susedfor.Theareonly4stylesofbolts/screwsrequired
toassembletheProSeriesframeanddesktop.

M8x20mm
8piecesintotal
Allenkeyrequired(supplied)
Usedtoattachfeettothelegs
M6x10mm
4piecesintotal
Philipsheadscrewdriverrequired(notsupplied)
Usedtoattachthecontrolboxtotheadjustabletubes
M8x10mm
12piecesintotal
Allenkeyrequired(supplied)
Usedtoattachthelegstothewingsandadjustabletubes
SelfTapping16mm
14piecesintotal
Philipsheadscrewdriverrequired(notsupplied)
Usedtoattachtheframe,controlpanelandoptionalcabletraytothedesktop
6
2.3Step1
Note:Theframeisbeingassembledupsidedownatfirstasthisisthesimplestmethod.
UsingtheAllenkey(#8)provided,loosen(don’tremove)the8preinstalledscrewsasindicated
abovebytheyellowcircles.
Extendtheadjustabletubes(#4)theappropriatelengthtosuityourdesktop.
120cmdesktopsrequirethetubestobeadjustedinwards,asclosetothetabs(with
red/orangearrows)aspossible.
150cmdesktopsrequirethetubestobeextendedoutto130cm.
180cmdesktopsrequirea155cmlength.*
Theadjustedtubesshouldbeexactlythesamelengthasoneanother,sothatthecentretabswith
holesaredirectlyoppositeeachother(red/orangearrowsindicatedintheimageabove)forcontrol
box(#5)installationinStep4.Tightenthe8boltsusingtheAllenkey(#8)firmly.
*Important:Fordesktops180cmandgreaterinlength,it’scrucialthatyoudonotextendthe
adjustabletubeslongerthan155cm(or160cmmeasuredtotheoutsideofthewings).Doingsocan
reducetheframesstructuralrigidity.
7
2.4Step2
Positionthewings(#3)alongsidetheadjustabletubes(#4),ensuringtheyareroughlycentredas
shownabove(ignoretheadditionaloffsetholecircledinred,whichwasjustusedformanufacture).
Placealeg(#1)ontopoftheadjustabletubes(#4)andwing(#3).Youwillnoticethattheholesline
up(asdemonstratedbythegreencircles).Screwin‘M8x10mm’bolts(#9)inall6(six)holesinthe
legbaseusingtheAllenkey(#8)andtightenfirmly.Dothesamefortheotherleg(#1).
8
2.5Step3
Installthefeet(#2),keepingtheblackpadsfacingupwardsasshown.Screwinfour‘M8x20mm’
boltsforthefirstfootusingtheAllenkey(#8)andtightenfirmly.Repeatontheotherside.
9
2.6Step4
Flipthedeskframeontoitsfeet.Installthecontrolbox(#5)asshown.UsingaPhilipshead
screwdriver(nottheAllenkey),installthefour‘M6x10mm’screws.Tightenthescrewsuntilthey
arefullseatedonthesteelbracket.DONOTovertightenthesescrewsoruseexcessiveforceonce
theyareseated.
Itdoesnotmatterwhichdirectionyouinstallthecontrolbox.
10
DesktopInstallation
Installationofthedesktopandcontrolpanel(#10)usesthesameprinciplesnomatterwhatsize
desktopyouhave.Predrillingthedesktopandtheuseofanelectricscrewdriverisonlyoptional,
howeveritdoessimplifytheprocessparticularlyforhardwooddesktops.Readonforthespecifics
ofdrillusage.
Ifinstalled,unplugallcablesfromthecontrolboxandsetaside.Dothistoensurecablesarenot
pinchedintheprocessofthedesktopinstallation.
Layingasoftclothorcarpetontheground,putyourpreferreddesktopsidefacingdown.Some
modelsofdesktopcomewiththeUpDownDesklogo.It’spersonaltasteastowhetheryouhavethe
logofacingupwardsforeveryonetoseeorunderneath.
Positiontheconstructedframeinthecentreofthedesktopasshown.Toensureit’ssquare,the
distancefromthewingstotheedgesofthedeskmustbeidentical(Items‘A’mustallbeequaland
items‘B’mustallbeequal).It’sbesttodoublecheckeachdistancetwiceusingameasuringtape.
11
Usingascrewdriverandtheprovided16mmlongselftappingscrews,affixtheframein8(eight)
places.Startbyscrewinginoneofthewings(#3)asindicatedbelow.Remeasure,adjustif
necessaryandthenscrewasecondscrewinthediagonallyoppositecornerwingtoensurethe
frameislockedinposition.Allotherscrewscanthenbescrewedin,inanyorderthereafter.
Predrillingdesktopscansimplifythedesktopinstallationprocess.Itisnotrecommendedtopredrill
Melaminedesktops.InstallationofpredrilleddesktopsiscertainlyfareasieronHardwooddesktops
suchasMessmate,VicAsh,JarrahandAcacia.Whilstnotnecessarily,somecustomersreportpre
drillingofBamboodesktopsalsouseful.
Topredrillholes,oncetheframeisperfectlycentredperthestepsabove,usingapen/marker,place
adotinthemiddleofeachaffixingpoint.Removetheframeinpreparationfordrilling.Usinga
powerdrillanda2.5mmdrillbit,drillaholebetween1012mmdeep.IMPORTANT:Beextremely
carefulnottodrillfurtherasyoumayruntheriskofdrillingallthewaythroughthedesktop!The
framecanthenbeattachedusingtheselftappingscrewseitherwithamanualorelectric
screwdriver.
12


13
ControlPanelInstallation
OneofthebenefitsoftheelectricProSeriesdeskisthatit’spossibletolocatethecontrolpanel
(#10)whereveryouwish.Mostpeoplesituateitontheleadingedgetothefarrightorleft
dependingontheirhandpreference.
Withthedeskstillupsidedown,simplyalignthetopedgeofthecontrolpanel(#10)withtheedge
ofthedesk.Using2(two)selftappingscrewsandaPhilipsheadscrewdriver,screwthecontrol
paneltothetimber.
14
CableTrayInstallation(OptionalExtra)
Thecabletraycangowhereverispracticable,dependingonthelocationofyourpowerpoints,your
screencables,yourcomputercablesetc.It’sentirelyuptoyou,howevermostpeoplelocateit
underneaththedesk,totherearandinthemiddle.
Ononesideofthecabletray,youwillnoticeathin,softpadding.Thissidealwaysgoesagainstthe
desk.It’stoprotectthedeskfrombeingscratchedandpreventsqueaking.
Ifyoupeerthrougheachofthelargeholesofthecabletray,youwillnoticeasmallholeonthe
otherside.Usingascrewdriverandaselftappingscrew,screwallthewaythroughthesoftpadding
andintothetimber.Screwbothscrewsinfirmlyuntiltheysittightagainstthecabletray.
IMPORTANT:Beforesecuringanypartofthepowercabletothecabletray,ensureyouleave
enoughcableforthedesktoberaisedtothestandingposition.
15
CableInstallation
Connectingcablesfromtheinstalledcontrolbox(#5)tothelegsandcontrolpanel(#10)isstraight
forwardandselfexplanatory;onlythecorrectplugswillfit.Thesamegoesforthepowercable.
Belowaresomeimagesforreference.OnthePROSeries2leggeddesk,therewillbe1spare
unusedportasindicatedbelowonthecontrolbox;itisusedonlyfor3leggedcornerdesks.
16
ControlPanelOperation
TheProSeriesdeskcanberaisedmanuallybypressingtheUp/Downbuttonsoralternativelyby
pressingpresetheightsusingtheM1M4buttons.
Tosetaheightonanygiven‘M’button,usetheUp/Downbuttonstoachieveyourdesiredposition.
Tostorethisheight,pressandholdanMbuttonfor56secondsuntilyouhearanaudiblebeep.
Thedisplayscreenwillshowyourcurrentheight.Itispresetfromfactorytoshowthelowest
heightat64cm,whichismeasuredtothetopofastandard2.5cmthickdesktop.Thiscanbe
adjustedintheeventyouinstallathickerdesktoporcastorwheelstoyourframe.
Thedeskhasabuiltin‘anticollision’safetyfeaturewherebyanyinterferenceorsevereresistance
experiencedautomaticallystopstheup/downmovementofthedeskandreboundsitasmall
amount.Thesensitivityforthiscanbeadjusted.
TheControlPaneldisplaywillswitchoffafter30secondsofnouse.Toreactivate,presstheUpor
Downbuttononce.
ControlPanelFunctionSettings
A. ‘Down’anticollisionsensitivity
B. Unitscmorinches
C. Heightcorrectionadjustment(whenaddingthickerdesktoporcastorwheels)
D. Minimumheightsetting(shouldyoubeplacinganobstructionunderthedesksuchas
pedestaldrawers)
E. Maximumheightsetting(shouldyoubeplacinganobstructionabovethedesksuchasa
windowsillorprintertray)
F. ‘Up’anticollisionsensitivity
17
A‐‘Down’anticollisionsensitivity
Ifyoufeelyourdesk’sdownwardanticollisionfeatureisbeingactivatedtoosoonornotsoon
enough,youcanadjustitssensitivity.
1. Pressandholdthe‘M4’buttonforapproximately10secondsuntilyouhearthe2ndaudible
beep.Releaseyourfingerfromthebutton.Theletter‘A’willbedisplayed.
2. Press‘M4’once
3. Usethe‘Up’and‘Down’buttonstoscrollthrough14.1beingthemostsensitive,3being
theleastsensitiveand4turnsofftheanticollision.
4. Press‘M3’twicetoexit
Ifyoumakeanyerrorsorneedtostarttheaboveinstructionsagain,simplypressthe‘M3’button
twice.
B‐Unitscmorinch
1. Pressandholdthe‘M4’buttonforapproximately10secondsuntilyouhearthe2ndaudible
beep.Releaseyourfingerfromthebutton.Theletter‘A’willbedisplayed.
2. Usethe‘Up’and‘Down’buttonstotogglethroughthemenuuntilyoureach‘B’
3. Press‘M4’once
4. Usethe‘Up’and‘Down’buttonstoscrollthrough12.1indicatescmunits,2indicatesinch
units.
5. Press‘M3’twicetoexit
Ifyoumakeanyerrorsorneedtostarttheaboveinstructionsagain,simplypressthe‘M3’button
twice.
C‐Heightcorrectionadjustment
Ifyou’readdingathickerorthinnerdesktopthan2.5cmoraddingcastorwheels,thedisplayheight
shownisgoingtobeinaccurate.Itshouldbeadjusted.
1. Usingthe‘Down’button,loweryourdesktothelowestpossibleheight.
2. Takeatapemeasureandmeasurethedistancefromthegroundtothetopofyourdesktop.
Takenoteofthismeasurement.
3. Pressandholdthe‘M4’buttonforapproximately10secondsuntilyouhearthe2ndaudible
beep.Releaseyourfingerfromthebutton.Theletter‘A’willbedisplayed.
4. Usethe‘Up’and‘Down’buttonstotogglethroughthemenuuntilyoureach‘C’
5. Press‘M4’once
18
6. Usethe‘Up’and‘Down’buttonstoscrollthroughtheheightsuntilyoureachyourdesired
minimumheight.
7. Press‘M3’twicetoexit
Ifyoumakeanyerrorsorneedtostarttheaboveinstructionsagain,simplypressthe‘M3’button
twice.
D‐Minimumheightsetting
Ifyouhaveplacedanobstructionunderthedesksuchaspedestaldrawers,youshouldseta
minimumheight.Thiswillensurethataninterferencedoesnotoccur,anddamageisnotinflicted
toeithertheobstructionoryourdesk.
1. Usingatapemeasure,measuretheheightoftheobstructionfromtheground.
2. Pressandholdthe‘M4’buttonforapproximately10secondsuntilyouhearthe2ndaudible
beep.Releaseyourfingerfromthebutton.Theletter‘A’willbedisplayed.
3. Usethe‘Up’and‘Down’buttonstotogglethroughthemenuuntilyoureach‘D’
4. Press‘M4’once
5. Usethe‘Up’and‘Down’buttonstoadjusttheheightshownonthedisplay.Add2cmtothe
distanceyoujustmeasuredoftheobstruction.
6. Press‘M3’twicetoexit.Yourdeskwillnotgobelowthisheight.
Ifyoumakeanyerrorsorneedtostarttheaboveinstructionsagain,simplypressthe‘M3’button
twice.
E‐Maximumheightsetting
Ifyouhaveanobstructionabovethedeskoraboveyourmonitorssuchasawindowsillorprinter
tray,youshouldsetamaximumheight.Thiswillensurethataninterferencedoesnotoccur,and
damageisnotinflictedtoeithertheobstructionoryourdesk.
1. Usingatapemeasure,measuretheheightoftheobstructionfromtheground.
2. Pressandholdthe‘M4’buttonforapproximately10secondsuntilyouhearthe2ndaudible
beep.Releaseyourfingerfromthebutton.Theletter‘A’willbedisplayed.
3. Usethe‘Up’and‘Down’buttonstotogglethroughthemenuuntilyoureach‘E’
4. Press‘M4’once
5. Usethe‘Up’and‘Down’buttonstoadjusttheheightshownonthedisplay.Subtract2cm
fromthedistanceyoujustmeasuredoftheobstruction.
6. Press‘M3’twicetoexit.Yourdeskwillnotgoabovethisheight.
19
Ifyoumakeanyerrorsorneedtostarttheaboveinstructionsagain,simplypressthe‘M3’button
twice.
F‐‘Up’anticollisionsensitivity
Ifyoufeelyourdesk’supwardanticollisionfeatureisbeingactivatedtoosoonornotsoonenough,
youcanadjustitssensitivity.
1. Pressandholdthe‘M4’buttonforapproximately10secondsuntilyouhearthe2ndaudible
beep.Releaseyourfingerfromthebutton.Theletter‘A’willbedisplayed.
2. Usethe‘Up’and‘Down’buttonstotogglethroughthemenuuntilyoureach‘F’
3. Press‘M4’once
4. Usethe‘Up’and‘Down’buttonstoscrollthrough14.1beingthemostsensitive,3being
theleastsensitiveand4turnsofftheanticollision.
5. Press‘M3’twicetoexit
Ifyoumakeanyerrorsorneedtostarttheaboveinstructionsagain,simplypressthe‘M3’button
twice.
20
Troubleshooting
ErrorCodeCauseSolution
ER1 Motor stoppage
(1) Turn power off at the power point.
(2) Wait 60 seconds.
(3) Check cable connections.
(4) Turn power back on.
ER2 Legs not synchronised
(1) Turn power off at the power point.
(2) Wait 60 seconds.
(3) Check cable connections.
(4) Turn power back on.
(5) Using the down arrow, lower the desk to the minimum height to reset.
ER3 Cable connection fault
(1) Turn power off at the power point.
(2) Wait 60 seconds.
(3) Disconnect all cables and reconnect.
(4) Turn power back on.
ER4 Communication fault
(1) Turn power off at the power point.
(2) Wait 60 seconds.
(3) Check connection between control panel cable and the control box.
(4) Turn power back on.
ER5 Overload protection
(1) Reduce load on desk.
(2) Turn power off at the power point.
(3) Wait 60 seconds.
(4) Turn power back on and lower the desk to the minimum height to reset.
Hot
Continuous over usage
(approx. 1min continuous usage
every 10min)
(1) Reduce load on desk.
(2) Turn power off at the power point.
(3) Wait 5 minutes.
(4) Turn power back on and lower the desk to the minimum height to reset.
Desk stuck at a certain height
Follow the instructions above for minimum height setting or
maximum height setting. Set the minimum height to 64, and the maximum
height to 129. Please note that these heights have been calculated using a
standard 2.5cm thick desktop. If your desktop is thicker or thinner, follow
instructions mentioned in the previous section: Height correction adjustment
ASR Anti-collision triggered,
obstruction encountered
(1) Turn desk off at wall.
(2) Wait 60 seconds.
(3) Turn desk back on and as soon as the ASR code appears - BEFORE
YOU HEAR A BEEP - hold the down arrow until the desk has reached its
lowest height. This will clear the ASR notification.
Foranyothertroubleshootingissues,pleasevisittheSupportsectionofourwebsiteat
updowndesk.com.au.
/