Cognex DM302 Quick Reference Manual

Type
Quick Reference Manual

This manual is also suitable for

DataMan
®
300 Series
Quick Reference Guide
2020 April14
Revision: 6.1.6SR2.5
Precautions
WARNING: LASER LIGHT, DO NOT STARE INTO BEAM: CLASS 2
LASER PRODUCT. FAILURE TO FOLLOW THESE INSTRUCTIONS
MAY CAUSE SERIOUS INJURY
l CAUTION - Use of controls or adjustments or performance of procedures
other than those specified herein may result in hazardous radiation
exposure.
l Do not attempt to service or repair this product -- return it to Cognex for
service.
l Do not permit anyone other than Cognex Corporation to service, repair, or
adjust this product.
l Do not attempt to open or modify this device except as described in this
document.
l Do not direct or reflect laser light toward people or reflective objects.
l Do not operate this device if it is damaged or if the covers or seals are
missing or damaged.
l IP protection is ensured only when all connectors are attached to cables or
shielded by a sealing cap.
This Laser Product is designated as Class 2 during all procedures of operation.
Wavelength 650 nm
Laser Power for classification < 1mW
Beam Diameter < 3mm at aperture
Divergence < 1.5 mrad
2
Product Overview
1
Laser aimer
2 Illumination LED clusters
3 External illumination mounting point
4 Mounting holes (M3 x 5mm)
5
Trigger button
6
Power
7
Train status
8
Read/no-read indicator
9
Network
10
Error
11
Peak meter
12
Tuning button
13
Ethernet
14
External light control
15
Power, I/O, and RS232
3
DataMan 300 Accessories
LENS OPTIONS ANDCOVERS
10.3 mm M12 lens with locking
10.3 mm IR M12 lens with locking
DM300-LENS-10
DM300-LENS-10-IR
Liquid lens module and pre-focused 10.3 mm or 10.3
mm IR M12 lens with wrench
DM300-LENS-10LL
DM300-LENS-10LL-IR
19 mm liquid lens module DM300-LENS-19LL
16 mm M12 lens with locking without built-in IR
blocking filter
DM300-LENS-16
24 mm F6 liquid lens module with built-in IR blocking
filter
DM360-LENS-24LL
25 mm M12 lens with lens spacer and hex wrench (also
requires Extension kit)
DM300-LENS-25
Extension kit DM300-EXT
DM500 C-Mount cover (use with HPIA) DM500-CMTLC-000
DM500 Lens cover extender DM500-LNSEXT-000
Blue,
red,
green,
orange bandpass filters
CKR-BP470
CKR-BP635
CKR-BP525
CKR-BP590
Clear lens cover DM300-CLCOV
4
Clear lens cover with white LED illumination
(RiskGroup Exempt acc. IEC 62471)
DM300-CLCOV-WHI
Diffuse lens cover with red LED illumination,
with blue LED illumination,
with IR LED illumination,
Polarizer lens cover with red LED illumination
(RiskGroup Exempt acc. IEC 62471)
DM300-DLCOV-RE
DM300-DLCOV-BL
DM300-DLCOV-IR
DM300-PLCOV-RE
Diffuse lens cover, red illumination (assembled), ESD
safe
(RiskGroup Exempt acc. IEC 62471)
DM300-DLCOV-RE-ESD
Red LED high-powered integrated light, 10.3 mm lens
(RiskGroup Red LED Exempt acc. IEC 62471, RiskGroup Green
LED AimerExempt acc. IEC 62471)
DM360-HPIL-RE
Polarized red LED high-powered integrated light, ESD
safe, 10.3 mm lens
(RiskGroup Red LED Exempt acc. IEC 62471, RiskGroup Green
LED AimerExempt acc. IEC 62471)
DM360-HPIL-RE-P
White LED high-powered integrated light, 10.3 mm lens
(RiskGroup White LED low riskacc. IEC 62471, RiskGroup Green
LED AimerExempt acc. IEC 62471)
DM360-HPIL-WHI
Red LED high-powered integrated light, 24 mm lens
(RiskGroup Red LED Exempt acc. IEC 62471)
DMLT-HPIL-RE
Polarized red LED high-powered integrated light, 24 mm
lens
(RiskGroup Green LED AimerExempt acc. IEC 62471)
DMLT-HPIL-RE-P
White LED high-powered integrated light, 24 mm lens
(RiskGroup White LED low riskacc. IEC 62471, RiskGroup Green
LED AimerExempt acc. IEC 62471)
DMLT-HPIL-WHI
C-Mount cover for C-Mount lenses DM300-CMCOV
Short C-Mount cover for C-Mount lenses DM300-CMCOV-SH
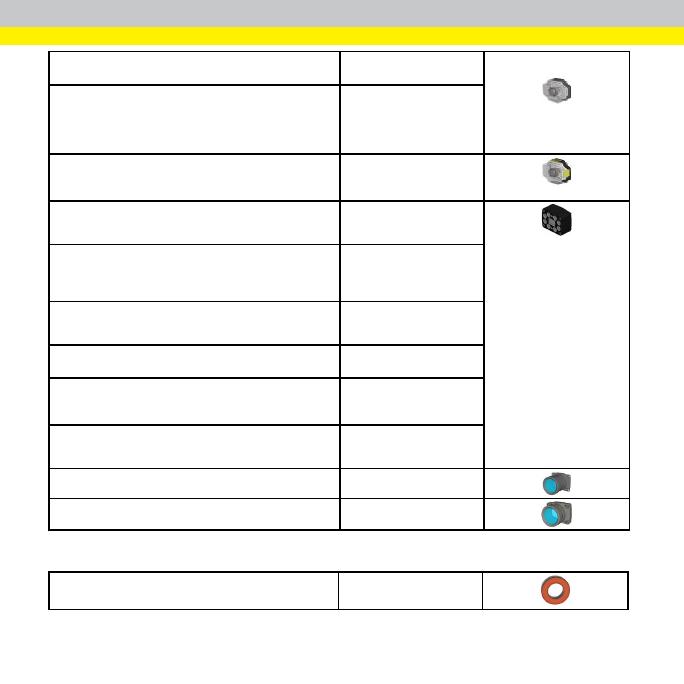
EXTERNAL LIGHTS (RED LED) ANDHIGHPOWERILLUMINATIONS
Ring Light CLRR-R7030G1CLR
5
Back light CLRB-F100100G1
Coaxial (DOAL) light CLRO-K5050G1
Spot light CLRS-P14G1
Dark-field light CLRD-D120G1
HPIA, Red narrow DM30X-HPIA3-625
HPIA, Red wide DM30X-HPIA3-625-W
HPIA, Red narrow with polarizer DM30X-HPIA3-625P
HPIA, Red wide with polarizer DM30X-HPIA3-625P-W
HPIA, White narrow DM30X-HPIA3-WHI
HPIA,White wide DM30X-HPIA3-WHI-W
HPIA, Blue narrow DM30X-HPIA3-470
HPIA, Blue wide DM30X-HPIA3-470-W
HPIA, Infrared narrow DM30X-HPIA3-IR
HPIA, Infrared wide
DM30X-HPIA3-IR-W
Red narrow DM30X-HPIA-625
Red wide DM30X-HPIA-625-W
Red narrow with polarizer DM30X-HPIA-625P
White narrow DM30X-HPIA-WHI
White wide DM30X-HPIA-WHI-W
Blue narrow DM30X-HPIA-470
Blue wide DM30X-HPIA-470-W
Infrared narrow DM30X-HPIA-IR
Infrared wide DM30X-HPIA-IR-W
6
OTHER
Connection cable 24V, I/O, RS-232 (y straight/angled, xx
specifies length)
CCB-M12x12Fly-xx
Connection cable 24V, I/O, RS-232 CCBL-05-01
Power and I/O breakout cable, M12-12, straight, xx
specifies length: 5m, 10m, 15m,
angled, xx specifies length: 5m, 10m, 15m
CCB-PWRIO- xx
CCB-PWRIO-xxR
Connection cable RS-232 CCB-M12xDB9Y-05
Ethernet M12 to RJ45 cable (y=1: straight / y=6: angled,
x-xx specifies length)
CCB-84901-y00x-xx
External light cable (xxx specifies length)
CCB-M12x4MS-xxx
Bar light cable (xxx specifies length: 300, 500, 1000,
2000 mm)
IVSL-5PM12-Jxxx
I/O extension cable, 5m straight CKR-200-CBL-EXT
Laser aimer (use with HPIA) DM300-AIMER-00
Connection module (4 or 1 camera)
(xx can be US, EU, UK or JP)
DMA-CCM-4X-xx or
DMA-CCM-1-xx
External light mounting brackets (xx specifies light type)
(may get used in combination with DM100-PIVOTM-00
or DM500-BRKT-000 if pivoting is required)
DM300-ELMB-xx
Universal Mounting Bracket DM100-UBRK-000
Pivot Mounting Bracket DM100-PIVOTM-00
7
Dimensions
A S-Mount (M12)Lens version
B C-Mount Lens version
8
Field of View and Reading Distances
Note: Due to tolerances, ranges can vary by +/- 5 % from unit to unit.
10.3 mm lens (green) 16 mm lens (red) 25 mm lens (blue)
inner:
DM300
inner:
DM300
inner:
DM300
outer:
DM302
,
DM303
outer:
DM302
,
DM303
outer:
DM302
,
DM303
9
Device Distances in mm/2D min. code 10.3 mm
lens
Distances in mm/1D min. code 10.3 mm lens
DM300
,
DM302
0-75 5 MIL 0-215 7 MIL
0-210 10 MIL 0-409 13 MIL
0-374 20MIL 0-500 18 MIL
DM303
20-110 5 MIL 20-350 7 MIL
15-325 10 MIL 25-735 13 MIL
10-580 20 MIL 25-840 18 MIL
Device Distances in mm/2D min. code 16 mm lens Distances in mm/1D min. code 16 mm lens
DM300
,
DM302
59-72 2 MIL 60-125 2 MIL
55-207 4 MIL 55-270 4 MIL
49-295 8 MIL 56-400 6 MIL
DM303
35-190 5 MIL 45-400 7 MIL
30-420 10 MIL 45-495 13 MIL
25-500 20 MIL 45-540 18 MIL
Device Distances in mm/2D min. code 25 mm lens Distances in mm/1D min. code 25 mm lens
DM300
,
DM302
100-155 2 MIL 95-155 2 MIL
95-350 4 MIL 92-350 4 MIL
90-470 8 MIL 88-380 6 MIL
DM303
95-155 2 MIL 95-155 2 MIL
90-350 4 MIL 92-360 4 MIL
88-385 8 MIL 90-390 6 MIL
10
24 mm lens,
DM303
:green 24 mm lens,
DM302
: brown 24 mm lens,
DM300
:red
Device Distances in mm/2D min. code 24 mm lens Distances in mm/1D min. code 24 mm lens
DM300
,
DM302
80-120 2 MIL 80-230 2 MIL
80-230 4 MIL 80-460 4 MIL
80-460 8 MIL 80-690 6 MIL
DM303
80-150 2 MIL 80-270 2 MIL
80-300 4 MIL 80-540 4 MIL
80-600 8 MIL 80-810 6 MIL
11
Connecting the Reader
CAUTION: The Ethernet cable shield must be grounded at the far end.
Whatever this cable is plugged into (usually a switch or router) should have a
grounded Ethernet connector. A digital voltmeter should be used to validate
the grounding. If the far end device is not grounded, a ground wire should be
added in compliance with local electrical codes.
CAUTION: To reduce emissions, connect the far end of the Breakout cable
shield to frame ground.
Perform the following steps:
1. Mount the reader.
2. Connect the Ethernet cable to a computer or a switch.
3. Connect the breakout cable.
For information on the cable pinout and wire colors, see section Connections, Optics,
and Lighting in the DataMan 300 Reference Manual.
12
Installation
Installation procedures and specifications are presented in detail in the DataMan 300
Reference Manual, which is installed with the DataMan Setup Tool. From the
Windows Start menu, select the following to access the manual: All Programs >
Cognex > DataMan Software vx.x.x > Documentation.
Note:
l Cables are sold separately.
l If a standard component is missing or damaged, immediately contact
your Cognex Authorized Service Provider (ASP) or Cognex
Technical Support.
CAUTION: All cable connectors are "keyed" to fit the connectors on the
DataMan system; do not force the connectors or damage may occur.
13
Mounting
CAUTION: It is recommended the reader be grounded, either by mounting
the reader to a fixture that is electrically grounded or by attaching a wire from
the readers mounting fixture to frame ground or Earth ground. If a ground
wire is used, it should be attached to one of the four mounting points on the
back plate of the reader; not to the mounting points on the front of the reader.
Mounting the DataMan reader at a slight angle (15°) can reduce reflections and
improve performance.
Use the set of mounting holes on the bottom part to mount the DataMan reader.
For more information on mounting, see the DataMan 300 Reference Manual.
14
Connect the Ethernet Cable
CAUTION: The Ethernet cable shield must be grounded at the far end.
Whatever this cable is plugged into (usually a switch or router) should have a
grounded Ethernet connector. A digital voltmeter should be used to validate
the grounding. If the far end device is not grounded, a ground wire should be
added in compliance with local electrical codes.
1. Connect the Ethernet cable's M12 connector to the DataMan system's
ENETconnector.
2. Connect the Ethernet cable's RJ-45 connector to a switch/router or PC, as
applicable.
Connect the Breakout Cable
CAUTION: To reduce emissions, connect the far end of the Breakout cable
shield to frame ground.
Note:
l I/O wiring or adjustments to I/O devices should be performed when
the reader is not receiving power.
l You can clip unused wires short or use a tie made of non-conductive
material to tie them back.Keep bare wires separated from the
+24VDC wire.
1. Verify that the 24VDC power supply is unplugged and not receiving power.
2. Attach the Breakout cable's +24VDC and Ground to the corresponding
terminals on the power supply.
15
CAUTION: Never connect voltages other than 24VDC. Always
observe the polarity shown.
3. Attach the Breakout cable's M12 connector to the DataMan 300 reader's
24VDC connector.
4. Restore power to the 24VDC power supply and turn it on if necessary.
16
Install Software and Documentation and
Connect the Reader
Follow the steps below to connect your reader to power and network:
1. Connect the I/O+RS232+24V cable to your reader.
2. For a network connection, connect your reader through an Ethernet cable
to your network.
3. Connect the cable to a 24V power supply.
To configure a DataMan 300 reader, the DataMan Setup Tool software must be
installed on a networked PC. The DataMan Setup Tool is available from the
DataMan support site: http://www.cognex.com/support/dataman.
1. After installing the software, connect the DataMan 300 series reader to your
PC.
2. Launch the DataMan Setup Tool and click Refresh.
3. Select your DataMan 300 series reader from the list and click Connect.
17
DataMan 300 Series Specifications
Weight
165 g
Operating Temperature
0ºC 45ºC (+32ºF 113ºF)
Storage Temperature
-10ºC +60ºC (+14ºF +140ºF)
Maximum Humidity < 95% (non-condensing)
Environmental
IP65 (with cable or protection cap attached to all connectors, front cover properly
installed)
LED Safety IEC62471: red illumination: Exempt Risk Group, blue and white illuminations:
Risk Group 1 (Low-Risk). No further labeling is required.
RS-232 RxD, TxD according to TIA/EIA-232-F
Codes
1-Dbarcodes: Codabar, Code 39, Code 128, and Code 93, Interleaved 2 of 5,
MSI, Pharma, GS1 DataBar, Postal, UPC/EAN/JAN
2-D codes: Data Matrix
TM
(IDMax and IDQuick: ECC 0, 50, 80, 100, 140, and
200), QR Code and microQR Code, MaxiCode, DotCode, Aztec Code, RSS/CS
Stacked codes: PDF 417, MicroPDF 417
Discrete I/O operating limits
HS Output 0,1,2,3 I
MAX
50 mA
R
MIN
@ 12 VDC 200 Ω
Input 0 (Trigger) V
IH
±12 ±28 V
Input 1,2,3 V
IL
0 ±8 V
I
TYP
@ 12 VDC 2.0 mA
@ 24 VDC 4.2 mA
18
Power Supply Requirements
24V +/- 10%
Options:
l Internal illumination (non-HPIL*): 250 mA maximum, 5 W
l Internal illumination (HPIL*): 2.2 A maximum, 6 W
l External illumination: up to 800 mA average, 20 W, peak current
according to illumination, these values depend on the illumination
and its configuration
Supplied by LPS or NEC class 2 only
*HPIL denotes one of the DM360-HPIL-RE or DM360-HPIL-RE-P accessories
Light Connector
Current load up to 630 mA average
Ethernet Speed
10/100
Duplex Mode Full duplex or half duplex
19
DataMan 300 Series Imager Specifications
Specification DataMan 300 Series Imager
Image Sensor 1/1.8 inch CMOS
Image Sensor Properties
6.9 mm x 5.5 mm (H x V); 5.3 µm square pixels (DataMan 300 and 302),
4.5 µm square pixels (DataMan 303)
Image Resolution (pixels)
l DataMan 300: 800 x 600
l DataMan 302: 1280 x 1024
l DataMan 303: 1600 x 1200
Electronic Shutter Speed
l minimum exposure: 5 µs (DataMan 300 and 302), 12 µs
(DataMan 303)
l maximum exposure: 1000 µs with internal
illumination/100000 µs with external illumination
Image Acquisition at Full Resolution
l DataMan 300 and 302: up to 60 fps
l DataMan 303: up to 40 fps
Lens Type
l S-Mount 10.3 mm F:5 (with optional liquid lens) with IR
blocking filter
l S-Mount 16 mm F:9, no IR blocking filter
l C-Mount 24 mm F:6 (with liquid lens only) with IR blocking
filter
l S-Mount 25 mm M12 lens, no IR blocking filter
l C-Mount lenses (with limitations, see below)
Limitations to C-Mount lenses:
20
  • Page 1 1
  • Page 2 2
  • Page 3 3
  • Page 4 4
  • Page 5 5
  • Page 6 6
  • Page 7 7
  • Page 8 8
  • Page 9 9
  • Page 10 10
  • Page 11 11
  • Page 12 12
  • Page 13 13
  • Page 14 14
  • Page 15 15
  • Page 16 16
  • Page 17 17
  • Page 18 18
  • Page 19 19
  • Page 20 20
  • Page 21 21
  • Page 22 22
  • Page 23 23
  • Page 24 24
  • Page 25 25
  • Page 26 26
  • Page 27 27

Cognex DM302 Quick Reference Manual

Type
Quick Reference Manual
This manual is also suitable for

Ask a question and I''ll find the answer in the document

Finding information in a document is now easier with AI