Page is loading ...

S50

Contents
Main Functions and features ................................1
List of accessories ................................................................. 3
Component guideline............................................5
Front view .............................................................................. 5
Rear view: ..............................................................................6
Description of indicators .........................................................7
Preparations before use .......................................8
Charging ................................................................................. 8
Remove the battery ................................................................9
Install TFT display ................................................................10
Insert and remove the memory card .................................... 11
Startup .................................................................................. 12
Setting the date and time .....................................................13
Language ............................................................................14
Select light metering mode ................................................... 14
Video recording .................................................15

Basic operations of video recording .....................................15
Start video recording via G-SENSOR mode .......................16
Parameter setting for video recording ..................................17
Audio recording ..................................................21
Enter audio recording mode .................................................21
Operating procedures for audio recording ............................22
Exit audio recording mode ....................................................23
Photo shooting....................................................24
Parameter settings for photo shooting ................................25
Playback ............................................................28
Operating procedure for playback .......................................28
Delete les ............................................................................30
File protection and unlocking ................................................31
Upload audio/video/photo les to PC ...................................32
View video / photo on HDTV ................................................33
WiFi ...................................................................34
Operating Instructions for WiFi Control Interface .................37
Download Files to Mobile Device ........................................42

Trim Videos ..........................................................................44
Change WiFi Connection Name and Password ...................45
Other basic setting..............................................46
Warning tone ........................................................................46
status indicators ...................................................................46
OSD .....................................................................................47
Video content loop ............................................................... 47
Auto to standby ...................................................................47
TV output format ...................................................................48
Recover factory settings ....................................................... 48
Accessory application .........................................49
Water-proof housing ............................................................. 49
Mount plug bracket components ..........................................50
Use convex sticker and at sticker .......................................50
Specications .....................................................52
Tips .....................................................................54

1
aee.com
Main Functions and features
1 175° wide-angle lens.
2 High-definition video recording with multiple interchangeable
recording modes.
3 Automatic white balance and automatic exposure.
4 External scalable power supply and GPS module.
5 Support external TF card up to 64GB.
6 Support Audio-in function and external dedicated microphone.
7 Support HDMI output function.
8 All-round highlight status indicator.
9 Built-in speaker and key tone.
10 Professional water-proof housing design, up to Grade IP68 and
100 meters waterproof.
11 Accessories adopt strengthened structure with improved
reliability and stability.
12 Rechargeable built-in high capacity lithium-ion battery extends
the video recording time.
13 Built-in microphone adopts dual-Mic design to achieve stereo
and high-quality recording effect.

2
aee.com
14 100m wireless remote control allows you to control the video
camera functions remotely.
15 Built-in G-Sensor can function as automobile black box.
16 Burst mode can take 10 photos in 1 second to record every detail
in high-speed motion.

3
aee.com
List of accessories
S50 main unit TFT display Water-proof housing
Remote control
(optional)
Lithium-ion battery Back clip
Vertical-horizontal
joint
Waterproof plug Lens protective cap

4
aee.com
Flat sticker Convex sticker Plug bracket unit
Extended adjusting
bolt unit
Moisture-proof foam USB data cable
Power supply
terminal
Cloth bag Hand strap
CD-ROM User manual
The actual items may be different from the pictures. Package is
subject to change without prior notice.

5
aee.com
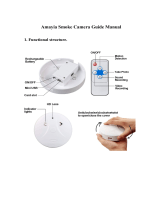
Component guideline
Front view
Light meter mode key
WiFi status indicator
Working status indicator
Power status indicator
G-Sensor key
Video/audio recording button
Power on/off key
Green indicator
Battery lock
WiFi key
Lens
Green
indicator
tripod mountMicrophone

6
aee.com
Rear view:
Red indicator
LCD segment display
Down button
Up button
OK button
Green indicator
Red indicator
TFT display
Microphone
Playback button
Left arrow button
Menu button
Green indicator
Shutter button
Stop button
HDMI interface
Right arrow button
USB interface
TF card slot
Speaker

7
aee.com
Description of indicators
Indicator
Status
Red
indicator
Green
indicator
Tricolor
indicator
Quantity 3 Quantity 5 Quantity 1
Position
1 at front/
top cover/
TFT display
each
Position
1 at
front/top
cover/TFT
display
each; 2 at
bottom side
Position
Front
cover
Startup Stay on
Video
recording
Flash slowly
Audio
recording
Flash slowly
Photo
shooting
Flash once
Card full Stay on
Charging
(switched off)
Flash slowly
Fully charged
(switched off)
Stay on
Low-battery
indicator
Flash fast for 5s and
then auto power off
Data
transmission
Stay on
WiFi on
Blue (ash
slowly)

8
aee.com
Preparations before use
Charging
Start up the unit to check the battery power. If the battery level is low,
charge it.
Use the supplied power adapter or USB port of a PC to charge S50:
S50 USB interface
S50 USB interface
PC USB interface
S50 power adapter
When S50 is charged in power-off state, the red indicator will ash
slowly. After the battery is fully charged, the red indicator will stay on.
Max. continuous video
recording time
About 3 hours with fully
charged battery
Max. continuous audio
recording time
About 3 hours with fully
charged battery

9
aee.com
Remove the battery
Battery lock
Before removing the battery, ensure that the battery "lock key" at the
bottom of S50 is unlocked.
Dent
Place the gure at the battery dent and press down the battery in the
direction of arrow to detach it from the camera.

10
aee.com
Install TFT display
S50 supports external dedicated 2″ TFT display, which can perform
Setup, Playback and Delete, etc. on the camera to preview or play
back the video.
Install the display as shown below:

11
aee.com
Insert and remove the memory card
S50 supports external TF card up to 64G. Though all SD
cards above Class 6 can be used on S50, high-speed card is
recommended to perform high-definition shooting. When shooting
during dynamic motion, brand SDHC cards are recommended for
use in order to ensure smooth shooting.
* Insert the memory card
1 Ensure that S50 is switched off.
2 Insert SD card into the memory card slot in the arrow direction
atly to the end. A "click" can be heard to indicate the card has
been well inserted.
* Remove the memory card
Press the center of exposed part of SD card and SD card will
pop up slightly. Then pull it out atly.

12
aee.com
Startup
Turn the power key to "ON" to turn on S50;
• 3 red indicators will be lit up (one at front cover, top cover and
display each)
• The startup picture shows "AEE LOGO" and S50 enters
recording standby mode. Now TFT display is shown as below:
1080P/25
Working mode
Battery level
Resolution of
video recording
avaliable space of TF card
• LCD segment screen is shown as below:
1080P 30
100-088
2H30
Working mode
Resolution of video
recording
Remaining video recording
time of memory card
Battery level

13
aee.com
Setting the date and time
Set time and date by following these steps:
1 Turn on S50 to enter recording standby mode;
2 Press "M" button to enter the camera setting menu;
3 Press "<" / ">" button to select " ";
4 Press "-" / "+" button to select time setting option and press "OK"
button to conrm;
5 Press "<" / ">" button to move the cursor to the time or date to be
modied. Then press "-" or "+" button to modify the time and date
and press "OK" to conrm;
6 Press "M" button to exit the menu and return to recording
standby mode.
Use "<" / ">" button to select the item to the left / right, and use "+" /
"-" button to select the item above/below of the selected item. After
selection, press "OK" button to conrm operation.
Note: Please ensure that the date and time are correctly set. This
unit will add time to the photo/video based on this setting.
Date/
Time

14
aee.com
Language
1 Turn on S50 to enter recording standby mode;
2 Press "M" button to enter the camera setting menu;
3 Press "<" / ">" button to select " ";
4 Press "-" / "+" button to select language setting option and press
"OK" button to conrm;
5 Press "<" / ">" button to move the cursor to the language type to
be modied. Then press "OK" to conrm;
6 Press "M" button to exit the menu and return to recording
standby mode.
Select light metering mode
To achieve the best exposure effect, use central spot light metering
mode when the central spot is bright while the surrounding
environment is dark.
"ON": turn on central spot metering
" ": turn off central spot metering
light meter
mode key

15
aee.com
Video recording
Basic operations of video recording
1. Turn on S50 to enter recording standby mode;
2. Aim the lens to the subject and preview it in TFT display;
3. Press "Video recording button" once to start video recording;
Video
recording
button
• The system will tick once to indicate the effective of video
recording;
• The green indicators will ash slowly and time counter starts;
TFT display is shown as below for video recording:
1080P/25
000:00:28
Battery level
Working mode
(video recording)
Resolution for
Video recording
Time of video
recording
avaliable
space of
TF card

16
aee.com
LCD segment display is shown as below for video recording:
1080P 25
00:00:28
2H30
Working mode (video recording)
Resolution for video recording
Remaining video recording time
of memory card
Recording time
Battery level
4. During video recording, press the "Stop" button once to stop
video recording.
• the system generates a tick tone twice ,indicating that the video
recording operation stops recording, and the time counter stops.
• The green indicators will be turned off.
• The display will return to recording standby mode.
Start video recording via G-SENSOR mode
G-Sensor
key
Turn G-Sensor key to "ON" so that S50 will actively sense the
1/60