SERVICE
1
4
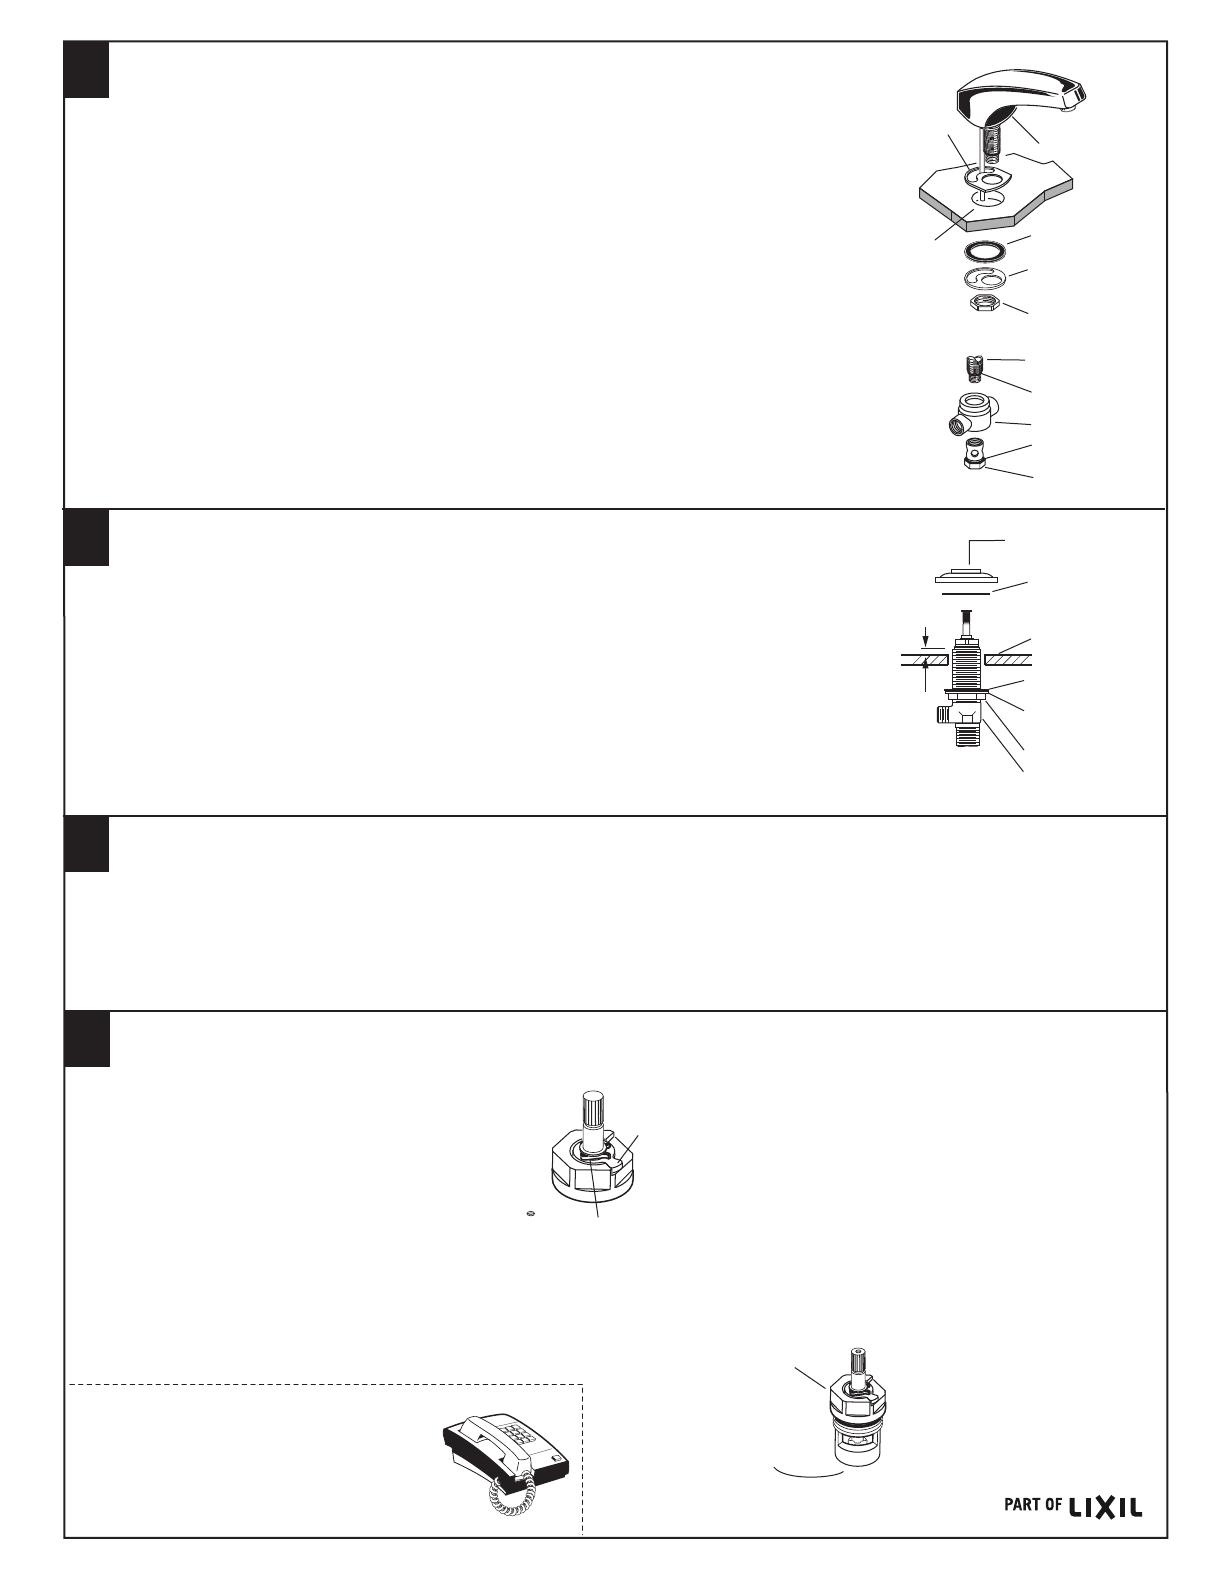
LOCKNUT
SPOUT
CARTRIDGE
SCREEN
SPRING
CLIP
STOP
WASHER
RETAINER
RUBBER
WASHER
RUBBER
GASKET
SINK
• Insert BASE or SPOUT shank through center hole of SINK, making sure RUBBER GASKET
is properly positioned.
• Assemble RUBBER WASHER, RETAINER, and LOCKNUT onto threads of SPOUT
from underside of SINK.
• Insert LIFT ROD through SPOUT (or BASE) and slot of RETAINER.
• Align SPOUT and tighten LOCKNUT. Be sure slot in BRASS WASHER
is positioned to the rear as shown.
• Insert VALVE BODY through hole from underside of SINK. Thread of VALVE BODY should
extend at least 5/16 inch above SINK top. If necessary, adjust LOCKNUT.
• Place RUBBER RING into ESCUTCHEON and screw ESCUTCHEON onto VALVE BODY
until snug against internal stop.
• Set VALVE BODIES so that their outlets are facing toward center of SINK. Tighten LOCKNUT
using wrench supplied with faucet.
• Before connecting TEE make certain that O-RINGS are properly seated on stepped
SHANK and SCREW.
• Remove AERATOR.
• With handle in OFF position, turn on water supplies and check all connections for leaks.
• Operate both handles to ush water lines thoroughly. Check spout mounting and hose connections for leaks.
• Turn handles into OFF position and replace AERATOR.
• To change direction of handle rotation, proceed as follows:
• Turn valve to OFF position.
• Remove INSERT and HANDLE SCREW.
• Slip HANDLE with ADAPTER off.
• Remove SPRING CLIP.
• Lift STOP WASHER, turn 90° and replace.
• Replace SPRING CLIP.
• Replace ADAPTER, HANDLE, SCREW, and INSERT.
• AERATOR may accumulate dirt causing distorted and reduced
water ow. Remove AERATOR and rinse clean.
• If spout drips, operate handles several times from OFF to ON
position. Do not force - handles turn only 90°.
• Plastic SCREEN in CARTRIDGE may accumulate
dirt causing reduced water ow. To clean, rst
turn off hot and cold water supplies, then:
• Remove INSERT and HANDLE SCREW.
• Slip HANDLE with ADAPTER off.
• Unscrew CARTRIDGE with wrench.
• Thoroughly rinse plastic SCREEN a base of CARTRIDGE.
• Replace CARTRIDGE until ange is tight against
valve body.
• Turn valves OFF.
• Replace ADAPTER, HANDLE, SCREW, and INSERT.
• Push SCREW into TEE and tighten SCREW onto SHANK to secure SPOUT connection.
• Place WASHERS inside COUPLING NUTS and connect HOSE to each valve outlet. Tighten COUPLING NUTS.
• Connect HOT water supply to the left VALVE and the COLD water to the right VALVE using
sealant and appropriate connectors and coupling nuts.
• Refer to separate "Instruction Sheet" for assembly of handles.
TEST INSTALLED FAUCET
3
TEE
SCREW
O-RING
O-RING
SHANK
SPOUT OR BASE ASSEMBLY (continued)
34312 Rev. 1.3 (4/16)
VALVE INSTALLATION
2
LEDGE
RUBBER
WASHER
BRASS
WASHER
LOCKNUT
VALVE
BODY
5/16''
MIN.
ESCUTCHEON
RUBBER
RING
HOT LINE FOR HELP
For toll-free information and answers to your questions, call:
1 (800) 442-1902
Mon. - Fri. 8:00 a.m. to 8:00 p.m. EST
Saturday 10:00 a.m. to 4:00 p.m. EST
IN CANADA 1-800-387-0369
(TORONTO 1-905-306-1093)
Weekdays 8:00 a.m. to 7:00 p.m. EST
IN MEXICO 01-800-839-1200
Product names listed herein are
trademarks of AS America, Inc. ©2016

