Page is loading ...

L Plate Round Plate
Hardware Included
Step 2 Attach the VESA plates to the monitors
Philips Screws Philips Screws Spacers
x4 x8
M-A M-B
x4
M-C M-D
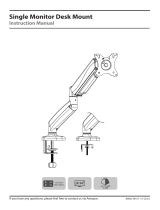
DA-1L
v2
INSTALLATION INSTRUCTION
Arm
Upper Pole
03 x1
01B
02A x1
x1 01C x1
M4 x 12mm M4 x 30mm L10mm
Lower Pole
02B x1
x1
Safety
Screw
M5 x12mm
Max:
(8KG)
17.6LBS
If you have any questions, please feel free to contact Customer Service via Amazon before returning.
75x75mm
100x100mm
Before Starting Assembly
Safety Caution
Please read this instruction carefully before installation.
If you do not understand these instructions or have doubts about the safety of the installation, assembly
or use of this product, please contact us.
WARNING:
This product contains small items that could be a choking hazard if swallowed.
Before starting assembly, verify all parts are included and undamaged. For parts shortage or
damage, please contact us.
Correct Correct
Too Long
Too Short
When attaching brackets to the flat screen, be careful not to over tighten screws and
be sure that screws do not bottom out in the mounting holes.
No!
KEEP AWAY FROM CHILDREN UNDER 3 YEARS OLD. ADULT SUPERVISION IS REQUIRED.
Do not tighten the screws excessively or your monitor might be damaged.
Step 1A Clamp Installation Step 1B Grommet Base Installation
Monitor Kit
Clamp Bracket
Clip Plate
01A x1
aKnob Bolt
bBracket
cdBolt eWasher fWasher
All are included in 01A
4
3
VESA
Plate
05A x1 05B x1
04 x1
3mm
Allen key
5mm
Allen key
06 x2
Screw
M8*10mm Cable Clip
07A x2
Cable Clip
07B x2
Adjust the Clamp height to fit
your desk plate. Secure stand
to the desktop by tightening
Clamp.
05A
05B
02A
02B 02B
01B
02A
02B
05A
05A
02B
a
b01C
05A
Secure the pole
assembly with the
preassembled
screws
a
b
02B
01C
0.39~1.57"
10~40mm
Φ 0.39~2.36"
Φ 10~60mm
1A-1 1A-2 1A-3 1B-1 1B-2 1B-3
For 10~51mm
thickness
desk plate
Secure the pipe
assembly with the
preassembled screw
For 51~80mm
thickness
desk plate
06
0.39~2”
10~51mm
Assemble the
upper pole 02A
and the lower
pole 02B
together
Assemble the
upper pole 02A
and the lower
pole 02B
together.
Dis-assemble the
clamp bracket.
the marked parts
and will be
used in next step.
Assemble the round
plate 01C to the
lower pole
with the preassem-
bled screws.
Position pole assembly on the desk then
secure it by tightening the knob bolt
after making knob bolt b through the
Long plate a , desk hole, and the bottom
of pipe assembly sequentially.
Secure the L plate 01B
to the lower pole 02B
with the preassembled
screws.
Secure the clamp bracket to the L plate with the
screws 06
01B
02B b
02A
02B
02A
02B ab
01C
02B
a
2~3.15"
51~80mm
05B
06
2
1
5
4
3
(a) For Flat Back
(b) For Recessed / Curved Back
Note: use 1 piece or 2 pieces of spacers
M-A
M-D
M-D
M4 x 12mm
M-B
M4 x 30mm

Step 3 Attach the monitors to the stand Step 4 Tilting Adjustment
Loosen tilting bolts, pull monitor to your desired angle, then fasten tilting bolts with the
5mm Allen key 07C .
Switch screen horizontally and vertically
If needed, the monitor can be rotated ±90 degrees for switching screen between horizontally and
vertically for turn the monitors directly
Step 5
Manage tools and cables Product dimensionsSet the desired angle of the monitor
+90°
-90°
05B
Loosen
5mm Allen key
360° Rotation
This function works better for monitors with the center of gravity.
Assemble the monitor arm 03 and the pole toghther.
Hang the monitor onto the arm then using the safety screw M-D to secure the
monitor.
M-C
±90°
±90°
This cable clip
also can take in
the Allen keys
Note: To ensure stability, the tightness of the rotation axis is preset, so it need
take some effort to rotate the VESA Plate.
Suggestion: Please attach the monitor first, then hold the two sides of it with
both hands, and rotate vigorously. If that doesn't work out, please do not
hesitate to ask for our help via Amazon.
Desk
Desk
1.5”
38mm
7.29”
185mm
6.18”
157mm
2.95”
75mm
100mm
3.94”
±90
2.95”
75mm
10 0mm
3.94”
±90
806mm
31.7”
0.39~3.15”
10~80mm
Bolt Heads UP!
03
03
05B
07B
07A
Fasten the bolt with
5mm Allen key 05C.
Attach the cable clips
07A and 07B to the
stand.
07A 07B
05B
76
8
11
10
9
03
M-C
05B
/