Arlo Blinds 04HCA285600 User manual

Type
User manual
Know Your Shade
Number of parts included for each shade:
Shade
Width
Brackets
Hold-
down
Bracket
Headrail
end caps
Bottom
rail end
caps
Handle
Larger
Screws
(Bracket)
Smaller
Screws
(Hold-
down
Bracket)
W ≤ 38"
2 2 2 2 1 4 4
W > 38"
3 2 2 2 2 6 4
- Bracket
- Hex head screw
- Handle
- Headrail end caps
Left side: Right Side:
- Bottom rail end caps
- 1/2 inch screws
- Hold down brackets
Prepping the Shade
Install the left and right headrail end caps by sliding both top
tabs into the top of the headrail.
Left Side: Right Side:
To install the bottom rail left and right end caps, match the flat
side of the end caps with the bottom rail of your shade (For
bottom rail end caps, left/right side are the same). Using the
flat surface on the end caps, push fabric/stiffener against the
end of the rail and slide the end caps into the side of the rail.
Left Side: Right Side:
Outside Mount
(A minimum 3/4" flat wall space is necessary.)
Position brackets above window opening. Remember to leave
the brackets a few inches away from each side of your window.
Spread them out evenly by measuring the same distance from
each side of the window.
Make sure brackets are aligned. “L” shape opening should be
facing down, with the shorter side against the wall.
Insert 2 of the hex head screws into both openings and fasten.
Inside Mount
(A minimum 1" depth is required or 2-inch depth for flush
mounts.)
Position brackets along the top of the window opening in the
desired location. Remember to leave a few inches from each
side of your window.
Make sure both brackets are aligned. “L” shape opening
should be facing down, with longer side against top of the
window opening.
Insert 1 hex head screw into the oval opening, between the
two springs, and fasten.
DO NOT use hex head screws for holes on the back of the
bracket for inside mount. It will prevent your shade from
clicking in place. These holes can be operated with 2 flat-head
screws (Flat-head screws are not included in the package).
180-889/006
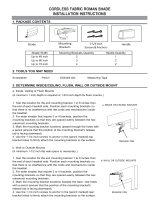
Mount Shade on Brackets
a. Lift the headrail into position such that the front edge of
the bracket is under the inner front edge of the headrail.
b. Rotate headrail backward toward window, push the
headrail upward until the release tab at the bottom of
each bracket snaps onto the back of the headrail until a
snapping sound is heard. This will let you know that the
shade is engaged into the bracket.
c. Check carefully to assure that each bracket is properly
secured.
d. Please allow 24 hours for your shade to drop to its actual
height when first installed due to the nature of the fabric.
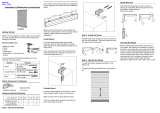
Installing Handle
1. 2.
3.
Transparent cordless handles should be operated from the
center of the bottom rail.
For shades 38” W 72”, spread handles out evenly- by
having the same distance from each side of the window.
To ensure proper usage of cordless shades, be sure to extend
and retract the shade steadily, thus assuring the cord to
stack evenly.
Operate the Shade
To lower the shade: grip the handle and slowly pull straight
down.
To raise the shade: put one hand under the handle (palm
facing up) and slowly lift until the desired height is reached.
Remove the Headrail
Push the headrail toward mounting brackets, hold it on and
rotate headrail downward away from window to release
headrail from the tab of bracket by lifting the headrail out
from the front edge of bracket.
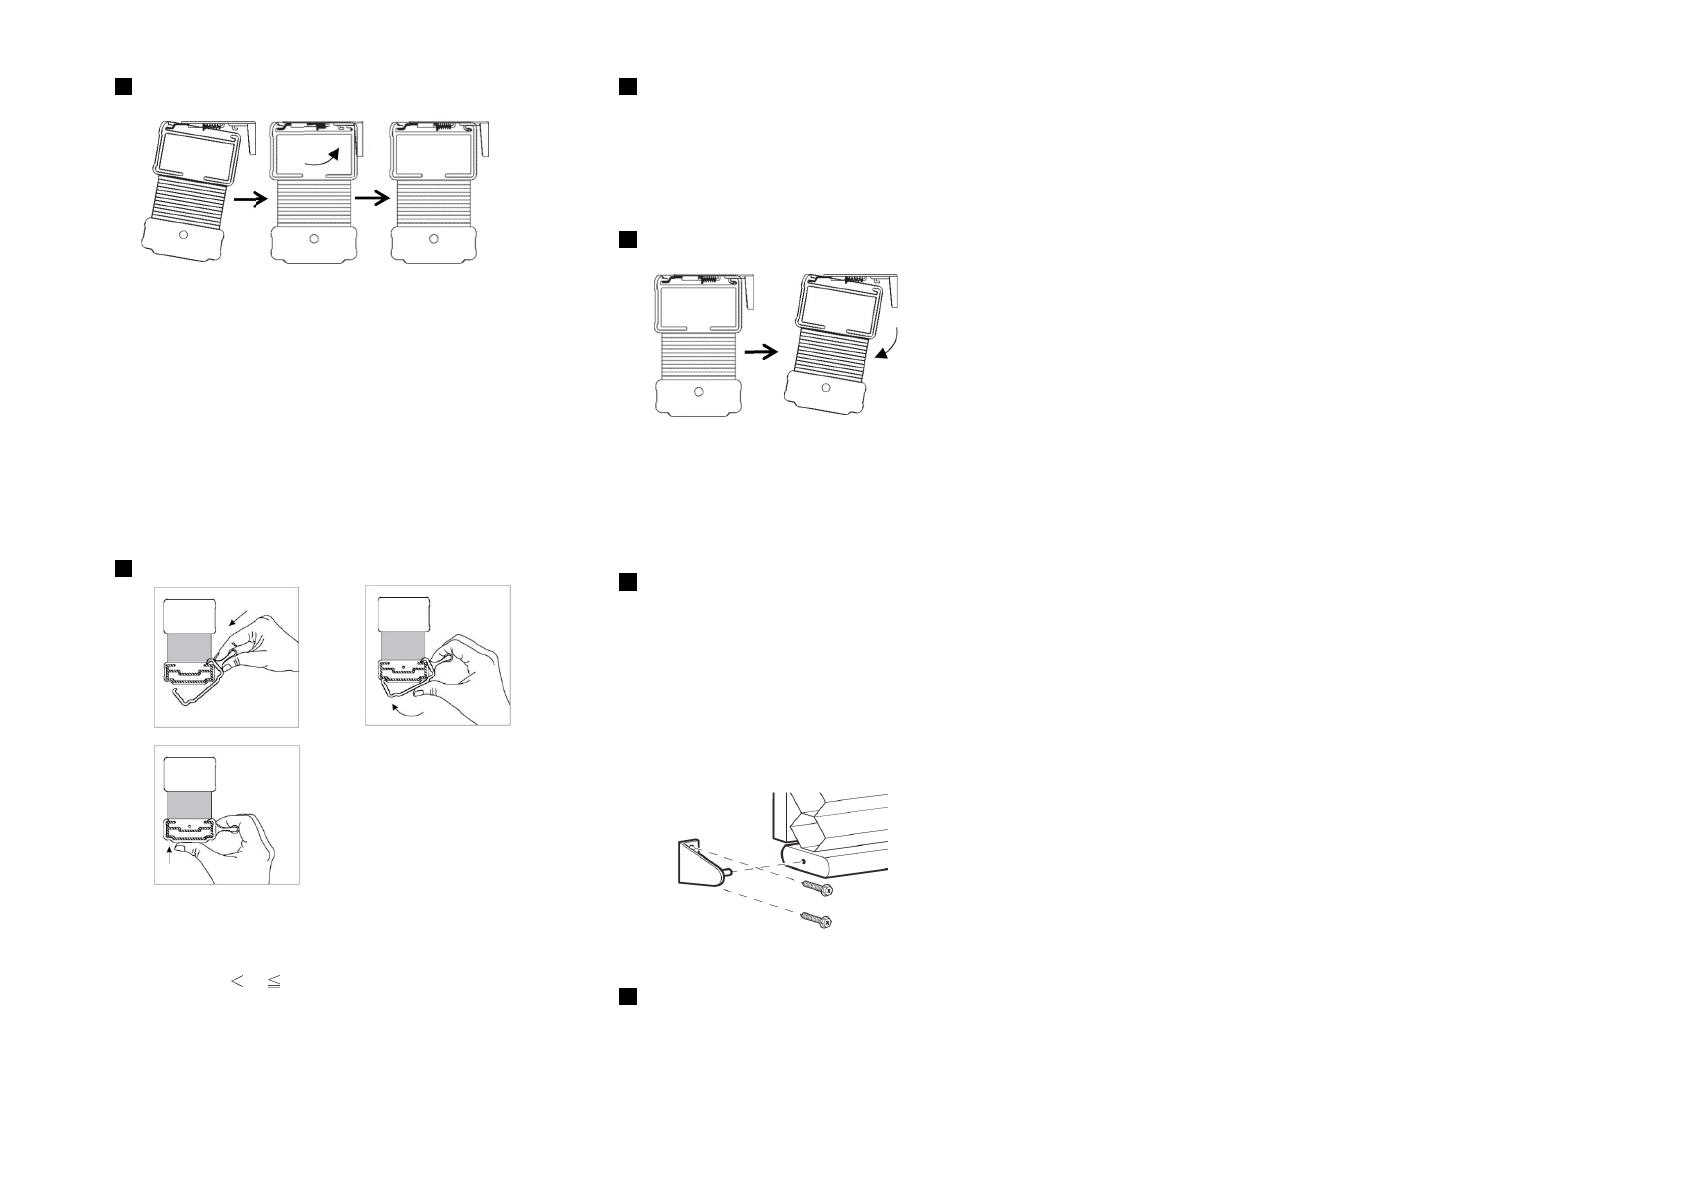
Optional Hold Down Brackets
Hold down brackets are mounted with the supplied 1/2 inch
screws. With the shade at its proper drop, place the pin of
each hold down bracket into the hold of each end cap and
mark the screw holes.
Make sure the pins are level and aligned. Raise the shade,
then screw the hold down bracket into the mounting surface.
Cleaning & Care
To clean the shade fabric, use a feather duster or vacuum
lightly using the soft brush attachment.
CORDLESS CELLULAR SHADE
INSTALLATION INSTRUCTIONS
  • Page 1 1
  • Page 2 2

Arlo Blinds 04HCA285600 User manual

Type
User manual

Ask a question and I''ll find the answer in the document

Finding information in a document is now easier with AI