
iOttie One Touch 2 Car Mount
The iOttie Easy One Touch 2 provides a safe, versatile & stylish smartphone mounting solution.
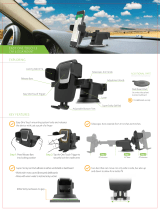
Locking Side Arms
One Touch
Trigger Button
Telescopic Arm
Adjustable Knob
Locking Lever
Super Sticky Gel Pad
Adjustable
Bottom Foot
Release Button
• Adheres to either windshield or dashboard.
• Works with most curved & textured dashboards.
• Rinse with warm water to restore tacky suction.
• Mount your device quickly & safely.
• Simple push of a nger locks your
device in place.
• US patented locking mechanism.
• Allows for adjustable gel pad strength for
multiple surfaces.
• Pull down lever once for smooth surfaces.
• Pull down lever twice for textured
surfaces.
• Arm extends from 4 inches to 6.5 inches.
• Telescopic arm allows for safer & easier use.
• Great for use with long & hard to reach
dashboards & windshields.
Super Sticky Gel Pad
Easy One Touch Locking Feature 2-Step Locking
Telescopic Arm
To avoid the possibility of marks or harm to select dashboards, we
recommend you to place the mount onto your windshield.
Air Gap
iOttie Sticky Gel Pad Traditional Suction Cup
Sticky Gel

Mount Smart. Drive Smarter!
Customer Support
Telephone – 201-580-2688
E-mail – [email protected]
Website – www.iOttie.com
One Year Limited Warranty - Satisfaction Guaranteed.
iOttie has you covered. Should anything go wrong with your mount within
the warranty period, iOttie will provide you with a hassle-free replacement.
1. Unpeel dashboard pad cover and place
sticky side on desired dashboard location
*Dashboard pad for dashboard use only
6. Adjust bottom foot to locate proper
position.
9. Adjust cradle in any angle with ball
pivot joint.
5. Place your device inside the mount
rmly to activate the one touch
locking system.
8. Tighten knob to fasten in place.
4. Press side buttons into locking position.
7. Loosen knob to extend telescopic
arm to desired length.
3. Pull down the lever to secure the mount.
a) Pull down once for smooth surfaces.
b) Pull down twice for textured surfaces.
2. Unpeel sticky gel pad cover, place
onto dashboard cover and press down
INSTALLATION INSTRUCTIONS
DASHBOARD PAD INSTRUCTIONS
1. Unpeel dashboard pad cover
2. Place on desired location
3. Mount your device
Dashboard Pad
* iOttie recommends to use included dashboard pad for all dashboard
mounting, this will help mounting on curved and textured surfaces as well
as prevent any potential dashboard damage. Use of the dashboard pad is
not required on the windshield.
-
 1
1
-
 2
2
iOttie One Touch 2 User manual
- Type
- User manual
- This manual is also suitable for
Ask a question and I''ll find the answer in the document
Finding information in a document is now easier with AI
Related papers
-
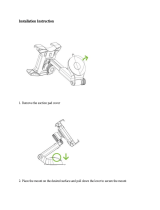 iOttie HLCRIO141 User manual
-
 iOttie HLCRIO120 User manual
-
iOttie HLCRIO134 User manual
-
 iOttie HLCRIO134AM User manual
-
iOttie Easy One Touch Connect Alexa Built-in Dashboard and Windshield Mount User guide
-
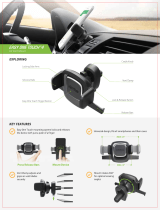 iOttie HLCRIO127 User manual
-
 iOttie HLCRIO152RT User manual
-
 iOttie vlxwcg211 Velox Magnetic Wireless Charger Mini Air Vent Mount User manual
Other documents
-
 Nulaxy Nulaxy Phone Holder for Car, No Obstruction View Dashboard Windshield Car Phone Mount Strong Suction User manual
-
 iotty Wi-Fi Installation guide
-
Phonix TOP3BK Datasheet
-
Phonix AUTOSP Datasheet
-
 VANMASS 5962934482 User manual
-
Arkon GP134 Datasheet
-
 VANMASS Car Phone Mount, Dashboard Air Vent Cell Phone Holder for Car, Washable Strong Sticky Suction Pad, One Button Release Car Cradle, Compatible iPhone 11 Pro Xs XR X 8 7 Galaxy S10 S9 S8 Etc User manual
-
 VANMASS VANMASS 15W Wireless Car Charger Mount, World Leading Electric Automatic Clamping Dashboard Air Vent Windshield Phone Holder, Fast Charging Compatible iPhone 12 11 Pro Max Xs X,Samsung S20 S10 Note10 User manual
-
 VANMASS VANMASS Wireless Car Charger Mount, Automatic Clamping, Qi Fast Charging, QC 3.0 Car Charger, Windshield Dash Air Vent Phone Holder Compatible User manual
-
 VANMASS CTEZ54 User manual


