Page is loading ...

Email: [email protected] www.vanmasslife.com
VANMASS
®
trademark is registered in the USA and other
countries. All rights reserved. Designed in H.K. Made in China.
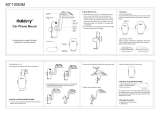
1. Press the release button on the back of the car mount
then the clamp arms open automatically.
Dashboard Pad
Tips for Removing the Suction Cup
Tips for Placing the Dashboard Pad
Before installing the mount on uneven or textured dashboard,
please firstly stick the gel pad on the dashboard (only
one-time use). Tear off the red protective sticker on the pad,
stick it on the dashboard, press it firmly for over 1 minute then
let it rest for 1-3 days to have strong stickiness.
Please wait for 24 hours to use the dashboard pad after
placing.
≥24 Hours ≥72 Hours
<1 Hour
<6 Hours
stickiness
reach
5%~10%
stickiness
reach
20%~30%
stickiness
reach
60%~70%
stickiness
reach
80%~100%
2. Put the phone in the car mount then press the clamp arms
to grasp the phone.
1. Take out the grip nut on the mount, assemble it with suction up.
2. Find a suitable place, attach the car mount.
3. After using, please press the release button again to open the
clamp arms and take out the mobile phone as shown in the
picture.
Product Name
Model
Applicable Places
Package List
Car Mount
CTVK13
Windshield, Dashboard
Car Mount x1,
Suction Cup ×1,
Dashboard Pad ×1,
User Manual x1
The parameters above are derived from the laboratory of VANMASS®.
The actual parameters would be different because of products
and other factors. The image shown here is indicative only.
●
Avoid dropping.
●
Do not disassemble.
●
Please install the car mount on a suitable place before
driving, do not operate and adjust the car mount during
driving.
●
Do not install the car mount in places which interfere with
airbag or driving.
●
Keep the car mount away from children.
Tips for Using the Suction Cup
1. Clean the dashboard or windshield where you need to install
the car phone mount with a alcohol wool or a wet cloth, wait
for it to dry.
2. After attach the suction cup, press down the suction cup lock
totally to fix it.
3. It will reduce the adsorbability when stick the suction cup on
the curved surface, plush cloth surface or uneven surface.
4. It is not recommended to attach the suction cup to leathers,
walls or film-coated surfaces since the suction cup is
designed with strong suction power which may cause
surface damage.
5. If the suction cup is used frequently in high temperature, low
temperature or humid conditions, the adsorption forces
would be lower (Please avoid to exposit it to the sun
directly.).
6. If the suction is not sticky enough after usage, please take
down the suction cup base and wash it with warm water. It
will be sticky again after drying.
7. Please guarantee the suction cup is covered by plastic wrap
if the suction cup holder is removed.
Bottom Tray
Silicone Pads
Clamp Arms
Grip Nut
Release Button
Suction Cup
Telescopic Arm
Angle Adjustment
Knob (Adjust the
Angle of the Arm)
Length Adjustment Knob
(Adjust the Length of the Arm)
Ball Joint
Suction Cup Lock
VMPI0045A
User manual
Benutzerhandbuch
取扱説明書
www.vanmasslife.com
24h
Using Steps
Specifications
Attentions
Installation StepsOverview
Clean
Press 1 min
Waiting
1~3 days
02 03
07
04
0805 06
01
封面 封面反面空白页封底 封底反面
背脊宽度根据实际尺寸调整
/


