Interquartz Discovery CLI 9859 User manual

Category
IP phones
Type
User manual

This manual is also suitable for

1
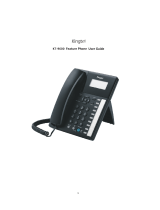
CALLING LINE IDENTITY
TELEPHONE
MODEL 9859
IDea
OPERATING INSTRUCTIONS
2
3
Contents
1. FEATURES
...................................................................................
5
2. IMPORTANT NOTES
.....................................................................
6
CONDITIONS OF USE
6
EMERGENCY CALLS
..........................................................................................................................................
6
3. SETTING UP
.................................................................................
8
UNPACKING
.........................................................................................................................................................
8
INSTALLATION
....................................................................................................................................................
8
PROGRAMMING THE CLOCK
............................................................................................................................
8
To set the time
.....................................................................................................................................................
9
LINE CONNECTION
.............................................................................................................................................
9
4. TECHNICAL ADJUSTMENT - FOR CORRECT OPERATION
........
11
PBX RECALL BUTTON SETTING
....................................................................................................................
11
600 OHM / COMPLEX and AGCA / AGCB SELECTORS
................................................................................
11
HANDSFREE / EADSET SWITCH
....................................................................................................................
11
HEADSET MICROPHONE SENSITIVITY ADJUSTMENT
................................................................................
11
HANDSFREE MICROPHONE SENSITIVITY ADJUSTMENT
...........................................................................
12
LOCATION
..........................................................................................................................................................
12
5. GENERAL CONTROLS AND INDICATORS
.................................
13
HANDSFREE / HEADSET KEY AND INDICATOR
...........................................................................................
13
MUTE KEY AND INDICATOR
............................................................................................................................
13
PAUSE KEY
.........................................................................................................................................................
14
PBX RECALL KEY
............................................................................................................................................
14
REDIAL KEY
.......................................................................................................................................................
14
DIAL KEY
............................................................................................................................................................
14
CALLS KEY AND INDICATOR
..........................................................................................................................
14
SCROLL KEY
..................................................................................................................................................
14
STORE KEY
........................................................................................................................................................
14
CLEAR KEY
........................................................................................................................................................
14
CURSOR KEYS
..................................................................................................................................................
15
TIMER KEY
.........................................................................................................................................................
15
MEMORY KEYS
..................................................................................................................................................
15
ALPHA-NUMERIC KEY PAD
.............................................................................................................................
15
RINGER INDICATOR
.........................................................................................................................................
15
RINGER VOLUME CONTROL
...........................................................................................................................
15
RINGER PITCH CONTROL
...............................................................................................................................
15
VOLUME SLIDER
...............................................................................................................................................
15
LIQUID CRYSTAL DISPLAY (LCD)
...................................................................................................................
15
HANG-UP FUNCTION
.......................................................................................................................................
16
PAUSE FUNCTION
.............................................................................................................................................
16
FOR MANUAL DIALLING
..................................................................................................................................
16
TIMER KEY FUNCTION
.....................................................................................................................................
16
PREVIEW DIALLING
......................................................................
17
6. CALLER DISPLAY OPERATION
..................................................
17
CALLS LIST
........................................................................................................................................................
17
To change this setting:
.........................................................................................
18
SET LIST TYPE
...................................................................................................................................................
18
VIEWING THE CALLS LIST
...............................................................................................................................
18
To view the calls list
..............................................................................................
18
EDITING THE CALLS LIST
................................................................................................................................
18
To Delete an Entry
.............................................................................................................................................
19
To edit an existing entry
...................................................................................................................................
19
DIALLING FROM THE CALLS LIST
.................................................................................................................
19
PERSONAL DIRECTORY
..................................................................................................................................
19
TO STORE AN ENTRY IN THE DIRECTORY
...................................................................................................
20
VIEWING AND DIALLING FROM YOUR PERSONAL DIRECTORY
...............................................................
20
EDITING YOUR PERSONAL DIRECTORY
.......................................................................................................
21
To delete an entry:
.................................................................................................
21
7. MEMORY OPERATION
...............................................................
22
MEMORY BACK-UP
...........................................................................................................................................
22
MEMORY MODE 1
..............................................................................................................................................
22
ONE-TOUCH MEMORIES
..................................................................................................................................
23
TWO-TOUCH MEMORIES
.................................................................................................................................
23
MEMORY STORAGE PROCEDURE
..................................................................................................................
23
DIALLING A NUMBER FROM THE MEMORIES
..............................................................................................
24
MEMORY MODE 2
..............................................................................................................................................
24
One-touch memories
........................................................................................................................................
24
Two-touch memories
........................................................................................................................................
24
STORAGE PROCEDURE
...................................................................................................................................
25
SELECTING MODE 2
.........................................................................................................................................
25
To select mode 2
....................................................................................................
25
DIALLING A NUMBER FROM THE MEMORIES
..............................................................................................
26
REDIAL MEMORY
..............................................................................................................................................
26
8. HANDSFREE AND HEADSET OPERATION
.................................
27
HANDSFREE OPERATION
................................................................................................................................
27
VOLUME SLIDER
...............................................................................................................................................
27
HANDSFREE MICROPHONE
............................................................................................................................
27
HANDSFREE BUTTON AND INDICATOR
.......................................................................................................
27
HINTS FOR HANDSFREE OPERATION
...........................................................................................................
28
HEADSET OPERATION
.....................................................................................................................................
28
Volume Slider
.........................................................................................................
29
TRAINEE / SUPERVISOR MODE
.......................................................................................................................
29
Training mode
........................................................................................................
30
Supervisor mode
...................................................................................................
30
9. EASYCALL AND CUSTOMNET USAGE
......................................
30
MAKING OUTGOING CALLS
.........................................................
30
* PAUSE BUTTON
..............................................................................................................................................
31
* AUTOMATIC PAUSE INSERTION
...................................................................................................................
31
*AND # BUTTONS
..............................................................................................................................................
31
10. GENERAL CARE AND MAINTENANCE
....................................
31
CLEANING
..........................................................................................................................................................
31
FAILURE TO OPERATE AND SERVICE DIFFICULTIES
..................................................................................
32
11. THUNDERSTORMS
...................................................................
32
12. WARRANTY
..............................................................................
33
13. SERVICE CENTERS
..................................................................
33
6
7
1. FEATURES
* Alpha-numeric keypad
* Large LCD
* Clock / timer
* 30 number incoming call memory
* Time Date and number of new calls
* 40 personal Directory memories
* Displays number and name of caller (if available)
* 10 one-touch / 10 two-touch repertory dialling memories
* 5 number redial memory
* EEPROM memory feature
* HANDSFREE operation
* Built in HEADSET support
* Speaker volume control
* HEADSET mic sensitivity adjustment
* PBX Recall key
* TBR / Earth recall switch
* Ringer indicator
* Ringer pitch / volume control
* Mute function
* Preview dialling
* HANDSFREE mic adjustment
8
2. IMPORTANT NOTES
This Interquartz telephone has been manufactured to very high standards and
is very easy to use. Please read this manual carefully to find out how to use the
features.
CONDITIONS OF USE
This Interquartz telephone is approved for use on private branch exchange
extensions business or private direct exchange lines.
EMERGENCY CALLS
"000" calls can be made on this telephone for the purpose of making calls to the
emergency service. An access code may also be required before dialling the
emergency number, if the telephone is connected to a PABX.
8
9
FIGURE 1 IDEA PROFILES
TOP VIEW OF IDea
REAR VIEW OF IDea
BOTTOM VIEW OF IDea
IDE VIEW OF IDea
10
3. SETTING UP
UNPACKING
The carton contains the following
* Telephone body and handpiece
* Coiled cord
* RJ11 - RJ45 line cord,
* Operating manual,
* Power pack
INSTALLATION
1. Fit the coiled cord to the appropriate sockets in the HANDSET and tel-
ephone base.
2. Connect the power pack to a wall socket and to the socket at the rear of the
telephone marked DC 9v.
3. Install 4 x AA alkaline batteries(not provided) for complete power backup.
(batteries are not required for the telephone to operate) in the battery com-
partment shown in fig. 1.
* Note : Batteries may be used alone, as an alternative to the power pack and
will last for approximetly 3 months.
4.Fit the line cord to the rear socket and to your telephone network outlet.
5.Set ringer volume and ringer pitch control.
6.Complete technical adjustments to suit your application (see appropriate
section).
PROGRAMMING THE CLOCK
If your network operator provides caller display information, the clock will
automatically be set to the correct timer by the caller display signal. If this is
the case, you will only need to make an adjustment if you require the time to be
in 24 hour mode.
11
To set the time
* Press the STORE key
* Press the TIMER key
- Follow the screen prompts and enter the time using the Alpa-Numeric keypad
- hour time (HH) as two digits
- minute time (mm) as two digits
* Then enter 0, for am
* 1 for pm
* 2 for 24 hour mode
* Complete the process by pressing the store key
LINE CONNECTION
This telephone is supplied with a RJ11-RJ45 line cord for connection to your
network. Other types of plugs and cords are available on request.
FIGURE 2 IDEA TECHNICAL ADJUSTMENTS
12
13
4. TECHNICAL ADJUSTMENT - FOR CORRECT OPERATION
Caution : please exercise care when adjusting all selectors described, as they
and their surrounding electronic components may be damaged by rough
treatment. It is also recommended that all adjustments be made with the
telephone disconnected from the line.
PBX RECALL BUTTON SETTING
To achieve compatibility with all networks, the PBX recall button may be
selected to execute either Earth Recall or Timed Break (hook flash) by
switches under the telephone memory card.
1. Determine the setting required for your PABX
2. Set the F/E switch as required (see fig 2)
3. If Hook Flash (F) is selected set the timing switches (RLC1 and RLC2) to
suit your PABX (also see fig 2)
The telephone, unless pre-set by your dealer, will be factory set on hookflash
(F) and 100ms.
600 OHM / COMPLEX and AGCA / AGCB SELECTORS
Insteaded to provide enhanced compatibility with all line, conditions, these
controls influence the sidetone (the sound of your own voice that you hear in
the receiver) of the HANDSET. The selectors, unless pre-set by your dealer,
one set to complex and AGC'B'. Note that for direct lines the factory.
Setting should be altered. If in doubt, contact your Interquartz Dealer.
HANDSFREE / EADSET SWITCH
The HANDSFREE(HF) / HEADSET(HS) switch is located on the underside of
the telephone (see fig1 ) The switch must be set to HEADSET(HS) if a head-
set is to be used with the telephone. The telephone is factory set to
HANDSFREE(HS) unless pre-set by your Interquartz dealer.
HEADSET MICROPHONE SENSITIVITY ADJUSTMENT
This control allows a number of different headsets on the Australian market to
function correctly with the IDea telephone by adjusting the headset microphone
14
sensitivity. The control is located on the underside of the telephone (see fig 1).
The adjustment can be made with a small screwdriver or similar implement that
will fit into the control slot.
To make this adjustment
1. Connect the HEADSET to the socket at the rear of the telephone (see fig 1)
2. Set the HF/HS switch to HS (Headset)
3. With the HEADSET plugged in, put it on and lift the HANDSET to the other
ear and make an out-going call.
4. Using the HANDSFREE / HEADSET key, switch between HANDSET and
HEADSET modes (the indicator will illuminate when the HEADSET is in
use) while speaking to the other party.
5. Determine with the other party if your voice level is the same when using the
HANDSET and HEADSET while swapping from one mode to the other
6. If a difference is deleted, adjust the microphone sensitivity so that your voice
level. W
hen using the HEADSET matches that of the HANDSET.
HANDSFREE MICROPHONE SENSITIVITY ADJUSTMENT
Located on the underside of the telephone (see fig 1), this control allows the
user re adjust their voice level as heard by the person they are speaking to
using a small screwdriver or similar implement that will fit into the control slot,
turn the control clockwise to increase your voice level and anti-clockwise to
decrease your voice level.
LOCATION
The telephone should be placed on a desk, table or shelf where it is not likely
to be pushed off and damaged. Avoid excessive heat, damp, dust, direct
sunlight, vibration, and other appliances or devices which may transmit or emit
electrical or electromagnetic radio frequency raise or signals (eg. computers,
welders, pagers).
15
FIGURE 3. GENERAL CONTROL AND INDICATES
5. GENERAL CONTROLS AND INDICATORS
HANDSFREE / HEADSET KEY AND INDICATOR
When the HANDSFREE / HEADSET key is pressed the red indicator will
illuminate to show that the HANDSFREE mode or headset mode is activated.
Press the key again to release the HANDSFREE or HEADSET mode.
* Note: The HANDSFREE / HEADSET switch setting will determine the mode
the HANDSFREE/HEADSET key will activate (see installation section)
MUTE KEY AND INDICATOR
When pressed it cuts off transmission from the HANDSET, HANDSFREE or
HEADSET microphone to allow user privacy. The red indicator will illuminate
16
when the mute condition is active. Press mute again to release the mute condi-
tion.
PAUSE KEY
Used for both manual and memory dialling. Pressing the pause key will cause
the telephone to delay all following dialling functions for 2.5 seconds after which
further dialling may commence*.
PBX RECALL KEY
For use with PABX systems to invoke special functions such as call hold and
call transfer Caller Display functions will not operate if the telephone is con-
nected behind a PABX system (see caller ID section).
REDIAL KEY
Provides access to the redial memory.
DIAL KEY
Allow direct dialling of numbers displayed on the screen from the calls memory,
redial memory and directory.
CALLS KEY AND INDICATOR
Provides access to the calls memory. The red indicator will flash when a new
call has entered the calls memory.
SCROLL KEY
Used to view the contents of the calls list, redial memory and directory.
STORE KEY
Used to store into the memory locations and directory. Also used when pro-
gramming the clock.
CLEAR KEY
Used to clear enteries in the calls memory redial and directory.
17
CURSOR KEYS
TIMER KEY
The timer key is used to select either the timer display or clock display.
MEMORY KEYS
10 memory keys allow access to 20 memory locations, 10 one-touch and 10
two-touch.
ALPHA-NUMERIC KEY PAD
A standard 4 x 3 configuration for manual dialling and for numeric and character
entries during memory programming.
RINGER INDICATOR
Flashes when the telephone receives an incoming call.
RINGER VOLUME CONTROL
Located on the under side of the telephone (see fig 1) three settings are avail-
able Hi / Low / Off.
RINGER PITCH CONTROL
Located on the bose of the unit (see fig 1), rotating this knob alters the pitch of
the ringing signal useful where there is more than one phone in a room.
VOLUME SLIDER
Adjusts the volume of the HANDSFREE speaker (or headset earpiece, if con-
nected)
LIQUID CRYSTAL DISPLAY (LCD)
The telephone is supplied with a clear protective cover over the display which
should be carefully removed before use.
When the telephone is not in use the LCD will show the time of day and the
number of new calls that have not yet been viewed. The date will be displayed
with incoming calls or when viewing the directory or calls list. Several other
18
prompts indicate the state the phone is in. (see fig 4)
HANG-UP FUNCTION
If the Cradle Switch is tapped or the On Hook Dial or Handsfree modes termi-
nated, the line will be released automatically. After approximately 2 second, the
dial tone will be heard and dialling may be commenced after a brief pause. This
function prevents the false transmission of a Hook Flash or Timed Break signal
from the Cradle Switch.
Caution : Tapping the Cradle Switch (as recommended in some PABX extension
user guides) will not create a Hook Flash or Timed Break signal, it will only hang
up the call.
PAUSE FUNCTION
To prematurely terminate the pause period, press the pause button as a hurry-
up to commence follow-on dialling. The pause command may be needed if your
phone is connected to some types of PABX or to any network where a pause is
required, eg between internal and external dial tones contact your PABX sup-
plier or authorized Interquartz dealer if assistance is required.
FOR MANUAL DIALLING
Example : To dial the telephone number 94643333, then resume on a telephone
connected to a PABX whose access code is 0 followed by a 4 second pause.
1. Lift HANDSET
2. Dial 0 on the keypad
3. press PAUSE
4. Dial 9464 3333 on the keypad
5. The telephone will delay the dialling of 9464 3333
automatically 2.5 seconds
after dialling 0.
TIMER KEY FUNCTION
When the telephone is idle the LCD will display the time of day when making or
receiving a call the telephone will automatically record the call duration in min-
utes and seconds and display the information on the screen. Pressing the timer
key once will revert the timer display to the time of day. Pressed again, the
19
display will return to the continuing timer mode.
While the telephone is not in use, pressing the timer key changes the mode
display in the following sequence:
* previous elapsed time
* reset and start timer
* stop timer
* time of day
The timer key is also used to set the clock (see installation section)
PREVIEW DIALLING
The preview dialling option allows you to enter a phone number into the keypad
without first Lifting the handset or engaging the HANDSFREE function.
1. Enter desired phone number into keypad
2. Lift handset or press HANDSFREE
3. The telephone will dial the number
If the telephone rings while entering a number in preview mode
* Wait until entered digits disappear before answering the call.
6. CALLER DISPLAY OPERATION
CALLS LIST
The calls memory is capable of storing the details of the last 30 incoming calls
received by the telephone. The calls memory will record the date and time of
the call, the number of the caller (and name if this information is stored in your
memories or personal directory) and whether the call was answered or not (All
calls mode).
It is possible to programme the telephone to store either 'ALL' incoming calls or
only 'UNANSWERED' calls. This option is factory set to 'ALL' calls information
being stored.
20
To change this setting:
* Press and hold the calls key until the display shows.
SET LIST
TYPE
< UNANSWERED ALL >
* The current setting sill flash. Using the cursor keys
and
select the
desired mode.
* Press the store key to set the mode.
VIEWING THE CALLS LIST
When the telephone receives a new call, the red indicator above the calls key
will flash and the new calls display on the LCD will indicate the number of new
calls that have not been viewed.
To view the calls list
* Press the calls key to access the calls memory.
* Use the scroll key to view the memory content.
When viewing the calls list, each entry on the display will show.
* The time the call was received
* The date the call was received
* The location of the number in the memory (1 to 3)
* If the call was, answered or not (ALL calls mode)
* The number of the caller
* The name of the caller (if stored in the memories or directory)
* Note: There are circumstances where the telephone number of the caller may
not be available due the caller having a private number or calling from a
payphone or overseas. Such calls will be displayed on the screen as PRIVATE
or UNAVAILABLE.
EDITING THE CALLS LIST
When the calls memory contains its capacity of 30 enteries, any new calls
entering the memory will 'Push' the oldest entry out.
  • Page 1 1
  • Page 2 2
  • Page 3 3
  • Page 4 4
  • Page 5 5
  • Page 6 6
  • Page 7 7
  • Page 8 8
  • Page 9 9
  • Page 10 10
  • Page 11 11
  • Page 12 12
  • Page 13 13
  • Page 14 14
  • Page 15 15
  • Page 16 16
  • Page 17 17
  • Page 18 18
  • Page 19 19
  • Page 20 20
  • Page 21 21
  • Page 22 22
  • Page 23 23
  • Page 24 24
  • Page 25 25
  • Page 26 26
  • Page 27 27
  • Page 28 28
  • Page 29 29
  • Page 30 30
  • Page 31 31
  • Page 32 32
  • Page 33 33
  • Page 34 34
  • Page 35 35
  • Page 36 36

Interquartz Discovery CLI 9859 User manual

Category
IP phones
Type
User manual
This manual is also suitable for

Ask a question and I''ll find the answer in the document

Finding information in a document is now easier with AI