Page is loading ...
Page is loading ...
Page is loading ...
Page is loading ...

8 9
1
2 3
4 5
6 7
8 9
Scope of delivery (figure. 1)
1x Mobility trainer with resistance screw and display (including LR44 battery)
1x Instruction for use
Technical data
Dimensions: approx. 48 x 37 x 30 cm
Weight: approx. 2.4 kg
Material: plastic, steel
Maximum load capacity: 100 kg
Equipment class: HC (for use in private households, precision C) / not suitable for therapeutic
training
Speed-independent training device
Correct use
The article is not designed for commercial use. This article enables you to train your arms and legs;
fitted with a resistance screw in order to increase and maintain mobility. An integrated display shows
training advances.
Folding legs allow you to store the mobility trainer and assemble it again.
Safety notes
Important: read through these operating instructions carefully and always retain
them for future reference.
The article is not suitable for therapeutic purposed.
During the exercises sit upright and relaxed with a straight back.
Exchange defective parts of the article immediately and do not use the article until the
repair is complete.
Please note that incorrect or excessive training may be detrimental to health.
Place the article on a horizontal, level surface.
Use an anti-slip underlay on smooth surfaces.
Observe wear on parts. If the article no longer offers any step resistance then the drive
belt is worn and the article needs to be replaceed.
There must be a free area of approx. 0.6 m around the training area (figure 8, 9)

10 11
Danger to life!
Never allow children to play with the packaging material unsupervised. There is a risk
of suffocation.
The product is not a piece of climbing or play equipment. Make sure that persons,
particularly children, do not stand on the product or pull themselves up on it. The
product can tip over.
The article is not designed to support the entire body weight.
Children should only use the article under supervision.
Consult your doctor before beginning use or if you experience any discomfort.
Risk of injury!
Do not place your full body weight on the article. It may only be used as described in
the instructions.
Ensure that article is sufficiently stable before use.
Place the article on a level surface.
Be careful of your fingers when unfolding and folding. Fingers may become trapped.
Ensure that the article is fully extended before use.
Examine the article for any damage or wear before each use. Replace damages or
worn parts on the article immediately as the function and safety could otherwise be
impeded.
The article may only be used for the intended purpose.
Do not touch the metal parts on the article after use, particularly not the pedal arms, as
they heat up during use.
Warning notes - batteries!
Only use batteries from the same manufacturer and of the same type.
Remove the batter when it is spent or if the product has not been used for a long period.
Warning! Batteries may not be charged or reactivated by other means, may not be
dismantled, thrown into fire, or short-sircuited.
Always keep batteries out of the reach of children.
Non rechargeable batteries may not be charged.
Rechargeable batteries may only be charged under adult suppervision.
Rechargeable batteries must be removed from the article before being charged.
The connecting terminals may not be shortcircuited.
Treat a damaged or leaking battery with great care and dispose of it immediateyly in
the correct way.
If you come into contact with battery acid, then wash the affected area with water and
soap. If battery acide gets in your eyes then rinse them with water and consult a doctor
immedictely.
Assembly
Assembling the article
Remove the packaging material.
Unfold both legs until you hear an audible click from the safety pins (figure. 2).
Put the article up in front of you and turn the resistance screw clockwise to increase resistance and
counter-clockwise to decrease resistance (figure 3).
Note: "+" and "-" are marked on the resistance screw to adjust the resistance. "+" stands for increase
and "-" stands for reduction of the resistance.
Folding the article (figure 4)
Turn the article onto its side.
Pull on the key ring on the legs to releas the safety pin and fold the legs inwards, one at a time.
Setting the pedal strap (figure 5)
The pedal straps are pre-mounted. You have the choice of setting the straps to one of two lengths.
Pull the outer strap end over the second pedal pins.
Choose the holes on the strap ends for the appropriate length and place them over the pedal pins.
Changing the battery
CAUTION! Follow these instructions in order to avoid mechanical and electrical damage.
Danger!
One LR44 battery is included in the article. If the battery is on longer working then you
can change it.
Lift the display on the side and remove it care fully (figure 6). The battery is on the back of the display.
Carefully silde the spent battery out of the battery holder and exchange it for a new battery (figure 7).
Note: ensure that the beattery is completely inside the mounting.
Insert the cable connections and the display back into the casing
Note: please ensure that the display is replaced correctily into the casing.
Training notes
Consult a doctor before using the artcle.
Stop training as soon as you feel discomfort during training.
Start slowly and increase training intensity as necessary.
We recommend training the legs and arms every day for 30 minutes each.
Wear comfortable clothing to use the articel. However, please ensure that trouser legs or sleeves are
not too wide as they could be caught in the pedals.
Increase your speed slowly until you reach the desired level.
Onlyh increase resistance slowly.
Slow the speed to end use.
USE
Place the training article in front of you. Start with easy training and low resistance. Release the
resistance screw to achieve this. The tighter you turn the resistance screw, the more difficult it is to turn
the pedals.
Begin your training in the warm-up phase with slow movements and low resistance.
Increase the speed and the resistance after 5-10 minutes. Reduce the speed and the resistance again
at the end of your training session.
Carry out some stretching exercises for the corresponding muscles after your training session.

12 13
Leg training (figure 8)
For this exercise the chair must be placed in front of the article so that your knees always remain slightly
bent in the extended phase.
Ensure that you sit on the chair without support and do not lean back.
Place the article on a level, stable and non-slip area of floor, and sit upright and with a straight back
on a chair in a relaxed position in front of the article.
Note: ensure that the chair is stable and comfortable.
Place your feet on the pedals so that pressure is placed on the centr of the soles.
Tip your pelvis forwards and tense your abdominal muscles. Keep your abdominal muscles tensed
throughout the exercise.
Keep you upper body upright and pull your shoulder blades to your spine. You head should form
the extension of your spine.
"Cycle" with your feel and avoid evasive movements inwards and outwards.
Arm training(figure 9)
For this exercise the article must stand in a position so that the movement takes place at the height of
your breastbone or under your shoulders. Ensure that your elbows are slightly bent in the extended
phase.
Place the article in front of you on a level, stabel and non-slip surface (e.g. at table height), and sit
upringt with your back straight in a relaxed position on chair.
Place your feet on the floor shoulder-width apart and tip your pelvis forward.
Tense your abdominal muscles, straighten your upper body and pull your shoulder blades towards
your spine. Keep your abdominal muscles tensed throughout the exercise. Keep your shoulders
down.
Please the palms of your hands on the pedals so that the pedal strap is adove your hand.
"Cycle" with your hands. Your head should form the extension of your spine. Ensure that you do not overextend
your head.
Display function
The display has various modes that you can select by preesing the button:
SCAN: This mode displays the various display modes alternately.
TIME: This mode displays the duration of your current training session.
CNT: This mode displays the rounds completed in the current training session.
CAL: This mode displays the calores usde during your current training session.
Note: calorie consumption is only an approximate reference value.
R.P.M.: This mode displays the speed in rounds per minute.
Note: the display switches off automatically after approx. four minutes when not in use.
Set value to zero
Press on the button for approximately four seconds to reset the value to 0.
Cleaning and care
Clean the article with a damp cloth and a mild cleaning agent.
Caution! Do not allow moisture to penetrate the display. Fold the legs away as described in the
section "folding the article." Store the article in a dry place.
Parts that are susceptible to wear: if the article is no longer offering any step resistance then the drive
belt is worn. The article must be replaceed.
Environmental recommendation
An electrical/electronic product should be disposed of in a manner that minimises environmental impact
as much as possible. The device should be disposed of according to local guidelines. The device can
usually be disposed of at the local recycling station.
Environmental consideration and battery disposal
It is important to consider the environment in terms of battery disposal. Never dispose used
batteries with household waste. Used batteries must be handed in at one of the special indicated
authorised collection points in your municipality. Remove batteries before disposing the device. Further,
make sure that the batteries are not too old or used, since they may start to leak acid. Check the expiry
date on the batteries.
Device disposal
The law requires that electric and electronic devices are collected, and that the devices are partially
recycled. Electric and electronic devices, marked with the waste management symbol, must be handed
in at a municipal recycling centre.
Complaints
You have the right to complain according to applicable law. In case of complaints, please enclose a
machine marked receipt/purchase receipt with purchase date. Further, please hand in the device at the
retailer in question.
The guarantee is invalid
If the above is not observed.
If the device has been abused, exposed to force or other type of damage.
Agk Nordic A/S is not liable for loses or damages of any kind, neither indirectly nor directly, as a
consequence of wrong use or unauthorized operation of the unit. .
Importer
AGK Nordic A/S
www.agknordic.com
Copyright 2015. All rights reserved
Printed and published by Agk Nordic A/S. 16.06.2015
Hereby, Agk Nordic A/S, declares that this 10995 is in compliance with the essential requirements and
other relevant provisions of Directive 1999/5/EC.
-
 1
1
-
 2
2
-
 3
3
-
 4
4
-
 5
5
-
 6
6
-
 7
7
Ask a question and I''ll find the answer in the document
Finding information in a document is now easier with AI
in other languages
Other documents
-
Crivit 285681 Instructions For Use Manual
-
Crivit 292739 Assembly, Operating And Safety Instructions
-
Barbie BICYCLE 12 INCH User manual
-
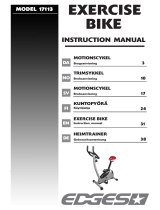
 Edges 17113 User manual
-
Garmin Trenazer rowerowy Tacx NEO Bike Smart User manual
-
Britax JOCKEY RELAX Owner's manual
-
 Robstep X1 Series User manual
-
Matrix CXP Owner's manual
-
Matrix CXP Owner's manual
-
Whirlpool KR 365 A2+ FRESH PT Installation guide


