Page is loading ...

MXHP-H500 (Hub)
Owner’s Manual v.1.0

MX HomePro MXHP-H500 Owner’s Manual
© 2016 Universal Remote Control, Inc. all rights reserved.
The information in this manual is copyright protected. No part of this manual may be reproduced
in any form without written consent from Universal Remote Control.
Universal Remote Control SHALL NOT BE LIABLE FOR OPERATIONAL, TECHNICAL, OR EDITORIAL
ERRORS/OMISSIONS MADE IN THIS MANUAL.
The information in this manual is subject to change without prior notice.
URC - Control the Experience is a registered trademark of Universal Remote Control, Inc.
All other brand or product names are trademarks or registered trademarks of their respective
companies or organizations.
Important Notices
The following sections contain information that is useful to the installer. It’s not necessary for you
to learn or remember any of the details. However, we still recommend that you read them so that
you are fully away of the functions and capabilities of your MX HomePro system.

Introduction.................................................................................................................1
Features and Benefits..................................................................................................1
Parts List.......................................................................................................................1
Before Getting Started................................................................................................2
MXHP-H500 (Hub)......................................................................................................2
MX HomePro Mobile App (iOS/Android)................................................................3
MXHP-R500 (Remote)................................................................................................4
Rear Panel Descriptions..............................................................................................5
Infrared Outputs....................................................................................................5
Ethernet LAN Connection/Wi-Fi...........................................................................5
Controlling Other Network Devices (IP Control)................................................5
DC Power Input......................................................................................................5
Front Panel Descriptions.............................................................................................6
Top Panel Descriptions
Power LED...............................................................................................................6
Status LED...............................................................................................................7
Wi-Fi LED.................................................................................................................8
Bottom Panel Description..........................................................................................9
Reset Button...........................................................................................................9
Factory Reset..........................................................................................................9
MAC Address Stickers..........................................................................................10
WPS Button..........................................................................................................10
Remove able Mounting Plate.............................................................................10
Network Installation.................................................................................................11
Wired.....................................................................................................................11
Wireless (Wi-Fi)....................................................................................................11
Hub Programming....................................................................................................12
Specifications.............................................................................................................12
Limited Warranty......................................................................................................13
End User Agreement.................................................................................................13
Federal Communication Commission Interference Statement............................13
FCC Caution................................................................................................................13
Federal Communication (FCC) Radiation Exposure Statement............................13

Page 1
Introduction
The MXHP-H500 (hub) controls the audio/video components in the home by sending infrared (IR)
or IP (Internet Protocol) commands over the network via a wired or Wi-Fi connection. In the
majority of installations the hub functions with little or no interaction from the end user.
This hub grants the user access to the MX HomePro mobile app (Entertain) which works in
conjunction with the hub to enable one-way control of the audio/video products and two-way
control of the connect smart devices in the home.
Adding a handheld MXHP-R500 remote to the system provides the same performance as the
Entertain mobile app. The MXHP-R500 is the perfect accessory companion for a television room or
bedroom night table.
It’s also possible to expand control to other rooms or areas of your home (refer to MX HomePro
Installation Guide). Hubs can be installed in up to five rooms using the same local network for
Internet access.
Features and Benefits
MX HomePro is designed to provide the user with the best possible resources for control of the
home. Enjoy key features such as:
● Connect with Wi-Fir or Wired Ethernet
The MXHP-H500 grants the smart home professional the flexibility to connect it to router
via a hard-wired Ethernet cable or via Wi-Fi.
● Two-way meta-data feedback
Experience real-time two-way feedback right on a smart phone, tablet, or optional MXHP-
R500 remote when using compatible smart home devices such as Z-Wave thermostats,
lighting, or a selection of compatible IP cameras. Full two-way control of Sonos, Nest, and
other compatible modules are also available (refer to Advance Device Integration Guide).
● Included iOS and Android mobile app
Purchase of the hub gives you unlimited free access to the Entertain app. This app can be
downloaded on to smart phones or tablets. It communicated through the local network to
provide one-way control of all audio/video devices and the same two-way meta-data
experience as found on the MXHP-R500 remote.
Parts List
Included in the MXHP-H500 box:
❑MXHP-500 Hub
❑iOS/Android Mobile App
❑12V 1000mA Power Supply
❑4x Mounting Screws
❑Ethernet Network Cable
❑4x Standard Infrared Emitters
❑Wall Mounting Plate

Page 2
Before Getting Started
Prior to installing an MX HomePro system, there are a few things to remember:
● MX HomePro systems are designed for use on the home’s local network. The hub can be
connected to the home network through an Ethernet cable or wirelessly using Wi-Fi.
● Adding a TRF-ZW Z-Wave gateway gives the MX HomePro system access to control the
home’s Z-Wave devices such as locks, thermostats, lighting, cameras, and scenes.
● Programing is performed via the web page MX HomePro Editor portal. The smart home
professional must log into this web portal in order to program all applicable MX HomePro
devices. Further enhancements may be added, for all inquiries please contract URC
Technical Support.
The Hub (MXHP-H500)
The hub is a network based product that require the use of a previously installed or custom local
area Wi-Fi network (LAN).
Do not attempt to disassemble the hub, there are no user-serviceable parts inside. Use only the AC
adapter provided by URC. Do not expose for extended periods or time to excessive heat, moisture,
or direct sunlight. Clean only with a soft, dry cloth. Unauthorized relocation of this unit may
negatively affect the performance of the system.

Page 3
MX HomePro Mobile App (iOS & Android)
The Entertain app comes free with the purchase of an MXHP-H500 hub; it is available for iOS and
Android. This mobile app provides full control of the audio/video components in a system without
the need of a point and shoot infrared remote.
The mobile app also provides advance control of applicable audio/video devices through the
usage of IP commands. These commands communicate over the network to control network based
equipment.
Through the usage of the Automate app, control of Z-Wave lights, thermostats, door locks, and IP
cameras are accomplished.

Page 4
MXHP-R500 Remote Control
Using the MX HomePro MXHP-R500 remote, sold
separately, with a hub allows for control of home
accessories such as lighting, thermostats, and
security. It also controls all of the home’s
audio/video devices.
This is a Wi-Fi only based remote and does not use
infrared or RF to communicate to any devices. It is
the perfect accessory companion for the television
room or bedroom night table.

Page 5
Rear Panel Description
Below are the components that make up the rear of the MXHP-H500 hub:
Infrared Outputs
The rear panel of the hub has four (4) infrared emitter ports, allowing for control of virtually any
audio/video device.
Self-adhesive flashers (included) affix to the front panels of the television, Blu-ray player and
any other equipment that uses infrared.
Ethernet LAN Connections/Wi-Fi
A standard Ethernet connection port is provided for a hard-wired connection to the local
network via a Cat5 cable (included).
The hub also supports wireless (Wi-Fi) connectivity to the same local network
Controlling Other Network Devices (IP Control)
The hub can control other IP controllable equipment (such as various AVRs) that are connected
to the same network as the MX HomePro system. One-way command of these devices can be
performed via the Entertain app or the remote control.
DC Power Input
The unit is powered by an AC power adapter that plugs into the input port shown below. Only
use the AC adapter that is supplied with this unit.

Page 6
Front Panel Description
The front panel of the hub houses an infrared blaster, this is used to send out IR commands to
components that are in the same cabinet or in line-of-sight range.
This blaster can be enabled or disabled via the MX HomePro Editor web portal. The smart home
professional installer has the flexibility to use either the rear emitter ports or the front panel
blaster. However, both cannot be used simultaneously.
An additional feature of the front blaster is the ability to use it for learned commands. If a device is
not in the database, use the MX HomePro Editor and the front blaster to learn commands from the
original remote (see MX HomePro Programming guide).
Top Panel Description
The top panel of the hub contains three (3) LED indicators that displays its status.
Power LED
This LED illuminates blue when the DC power is connected, as shown below.

Page 7
Status LED
The Status LED has six (6) possible states.
● Blue
❑Steady: Indicates that the hub is connected to the MX HomePro server and is fully
programmed to control the home.
❑Blinking: Indicates that the hub is being programmed by the MX HomePro server.
● Red
❑Steady: Indicates that the hub is connected to the MX HomePro server, but has not
been programmed.
❑Blinking: Indicates that the hub cannot connect to the MX HomePro server, please
check the network connection/settings.
● Green
❑Steady: Indicates that the hub is operating in a secondary room within the system.
❑Blinking: Indicates that the hub’s firmware is currently being updated.

Page 8
Wi-Fi LED
The Wi-Fi LED has six (6) possible states.
● Blue
Indicates an excellent Wi-Fi signal.
● Red
❑Steady: Indicates that the hub is connected with a poor Wi-Fi signal strength
❑Blinking: Indicates that there is an error when connecting to the wireless network.
● Green
Indicates that the hub is connected with a good Wi-Fi signal.
● Yellow
Indicates that the hub is connected with a fair Wi-Fi signal.
● Off
The LED is off when the hub is connected to the router via Ethernet.

Page 9
Bottom Panel Description
The following pages describe the components that make up the underside of the hub.
Reset Button
A single press of the Reset button REBOOTS the hub, this is similar to unplugging and
reapplying the AC power source.
DO THIS ONLY IF INSTRUCTED TO DO SO BY YOUR INSTALLER OR BY MX- HomePro
TECHNICAL SUPPORT
Factory Reset
Pressing and holding the Reset button for ten seconds results in setting the MXHP-H500 hub
to a factory default state. Meaning all user data and programming are erased and the system
requires re-programming.

Page 10
MAC Address Stickers
Two MAC address stickers are located at the bottom
panel of the hub. Use this unique address to identify
each hub on the system.
WPS Button
This button provides an easy one button press
connection on a WPS (Wi-Fi Protected Setup) ready
network. This button is only to be used by the smart
home professional.
Removable
Mounting Plate
A removable mounting plate along with the four
provided mounting screws can be used to mount the
hub to a flat surface such as a ceiling, wall, or
entertainment center.

Page 11
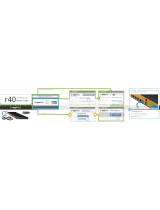
Network Installation
The hub can be installed using Wi-Fi or an Ethernet connection, keep in mind the initial
programming must be performed with a wired connection.
When being installed for the first time, one of the two following steps must be followed:
Wired Ethernet
Connect the hub to the router using the supplied Ethernet cable. See image below for proper
Ethernet placement.
OR
Wireless (Wi-Fi)
1. Connect the hub to the wireless access point by using the WPS button (page 10) and
pressing the same button on the wireless access point/router
2. If successfully connected, the Wi-Fi LED glows blue, green, yellow, or red based on the
signal strength (page 8)
Setup is now complete, if you wish to set specific network settings, see the following section.
When the Status LED illuminates red, use the remote control or mobile app to set the network
properties of the hub (see MX HomePro Installation Guide). Make sure the remote control or
mobile app are on the same network that the hub is hard wired into.
To set the network properties of the hub, insert the battery into the remote control and follow
the on-screen prompts (for more details refer to the MX HomePro Installation Guide).

Page 12
Hub Programming
Each MXHP-H500 requires professional programming for control of the equipment within the
home. Programming the hub is performed through the MX HomePro Editor web portal. Access it
through the following link:
https://www.mxhomepro.com
Once the system has been programmed using the MX HomePro Editor, a backup of the system file
is stored within the MX HomePro server. This file can be accessed and edited at any time by a
smart home professional installer.
If a URC TRF-ZW gateway is added to the system, additional programming and user setup steps
may be required (see Advanced Devices Integration Guide).
Specifications
IR Range (Line of Sight): 30-50 feet, dependant on environment
Macro Capability: Supports up to 255 steps per macro
Wi-Fi: IEEE 802.11 b/g/n (2.4Ghz)
Size: 1.18”H x 4.63”W x 4.63”D
Weight: 5.19oz
Power 12V DC 1A

Page 13
Limited Warranty Statement
Click on the section title above to read the full terms and conditions of the Limited Warranty
Statement. Also available publicly on the URC home page.
End User Agreement
Click on the section title above to read the full terms and conditions of the End User Agreement.
Also available publicly on the URC home page.
Federal Communications Commission
Interference Statement
This equipment has been tested and found to comply with the limits for a Class B digital device,
pursuant to part 15 of the FCC Rules. These limits are designed to provide reasonable protection
against harmful interference in a residential installation. This equipment generates, uses and can
radiate radio frequency energy and, if not installed and used in accordance with the instructions,
may cause harmful interference to radio communications. However, there is no guarantee that
interference will not occur in a particular installation. If this equipment does cause harmful
interference to radio or television reception, which can be determined by turning the equipment
off and on, the user is encouraged to try to correct the interference by one more of the following
measures:
❑Reorient or relocate the receiving antenna
❑Increase the separation between the equipment and receiver
❑Connect the equipment into an outlet on a circuit different from that to which the receiver
is connected
❑Consult the dealer or an experienced radio/TV technician for help
Warning!
Changes or modifications not expressly approved by the manufacturer could void the user's
authority to operate the equipment.
The manufacturer is not responsible for any Radio or TV interference caused by unauthorized
modifications to this equipment. Such modifications could void the user's authority to operate
the equipment.
FCC Caution
This device complies with Part 15 of the FCC rules. Operation is subject to the following conditions:
1. This device may not cause harmful interference
2. This device must accept any interference received, including interference that may cause
undesired operation. Any changes or modifications not expressly approved by the party
responsible for compliance could void the authority to operate equipment. The antenna(s)
used for this transmitter must not be co-located or operating in conjunction with any other
antenna or transmitter.
Federal Communication Commission
Radiation Exposure Statement
This remote device is approved as a hand-held and hand-operated only portable (relative to hand)
device, which is normally operated at 5cm from a person’s body.
/