Page is loading ...

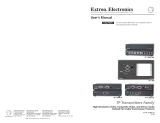
Setup Guide — RGB 580xi
This guide provides basic instructions for an experienced
installer to set up and operate the Extron RGB 580xi.
Installation
Refer to the RGB 580xi User’s Manual for details.
C
Installation and service must be performed by authorized personnel only.
Step 1 — Powering down
Turn off or disconnect all equipment from power sources.
Step 2 — Mounting
Mount the interface as desired.
Step 3 — Video input
Connect an RGBHV, RGBS, RGsB, or RsGsBs analog video input to the
front panel 15-pin HD input connector. The pinout table is shown below.
Pin Description
Wire ID
Pin Description Wire ID
15-pin HD male pinout table
1 red signal red coax
2 green signal green coax
3 blue signal blue coax
4 horizontal shift + green wire
5 horizontal shift — brown wire
6 red coax ground red coax shield
7 green coax ground green coax shield
8 blue coax ground blue coax shield
9 LED red orange wire
10 horizontal sync ground black coax shield
10 vertical sync ground yellow coax shield
10 audio ground black wire
10 LED ground yellow wire
10 shift ground grey wire
11 audio right red wire
12 audio left white wire
13 horizontal sync black coax
14 vertical sync yellow coax
15 LED green pink wire
Step 4 — Audio input
Connect an unbalanced stereo input to the front panel 3.5 mm stereo mini
jack.
Step 5 — Video output
Connect a display device to the rear panel video output BNC connectors, as shown below.
RGBSRGBHV RGsB (Sync on Green)
RsGsBs
(output only if input is RsGsBs)
R G B
H/HV
V R G B
H/HV
V R G B
H/HV
V
Step 6 — Audio output
Connect an audio device to the 3.5 mm, 5-pole captive screw connector for balanced or
unbalanced audio output. Wire the male connector as shown here.
CAUTION
For unbalanced audio, connect the
sleeve(s) to the ground contact.
DO NOT connect the sleeve(s) to the
negative (-) contacts.
Do not tin the wires!
Tip
NO Ground Here
Sleeve(s)
NO Ground Here
Tip
L R
Balanced Audio Output
Unbalanced Audio Output
Tip
Ring
Tip
Ring
L R
Sleeve(s)
1
15-pin HD Male Pin Locations
5
1
15
11
6
10
Sleeve ( )
Ring (R)
Tip (L)

Setup Guide — RGB 580xi
2
Step 7 — Contact closure
For contact closure, connect an optional contact closure device to the front panel 5-pin, captive
screw connector. Making contact closure between pins A and B transmits a channel signal
through the rear panel RS-232 port. The RGB 580xi SI/CCSI AAP models provide one-button
contact closure operation. Wire the male connector as shown below on the left. The Extron
VGA and control cable assembly comes with the male control connector prewired, as shown at
right.
Contact closure wiring
Contact closure
Contact closure
5 VDC
Ground
5 VDC
CONTROL
A B
C
D
E
Prewired male control
connector
Male VGA connector
Prewired male control cable connector
N
The contact closure pins on the RGB 580xi’s front panel are not to be used for horizontal
shift control. See the horizontal shift control wiring in the 15-pin HD pinout table in
Step 3.
Pin
Contact closure Description
A Contact closure + Contact closure + circuit
B Contact closure - Contact closure - circuit
C +5 V +5 V source for powering AAP devices
D Gnd Signal ground for powering AAP devices
E -5 V -5 V source for powering AAP devices
RGB580xi contact closure pinout table.eps
Step 8 — Setting the DIP switches
The DIP switches control DDSP (Digital Display Sync Processing),
serration pulse output, SOG (sync on green) output, vertical sync width,
sync polarity, and composite sync output. Moving a switch up sets it to On
and moving it down sets it to Off.
N
The default for all DIP switches is Off (down).
1 — DDSP (Digital Display Sync Processing) — This feature may be necessary for digital
display devices such as LCD, DLP (digital light processing) and plasma displays. Use this
option if the image is not displayed properly after other options, such as serration pulse
and vertical sync pulse width, have been explored.
On — The interface uses DDSP instead of ADSP.
DDSP does not process the sync signal.
N
DDSP disables the horizontal shifting control.
Off — The interface performs sync processing operations, such as centering, with ADSP.
2 — Serr (serration pulse) — Many LCD and DLP projectors and plasma displays must
have serration pulses removed from the sync signal in order to display properly. Flagging
or bending at the top of the video image is a sign that the serration pulses should be
removed.
On — The interface outputs serration pulses in the vertical sync interval.
Off — The interface does not output serration pulses.
SOG
SERR
DDSP
V-SYNC WIDTH
NEG SYNC
COMP SYNC

3
3 — SOG (sync on green)
On — The interface outputs sync on green.
Off — The interface outputs separate horizontal and vertical sync (on the H and
V connectors) for RGBHV.
4 — V-Sync Width (vertical sync pulse width) — For some digital display devices, if no
picture appears, the picture cuts in and out, or the picture is scrambled, try adjusting the
output vertical sync pulse width or switching from ADSP to DDSP.
On — The vertical sync pulse is narrow.
Off — The vertical sync pulse is wide.
5 — Neg Sync — This switch controls sync polarity.
On — Both the horizontal and the vertical sync signals are forced to negative polarity on
output.
Off — Output sync polarity follows (is the same as) input polarity.
6 — Comp Sync — This switch controls composite sync output.
On — The interface outputs combined horizontal and vertical sync for RGBS.
Off — The interface outputs RGBHV or RGsB video.
Step 9 — RS-232 control
For two-way RS-232 communication, connect an RS-232 device (control system or PC) to the
3-pole captive screw connector. Software for RS-232 control is included with the interface.
Refer to the “Remote Control” section of chapter 3 of the user’s manual for further details.
Wire the male connector, as shown here.
3-pin RS-232 Captive Screw Con_lateral.eps
Transmit
Receive
Ground
Tx
Rx
RS-232
Front Panel Adjustments
Video signals passing through long cable runs of over 125 feet (38.1 meters) can decrease
in strength, creating signal loss. The longer the cable, the greater the cable resistance and
capacitance, and the greater the level and peaking adjustments that will be required to
compensate for the resultant signal loss. These adjustments change the level and peaking of the
output signal to compensate for capacitance caused by up to 1000 feet (304.8 meters) of Extron
SHR cable.
N
If the displayed image is too bright or too dark, try changing the level setting. If the edges
of the displayed image seem to exceed their boundaries, or if thin lines and sharp edges look
thick and fuzzy, try changing the peaking setting. See the illustration below.
S
O
G
S
E
R
R
D
D
S
P
V-S
Y
N
C
W
ID
T
H
N
E
G
S
Y
N
C
C
O
M
P
S
Y
N
C
INPUTS
RGB 580xi
ANALOG
AUDIO
CONTROL
VIDEO
OUTPUT
LEVEL
A B C D E
PEAKING
Level
Peaking
1. Level adjustment control — The Video Output Level control alters the bright ness of the
displayed image. To adjust the video output level, view the display while using a small,
flat-blade screwdriver to rotate this potentiometer.
If the interface receives a typical (0.7 volts p-p) analog computer video input, the output is
as follows:

Setup Guide — RGB 580xi
Extron USA - West
Headquarters
+800.63 3.9876
Inside USA / Canada Only
+1.714.491.1500
+1.714.491.1517 FA X
Extron USA - East
+800.63 3.9876
Inside USA / Canada Only
+1.919.863.1794
+1.919.863.1797 FA X
Extron Europe
+800.39 87.6673
Inside Europe Only
+31.33.453.4 040
+31.33.453.4 050 FA X
Extron Asia
+800.733 9.8766
Inside Asia Only
+65.638 3.44 00
+65.638 3.46 64 FAX
Extron Japan
+81.3.3511.7655
+81.3.3511.7656 FAX
Extron China
+400.883.1568
Inside China Only
+86.21.3760.1568
+86.21.3760.1566 FA X
Extron Middle East
+971.4.2991800
+971.4.2991880 FAX
© 2009 Extron Electronics. All rights reserved.
68-536-50
Rev. A
11 09
•Attheminimumlevelsetting(thecounterclockwiselimitofthiscontrol),theinterface
outputs video at 0.5 volts p-p.
•Unitylevelis0.7voltsp-p,thesameastheinputsignal.Setthecontrolto
approximately one-half turn between the minimum and maximum level settings
to output unity level video.
•Atthemaximumlevelsetting(theclockwiselimitofthiscontrol),theinterfaceoutputs
video at 1.45 volts p-p.
Select a level setting of 0.7 volts or above to compensate for the decrease in signal level that
occurs when the signal passes through long cables. Set the level at the maximum setting
for cable lengths over 500 feet for all computer signals of 15 kHz to 135 kHz.
2. Peaking control — The Video Output Peaking control affects the sharpness of a picture.
Increased peaking can compensate for detail (mid- and high-frequency) loss from low
bandwidth system components or capacitance in long cables.
•Theminimumsetting(atthecounterclockwiselimit)providesnopeaking.
•Themaximumsetting(attheclockwiselimit)provides100%peaking.
Adjust this control while viewing the displayed image to obtain
the optimum picture sharpness.
Operation
Turn on the input devices (computer, audio device) and output device(s) (projector,
monitors, speakers). After powering up the RGB 580xi, the image should now appear on the
screen, and sound should be audible. If you are experiencing problems, please refer to the
“Troubleshooting” section of the user’s manual.
/