Page is loading ...

QSDR04RTC USER’S
MANUAL
Contact US:
Q-see Products
8015E.Crystal Dr
Anaheim, CA 92807
Website:
http://www.q-see.com
Customer Service:
Phone: 877-998-3440 x 538
Email:[email protected]
Tech Support:
Phone: 877-998-3440 x 539
Email:[email protected]
Fax:
714-998-3509
Rev 090109

CONTENTS
Chapter 1: DVR Features ...................................................................................................................................................2
Chapter 2: Layout ..............................................................................................................................................................3
2.1 Front Panel ....................................................................................................................................................................3
2.2 Rear Panel......................................................................................................................................................................4
2.3 Remote Control ..............................................................................................................................................................5
Chapter 3: DVR Installation...............................................................................................................................................6
3.1 Hard Drive Installation..................................................................................................................................................6
3.2 Camera and Monitor Connection...................................................................................................................................6
3.3 Power Supply connection ...............................................................................................................................................6
Chapter 4: DVR Boot up ....................................................................................................................................................7
4.1 System Initialization.......................................................................................................................................................7
4.2 Main Interface................................................................................................................................................................7
Chapter 5: DVR Menu .........................................................................................................................................................7
5.1 Main Menu Preview .......................................................................................................................................................8
5.2 Main Menu .....................................................................................................................................................................8
5.2.1 Camera setup ......................................................................................................................................................9
5.2.2 Record setup........................................................................................................................................................9
5.2.3 Network Setup ...................................................................................................................................................10
5.2.3.1 DHCP.............................................................................................................................................................10
5.2.3.2 PPPoE ............................................................................................................................................................11
5.2.3.3 Static ..............................................................................................................................................................11
5.2.3.4 Port Forwarding .............................................................................................................................................12
5.2.3.5 Pop-ups & ActiveX Controls .........................................................................................................................12
5.2.4 Recording Search..............................................................................................................................................13
5.2.5 Multi player .........................................................................................................................................................14
5.2.6 Device Management .........................................................................................................................................16
5.2.6.1 HDD Management.........................................................................................................................................16
5.2.6.2 Alarm Set .......................................................................................................................................................17
Email Alarm Notification...........................................................................................................................................18
5.2.6.3 PTZ Setup ......................................................................................................................................................19
5.2.6.4 Mobile............................................................................................................................................................19
Mobile Phone Access.................................................................................................................................................19
5.2.6.5 Motion Detect ................................................................................................................................................24
5.2.7 System Function................................................................................................................................................25
5.2.7.1 Time Set.........................................................................................................................................................25
5.2.7.2 Password ........................................................................................................................................................25

5.2.7.3 Video Setup....................................................................................................................................................25
5.2.7.4 Language........................................................................................................................................................26
5.2.7.5 Info.................................................................................................................................................................26
5.2.7.6 System Maintenance ......................................................................................................................................26
5.3 Menu Lock....................................................................................................................................................................26
5.4 Video Search.................................................................................................................................................................26
5.5 PTZ Control .................................................................................................................................................................27
5.6 Record ..........................................................................................................................................................................27
5.7 Stop recording ..............................................................................................................................................................27
Chapter 6: Net-Viewer Program .....................................................................................................................................28
6.1 Plug-ins download and installation .............................................................................................................................28
6.2 Log-in to NetViewer .....................................................................................................................................................28
6.3 Main Interface of Net-viewer .......................................................................................................................................29
6.3.1 Menu column......................................................................................................................................................29
6.3.1.1 Live ................................................................................................................................................................29
6.3.1.2 Replay ............................................................................................................................................................29
6.3.1.3. Setup .............................................................................................................................................................30
6.3.1.4
Log out ......................................................................................................................................................32
6.3.2 PTZ Control ........................................................................................................................................................32
6.3.3 Live Play Control ...............................................................................................................................................32
Chapter 7: Specifications.....................................................................................................................................................33
Chapter 8: Appendix............................................................................................................................................................32
8.1 Operation Function Table ............................................................................................................................................32
8.2 Recording Alarm setting...............................................................................................................................................33
8.3 Troubleshooting............................................................................................................................................................33
8.4 System Connections...................................................................................................................................................34
8.5 Accessories (Included) .................................................................................................................................................34
Q-See Product Warranty..................................................................................................................................................35

User Manual
1
Safety Instructions
1. Use proper power source.
Do not use this product with a power source that applies more than specified voltage (100-240V AC).
2. Never insert anything metallic into the DVR case.
Putting something into the DVR case can be a source of dangerous electric shock.
3. Do not operate in wet & dusty area or use near water.
Avoid places like a damp basement or dusty hallway.
4. Do not expose this product to rain or use near water.
If this product accidentally gets wet, unplug it and contact an authorized dealer immediately.
5. Keep product surfaces clean and dry.
To clean the outside case of the DVR, use a cloth lightly dampened with water (no solvents).
6. Provide proper ventilation.
This DVR has a built in fan that properly ventilates the system.
7. Do not attempt to remove the top cover.
If there are any unusual sounds or smells coming from the DVR, unplug it immediately and contact an
authorized dealer or service center.
8. Do not attempt to remove the top cover.
Warning: You may be subjected to severe electrical shock if you remove the cover of the DVR.
9. Handle DVR box carefully.
If you accidentally drop your DVR on any hard surface, it may cause a malfunction. If the DVR doesn’t
work properly due to physical damage, contact an authorized dealer for repair or exchange.
10. Use standard lithium cell battery. (NOTE: Manufacturer has preinstalled battery.)
The standard lithium cell 3v battery located on the mother board should be replaced if the time clock
does not hold its time after the power is turned off. Warning: unplug the DVR before replacing battery or you
may be subjected to severe electrical shock. Properly dispose of old batteries.
11. Make sure there is good air circulation around the unit.
This DVR system uses a hard drive for video storage, which generates heat during operation. Do not
block air holes (bottom, upper, sides and back) of the DVR that cool down the system while running. Install
or place this product in an area where there is good air circulation.
.

User Manual
2
Chapter 1: DVR Features
Real time monitoring Supports real time surveillance via Monitor
Saves Recordings DVR saves real-time recording image to HDD
Backup Recordings Supports DVR backup via USB flash drive and hard drive.
Playback Recordings Supports DVR single CH and multiple CH playback of recorded files
Network operation Supports remote surveillance by multiple users simultaneously
Alarm Setting Supports HDD & video input alarm management and external alarm signal
inputs
Mouse Operation Supports Mouse operation for faster menu navigation.
PTZ Control Supports PTZ camera operations through RS-485.
Other Features
H. 264 video compression format, supports D1, HD1, CIF resolution
ADPCM audio compression format
Windows Graphical interface
BNC and VGA video out ports
Supports remote live viewing via 3G mobile networks
Supports sending email alerts when motion is detected by system
Triplex (recording, playback and net transmitting at the same time)
Supports USB mouse, IR remote control operation
Rear USB2.0 ports for backup, upgrade and mouse operation.
Supports Double Encode bit network transmission
The video package time is adjustable
Multiple alarm record mode
Multiple language OSD
Supports auto maintenance

User Manual
3
Chapter 2: Layout
2.1 Front Panel
Item
Key title/Indicator Marks Functions
1 HDD indicator HDD
When the “Red” indicator flashes it means the hard drive is being read or written to
.
2 Power indicator
PWR
If the “Green” indicator is on the system is getting power
3 IR Receiver
Receives signal from Remote Control
4 Channel Select:
CH1 CH2 CH3 CH4 Select Single Channel Display
5 QUAD Display all cameras in Live display or playback mode
6 REW
Move Left / Reverse
7 PAUSE
Pause / play frame by frame, dwell time (Sequential Channel Switch)
during single
camera display
8 PLAY
Play
9 FWD
Move Right / Play Forward
10 STOP
Stop Playback; stop manual recording
11 REC Start Manual recording
12 MENU/ESC
Enter into main menu or exit menu
13 Up
Move Up
14 SEL/EDIT
Select key / Edit
15 Down
Move Down
16 PTZ Enter PTZ control mode
17 USB 2.0 Port Backup to USB Flash Drive and USB Hard Drive

User Manual
4
2.2 Rear Panel
Item Physical port Connection method
1 Video input Connect CH1-4 ( BNC interface)
2 Video output Connect monitor output ( BNC interface)
3 Audio input Connect CH1-4 audio signal input (RCA interface)
4 Audio output Connect audio signal output (RCA interface)
5 Ethernet Port Connect intranet, internet (RJ45 interface)
6 USB Port Connect USB Mouse
7 RS-485/Sensor/Alarm
RS485/Sensor/Alarm interface (see pin outs below)
8 Power Port Connect power supply - DC12V 3A
9 VGA Port Connect to VGA monitor
10 Power Switch Turn Power on and off

User Manual
5
2.3 Remote Control
Mouse Operation
You can use a mouse instead of front panel buttons or remote control.
In menu lock mode, Enter into pop-up menu and clicking any sub menu to pop up Log-in
window; on menu unlock mode, enter into pop-up menu, and then clicking left key to
enter into any sub menu directly.
After entering main menu, clicking left key could enter into any sub menu; On[Detailed
file] menu mode, clicking left key could playback one recording file.
Change the status of check box and motion detection area.
Clicking combo box to access pull-down menu
By clicking left key you can adjust Color control bar and volume control bar.
By clicking left key you can select values in edit boxes or pull-down menu and supports
Chinese word input, special symbol, numeric and character input, use instead of
[Enter- ] or [Backspace ]
Click left key of
Mouse
In the [Detailed file] menu mode, clicking left key will playback one recording file.
In live display mode, clicking right key will display pop-up menu (shown as Picture 5-1).
Click right key of
Mouse In Main menu or sub menu mode, clicking right key will exit current menu.
Double-click Left
key of Mouse In live display or playback mode, double-clicking left key will maximize the screen.
Moving Mouse Select menu item
Sliding Mouse On motion mode, sliding mouse will select motion area; On [Color set] menu mode,
sliding mouse will adjust color control bar and volume control bar.
1 1-8 Channel Select 1-8 ; Numeric key
2 9, 0 Numeric Keys
3 ALL Preview all Channels
4 Menu Enter/Exit Main Menu
5 ▲ Up Key
6 ▼ Down Key
7
◄ /
Left / Right Keys
8 SEL Select Key/ Edit Key
9 Rewind key
10 Play Key, Enter recording search menu
11 Forward Key
12
●
Manual Recording
13
Pause / Frame Play
14
■
Stop manual recording; Stop Playback
15 Audio Undefined
16 Mute Undefined

User Manual
6
Chapter 3: DVR Installation
3.1 Hard Drive Installation
Caution Please do not Install or take out hard drive when DVR is running!
(1) Remove screws and open DVR upper cover carefully;
(2) Insert Power Cord and data cable into Pin of hard drive securely;
(3) Put the upper cover back carefully, re-attach screws.
3.2 Camera and Monitor Connection
Connect camera cable to video input of DVR, and from video output of DVR to Monitor via BNC
connector (Refer to section2.2-Rear Panel); or
If the camera is a PTZ speed dome, you could connect RS485 A & B to the according port of DVR
respectively (refer to system figuration on Chapter 8).
3.3 Power Supply connection
Please only use the power adapter supplied with the DVR.

User Manual
7
Chapter 4: DVR Boot up
4.1 System Initialization
4.2 Main Interface
Chapter 5: DVR Menu
Pop-up Menu
After finishing system initialization, click right key of mouse on main
interface mode to enter into Pop-up Menu. Now you could proceed parameter
setting and operate for Main Menu, Menu Lock, Video Search, PTZ, Start
record, Stop Record and also operate for Start Cruise after successful PTZ
parameter setting etc.
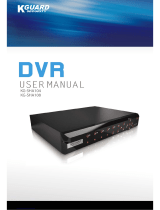
After connecting the power adapter and turning
On the power button, the system will boot-up and start
initializing.
After finishing system initialization the system will enter into main
interface. Picture 4-2 is the main interface displayed by system, which
is showing no video input status. Once there are video inputs, the
interface will display live images from the cameras. In main interface
mode, if you use the mouse to double-click the live image of any
channel, the image will be maximized to full screen, by double-clicking
again, the display will be come back to quad mode displaying all
cameras; clicking the right button of the mouse, will enter into Pop-up
Menu; by clicking the left button of the mouse, you select menu items;
when clicking any area outside the menu, you will exit the Pop-up
Picture 4-1
Picture 4-2
Picture 5-1

User Manual
8
5.1 Main Menu Preview
5.2 Main Menu
Audio/Video setting, Language select, and access system information, system maintenance etc.
After clicking right button of mouse, pop-up menu will be displayed
on the screen. You can click [main menu] button on pop-up menu
to enter into Main menu interface (Shown as Picture 5-2). You can
also use the Menu button on the front panel to bring up the window,
when using the front panel buttons use the FWD and REW button
to move in the menu, and the SEL button to select the icon. You
use the ESC button to return to previous window. In Main Menu
mode, you can control device management settings, such as
Camera, Recording, Network, Recording search, HDD, Alarm, PTZ
Control, Mobile Phone & motion detection etc, you can also set
system function settings, such as Time setting, User password,
Picture 5-2
Main Menu
Rec. Search
Search
Playback
Detail File File Backup
Camera
Recording
HDD
Management
Alarm Setting
PTZ Setting
Mobile
Motion
Color set
System
User
password
System Information
Language Select
System Maintenance
Video Setting
Time Setting
Device
Management
Network
Area setting
E-mail setting
Dwell time display

User Manual
9
5.2.1 Camera setup
Explanation
1. The modifications will be available after clicking [APPLY] button on the bottom of the sub-menu windows
and being prompted to save and then clicking [ok] button.
2. If you want to cancel the modification, click [Exit] button to exit the menu.
3. When clicking [DEFAULT] button, all system default values will be reset to default value.
4. System default value indicates the value pre-set at the factory.
5.2.2 Record setup
Go to [Main Menu Camera] to set up the name display
and position display of each channel (Shown as Picture 5-3), You
can also adjust image brightness, saturation, contrast and hue
settings of each channel after entering into [Color] Menu and set
up whether each channel can be previewed or not under Live
display and/or Recording mode.
Please note that the name of each channel supports up to
eight characters or four Chinese characters.
Click [Main Menu] [Record] to enter into [Record Setup]
menu (Shown as Picture 5-5)
Functions
1. The [Rec Mode] button allows you to setup recording 24
hours, on motion, or on a set schedule.
2. [PACK time] indicates maximum continuous time length of
recorded files (15, 30, 45, 60 min).
Below is the Color Menu where you can adjust image
brightness, saturation, contrast and hue parameters of each
channel. (shown as picture 5-4)
Picture 5-4
Picture 5-5
Picture 5-3
Click [AUTOSEQ] button to start auto rotation function.
(setting sub menu shown as Picture 5-4A. After starting auto
rotation function, system will auto rotate the video images among
CH1, CH2, CH3, CH4 and Quad in turn.
Default rotation time: 5 second
Settable time range: 0~10 second
Picture 5-4A

User Manual
10
The [Record Setup] menu allows you set up recording status (on/off) of each channel, it also allows you
setup recording image resolution and quality, and turn audio on/off. This menu also allows you select
recording mode (recording after power on and scheduled recording) and recording file length.
Once a channel is set to “on” the channel can record, if it is set to “off” the video from the channel will not
be recorded. Resolution options are D1 (702x480), HD1 (702x240) and CIF (352x240); and Quality
options are Best, Good and Normal.
When Audio is set to “On”, system will also record audio from the channels and will have audio output on
playback mode; if it is set to “off” you can not record audio and will have no audio output available on
playback mode.
To record 24 hours a day set the Rec Mode to Always. To record on motion or a set schedule, select
Time Schedule Record and click the “Schedule” option, the Schedule interface will open as shown in (picture
5-6):
complete the schedule you activate it by clicking the [Apply] button.
You can also click on the Default button to use the system defaults. The system default settings are:
Hr 01:00 am - 07:59 am: No recording
Hr 08:00 am -18:59 pm: Normal recording
Hr 19:00 pm - 00:59 pm: Alarm recording
Explanation: Under the recording Set menu and recording search menu, original color stands for no
recording, “Red” stands for alarm recording, “Green” stands for normal recording and “Blue” stands for the
channel and date you have selected.
5.2.3 Network Setup
Enter into [Main MenuNetwork Set] to setup the network configuration (Shown as picture 5-7):
5.2.3.1 DHCP
When selecting DHCP the router will allocate DVR IP address automatically After you exit the menu. You
might want to write down the addresses assigned and then switch to static and re-inter the addresses so the
router does not change them later.
Recording options include All, CH-1, CH-2, CH-3, CH-4
respectively. Please click the channel you need, the channel you
select will be highlighted in “Blue” unselected channels will be “Grey”.
To setup weekly schedules, click on the box of the recording
status you want (Alarm, General, or No Record) and then click on
each box in the schedule time line that you want this method to apply
to. You can use the [From – To] pull-down menus and Copy button to
copy settings from one day to another day or all days. After you
After selecting network mode - such as DHCP, PPPOE, or
static allocation and setting up web ports (80 and 9000 by default),
you can view DVR remotely over a network or the internet.
Picture 5-6
Picture 5-7

User Manual
11
5.2.3.2 PPPoE
.
5.2.3.3 Static
When selecting static allocation, You will need to setup the network settings on the DVR to match the
settings of the router that you attach the DVR to. To get the router settings you would go to the Run option on
a computer attached to the same router as the DVR and type cmd and hit OK to bring up a command prompt
(Picture 5-9), then type ipconfig at the prompt (RED arrow on Picture 5-9) to access the router settings. Write
down the gateway and subnet mask numbers (GREEN arrows on (Picture 5-9) so you can copy them into the
network settings on the DVR (Picture 5-10). To get to the NETWORK SETUP window, Go to [Main
MenuNetwork Set] then use the Direction Keys on the DVR to go to the TYPE dropdown and select
STATIC
For the DVRs IP address you would enter the same first 3 sets of numbers as the gateway and select a
fourth set of numbers that is different then any other device attached to the same router. If the IP address of
your computer in the ipconfig (BLUE arrow in Pic 5) was a single or two digit number you should be ok with
any three digit number, if the computer IP address ends with a number in the 100s then you should go with a
200 number (LIGHT BLUE box in Pic 6). After you enter the addresses hit the OK button.
At the bottom of the NETWORK SETUP window there is an option to setup the DVR to be accessed
through a DDNS service. When you click on the DDNS button it brings up the window displayed as Picture
5-11.You can access the DVR through a static or dynamic IP address; however a dynamic address can
Your dynamic domain name into an Internet Explorer browser instead of an IP address and be directed to
whatever the current dynamic IP address is, so that you can always access the DVR by entering the same
address. This DVR also supports the DDNS service provided by dyndns. You can get more information on
how to use these services from the myq-see.com or www.dyndns.com website.
When selecting PPPoE, you need to input user and
password provided by your internet service provider and set up
web port (for details refer to the below picture 5-8)
change from time to time. How often depends on your service provider
When it changes you need to go to a website such as
www.myipaddress.com from a computer attached to the same router
as the DVR to find out what the new IP address is. There are two
solutions to this problem. One would be to get a static IP address from
your service provider so that you do not have to be concerned with the
address changing. Another solution would to use a dynamic domain
name service to get a domain name that can be linked to your dynamic
address. You can register on our company’s myq-see.com website and
get a domain name, user name, and password. You can then enter
Picture 5-8
Picture 5-9
Picture 5
-
10

User Manual
12
5.2.3.4 Port Forwarding
To access the DVR from a remote computer over the internet you would then need to forward port 80 and
port 9000 on the router the DVR is attached to, to the IP address of the DVR. You can get instructions on how
to do this for most popular routers by going to the www.portforward.com website. On this website click on the
orange “Routers” link in the second paragraph (RED box in Picture 5-12), which will open a list of router
manufactures, then find the brand and model of your router on the list and click on the link. On the next page
that opens click on the orange “Default Guide” link (BLUE box in Picture 5-13), this will take you to the port
forwarding instructions for your router.
website will display the box in Picture 5-14 below that shows the IP address you need to use. It will be in the
space where the below example shows 76.254.183.54.
5.2.3.5 Pop-ups & ActiveX Controls
To access the DVR through Internet Explorer: once you have setup the network settings on the DVR to
match the settings of your router and forwarded the ports needed by the DVR (for remote access over the
internet), you need to modify your browser controls. You need to allow Pop-ups. To do so go to the Internet
Explorer tool bar and select the "tools" option (RED box in Picture 5-15), then select the "Pop up Blocker"
option and select "Turn Off Pop-up Blocker” (BLUE arrows in Picture 5-15). You will also need to enable
Active X controls. To do so go to the Internet Explorer tool bar and select the "tools" option, then "Internet
Options"(GREEN arrow in Picture 5-15), In the windows that opens (Picture 5-16) Go to "Security" (RED
box in Picture 5-16), then click the "Custom Level" button (GREEN box in Picture 5-16), then click on OK
(BLUE arrow in Picture 5-16). This will open the page shown in Picture 5-17. On this page scroll down to the
ActiveX Controls and Plug Ins and make sure they are all set to either prompt (RED arrows) or enabled
(BLUE arrows).
Picture 5-15
Picture 5-12 Picture 5-13
Picture 5-14
When you access the DVR from a remote computer you also need
to use a different address in the Internet Explorer browser window.
Instead of entering the IP address of the DVR you need to enter
the public IP address of the router the DVR is attached to. You can
get this address by going to www.myipaddress.com from a
computer that is attached to the same router as the DVR. This

User Manual
13
To connect to the DVR from the remote computer you would then open an Internet Explorer browser
window and enter the internet IP of your router that you got by going to www.myipaddress.com.
Notice
: If you cannot use HTTP port 80 or 9000 because it is being used by another program, or it is being blocked by your service
provider, you can use another port in the same range. If you do so then you need to forward the IP address of the router to the other port,
change the port in the DVR NETWORK settings, and you need to add the port number after the IP address. For example, if you set the
HTTP port as 82, you need to enter the IP address as 192.168.0.25:82.
User name and password here are the same as what you use on the DVR.
If you get a error message that says the program cannot load because the publisher is unknown or the
program is unsigned, go to internet explorer, tools, internet options (refer to Picture 5-15), then go to the
“Advanced” tab (RED box in Picture 5-18), this will open the window in Picture 5-19, scroll down to “Security”,
and select the options to “Allow software to run or install even if the signature is invalid”, and “Allow Active
Content to Run Files on My Computer” (RED box in Picture 5-19).
5.2.4 Recording Search
Click [Main menu search] to enter into [Video Search] menu (shown as the below picture 5-20).
Searched playback:
If you input specific date and click [Search], you will find all the
recordings for that day. When you select [Date] item, you will
playback the recordings in 4 channel mode; or, click [File list] button
to display File list interface, where you can playback or backup the
file you selected. See File List heading below.
Picture 5
-
16
Picture 5
-
17
Picture 5-19
Picture 5-18
Picture 5-20

User Manual
14
You can play video Forward at 2x, 4x, and 8x speeds, Slow play at 1/2x, 1/4x, and 1/8x, normal play,
pause and play frame by frame using the playback control bar, and adjust volume by clicking or sliding tune
control bar. When playback has finished, system will return to previous menu.
File list
On the [Video search] menu mode, click [File list] to pop up the sub-menu shown below as Picture 5-21.
This option will allow you to view all of the available files by channel and type (all, normal, or alarm).
You can select a file and push the SEL button to playback the file, or use the FWD button and down button to
select the option and backup the recording file you selected. You can also put a checkmark in the box at the
end of multiple files if you want to backup more then one file.
LAST (Last page): Indicates the last page of recording history you have searched. When you view other
pages, clicking [Last page] button will take you to the Last page.
ALL (Select All): Allows you to select all the events on the current page.
INVERSE (Select Invert): Allows you to select other events on the current page except those you have
currently selected.
Recording File Backup
If you want to backup one recording from the file list, you just select the recording and click [Backup]
button. When the backup is completed you will be notified. Please click [OK] button to save your backup
(shown as Picture 5-22).
Explanation: Backup file will be in H264 format, you can convert it to AVI format using the Multimedia
Player program that comes with the DVR or through the net-viewer program, so you can use any player
which supports AVI format.
5.2.5 Multi player
1. Copy backup file to your PC.
2. Open multimedia player and click [File Local File] to find/select the backup file, and then click [open]
button
Note: the file type you have selected should be *.264 format.
Picture 5-22 Picture 5-23
Picture 5-21
First Indicates the first page of recording history you have
searched. When you view other pages, clicking [First] button brings
you back to Page one.
PRE (Previous page): When viewing event list, clicking
[Previous page] button will take you back to page before the one you
are currently viewing (except the first page).
NEXT (Next page): When viewing event list, clicking [Next page]
button will take you to the page after the one you are currently viewing
(except the last page).

User Manual
15
3 Open backup file:
2. Click pop-up menu button on the bottom of multimedia player and [Play- ] button, then the
backup file will be played on the according channel.
3. The Menu brief on the bottom of multimedia player:
Date: recording date for the current backup file shown as right corner;
24H recording time: lie under [Date] menu. Black number button stands for current recording
playback is normal recording for the time line.
0~60 Minute recording time quantum: Green part on play processing bar stand for recording length
for one hour recording.
Recording date and time processing for the current recording file
1
Play
10
Display a
ll the windows
2
Previous recording file
11
Add window
3
Pause
12
Start
4
Stop
13
Cut
5
Previous frame / Next frame
14
Delete
6
Slow play, Normal play, Fast Play
15
Convert
AVI
7
Next Hour
16
O
n Screen Display
8
Capture picture
17
Mute switch
9
Reduce window
18
Volume adjust
1. Click [Play] menu (P) on the top of multimedia player interface
to select playing the backup file;
Picture 5-24 Picture 5-25
Picture 5-26

User Manual
16
4. Please refer to the below [Video on] setting procedure (System default - video for every channel is on)
5. Refer to the below for [Audio on] setting procedure. (Setting parameter will be available after re-starting
multimedia player after [Audio on] set up.)
SettingAudio channel setting Normal video BarSelect the channel you want to playback the
audioSelect the channel has audio filesApplyOK.
After successfully setting the above, when you playback the current channel, you can open the channel’s
audio function at the same time as the video
5.2.6 Device Management
SettingVideo play setting Normal video
BarSelect the channel you want to display Select
to play the videoApplyOK
Options in device management include Hard drive,
External Alarm, PTZ control, Mobile Phone Monitoring, and
Motion Detection.
Click [Main MenuDevice HDD] to enter [HDD
Management] menu (shown as Picture 5-30)
Picture 5-27
Picture 5-27A
Picture 5-28A Picture 5-28B
Picture 5-29
Picture 5-30

User Manual
17
OVERWRITE: If you select “on” the system will automatically overwrite the oldest recordings once the
hard drive is full; if you select “off”, recording will stop once the hard drive is full.
HDD FORMAT: You use this option to format the hard drive, you can not record files to the hard drive
until it has been formatted. Click [Format HDD] button to start formatting. When selecting [Format HDD]
option the system will prompt you – “Format HDD will loss all the data, do you confirm?” ; click “OK”, system
will prompt you – “Is formatting…” and “successful format”; and then system will restart automatically.
USB FORMAT: Use this option to format USB devices.
5.2.6.2 Alarm Set
not external sensors to record on motion detection.
HDD LOSS: Options are On and Off. If you select On there will be a buzzer sound and “H” sign on screen
when HDD is not detected or not formatted; on the contrary, if you close the function, there is only “H” sign to
indicate HDD not found, but no alarm sound when HDD not found or not formatted.
HDD SPACE: Options are On and Off. When the alarm function is on, there are alarm sounds when the
HDD is running out of space; when the function is off, there are no alarm sounds.
VIDEO LOSS: Options are On and Off. When the function is on, system will issue alarm sound and
display video loss on the preview interface; when the function is off, system will have no alarm sound, but the
preview interface will display video loss.
ALARM MANAGE Alarm Output 0s,10s,20s,40s,60s Buzzer time (0s,10s,20,40s,60s) and alarm
duration time 0s, 30s, 1minute 2minute 5minute
List 5-1
Click [Main MenuDevice Alarm] to enter into [Alarm setup]
menu to setup Alarm warnings (shown as Picture 5-32).
I/O STATUS Options include NO (Normal-open), NC
(Normal-close) and OFF. Set to “Normal-open” if you use external
sensor alarms that are normally open, Set to “Normal-close” if you
use external sensor alarms that are normally closed, set to “off” if you
are not going to use external sensor alarms. You can use the DVRs
internal motion detection to record when motion is detected; you do
Picture 5-32
When you install a HDD, the system will automatically detect
if HDD is formatted or not; If HDD needs to be formatted, HDD
status will be shown as “Not format”, otherwise, the HDD status
will be shown as “Normal” (refer to Picture 5-31)
TOTAL SPACE: Indicates total space available on Hard
Drive.
FREE SPACE: Indicates unused space available on the
Hard Drive.
USEABLE REC TIME: Based on current image
detail/quality and frame rate, system will show you how
Recording time you have left on the Hard Drive.
Picture 5-31
/