Page is loading ...

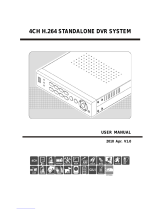
KGUARD Standalone DVR KG-SHA104/108 User Manual
www.kguardsecurity.com
CONTENTS

KGUARD Standalone DVR KG-SHA104/108 User Manual
www.kguardsecurity.com
CONTENTS
SAFETY INSTRUCTIONS ..................................................................................................................... 1
CHAPTER 1. DVR FEATURES ............................................................................................................. 2
CHAPTER 2. LAYOUTT ........................................................................................................................ 3
2.1. FRONT PANEL .................................................................................................................................... 3
2.1.1. 4-CH Front Panel ....................................................................................................................... 3
2.1.2. 8-CH Front Panel ....................................................................................................................... 4
2.2. REAR PANEL ...................................................................................................................................... 5
2.3. REMOTE CONTROL ............................................................................................................................ 6
CHAPTER 3. DVR INSTALLATION.................................................................................................... 7
3.1. HARD DRIVE INSTALLATION .............................................................................................................. 7
3.2. CAMERA AND MONITOR CONNECTION............................................................................................... 8
3.3. POWER SUPPLY CONNECTION............................................................................................................. 8
CHAPTER 4. DVR BOOT UP OUT....................................................................................................... 9
4.1. SYSTEM INITIALIZATION .................................................................................................................... 9
4.2. MAIN INTERFACE............................................................................................................................... 9
CHAPTER 5. DVR MENU .................................................................................................................... 10
5.1. MAIN MENU PREVIEW..................................................................................................................... 10
5.2. MAIN MENU .....................................................................................................................................11
5.2.1. Camera Setup............................................................................................................................11
5.2.1.1. Color Setup.........................................................................................................................11
5.2.1.2. Privacy Zone Setup ........................................................................................................... 12
5.2.1.3. Autoseq Setup.................................................................................................................... 12
5.2.2. Record Setup............................................................................................................................ 13
5.2.2.1. Record Mode ..................................................................................................................... 13
5.2.2.2. Record Schedule Setup...................................................................................................... 13
5.2.2.3. Manual Recording ............................................................................................................. 14
5.2.3. Recording Search & Playback ................................................................................................. 14
5.2.3.1. Search ................................................................................................................................ 14
5.2.3.2. Playback Interface ............................................................................................................. 15
5.2.3.3. Video Backup .................................................................................................................... 15
5.2.4. Device Management ................................................................................................................ 16
5.2.4.1. HDD Management ............................................................................................................ 16
5.2.4.2. Alarm Setup....................................................................................................................... 17
5.2.4.3. Motion Detection Setup..................................................................................................... 19
5.2.4.4. PTZ Setup.......................................................................................................................... 19
5.2.4.5. PTZ Control....................................................................................................................... 19
5.2.5. System Setup............................................................................................................................ 20
5.2.5.1. Time Setup......................................................................................................................... 20
5.2.5.2. Password............................................................................................................................ 21

KGUARD Standalone DVR KG-SHA104/108 User Manual
www.kguardsecurity.com
5.2.5.3. Video Setup ....................................................................................................................... 22
5.2.5.4. Language ........................................................................................................................... 22
5.2.5.5. Info .................................................................................................................................... 22
5.2.5.6. System Maintenance.......................................................................................................... 22
5.2.6. Network Setup ......................................................................................................................... 23
5.2.6.1. Intranet/LAN Access Setup ............................................................................................... 23
5.2.6.2. Internet Access Setup ........................................................................................................ 24
5.2.6.3. Ports................................................................................................................................... 25
CHAPTER 6. NETWORK ACCESS .................................................................................................... 26
6.1. IE & NETVIEWER ACCESS ............................................................................................................... 26
6.1.1. IE Setup.................................................................................................................................... 26
6.1.2. Connect to DVR....................................................................................................................... 27
6.1.2.1 IE Plug-in & Netviewer Interface ...................................................................................... 27
6.1.3. Control Network Access .......................................................................................................... 28
6.1.3.1 Live..................................................................................................................................... 28
6.1.3.2. Setup.................................................................................................................................. 28
6.1.3.3. Replay................................................................................................................................ 28
6.1.3.4. Convert 264 file to AVI file............................................................................................... 28
6.1.3.5. Remote Backup ................................................................................................................. 29
6.1.3.6. PTZ Control....................................................................................................................... 29
6.1.3.7. Logout ............................................................................................................................... 29
6.1.3.8. Playback Local File with Netviewer ................................................................................. 30
6.2. MOBILE PHONES ACCESS................................................................................................................. 31
6.2.1. Mobile Setup............................................................................................................................ 31
6.2.1.1. Install & Operate Mobile Client in Windows® Mobile Phones......................................... 31
6.2.1.2. Install & Operate Mobile Client in Symbian® Phones...................................................... 33
6.2.1.3. Install & Operate Mobile Client in iPhone®...................................................................... 35
6.2.1.4. Blackberry Handheld Application Installation Guide ....................................................... 41
CHAPTER 7. SPECIFICATIONS ........................................................................................................ 44
CHAPTER 8. SYSTEM CONNECTION CONFIGURATION ......................................................... 45
CHAPTER 9. APPENDIX ..................................................................................................................... 47
9.1 OPERATION FUNCTION TABLE........................................................................................................... 47
9.2. RECORDING ALARM SETTING .......................................................................................................... 48
9.3. TROUBLESHOOTING ......................................................................................................................... 48
9.4. EMAIL SERVER CHECK LIST(THE BELOW INFO ONLY FOR YOUR REF.).......................................... 49
9.5. USAGE MAINTENANCE .................................................................................................................... 49
9.6. USB DEVICE SUPPORT LIST............................................................................................................. 49
9.7. HDD DEVICE SUPPORT LIST............................................................................................................ 50
9.8. 3G CELL PHONE SUPPORT LIST ....................................................................................................... 51

KGUARD Standalone DVR KG-SHA104/108 User Manual
1 www.kguardsecurity.com
Safety Instructions
1. Use proper power source.
Do not use this product with a power source that applies more than specified voltage (100-240V AC).
2. Never insert anything metallic into the DVR case.
Putting something into the DVR case can be a source of dangerous electric shock.
3. Do not operate in wet & dusty area or use near water.
Avoid places like a damp basement or dusty hallway.
4. Do not expose this product to rain or use near water.
If this product accidentally gets wet, unplug it and contact an authorized dealer immediately.
5. Keep product surfaces clean and dry.
To clean the outside case of the DVR, use a cloth lightly dampened with water (no solvents).
6. Do not attempt to remove the top cover.
If there are any unusual sounds or smells coming from the DVR, unplug it immediately and contact an
authorized dealer or service center.
7. Do not attempt to remove the top cover.
Warning: You may be subjected to severe electrical shock if you remove the cover of the DVR.
8. Handle DVR box carefully.
If you accidentally drop your DVR on any hard surface, it may cause a malfunction. If the DVR doesn’t work
properly due to physical damage, contact an authorized dealer for repair or exchange.
9. Use standard lithium cell battery. (NOTE: Manufacturer has preinstalled battery.)
The standard lithium cell 3v battery located on the mother board should be replaced if the time clock does not
hold its time after the power is turned off. Warning: unplug the DVR before replacing battery or you may be
subjected to severe electrical shock. Properly dispose of old batteries.
10. Make sure there is good air circulation around the unit.
This DVR system uses a hard drive for video storage, which generates heat during operation. Do not block air
holes (bottom, upper, sides and back) of the DVR that cool down the system while running. Install or place this
product in an area where there is good air circulation.

KGUARD Standalone DVR KG-SHA104/108 User Manual
2 www.kguardsecurity.com
Chapter 1. DVR Features
Real time monitoring Supports real time surveillance via Monitor
Save Recordings DVR saves real-time recording image to HDD
Backup Recordings Supports DVR backup via USB flash drive and hard drive.
Playback Recordings Supports DVR single CH and multiple CH playback of recorded files
Network operation Supports remote surveillance by multiple users simultaneously
Alarm Setting Supports HDD & video input alarm management
Mouse Operation Supports Mouse operation for faster menu navigation.
PTZ Control Supports PTZ camera operations through RS-485.
Other Features:
H.264 real-time high compression and supports dual stream network transmission
Graphics & Windows OSD interface
ADPCM audio compression
Supports pentaplex operation: live view, record, playback, backup and network transmission
Supports backup & upgrade with USB flash disk
Supports DDNS
Supports audio transmission via network
Selectable packing time for recorded files
Supports editing camera title
Supports adjusting image color
Event camera pop-up function
Supports remote view with mobile phones based on Symbian S60 3rd/5th edition, Windows Mobile, iPhone &
Blackberry
Supports VGA output (max. resolution: 1920 x 1200)
Alarm modes: video loss, HDD full, HDD loss ,Motion detection,
Email alert function
With free-drag digital zoom function for live viewing
Multiple languages OSD
Supports auto maintenance

KGUARD Standalone DVR KG-SHA104/108 User Manual
3 www.kguardsecurity.com
Chapter 2. Layoutt
2.1. Front Panel
2.1.1. 4-CH Front Panel
Item Key/Indicator Marks Functions
1 CH1 Select Channel 1 to be full screen displayed
2 CH2 Select Channel 2 to be full screen displayed
3 CH3 Select Channel 3 to be full screen displayed
4 CH4 Select Channel 4 to be full screen displayed
5 QUAD Select quad display
6 REC Start manual recording
7 REW Move leftward / Rewind
8 PAUSE Pause / play frame by frame
9 PLAY Enter into playback mode / Play button
10 FWD Move rightward / Play forward
11 STOP Stop Playback / stop manual recording
12 LEFT Enter into main menu or exit menu
13 UP Move Up
14 DOWN Move Down
15 RIGHT Move rightward / Play forward
16 SEL/PTZ SEL/PTZ Enter system pop-up (short cut) menu bar/ edit button / enter
PTZ mode
17 MENU/ESC MENU/ESC
Enter/exit system menu
18 HDD indicator HDD Continuous flicker indicates HDD is being accessed
19 Power indicator PWR Green light indicates power supply status
20 IR Receiver To receive signal from remote controller
1 2 3 4 5 7 9 10 12 13 18 1915
68 11 14 16 17 20

KGUARD Standalone DVR KG-SHA104/108 User Manual
4 www.kguardsecurity.com
2.1.2. 8-CH Front Panel
Item Key/Indicator Marks Functions
1 SEARCH Enter system pop-up (short cut) menu bar
2 CH- Switch to previous channel
3 CH+ Switch to next channel
4 ALL CH Switch to 4/8 pictures display
5 MUTE Audio mute key
6 REC Start manual recording
7 REW Move leftward / Rewind
8 PAUSE Pause / play frame by frame
9 PLAY Enter into playback mode / Play button
10 FWD Move rightward / Play forward
11 STOP Stop Playback / stop manual recording
12 LEFT Move leftward / Rewind
13 UP Enter into main menu or exit menu
14 Down Move Up
15 RIGHT Move rightward / Play forward
16 SEL/PTZ SEL/PTZ Enter system pop-up menu bar / edit button / enter PTZ mode
17 MENU/ESC MENU/ESC
Enter/exit system menu
18 HDD indicator HDD Continuous flicker indicates HDD is being accessed
19 Power indicator PWR Green light indicates power supply status
20 IR Receiver To receive signal from remote controller
1 2 3 4 5 7 9 10 12 13 18 1915
68 11 14 16 17 20

KGUARD Standalone DVR KG-SHA104/108 User Manual
5 www.kguardsecurity.com
2.2. Rear Panel
4-CH Rear Panel
8-CH Rear Panel
Item Physical port Connection method
1 Video input Connect CH1-4/9 (BNC interface)
2 Video output Connect monitor output (BNC interface)
3 Audio input Connect 1 audio signal input (RCA interface)
4 Audio output Connect 1 audio signal output (RCA interface)
5 USB Port Connect USB mouse
6 USB Port Connect USB device (USB CD/DVD-RW, USB thumb disk, USB hard disk)
7 Ethernet: Port Connect intranet, internet (RJ45 interface)
8 VGA Port Connect to VGA monitor
9 RS-485 RS485 interface
10 Power Port Connect power supply - DC12V,3A
8 5 3 2 1
4 6 7 9 10
8 5 3 2 1
4 6 7 9 10

KGUARD Standalone DVR KG-SHA104/108 User Manual
6 www.kguardsecurity.com
2.3. Remote Control
Mouse Operation
You can use a mouse instead of front panel keys or remote control to navigate the operation of your DVR
Left button of Mouse In OSD menu, click left button to select & edit
In live display mode, clicking right key will display pop-up menu bar
Right button of Mouse
In Main menu or sub menu mode, clicking right key will exit current menu.
Double-click Left button
of Mouse
double-click the live image of any channel for full screen display; by
double-clicking again, the display will return to display all cameras
Sliding Mouse On motion mode, sliding mouse will select motion area; On [Color Setup] menu
mode, sliding mouse will adjust color control bar and volume control bar.
Using the Virtual Keyboard – Mouse Only
When using the mouse, you can input certain values using the onscreen virtual keyboard.
You will need to use the Virtual Keyboard when entering your User ID and Password.
To use the Virtual Keyboard:
1 1-8 Channel Select 1-8 ; Numeric key
2 9、0 Numeric Key
3 ALL Display all Channel
4 Menu Enter/Exit Main Menu
5 ▲ Up Key
6 ▼ Down Key
7 ◄ / Left / Right Key
8 SEL Select Key/ Edit Key
9 Rewind key
10 Play Key, Enter to recording search menu
11 Forward Key
12 ● Manual Recording
13 Pause / Frame Play
14 ■ Stop manual recording; Stop Playback
15 Audio Undefined
16 Mute Undefined
1. Click on an option or field, such as the User ID and Password fields.
2. Click 0~9 to enter the desired digit.
3. Click to switch between numerals, upper and lowercase letters,
and other characters (only for certain options)
4. Click to Backspace/Delete.
NOTE: The buttons will turn from orange to white when you select
the button with the mouse cursor.
5. Click to enter/confirm and close the Virtual Keyboard.

KGUARD Standalone DVR KG-SHA104/108 User Manual
7 www.kguardsecurity.com
Chapter 3. DVR Installation
3.1. Hard Drive Installation
Caution: Please do NOT install or uninstall hard drive while DVR is running!
1. Loosen the screws in the left and right sides.
2. Remove the cover
3. Connect data cord and power cable.

KGUARD Standalone DVR KG-SHA104/108 User Manual
8 www.kguardsecurity.com
4. Install HDD on the bracket, fixed with screws firmly.
5. Check if the connectors are properly connected and there is no problem with wiring and close up
cover, and fix it with screws.
3.2. Camera and Monitor Connection
Connect camera cable to video input port of DVR, and from video output of DVR to Monitor via BNC
connector or VGA port (refer to system figuration on Chapter 9.6).
If the camera is a PTZ speed dome, you could connect RS485 A & B to the corresponding port on
DVR respectively (refer to system figuration on Chapter 9.6).
3.3. Power Supply connection
Please only use the power adapter supplied with the DVR.

KGUARD Standalone DVR KG-SHA104/108 User Manual
9 www.kguardsecurity.com
Chapter 4. DVR Boot Up out
4.1. System Initialization
4.2. Main Interface
After initialization, the system will display main
interface. When there are video inputs, live images
from the cameras will be displayed on screen. You can
use mouse to double-click the live image of any
channel for full screen display; by double-clicking
again, the display will return to display all cameras.
On the main interface, you will be able to see current
system date & time, channel title, recording status.
When there is no HDD installed in the DVR, or the
HDD is in abnormal working condition, system will
display “H” on screen.
Press SEL button on the front panel or click the right button of mouse, you will be able to see the
pop-up menu bar. It’s a short cut for your quick jump to menus in common use. Detailed method to
operate the pop-up menu bar will be introduced in relative chapter.
After connecting the power adapter the system
will boot-up and start initializing.

KGUARD Standalone DVR KG-SHA104/108 User Manual
10 www.kguardsecurity.com
Chapter 5. DVR Menu
5.1. Main Menu Preview
Search
Camera
Record
S
y
stem
Devices
Network
Main Menu Search
Pla
y
back
File List
HDD Mana
g
ement
Alarm Settin
g
PTZ Settin
g
Mobile Phone Setup
Motion
Color setu
p
User Password
S
y
stem Information
Lan
g
ua
g
e Selection
S
y
stem Maintenance
Video Settin
g
Time Settin
g
Autose
q
Setu
p
Camera Title
Privac
y
Setup
Record Qualit
y
Record Solution
(
4CH
)
Audio Record
Record Mode
Record File Size
DDNS Setup
Record Schedule
Area Setup
E-mail Setup
Backu
p
VGA Solution
TV S
y
stem
Firmware Upgrade

KGUARD Standalone DVR KG-SHA104/108 User Manual
11 www.kguardsecurity.com
5.2. Main Menu
5.2.1. Camera Setup
Name: You are able to edit the title of the camera with letter and number. Max. 8 characters.
Position: Edit the position to display the camera title on screen.
5.2.1.1. Color Setup
Press SEL button on the front panel or click the right
button of mouse to display pop-up menu.
Select MAIN MENU to enter main OSD menu.
Press ▲, ▼, ◄, keys on front panel to move the
cursor, then press SEL key to enter selected item.
Or use you mouse to select and enter menu.
Press ESC key or click right button of mouse to
return to previous window
Live: Select to display live image or not. If you
select OFF, the image is still recorded and you can
see it in playback mode.
DISPLAY TIME WHILE IN LIVE VIEW: If you
select OFF, you will not be able to see the system
time display in live picture.
DISPLAY TIME WHILE RECORDING: If you
select OFF, you will not be able to see the system
time display in recorded picture while playing back.
Picture 5-2
You can adjust image brightness, saturation,
contrast and hue settings for each channel.
Press ▲ & ▼ key on front panel to adjust the
value, or drag the bar to adjust with you mouse.
Press APPLY button to save your settings.

KGUARD Standalone DVR KG-SHA104/108 User Manual
12 www.kguardsecurity.com
5.2.1.2. Privacy Zone Setup
5.2.1.3. Autoseq Setup
Go to main interface and trigger the pop-up menu bar, you will find the START AUTOSRQ menu.
Click it and the DVR will enter auto sequence display mode. Press any key will exit autoseq mode.
AUTOSEQ allows system to display every
selected channel in full screen by certain dwell
time, and auto-switch in sequence.
Default dwell time: 5 second
Selectable time range: 0~10 seconds
2. Press SETUP button to adjust the position of the
privacy zones.
3. After finishing the position adjustment, press ESC
key on front panel or click right button of mouse to
exit and return to PRIVACY ZONE page.
4. Press APPLY to save you settings.
Privacy zone function allows you to cover the
private area, such as password input area on ATM
machines. The covered areas will not be able to see
in live view mode or in playback mode.
You can select max. 4 privacy zones for each
channel.
1. Select the No. of area (AREA1 – AREA4) you
want to set

KGUARD Standalone DVR KG-SHA104/108 User Manual
13 www.kguardsecurity.com
5.2.2. Record Setup
5.2.2.1. Record Mode
5.2.2.2. Record Schedule Setup
Functions:
CHANNEL: ON/OFF option decides to record or
not.
RESOLUTION: (4-CH only) decides the recording
video resolution. About the definition of resolution,
please refer to the specification chapter.
QUALITY: select recording video quality, higher
quality will need more HDD space to save the video
AUDIO REC.: DVR supports to record 1 channel
audio signal. Here you can bind the audio channel to
an appointed video channel for together recording.
FILE SIZE: System record and save the videos to
HDD by separate files. It indicates the maximum
recoding length for every single continuous
recording file (15, 30, 45, 60 minutes).
There are 2 record modes: ALWAYS & TIME
SCHEDULE RECORD.
When you select ALWAYS record mode, DVR will
execute continuous recording without stop.
When you select TIME SCHEDULE RECORD
mode, DVR will execute recording according to your
schedule.
4-CH
8-CH
Select TIME SCHEDULE RECORD, a SCHEDULE
button will display. Click it and enter schedule setup
interface.
There are 3 recording status options:
ALARM [RED]: Motion detection mode
GENERAL [GREEN]: Continuous record mode
NO RECORD [Transparent]: Do not record

KGUARD Standalone DVR KG-SHA104/108 User Manual
14 www.kguardsecurity.com
You are able to config 24 hours recording schedule for every channel or all channel from Sunday to
Saturday.
Steps:
1. Select Channel
2. Select a recording status among ALARM, GENERAL and NO RECORD
3. Move the cursor to the time point you want to set, click on the box in the schedule time line that
you want to apply the selected record type to.
4. If you want to change another recording status, repeat step 2 & step 3.
5. You can use copy function to fast complete your settings.
6. Press APPLY button to save your settings.
On the main interface, you will be able to check the recording status:
R: normal recording
M: motion detection recording
5.2.2.3. Manual Recording
5.2.3. Recording Search & Playback
You can enter search & playback interface by pop-up menu bar or main menu.
5.2.3.1. Search
There are 2 short cut menus listed in the Pop-up menu: START
RECORD and STOP RECORD. They are Manual record &
manual stop record buttons and the START RECORD function
only work when current recording mode is as following
recording status:
1. NO RECORD
2. ALARM, but the motion is no happening now.
The STOP RECORD function can only stop manual recording.
Play back by exact date & time:
Modify the date & time, press PLAYBACK button to
play back video which is started from your appointed
date & time.

KGUARD Standalone DVR KG-SHA104/108 User Manual
15 www.kguardsecurity.com
Search All Recorded File:
Press SEARCH button, system will search and show you
the recorded status. RED color indicates ALARM
recoding, GREEN color indicates continuous recording.
You can click the time point to play back.
For 4-CH DVR, system will play back all 4 channels at
the same time.
For 8-CH DVR, system can play back 1 channel only at
the same time.
File list
To check recoding event list, you can sort the files by Channel / Record Type (Normal Record / Alarm
Record)
5.2.3.2. Playback Interface
5.2.3.3. Video Backup
1. Insert your USB device (USB hard disk, USB thumb drive) into the bottom USB port on the rear
panel.
2. Select one or more files
FIRST: Turn to the first page
PREV: Turn to previous page
NEXT: Turn to next page
LAST: Turn to the last page
ALL: Select all files in current page
REVERSE: Allows you to revert the selected and
unselected events on the current page except those
you have currently selected.
You can play video Forward at 2x, 4x, and 8x
speeds, Slow play at 1/2x, 1/4x, 1/8x, or normal
play, pause and play frame by frame using the
playback control bar, and adjust volume by clicking
or sliding tune control bar. When playback is
finished, system will return to previous menu.

KGUARD Standalone DVR KG-SHA104/108 User Manual
16 www.kguardsecurity.com
3. Press BACKUP button on the menu.
NOTE: Do not remove your USB device during making backup.
Note: Backup files will be in H.264 format, you can play them with Netviewer program, or convert
them to AVI format using the Netviewer program that comes with the DVR, so you can use any player
that supports AVI format. (Introduced on Chapter 6)
5.2.4. Device Management
5.2.4.1. HDD Management
You will see the HDD information here.
HDD STATUS: HDD working status
TOTAL SPACE: HDD capacity
FREE SPACE: HDD free space
USABLE REC. TIME: estimated recording length of
the HDD free space
OVERWRITE: If you select DISABLE, DVR will
stop recoding when HDD is full; if you select ENABLE,
DVR will continuous record and cover the oldest data
when HDD is full.
DURATION DAYS: option for you to set that how
many days the video will be saved in the HDD. For example, if you set as 10, DVR will automatically
delete the data which was saved 10 days ago, that means you can only search & play back the data
which was saved in the past 10 days. The maximum value is 60 days.
Options in device management include
Hard drive, Alarm, PTZ control, Mobile
Phone Monitoring, and Motion Detection.

KGUARD Standalone DVR KG-SHA104/108 User Manual
17 www.kguardsecurity.com
5.2.4.1.1. HDD Format
When a new HDD is installed into the DVR, the HDD
status will show “NOT FORMATED”. You need to
format the HDD otherwise the system cannot record.
Warning: If you format a HDD which is being
currently used, all data saved in the HDD will be lost!
System will restart automatically after formatting the
HDD.
USB FORMAT: to format USB devices.
5.2.4.2. Alarm Setup
BUZZER:
Option to turn OFF the built-in buzzer alarm, or set the
buzzer alarm time.
MD ALARM: Option for buzzer to alarm or not when
the motion detection happens
HDD LOSS: Option for buzzer to alarm or not when
there is no HDD installed in the DVR, or the HDD is in
abnormal working condition.
HDD SPACE: Option for buzzer to alarm or not when
HDD space is full (if you have turned off the HDD overwrite function).
VIDEO LOSS: Option for buzzer to alarm or not when video signal loss.
FULL SCREEN: Option to pop up the channels to full screen display or not when motion detection
happens.
ALARM TIME:It determines the motion detection recording length, which means how long the
motion detection recording will still record after motion stops.
EMAIL: Option to send live images by email when motion detection happens.
5.2.4.2.1. Email Alarm Notification
Warning: We don’t promise every email server is compatible with the DVR alarm
notification function. Please make sure your DVR is well connected to Internet if you want to
realize Email alarm function,
SSL is a security link transport protocol. You can encrypt your communication info (including
your email) using SSL to prevent hackers from monitoring your email or communication info and
even your password. Please confirm with your email service provider if your email server support SSL
or not.
/