Page is loading ...

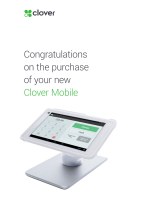
Congratulations
on the purchase
of your new
Clover Station Pro

2Clover Station Pro Install Guide — EU 1.0
Put your Station Pro together
What’s included
Clover Station Pro Display Clover Station PrinterClover Station Pro Terminal
ScrewdriverEthernet Receipt Paper
Hub Power Brick Power Cord
(Region Specic)
Pin Entry Aid
(Select Regions)
Display CablePin Shield
(Optional)

3Clover Station Pro Install Guide — EU 1.0
Put your Station Pro together
Plug in the cables for your Clover Station Pro
1. Plug the Station Pro Terminal into the Station Pro Display with the Display cable.
2. Plug the Station Pro printer into the Station Pro Display.
3. Plug the Station Pro hub into the Station Pro Display.
4. Plug the power brick’s circular cord into the Station Pro hub.
5. Plug the power brick’s power cord into a power outlet. The Station Pro will automatically
power on.
1
2
3
4
Station Pro Display Station Pro TerminalStation Pro Printer
5

4Clover Station Pro Install Guide — EU 1.0
Connect your Station Pro to a network
Connect via Mobile (SIM card)
Connect via Wi-Fi
Connect via Ethernet
There are three ways to connect your Station Pro to a network: Mobile (SIM) card, Wi-Fi, and
Ethernet.
1. On the network connection screen, wait for the SIM card to verify that it’s connected to
the mobile cellular network.
2. Once you see a message conrming the connection, tap Next.
1. Tap CONFIGURE in the Wi-Fi section.
2. Select the network you want to connect to.
3. If you’re connecting to a secure network, enter the password, then tap CONNECT.
4. Once you’ve connected to a network, tap Next.
1. Plug one end of the Ethernet cord into the Station Pro hub.
2. Plug the other end of the Ethernet cord into a modem, router, or Ethernet outlet.
3. Your Station Pro will automatically try to connect to a network. If it does not, tap Check
Connection.
4. Once your Station Pro is connected to a network, tap Next.

5Clover Station Pro Install Guide — EU 1.0
Activate your Station Pro
If you are activating multiple Clover devices, each one will have its own unique activation code.
Double-check the serial numbers of your device to see which activation code is needed. You
can nd the serial code on the activation screen.
NOTE: If you cannot nd the email with your activation code, check your spam folder.
When your Station Pro is connected to a network, an email will be sent to you containing the
activation code for your device.
1. Look for an email from Clover Support (app@clover.com). The email will be sent to the
email address associated with your merchant account.
• If you’ve already set up your Web Dashboard account, you can log in to
www.clover.com/home. The activation code will be listed on the top of the screen
once you log in.
2. Enter the 8-digit activation code from the email using the number pad on the touch-
screen.

6Clover Station Pro Install Guide — EU 1.0
Test the Station Pro printer
1. Load a roll of paper into the Station Pro printer.
2. Tap Test Print. The printer will print out a test receipt.
3. Tap Continue when you are nished.
You can test your Station Pro printer to see if it’s working. If you want to skip this step, tap
Continue to move on.

7Clover Station Pro Install Guide — EU 1.0
Register a ngerprint
1. Place your nger on the Station Pro sensor on the upper right corner.
2. Keep lifting and placing your nger on the sensor.
3. Once your ngerprint is registered, tap Continue.
You can register a ngerprint to unlock your Clover Station Pro. If you want to register a nger-
print later, tap Skip. You can register ngerprints in the Employees app.

8Clover Station Pro Install Guide — EU 1.0
Customize your device
Register your owner passcode
1. Enter a 4 or 6-digit passcode.
2. Re-enter the passcode to conrm it.
If you’re activating your rst Clover device, you’ll be prompted to create an owner passcode.
You can use passcodes to provide dierent permissions to your employees.
Your passcode can be changed in the Employees app.
NOTE: You can change the employee passcode length to either 4 or 6 digits by going to your
Web Dashboard and selecting Employees > Setup.

9Clover Station Pro Install Guide — EU 1.0
Customize your device
Customize passcode and payment settings
1. Select if you want to require a passcode to unlock your device.
2. Select where you want to take tips and signatures.
3. Select if you want to accept checks. You can select if you only want to accept electronic
checks, both electronic and manual checks, or no checks at all.
4. Tap Continue.
5. If your monthly fees have changed, you will see a screen detailing your new monthly total.
Tap Authorize to continue.
Choose whether you want to allow unlocking a device without a passcode, where you want to
take tips and signatures, and if you want to accept checks as tender.
You can always change these settings in the Setup app.
NOTE: If you want to accept tips on printed receipts, please make sure your closeout time is at
least an hour after your business has entered tips for the day.
NOTE: IF you do not see an option for tips, your merchant account is not enabled for tips. Con-
tact Customer Support and request tips be enabled.
/