Page is loading ...

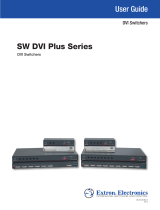
Setup Guide — SW DVI Plus Series
This guide provides basic instructions for setting up and
operating the Extron SW DVI Plus and SW DVI A Plus
Series switchers.
Installation
Step 1 — Mount the unit
Turn off or disconnect all equipment power sources and mount the switcher as required.
Step 2 — Connect video inputs
Connect source devices to one or more DVI video input connectors.
Only single-link DVI-D signals are supported. If necessary, set the
equalization DIP switches for each input to High (up) to compensate
for a weak signal, or to Low (down), if all signals are strong.
N
These connectors are not compatible with HDCP signals.
Step 3 — Connect video outputs
Connect a DVI-D display device to the DVI-I video output connector.
Step 4 — Connect audio inputs (SW DVI A Plus models
only)
Plug the input devices’ audio connectors into the 3.5 mm TRS audio
input jacks for unbalanced audio. See the wiring diagram at right.
Step 5 — Connect audio outputs (SW DVI A Plus models only)
Connect the switcher’s audio output to a suitable audio device. Wire the 5-pole connector as
shown below.
Step 6 — Enable auto switching (optional)
SW2 and SW4 DVI Plus (non-audio) models:
Enter one of the following Simple Instruction Set (SIS
™
)
commands via the RS-232 interface:
• 2#, to select auto switch mode
• 1#, to select normal switch mode
For explanations of all SIS commands, refer to chapter 4
of the SW DVI Plus Series User’s Manual.
All other models:
Use a jumper wire to connect pins 4 and 5 of one of the
provided 5-pin captive screw plugs. Insert the plug into the
Remote/Auto-SW shared connector as shown at right.
(Continued on reverse side)
AUTO
SWITCH
ACTIVE
IR
1 2 3 4
INPUT
EQ
1
HIGH
LOW
2 3 4
ON
1 2 3 4
SIGNAL
PRESENCE
1 2 3 4
SW4 DVI Plus SERIES
1
8
17
24
9
Sleeve ( )
Ring
(R)+
Tip (L)+
CAUTION
For unbalanced audio, connect
the sleeve(s) to the ground contact.
DO NOT connect the sleeve(s)
to the negative (-) contacts.
Tip
Ring
Tip
Ring
L R
Do not tin the wires!
Tip
NO Ground Here
Sleeve(s)
NO Ground Here
Tip
L R
Sleeve(s)
Balanced Audio Output Unbalanced Audio Output
8
SW8 DVI A PLUS
DVI-D / AUDIO
OUTPUT
Tx Rx
A S
REMOTE / AUTO-SW
L R

Setup Guide — SW DVI Plus Series, cont’d
Extron USA - West
Headquarters
+800.633.9876
Inside USA / Canada Only
+1.714.491.1500
+1.714.491.1517 FA X
Extron USA - East
+800.63 3.9876
Inside USA / Canada Only
+1.919.863.1794
+1.919.863.1797 FAX
Extron Europe
+800.39 87.6673
Inside Europe Only
+31.33.453.4 040
+31.33.453.4 050 FA X
Extron Asia
+800.7339.8766
Inside Asia Only
+65.638 3.44 00
+65.638 3.46 64 FAX
Extron Japan
+81.3.3511.7655
+81.3.3511.7656 FAX
Extron China
+400.883.1568
Inside China Only
+86.21.3760.1568
+86.21.3760.1566 FA X
Extron Middle East
+971.4.2991800
+971.4.2991880 FAX
© 2009 Extron Electronics. All rights reserved.
www.extron.com
Step 7 — Connect RS-232
• SW2 and SW4 DVI Plus (non-audio) models: Connect an RS-232 cable
from your computer to this female 9-pin D connector. Protocol for this
port is 9600 baud, 8 data bits, 1 stop bit, no parity. Wire the connector as
follows: pin 2 = Tx, pin 3 = Rx, pin 5 = Gnd.
• All other models:
Connect a bare wire-to-female
9-pin D RS-232 cable to pins 1, 2,
and 3 of one of the 5-pole captive
screw plugs. Insert the plug into
the Remote/Auto-SW shared
connector, and connect the cable to
the computer’s serial port. See the
illustration at right.
Step 8 — Wire power
connector
If using a different 12 V, 1 A external
power supply from the one that is
included (already wired), attach the
provided two-pole captive screw
connector to the power supply as
shown below.
Step 9 — Power on
a. Power on the output display.
b. Apply power to the switcher.
c. Power on the input devices.
Application Diagram
The figure at right provides an
example of how an SW8 DVI Plus
switcher may be connected.
Captive Screw Connector
Tie Wrap
Heat
Shrink
1/8”
(3 mm)
7/8”
(22 mm)
3/16”
(5 mm) Max.
5
1
9 6
1
3
2
4
5 6
7
8
0.4A MAX
POWER
12V
SW8 DVI A PLUS
DVI-D / AUDIO
OUTPUT
DVI / AUDIO
IN
PUTS
Tx
Rx
A S
REMOTE / AUTO-SW
L R
100-240V 0.5A, 50-60Hz
VOL/MUTE
STANDBY
CLASS 2 WIRING
1
2
LISTED 17TT
AUDIO/VIDEO
APPARATUS
XPA 1002
C
US
LEVEL
1
1 2
1 2
LIMITER/
PROTECT
SIGNAL
2
INPUTS
OUTPUT
REMOTE
0
0
10V 50 mA
PC with DVI Out
Extron SI 26
Two Way
Surface Mount
Speakers
Extron
XPA 1002
Power Amplier
Laptop with DVI Out
PC with DVI Out
Extron
SW8 DVI A Plus
DVI Switcher
with Audio
Projector with DVI In
Control
System
Audio
RS-232
68-1316-50
Rev. C
09 09
If you use cable that has a drain
wire, tie the drain wire to ground
at both ends.
Remote/Auto-SW
To Computer or
Control System
RS-232 Port
SW DVI Plus Switcher
Rear Ranel RS-232 Port
Tx Rx
A S
9 pin HD
Connector
Ground
Green
Orange
Red
Rx
Receive
Transmit
Tx
3
Receive (Rx)
Transmit (Tx)
2
Ground 5
/