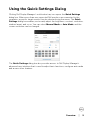
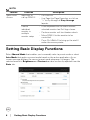
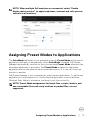
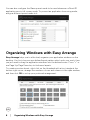
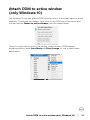
Dell U2422H: Experience stunning visuals and enhanced productivity with this feature-packed monitor. Its 24-inch screen offers crisp and detailed images, while the height-adjustable stand provides a comfortable viewing experience. Take advantage of multiple connectivity options, including DisplayPort, HDMI, and USB-C, to seamlessly connect to your devices.
Dell U2422H: Experience stunning visuals and enhanced productivity with this feature-packed monitor. Its 24-inch screen offers crisp and detailed images, while the height-adjustable stand provides a comfortable viewing experience. Take advantage of multiple connectivity options, including DisplayPort, HDMI, and USB-C, to seamlessly connect to your devices.


-
 1
1
-
 2
2
-
 3
3
-
 4
4
-
 5
5
-
 6
6
-
 7
7
-
 8
8
-
 9
9
-
 10
10
-
 11
11
-
 12
12
-
 13
13
-
 14
14
-
 15
15
-
 16
16


Dell U2422H: Experience stunning visuals and enhanced productivity with this feature-packed monitor. Its 24-inch screen offers crisp and detailed images, while the height-adjustable stand provides a comfortable viewing experience. Take advantage of multiple connectivity options, including DisplayPort, HDMI, and USB-C, to seamlessly connect to your devices.
Ask a question and I''ll find the answer in the document
Finding information in a document is now easier with AI